Hey there! If you’re diving into the world of online shopping and web forms, you’ve probably come across Gravity Forms and WooCommerce. Both tools have their unique strengths and when combined, they create a powerful solution for enhancing user experience and streamlining processes. Gravity Forms is a popular WordPress plugin that allows users to create custom forms, while WooCommerce transforms a regular website into an eCommerce powerhouse. Together, they can elevate your online business in remarkable ways.
Why Integrate Gravity Forms with WooCommerce?

Now, you might be wondering, “Why should I integrate these two tools?” Well, let’s break down some compelling reasons:
- Enhanced Customization: Gravity Forms provides advanced field options. You can create detailed forms tailored to your business needs, allowing you to gather specific information from your customers during the checkout process.
- Simplified Checkout Experience: By integrating Gravity Forms with WooCommerce, you can streamline the checkout process. This means fewer steps for customers, reducing cart abandonment rates.
- Conditional Logic: Gravity Forms offers conditional logic, which means your forms can display or hide fields based on previous answers. This leads to a more personalized experience and keeps the forms clean and relevant.
- Improved Data Collection: Collect important data such as custom order notes or preferences directly within the WooCommerce shopping experience. This data can significantly enhance customer interactions and product offerings.
- Easy Integration with Payments: Gravity Forms can integrate with various payment gateways, making it easier to accept deposits, payments, or donations directly from your forms.
In summary, integrating Gravity Forms with WooCommerce not only enhances functionality but also creates a more engaging shopping environment for your customers, ultimately driving more sales and increasing customer satisfaction.
Setting Up Gravity Forms for WooCommerce
Getting Gravity Forms up and running with WooCommerce is a straightforward process that opens up a world of possibilities for customizing your online store. With these two powerful tools combined, you can enhance user experience, streamline data collection, and make your checkout process more efficient.
First, ensure you have both Gravity Forms and the WooCommerce plugin installed and activated on your WordPress site. Once you have confirmed that both are up and running, follow these simple steps:
- Install the Gravity Forms WooCommerce Add-On: Navigate to the Gravity Forms add-ons page, find the WooCommerce integration, and install it. This add-on allows you to connect your forms seamlessly with your WooCommerce products.
- Create Your First Form: Go to the Gravity Forms dashboard and click on ‘Forms’. Choose ‘Add New’ to start building your form. This interface is user-friendly and allows you to drag and drop fields into place.
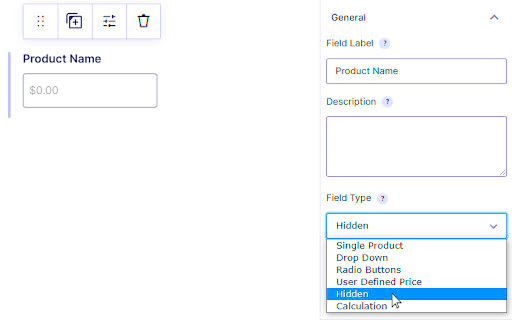
- Set Up Product Fields: Using the product fields available in Gravity Forms, you can create fields for prices, quantities, and a variety of custom options. This is especially useful for businesses that offer customizable products.
- Connect Your Form to a Product: Once your form is set up, you can link it directly to a specific WooCommerce product. This makes it easy for customers to access the form within the product page.
- Test Everything: Before you go live, conduct thorough testing. Fill out the forms yourself, ensuring that the data flows into WooCommerce as expected and that your customers will have a smooth experience.
With these steps, you can enhance your WooCommerce store’s functionality and provide a tailored experience for your users!
Creating Advanced Product Forms
When it comes to creating advanced product forms in Gravity Forms for WooCommerce, the sky’s the limit! Whether you’re selling digital products, physical goods, or customized services, advanced forms allow for a unique shopping experience tailored to your customers’ needs.
Follow these suggestions to create dynamic forms that engage users and help you collect vital information:
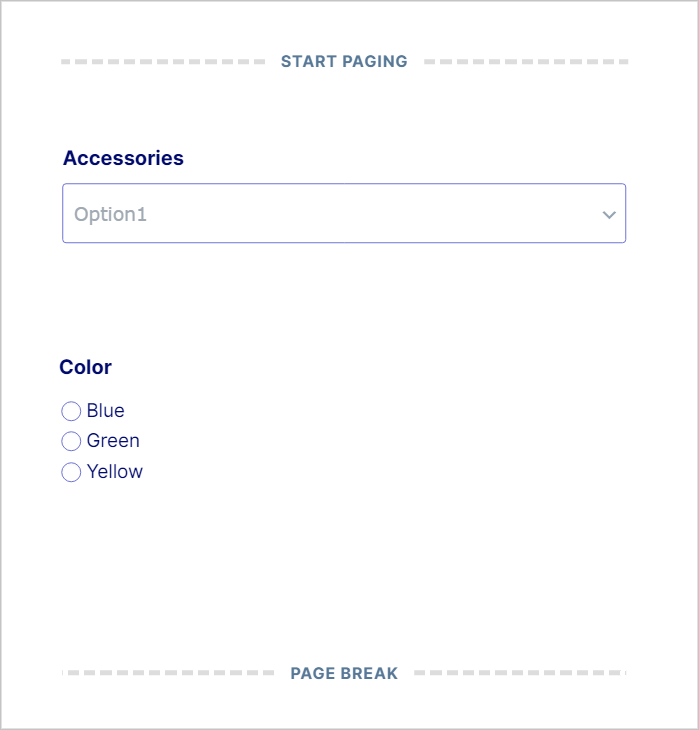
- Utilize Conditional Logic: Utilize Gravity Forms’ powerful conditional logic to show or hide fields based on user input. For example, if a user selects a certain product option, you could display specific customization fields relevant to that choice.
- Incorporate Calculations: If your products have variable pricing based on user selections (like size or color), use the calculation fields to automatically update the price for the customer based on their choices. This provides instant feedback and enhances user experience.
- Add File Uploads: If relevant, allow customers to upload files directly through your form. This can be especially useful for custom print jobs or personalized products, giving your customers an easy way to submit their designs or specifications.
- Include User Input Validation: It’s essential to ensure that the data collected is valid. Make use of built-in validation rules to prompt users to input the correct information, which minimizes errors and improves order processing.
- Design with the User in Mind: Don’t forget about aesthetics! Use the form customization options to align the form’s design with your brand’s style. Adding headings, descriptions, and custom CSS will not only make it more appealing but also enhance usability.
These advanced features will not just make your forms functional but also engaging for your customers, fostering a positive shopping experience that could lead to repeat business. In the competitive world of e-commerce, having the right tools is key to standing out!
Customizing Fields and Options
One of the most powerful features of Gravity Forms is its ability to customize fields and options to meet your specific needs. With WooCommerce integration, this means that you can enhance the user experience while streamlining your sales process.
When customizing fields, you have several options to choose from. Here’s how you can go about it:
- Field Types: Gravity Forms offers a variety of field types such as text fields, dropdown menus, checkboxes, and file uploads. You can choose the field type that aligns best with the data you want to collect.
- Field Labels: Personalize the field labels to make them clear and intuitive for users. This can help reduce confusion and improve the overall experience.
- Default Values: You can set default values for fields to simplify the process for users. For example, if you’re selling a specific product, you might set that product as the default for a dropdown menu.
- Field Required Settings: Designate which fields are required. This is essential for gathering necessary information while ensuring that the checkout remains as smooth as possible.
- CSS Class Names: Use custom CSS class names if you want to style fields in a unique way or modify the way they display without altering theme files.
By effectively customizing fields and options, you can create a tailored shopping experience that resonates with your audience, ultimately boosting your conversion rates. Don’t hesitate to get creative and experiment with different configurations until you find the optimal setup!
Using Conditional Logic for Enhanced User Experience
Conditional logic is a game-changer when it comes to creating a seamless user experience. With Gravity Forms, conditional logic allows you to show or hide fields based on user input, making forms not only more intuitive but also highly personalized.
Here’s how you can leverage conditional logic in your WooCommerce forms:
- Dynamic Field Display: Show specific fields based on previous answers. For instance, if a user selects “Yes” to needing custom options, additional fields for customization can appear—tailoring the experience based on their needs.
- Conditional Notifications: Set up email notifications that are sent based on user selections. This is particularly useful if you want to alert your team about specific orders or inquiries.
- Improving User Engagement: By guiding users through a personalized form based on their inputs, they are likely to feel more engaged and willing to complete the purchase.
- Simplifying the Process: Reduce friction by only displaying relevant fields. Too many fields can overwhelm users, so showing only what’s necessary can lead to higher submission rates.
To set up conditional logic, simply head to the field settings in Gravity Forms and enable the logic options. It’s that easy! By integrating conditional logic, you’re not just collecting data—you’re creating an interactive experience that propels your sales efforts forward.
Integrating Payment Gateways
Integrating payment gateways with Gravity Forms for WooCommerce is a game changer for e-commerce businesses. It allows you to seamlessly process payments while maintaining a great user experience. Whether you’re using PayPal, Stripe, or other popular payment processors, getting it set up is straightforward. Here’s how:
1. Choose Your Payment Processor: The first step is to decide which payment gateways you want to integrate. Some popular options include:
- PayPal
- Stripe
- Authorize.Net
- Square
2. Install Necessary Add-Ons: Depending on the payment provider, you may need specific Gravity Forms add-ons. For instance, the Gravity Forms Stripe Add-On will simplify your payment process directly from the form.
3. Configure Your Payment Settings: After installing the necessary add-ons, you’ll need to configure your payment settings. This usually involves entering API keys, customizing payment options, and specifying currency settings.
4. Design Your Checkout Form: Utilize the drag-and-drop builder that Gravity Forms offers to create a user-friendly checkout form. Make sure it captures all necessary information like name, email, and address.
5. Test Your Payment Workflow: Before launching your form, it’s essential to run a few test transactions. This way, you can ensure that everything is functioning properly before your customers start using it.
Integrating payment gateways ensures a streamlined checkout process for your customers and can boost conversion rates significantly.
Managing Form Submissions and Notifications
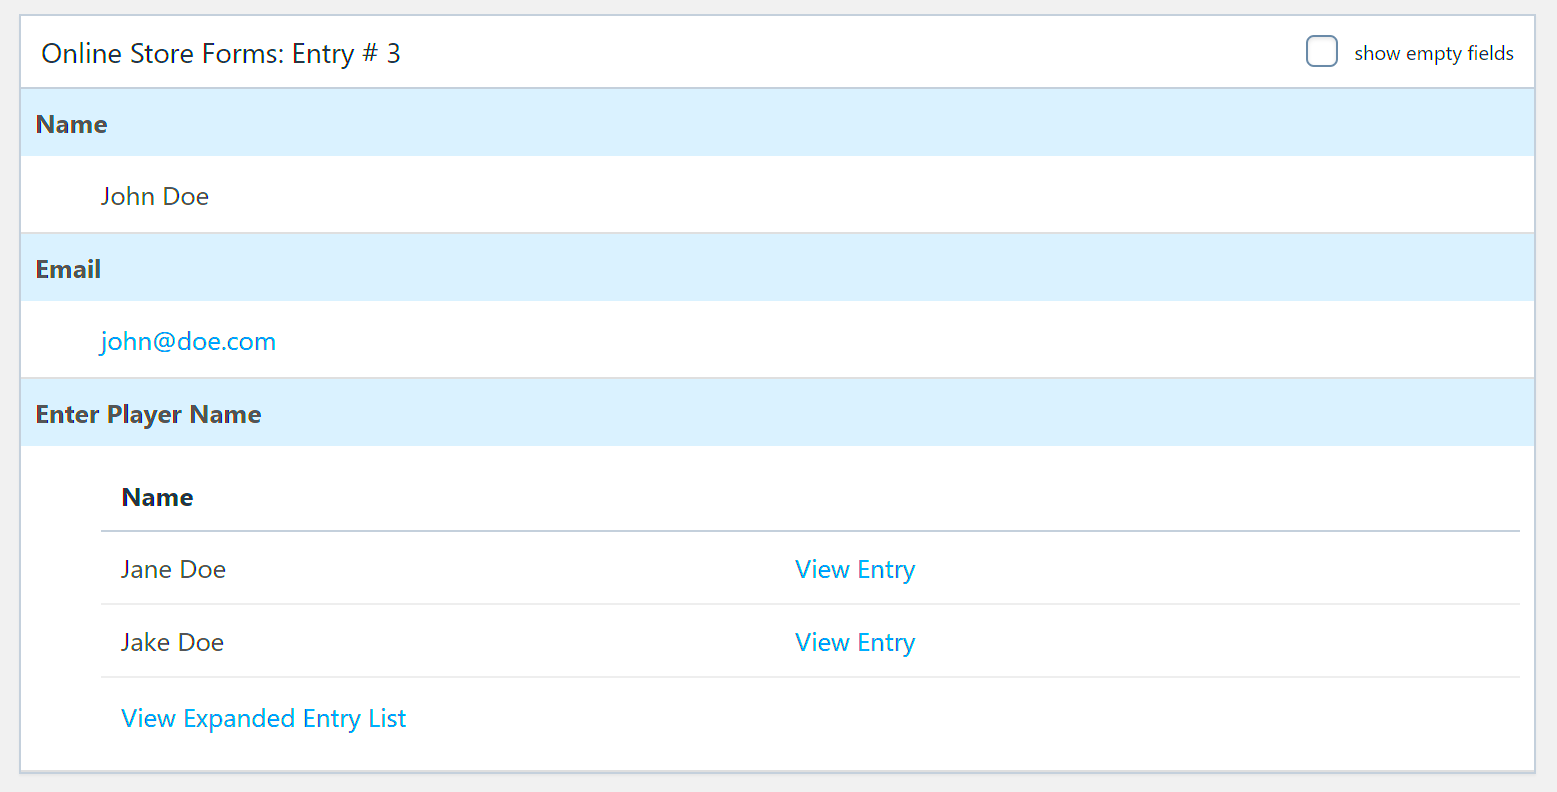
Once your forms are live and collecting submissions, managing those entries and setting up notifications is crucial for maintaining customer engagement. Using Gravity Forms in WooCommerce, you can easily keep track of all submissions.
1. View and Manage Submissions: Gravity Forms provides a user-friendly interface to view all the submissions. You can access this from the WordPress dashboard, allowing you to sort, filter, and view entries based on custom fields.
2. Set Up Notifications: Setting up notifications is vital to keep both admins and customers informed. Consider these key points:
- Admin Notifications: Get notified whenever a new form submission comes in. This helps you respond quickly to customer inquiries.
- User Notifications: Send confirmation emails to customers after they submit the form. This can include details like what they submitted and any next steps.
3. Use Conditional Logic: You can set up your notifications using conditional logic to send tailored responses based on the user’s input. For instance, if a user selects a particular service, you could direct them to a specific follow-up.
4. Exporting Submissions: Finally, if you need to analyze data over time or want to keep a record, Gravity Forms allows you to export your submissions easily. This can be invaluable for reporting or marketing analysis.
By effectively managing form submissions and notifications, you’ll enhance customer communication and improve overall collaboration within your team.
Best Practices for Advanced Forms Integration
Integrating advanced forms with WooCommerce can significantly enhance the user experience and streamline the purchasing process. However, to make the most out of this integration, it’s essential to follow certain best practices. Below, we discuss some tips to consider:
- Understand Your Users: Before creating forms, have a clear understanding of who your audience is. Identify their needs and preferences to tailor the forms effectively.
- Keep It Simple: While it’s tempting to add various fields, simplicity is key. Limit your form fields to what is necessary to avoid overwhelming users.
- Use Conditional Logic: Take advantage of Gravity Forms’ conditional logic feature. This allows you to show or hide fields based on user input, making forms much more user-friendly.
- Optimize for Mobile: With a significant number of users shopping via mobile, ensure that your forms are responsive and easy to fill out on smaller screens.
- Test Regularly: Regularly test your forms to identify any issues. User feedback and analytics can provide insights into areas that may need improvement.
- Integrate with Payment Gateways: Make sure your forms work seamlessly with your payment gateways to ensure a smooth transaction process for users.
- Monitor and Analyze: Utilize analytics tools to monitor how users are interacting with your forms. Data-driven decisions can lead to better form performance.
Case Studies: Successful Integrations
Real-world examples can provide important insights into how advanced forms can boost your WooCommerce store’s functionality. Let’s explore a couple of case studies that showcase successful integrations:
| Business | Challenge | Solution | Result |
|---|---|---|---|
| ABC Electronics | High cart abandonment rate due to lengthy checkout process. | Implemented a multi-step checkout form using Gravity Forms with conditional logic. | Reduced cart abandonment by 30% and improved conversion rates. |
| XYZ Apparel | Low customer engagement during product purchase. | Integrated a custom survey form post-purchase to gather feedback. | Increased customer feedback rates by 40%, enhancing product offerings. |
These case studies illustrate how the right advanced forms integration can solve significant challenges and positively impact business outcomes. Whether reducing cart abandonment or boosting customer engagement, Gravity Forms can be a game changer when implemented thoughtfully.
Troubleshooting Common Issues
When integrating Gravity Forms with WooCommerce, you may run into a few hiccups along the way. Don’t fret! Troubleshooting common issues is often simpler than you might think. Here are some typical problems and their solutions to keep your forms running smoothly:
- Form Submission Errors: If customers are encountering errors when submitting forms, check for required fields that may not be filled out. Ensure that all required fields are marked clearly. Additionally, inspect your form settings to make sure nothing is blocking submissions.
- Payment Gateway Conflicts: Sometimes, payment gateway issues could arise. Make sure your Gravity Forms add-ons are compatible with the latest version of WooCommerce. It’s helpful to check both Gravity Forms and WooCommerce changelogs for any updates that might solve the conflict.
- Calculations Not Working: If your forms include calculations and they aren’t functioning correctly, double-check the conditional logic and calculations settings. Make sure the field types are compatible with the calculations you are attempting to perform.
- Styling Issues: Your forms may not have the right look or feel when displayed on your WooCommerce pages. This can usually be fixed by adding custom CSS to your theme or adjusting the theme settings directly. Make sure your forms match your brand’s aesthetic!
- Form Not Appearing on Product Pages: If your forms aren’t showing up, ensure that the Gravity Forms shortcode is properly inserted in the product settings. Sometimes, a simple refresh or clearing the cache can fix visibility problems.
Whatever issues you find yourself facing, remember that the robust community forums and documentation provided by both Gravity Forms and WooCommerce can be invaluable resources. Don’t hesitate to reach out for help when needed!
Conclusion and Next Steps
Integrating Gravity Forms with WooCommerce opens up a world of possibilities for enhancing your e-commerce site. From custom product order forms to tailored customer interactions, this set-up allows you to collect data effectively while providing a seamless shopping experience.
So, what’s next? Here are some actionable steps to consider:
- Explore Additional Add-Ons: Both Gravity Forms and WooCommerce offer a myriad of add-ons that can extend your forms further. Take the time to explore options that can enhance features such as payment integrations, conditional logic, or marketing tools.
- Test Your Setup: Before going live, make sure to conduct thorough tests. This includes simulating customer interactions to see if the forms are functioning flawlessly across different devices and browsers.
- Engage with the Community: Don’t forget to connect with other users in forums or social media groups. Sharing experiences and solutions can be quite beneficial and might inspire you with best practices that enhance your integration.
- Continuously Monitor Performance: Once your integration is set up and running, regularly check on its performance. Utilize analytics tools to monitor form conversion rates, drop-off points, and user feedback.
In summary, while the integration of Gravity Forms and WooCommerce may present some challenges, the rewards far outweigh the initial hurdles. With careful planning, implementation, and a little creativity, you can transform your e-commerce site into a powerful tool for data collection and customer engagement. Happy form building!

