In the ever-evolving world of online education, LearnDash stands out as a premier Learning Management System (LMS) for WordPress. But what do you do when you want to offer limited access to your users? Whether you’re a course creator looking to engage specific users or an administrator aiming to manage permissions efficiently, understanding how to grant WordPress users limited access to LearnDash is vital. Let’s dive deeper into this topic and explore how you can customize user experiences while ensuring your course remains secure and tailored to your audience.
Understanding LearnDash and Its User Roles

Before diving into user permissions, it’s crucial to have a solid grasp of LearnDash and its user roles. LearnDash essentially helps you create, manage, and sell your courses through WordPress. But what makes it truly powerful is its ability to handle different types of users, each with specific roles and capabilities.
Here are the primary user roles associated with LearnDash:
- Administrator: This role has full control over the WordPress site and LearnDash functionality. They can create courses, manage users, and configure settings.
- Instructor: Instructors can create and manage their own courses but have limited access to site-wide settings. Perfect for course creators!
- Student: This role is for users enrolled in courses. Students have basic access to the content they’ve registered for, with no permission to alter course settings.
- Guest: Typically, this role has the least access, often restricted to viewing public content only.
By understanding these roles, you can effectively determine how to grant or restrict access to users in a way that keeps your course secure while enhancing the learning experience. It’s all about finding the right balance!
Why Grant Limited Access to Users?
In a world where content sharing and collaboration are crucial, managing user access effectively becomes paramount. Now, why would you want to grant limited access to users on your LearnDash-powered site? Let’s break it down.
- Enhancing Security: By limiting access, you reduce the risk of unauthorized changes or data breaches. This is especially important in educational or membership sites where sensitive information may be involved.
- Maintaining Quality Control: When users have limited access, you can ensure that only authorized personnel can create or alter content. This creates a more controlled environment that reflects your brand’s values.
- Fostering Accountability: When roles are clearly defined, it’s easier to track responsibilities. Each user knows what they are accountable for, reducing confusion and improving efficiency.
- Tailored Learning Experience: Limited access allows you to customize the learning journey for various users. For instance, students may only see materials relevant to their course, which helps keep them focused and engaged.
- Preventing Information Overload: Simply put, less can be more. By controlling access, you ensure users aren’t overwhelmed with information they don’t need.
So, in a nutshell, granting limited access to users is all about creating a secure, efficient, and engaging learning environment that benefits both the administrators and the learners. It encourages focus, accountability, and a smoother experience for everyone involved.
Setting Up User Roles in WordPress
Now that we understand the benefits of limited access, let’s dive into how to set up user roles in WordPress, especially when integrating with LearnDash. WordPress has a robust user management system that allows you to create and configure roles based on the needs of your site.
Here’s a simple guide to get you started:
- Access Your Dashboard: Log into your WordPress admin dashboard. This is where all the magic happens.
- Go to Users: On the left-hand side of your dashboard, you’ll see a menu. Click on “Users” to manage existing users or add new ones.
- Create or Edit a User Role: You can either create a new user by clicking “Add New,” or you can edit an existing user role. To create a new role, you may need a plugin like User Role Editor to fine-tune permissions.
Here’s a quick table of common user roles you may want to set up:
| User Role | Permissions |
|---|---|
| Student | Access to courses, quizzes, and progress tracking. |
| Instructor | Create and manage courses, quizzes, and grades. |
| Administrator | Full access to all site features and settings. |
| Editor | Manage content (posts, pages) but not user settings. |
Once you’ve assigned the correct roles, click “Update User” to save your changes. This structured approach ensures that each user has the right level of access, reinforcing the principles we talked about earlier. With this setup, you can manage your LearnDash content effectively while providing users with the relevant access they need.
Configuring LearnDash Access Settings
Configuring access settings in LearnDash is crucial to ensure that your users have the right level of access to your courses without overwhelming them with unnecessary content. It’s all about creating a tailored learning experience! By setting appropriate access controls, you’re not only safeguarding your content but also enhancing the learning journey for your users.
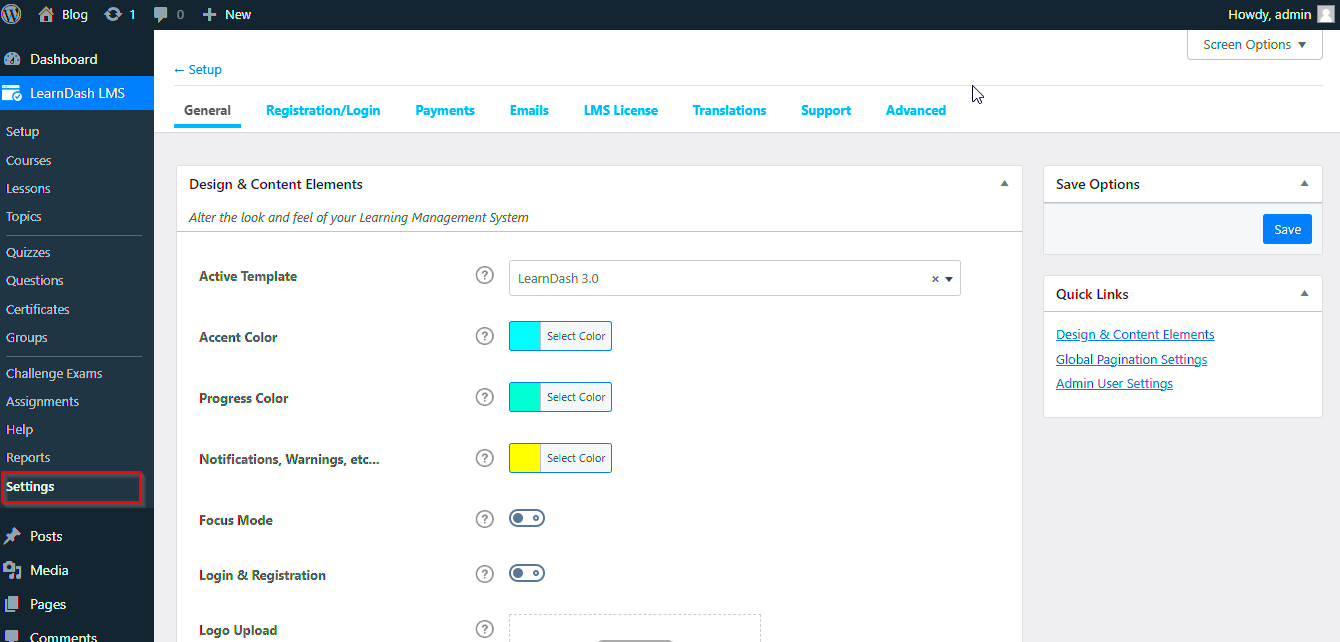
First off, you’ll want to navigate to the LearnDash settings within your WordPress dashboard. Here’s a step-by-step breakdown:
- Go to LearnDash LMS.
- Select Courses and choose the course you want to edit.
- Click on the Settings tab.
Here, you can manage several key access settings:
- Course Access: Choose who can see the course—options range from everyone to just logged-in users or specific user roles.
- Prerequisites: Set prerequisites for your courses to ensure learners have completed necessary courses before moving forward.
- Expiration Settings: Control how long users can access a course—great for time-sensitive content!
Don’t forget to save your changes! After configuring these settings, you can monitor user progress and adjust access based on performance. Configuring LearnDash access settings may seem daunting at first, but once you get the hang of it, it can really enhance the course’s effectiveness and user satisfaction!
Using Plugins for Advanced Access Control
Did you know there are a ton of plugins out there that can supercharge your LearnDash experience? Yep, that’s right! By leveraging specific plugins, you can take control of user access to new heights, allowing you to create a highly customized learning experience.
Here’s a list of some of the most effective plugins for advanced access control:
- LearnDash Groups: Perfect for organizations or schools, this plugin allows you to create groups and manage their enrollment in courses easily.
- Restrict Content Pro: A powerful membership plugin that can restrict access to specific courses based on membership levels.
- MemberPress: Offers excellent flexibility in managing memberships and course access while ensuring a seamless user experience.
When using these plugins, here’s a quick comparison table to see how they stack up in terms of functionality:
| Plugin Name | Group Management | Membership Levels | Course Restriction |
|---|---|---|---|
| LearnDash Groups | Yes | No | Yes |
| Restrict Content Pro | No | Yes | Yes |
| MemberPress | Yes | Yes | Yes |
Before you settle on a plugin, it’s essential to consider your specific access needs and the size of your learning community. With the right tools, you can create an engaging and efficient learning environment for your users. Embrace these plugins for advanced access control and watch your LearnDash site shine!
7. Testing User Access Levels
Once you’ve set up user access levels in LearnDash, it’s time to put them to the test. After all, nothing is worse than promising your users certain permissions only to realize they can’t access the content or features they need. Testing is a crucial step in ensuring that everything is functioning as planned.
Start by creating dummy user accounts that mirror each user role you’ve established. This way, you can experience the platform just as your users would. To effectively test access levels, follow these steps:
- Create sample courses or content: Make sure that the content you’re testing is representative of what your actual users will encounter. This includes lesson access, quizzes, and forums.
- Log in as different users: Use the dummy accounts to log in to your LearnDash environment. Check if each user can access the specific courses, lessons, and features you’ve assigned to them.
- Verify restrictions: This is where you ensure that users cannot access content beyond their permissions. Take note of any areas where the access doesn’t align with what you intended.
- Gather feedback: If possible, invite a few real users to test the setup with you. Their feedback can highlight areas for improvement that you might have missed.
After testing everything thoroughly, make adjustments as needed. Remember, the goal is to create a seamless learning experience. Once you’re satisfied with your access configurations, you can confidently launch your LearnDash course!
8. Best Practices for Managing User Access
Managing user access in LearnDash isn’t a one-time task; it requires ongoing attention and fine-tuning. Proper management can enhance user experience and maintain the integrity of your content. Here are some best practices to consider:
- Regularly review user roles: It’s essential to periodically assess whether the user roles and access levels you’ve set still align with your goals. Users may grow in their learning journey, and their permissions might need updating.
- Implement a clear access policy: Define what each user role can and cannot do. Create a guideline that all team members understand to ensure consistency.
- Use group access: If you have multiple users with similar needs, consider creating groups. This makes it easier to manage permissions collectively rather than adjusting them on an individual basis.
- Limit administrative access: Only give admin-level privileges to trusted individuals to avoid misuse or accidental changes to the course setup.
- Monitor user activity: Utilize LearnDash analytics to track how users interact with your content. This will help you understand which areas might require additional support or access adjustments.
- Provide user training: Especially for new users, offering a brief tutorial on how to navigate the system can help them understand their access levels and make the most of their learning experience.
By adopting these best practices, you can ensure that user access is both effective and efficient, providing an optimal learning environment for everyone involved.
Conclusion
Granting limited access to users in LearnDash through WordPress is an effective way to control content visibility and enhance student engagement. Using built-in features and plugins, you can customize user roles and access levels based on your instructional needs.
By implementing limited access, you can:
- Enhance User Experience: Tailor the learning environment by providing only the necessary materials and lessons relevant to each user’s needs.
- Increase Engagement: Encourage users to focus on specific content instead of overwhelming them with excessive options.
- Protect Sensitive Information: Limit exposure to confidential or unnecessary content to maintain the integrity and confidentiality of your course materials.
- Manage Course Progression: Control the flow of content and ensure learners progress through the curriculum in a structured manner.
| Benefit | Description |
|---|---|
| Customized Access | Users receive tailored access rights based on their roles. |
| Reduced Confusion | Limit choices to keep users focused on relevant content. |
| Security | Safeguard your course materials from unauthorized access. |
| Performance Tracking | Easier to monitor progress when access is restricted. |
In conclusion, granting limited access to WordPress users in LearnDash can significantly streamline the learning experience. By managing user permissions wisely, you create a more effective and engaging educational environment for your learners.


