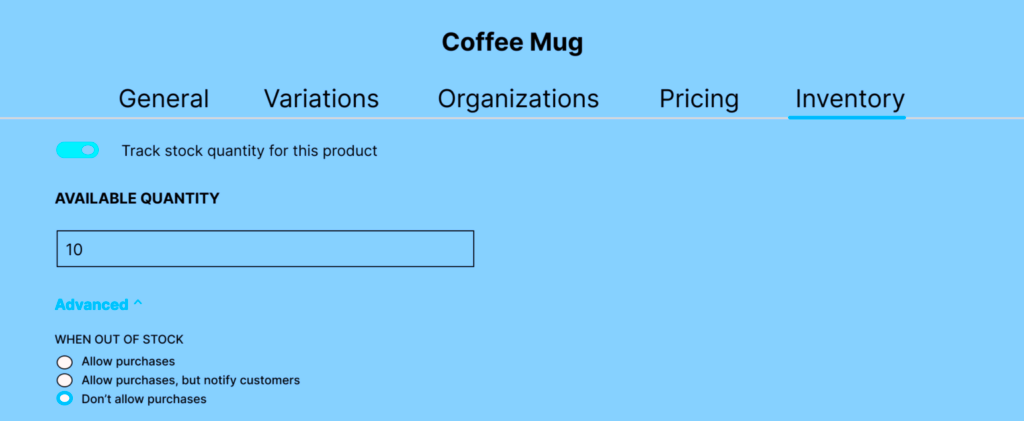
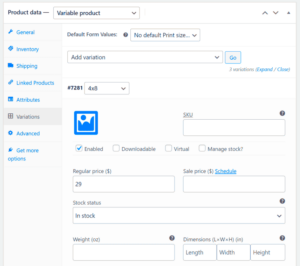
In the dynamic world of eCommerce, having a streamlined way to manage product listings can make a world of difference. That’s where frontend product editors come into play. These tools simplify the process of adding, editing, and managing products on your WooCommerce store directly from the frontend, making it intuitive for users who may not be tech-savvy. Instead of diving deep into the WordPress dashboard, you can see the changes in real-time, ensuring a smoother workflow and an engaging shopping experience for your customers.
Benefits of Using a Frontend Product Editor for WooCommerce

So, why should you consider integrating a frontend product editor into your WooCommerce store? Here are some compelling reasons:
- User-Friendly Interface: Frontend editors are typically designed to be more intuitive. You can drag and drop, click to edit, and see immediate results without needing technical expertise.
- Real-Time Changes: Unlike traditional methods where you have to refresh the backend to see updates, a frontend editor lets you preview changes instantaneously, ensuring what you see is what your customers will get.
- Faster Product Management: Edit or add multiple products in a fraction of the time compared to the standard WordPress interface, which can be tedious and overwhelming.
- Customization Options: Many frontend editors come with built-in templates and design features that allow you to style your product listings according to your brand’s identity.
- Enhanced Collaboration: If you work with a team, a frontend editor allows everyone to contribute easily, making it simple to brainstorm ideas and implement changes without the risk of breaking something in the backend.
With all these benefits, using a frontend product editor can revolutionize how you manage your WooCommerce store, leading to increased efficiency and a better overall user experience.
3. Prerequisites for Creating a Frontend Product Editor
Before you dive into creating a frontend product editor for your WooCommerce store, it’s essential to lay the groundwork. Think of the prerequisites as the building blocks that will support your editing capabilities and ensure a smooth process. Here are the crucial elements you’ll need:
- WordPress Installation: Ensure that you have a functional WordPress site, as WooCommerce runs on top of it.
- WooCommerce Plugin: It’s a must to have the WooCommerce plugin installed and activated. Otherwise, you’ll lack the foundational e-commerce functionalities.
- User Roles and Permissions: Familiarity with user roles is essential. Decide who will use the frontend editor—administrators, editors, or perhaps store managers. This affects both access and capabilities.
- Theme Compatibility: Check that your chosen theme is compatible with WooCommerce and allows for customization. A theme that is not compatible can hinder the functionalities you aim to implement.
- Backup Procedures: Always have a backup in place before making any significant changes to your website. This adds a layer of security and lets you revert if something goes awry.
- Knowledge of Basic HTML/CSS: While you might not need to write extensive code, having a basic understanding of HTML and CSS will help you customize and troubleshoot your frontend editor.
By ensuring these prerequisites are handled, you’ll set yourself up for success. Once you have the foundation laid, you’ll be ready to explore the exciting realm of frontend product editing!
4. Choosing the Right Frontend Product Editor Plugin
Now that you’re armed with the prerequisites, it’s time to select the right frontend product editor plugin. With numerous options out there, picking the right one can feel a bit overwhelming. Don’t worry; we’ll break it down step-by-step.
Here are the key factors you’ll want to consider:
- Features: Does the plugin offer the features you need? Look for functionalities like bulk editing, image uploading, and custom fields.
- User Interface: A user-friendly interface saves time and hassle. Check reviews or demo versions to get a sense of the usability.
- Compatibility: Ensure the plugin is compatible with the latest version of WooCommerce and your WordPress theme. This reduces potential conflicts.
- Support and Documentation: A good plugin comes with robust customer support and comprehensive documentation. This is crucial for troubleshooting and learning.
- Modular Extensibility: Consider whether the plugin allows for future growth. Plugins that are extensible can adapt as your business needs evolve.
- Pricing: Find a balance between cost and features. Some quality plugins offer free versions, while others come with premium pricing that might justify the additional features.
To help you visualize your options better, here’s a simple comparison table of popular frontend product editor plugins:
| Plugin Name | Key Features | Price |
|---|---|---|
| WP User Frontend | Custom fields, user roles | Free / Premium |
| WooCommerce Product Table | Bulk editing, table layout | $79 / Year |
| Frontend Product Editor | Simple interface, custom attributes | $39 / Year |
Taking the time to choose the right plugin will make a significant difference in your productivity and ease of use. Happy editing!
5. Installing the Frontend Product Editor Plugin
Installing the Frontend Product Editor plugin for WooCommerce might sound daunting, but it’s pretty straightforward! Just follow these steps, and you’ll be up and running in no time. You’ll be able to create a user-friendly experience for your online store.
- Download the Plugin: Start by heading to the WooCommerce marketplace or the official WordPress Plugin Directory. Search for “Frontend Product Editor” and download it. It’ll usually come in a .zip format.
- Access Your WordPress Dashboard: Log in to your WordPress admin area. It’s the backend where all the magic happens.
- Navigate to Plugins: On the left sidebar, click on ‘Plugins’ and then select ‘Add New.’ This is where you can manage all your WordPress plugins.
- Upload the Plugin: Look for the ‘Upload Plugin’ button at the top of the page. Click it, then choose the .zip file you downloaded earlier. Click ‘Install Now’ to begin the installation process.
- Activate the Plugin: After successfully installing, you’ll see a link to ‘Activate Plugin.’ Click that, and voila! Your Frontend Product Editor is now live on your site.
To confirm everything’s in order, go to ‘Plugins’ and find the one you just installed. If it’s listed there and activated, you’re all set!
6. Setting Up the Frontend Product Editor
Now that your Frontend Product Editor plugin is installed, it’s time to set it up so it can meet your specific needs. This is where you’ll tailor it to fit your store style and functionalities. Here’s how you can go about it:
- Access the Settings: Go to the WooCommerce menu in your WordPress dashboard. From there, locate the Frontend Product Editor settings. Click on it to access a range of configuration options.
- Customize User Roles: Decide which user roles can access the frontend editor. You can allow store managers, editors, or even customers to edit product details. Make your choice simple and efficient!
- Choose Display Options: This is your chance to pick the elements that appear on the frontend. Do you want a simple interface or a more detailed structure? Customize fields such as product name, price, description, and images.
- Enable/Disable Features: You can toggle features like product reviews, stock management, and categories. Think about what will simplify the editing process for your users without overwhelming them.
- Save Your Changes: After you’ve customized everything to your liking, don’t forget to save your changes! Click ‘Save’ or ‘Update’ at the bottom of the page to ensure all settings are active.
Once you’ve completed the setup, be sure to test the frontend editor. Make dummy edits to verify that everything functions smoothly. You want to ensure a flawless experience for your users right from the get-go!
7. Configuring Product Fields and Layouts
When it comes to setting up your WooCommerce store, one of the most crucial aspects is configuring the product fields and layouts. This makes a huge difference in how your products are presented to your customers and how easily they can find the information they need.
First, let’s dive into what exactly product fields are. These are the various attributes and details you can associate with a product. Common fields include:
- Product Title: The name of your product is often the first thing customers notice.
- Description: A detailed overview that provides customers with information about the product.
- Price: The cost of the product including any discounts or offers.
- Product Images: Visuals that showcase the product from different angles.
- Inventory Status: Indicates whether the product is in stock or out of stock.
Configuring these fields is straightforward with a frontend product editor. You can add, remove, or modify fields easily. For those who want to optimize layouts, consider using drag-and-drop builders available in many product editor tools. This allows you to visually arrange elements like:
| Field | Position |
|---|---|
| Product Image | Top |
| Title | Center |
| Description | Below Title |
| Price | Under Description |
By carefully configuring these product fields and layouts, you’ll improve the shopping experience for your customers, making it easier for them to understand your offerings at a glance.
8. Customizing the User Experience
Now that your product fields and layouts are set up, let’s focus on customizing the user experience. A seamless and enjoyable shopping experience can turn a casual visitor into a loyal customer. Here are some key elements to consider:
- Intuitive Navigation: Ensure that your site is easy to navigate. Implement categories and filters that help users find products quickly. Dropdown menus and breadcrumb links can add to this clarity.
- Search Functionality: Enhance your search bar so it suggests products as users type. This not only speeds things up but also engages customers effectively.
- User-Friendly Checkout: A complicated checkout process can lead to cart abandonment. Streamline this by reducing the number of steps and allowing guest checkouts.
- Responsive Design: With many shoppers using mobile devices, ensure that your site is optimized for mobile. This includes all product fields, buttons, and forms adjusting smoothly across different screen sizes.
Furthermore, consider adding customer reviews and ratings for products. They provide social proof and can significantly influence purchasing decisions. You can also incorporate live chat features, allowing customers to ask questions in real-time, which could help eliminate any hesitations they might have.
Lastly, personalized recommendations based on browsing history can enhance the shopping experience. By offering suggestions tailored to individual users, you create a more engaging and customized environment that encourages further exploration and purchases.
9. Testing the Frontend Product Editor
Once you’ve set up the Frontend Product Editor for your WooCommerce store, it’s time to put it through its paces. Testing is an essential step to ensure everything works seamlessly. Here’s how to go about it:
1. Create Test Products: Start by creating a few test products. Tinker with various attributes, such as different categories, prices, and images. This will help you gauge how the editor behaves with different inputs.
2. User Roles: Test the editor from different user roles. If you have admins, editors, and vendors, let each role try out the Frontend Product Editor to ensure permissions are correctly set. Each role should have the appropriate access and functionality.
3. Different Devices and Browsers: Test the Frontend Product Editor across various devices (desktops, tablets, and smartphones) and browsers (Chrome, Firefox, Safari, etc.). This ensures that the user experience is consistent, regardless of how customers access your store.
4. Functionality Check: Verify all functionalities, such as:
- Adding new products
- Editing existing product details
- Uploading images without issues
- Setting inventory levels
- Applying discounts and variations
5. Check for Errors: Make sure to check for any error messages or functionalities that might not work as expected. If something doesn’t seem right, try to replicate the issue to see if it’s a one-time glitch or a recurring problem.
After thorough testing, your Frontend Product Editor should be ready to provide a smooth and efficient experience for both your team and customers.
10. Common Issues and Troubleshooting Tips
Like any tool, the Frontend Product Editor for WooCommerce can sometimes run into hiccups. Here are some of the common issues you might encounter, along with tips to troubleshoot them:
| Issue | Description | Troubleshooting Steps |
|---|---|---|
| Editor Not Loading | The product editor may fail to load, leaving users unable to edit products. |
|
| Image Upload Issues | Users might face difficulties uploading images for products. |
|
| Permissions Errors | Some users may not have access to certain functionalities based on their roles. |
|
By keeping these common issues and troubleshooting techniques in mind, you can quickly resolve most problems that arise with the Frontend Product Editor. Remember, it’s all about enhancing the user experience, so stay proactive and keep an eye out for any glitches!
Conclusion and Next Steps
In this guide, we explored the comprehensive features and functionalities of a Frontend Product Editor for WooCommerce, which simplifies the product management process for online store owners. Utilizing a frontend editor can significantly enhance the user experience for both administrators and customers, enabling seamless product updates and modifications directly from the storefront.
To summarize our journey through the guide:
- Understanding the Frontend Product Editor: We learned about its significance in the WooCommerce ecosystem and how it can improve product management efficiency.
- Installation Process: The step-by-step instructions for installing the editor were covered, ensuring you have a functional tool at your disposal.
- Feature Exploration: We delved into the various features of the frontend editor, such as image uploads, price adjustments, and description modifications.
- Best Practices: Guidance on how to maximize the benefits of the frontend product editor for various types of products was outlined.
As a next step, consider implementing the Frontend Product Editor in your WooCommerce store to streamline your operations. Regularly review its features, keep your plugin updated, and leverage customer feedback to enhance the overall shopping experience. Staying informed about new updates and capabilities will ensure that your WooCommerce store remains competitive and user-friendly. Don’t hesitate to explore additional plugins and tools that can complement your frontend editor for further optimization.


