Accessibility is a vital aspect of web design, particularly for platforms like WordPress. With millions of websites powered by WordPress, ensuring that everyone, including individuals with disabilities, can navigate and interact with these sites is crucial. In this guide, we’ll explore the various free accessibility options available in
Understanding the Importance of Web Accessibility
Web accessibility refers to the practice of designing and developing websites that everyone can use, regardless of their abilities or disabilities. It’s not just a moral obligation; it’s a requirement in many regions. Here’s why web accessibility is important:
- Inclusivity: Making your site accessible ensures that everyone, including those with visual, auditory, motor, or cognitive impairments, can access your content.
- Legal Compliance: In many places, like the USA and EU, web accessibility is governed by laws (e.g., ADA, WCAG). Compliance can avoid legal issues.
- Wider Audience Reach: Increasing accessibility can attract a broader audience, including people with disabilities who might otherwise miss out on your content.
- SEO Benefits: Search engines favor sites that are well-structured and accessible. This means improved rankings and visibility!
- Enhanced Usability: Many accessibility features improve usability for all users, such as clearer layouts and better navigation.
By acknowledging the importance of web accessibility, you contribute to a more inclusive digital world while also reaping the benefits that come with it. It’s a win-win! So, let’s look at what free accessibility options WordPress offers to help you get started on this important journey.
Overview of Free Accessibility Tools and Plugins
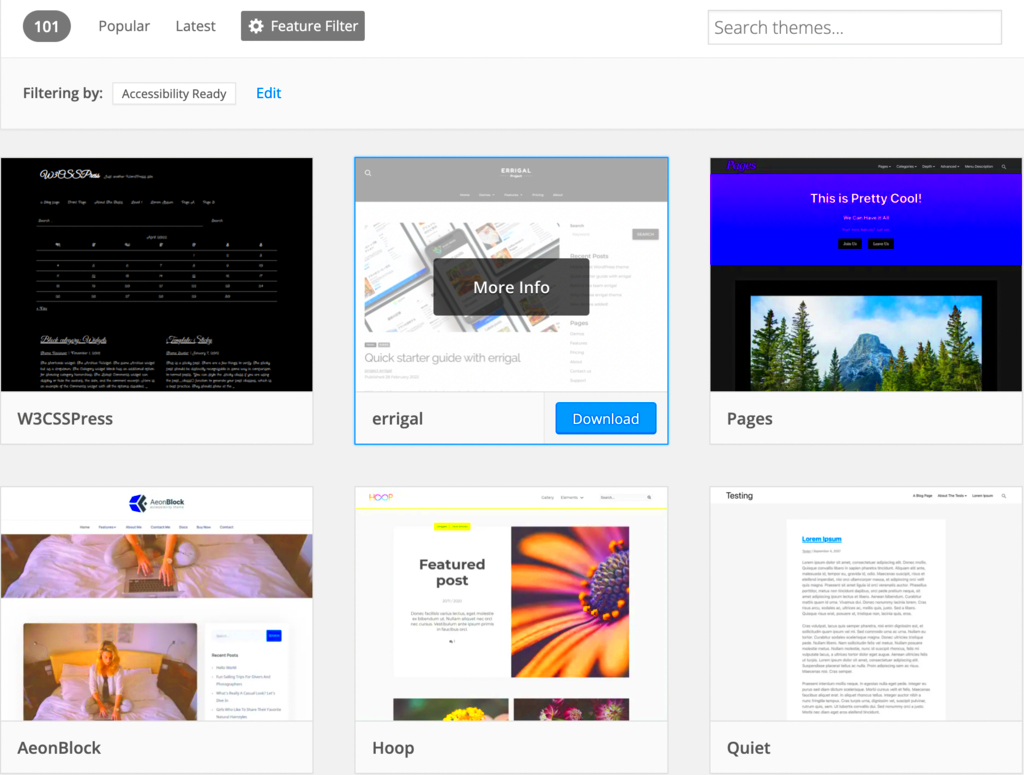
When it comes to making your WordPress site accessible to everyone, there’s a treasure trove of free tools and plugins available. These resources can help ensure that your website meets accessibility standards, allowing all users, including those with disabilities, to navigate and consume your content easily.
Here’s a rundown of some of the most popular free accessibility tools and plugins for WordPress:
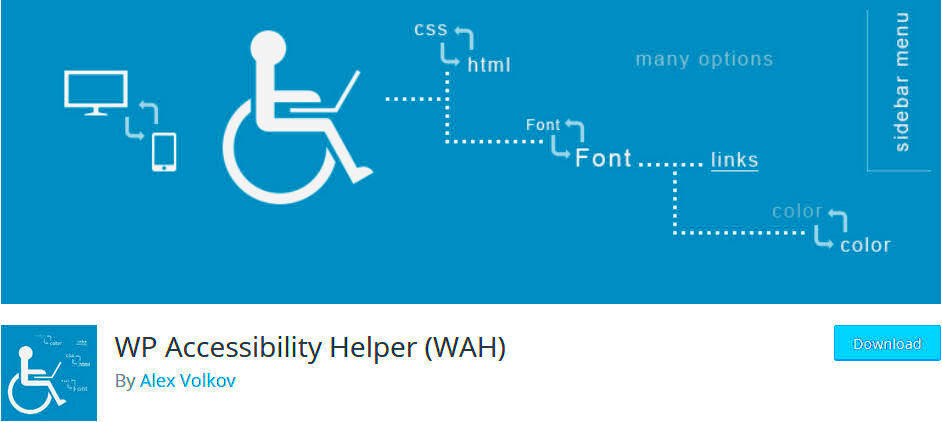
- WP Accessibility: This plugin is a go-to for many WordPress users. It helps eliminate common accessibility problems in your WordPress theme by adding features such as color contrast adjustments, skip links, and more.
- Accessible Poetry: A tool aimed at bloggers and content creators, it focuses on enhancing the readability of your text and improving overall access to content.
- One Click Accessibility: This handy plugin adds a floating accessibility toolbar to your site, giving users quick options to customize the website’s appearance, like adjusting font size and background color.
- WP ADA Compliance Checker: Perfect for developers, this plugin scans your site for compliance with the Americans with Disabilities Act (ADA) standards and provides suggestions for improvement.
- Accessibility Widget: If you want to ensure that your website is inclusive, this widget is useful for embedding accessibility options directly into your sidebar or widget area.
With these tools at your fingertips, making your WordPress site more accessible doesn’t have to feel like an uphill battle. Each plugin brings unique features that cater to different needs, making it easier for you to find the right one for your site.
Step-by-Step Guide to Implementing Accessibility Options
Implementing accessibility options on your WordPress site isn’t just a good deed—it’s essential for inclusivity. Luckily, the process is straightforward. Here’s a step-by-step guide to get you started:
- Assess Your Current Site: Before diving in, evaluate your website’s current accessibility level. You can use online tools like WAVE or the Axe accessibility checker to identify areas that need improvement.
- Choose Your Plugins: Based on your assessment, select the appropriate accessibility plugins from the previous section. A good starting point might be the WP Accessibility plugin for basic enhancements.
- Install and Activate the Plugins: Head to your WordPress dashboard, navigate to Plugins > Add New, search for your chosen plugin, and click “Install Now.” After installation, click “Activate” to enable it on your site.
- Adjust the Plugin Settings: Most plugins come with customizable settings. Take some time to explore the options available in your chosen plugins and configure them to fit your site’s needs. This can include setting color contrast, adding skip links, or enabling a toolbar for users.
- Test for Accessibility: Once you’ve implemented the changes, it’s crucial to test your site again. Use screen readers or accessibility testing tools to ensure that all users can interact with your content effectively.
- Gather Feedback: Finally, involve actual users in your testing process. Seek feedback from individuals with disabilities to identify any blind spots in your accessibility measures.
Following these steps will not only help you create a more accessible website but will also foster an inclusive online environment for all users. Remember, accessibility is an ongoing process, so keep revisiting your site and making improvements!
Using Accessibility Checker Plugins
When it comes to making your WordPress site accessible to everyone, accessibility checker plugins can be your best friend. These handy tools scan your website for potential accessibility issues and provide you with useful suggestions on how to fix them. Here’s why you should consider using them:
- Identify Issues Quickly: Accessibility checker plugins help you spot issues that could hinder users, such as inadequate alt text for images or poor color contrast. Quick identification means faster resolutions.
- Step-by-Step Guidance: Most of these plugins offer suggestions and guidance for resolving detected issues, making it easier for you to improve your site’s accessibility.
- User-Friendly: No developer skills are required! Many accessibility checker plugins feature intuitive dashboards, making them accessible to beginners and seasoned users alike.
Here are a few popular accessibility checker plugins you might want to consider:
| Plugin Name | Key Features |
|---|---|
| WP Accessibility | Enhances navigation by allowing users to choose font sizes and adds skip links. |
| Accessibility Checker | Scans your content for adherence to WCAG 2.1 guidelines and offers fix suggestions. |
| One Click Accessibility | Provides multiple accessibility features in one click, like keyboard navigation and color contrast adjustments. |
In summary, integrating accessibility checker plugins into your WordPress site not only helps you identify and fix accessibility issues but also enhances the user experience for everyone. Putting in the effort now means you’ll create a more welcoming online space.
Customizing Themes for Better Accessibility
Your choice of theme plays a significant role in your website’s accessibility. But did you know that you can customize your theme to enhance accessibility even further? Here’s a breakdown of how you can tweak your theme for better accessibility:
- Color Contrast: Ensure that there is sufficient contrast between text and background colors. Aim for a contrast ratio of at least 4.5:1 for normal text to meet WCAG standards.
- Header Structure: Use proper header tags (H1, H2, H3) to create a logical structure. This not only helps with accessibility but also enhances SEO.
- Alternative Text for Images: Always provide descriptive alt text for images. This helps screen reader users understand the content and context of images.
- Keyboard Navigation: Test how your site functions using the keyboard alone. Ensure that users can tab through links and buttons without hassle.
- Accessible Forms: Make your forms easy to navigate and understand. Use clear labels and error messages so users know how to correct mistakes.
Many WordPress themes come with built-in accessibility features, but customizing them further can make a world of difference. If you’re not comfortable making changes yourself, consider contacting a developer for assistance. Remember, creating an accessible site is not just about compliance—it’s about fostering an inclusive environment that everyone can enjoy!
7. Creating Accessible Content: Best Practices
Creating accessible content is crucial for ensuring that everyone, regardless of their abilities, can enjoy and benefit from your website. There are several best practices you can follow to make your WordPress content accessible.
- Use Clear and Simple Language: Write in a way that’s easy to understand. Avoid jargon and complex sentences.
- Structure Your Content: Use headings and subheadings (like
<h1>,<h2>, etc.) to create a logical flow. This helps screen reader users navigate your content more easily. - Provide Descriptive Links: When using hyperlinks, make the text descriptive. Instead of saying “click here,” use text like “learn more about accessible web design.”
- Keep Your Sentences Short: Long sentences can be overwhelming. Aim for shorter sentences for better readability.
- Use Lists and Tables Wisely: Structuring information in lists or tables can significantly enhance readability and comprehension. Just make sure to label them appropriately.
- Include Alt Text for Images: Every image should come with alternative text (alt text) that describes the content. This is especially important for users who rely on screen readers.
Remember, accessible content isn’t just about compliance; it’s about creating a more inclusive online community. By adopting these best practices, you can ensure that all users can enjoy your content without barriers.
8. Image and Media Accessibility Techniques
Images and media enrich our content, but they also need to be accessible. Here are some techniques that can help ensure your visuals are usable for all:
- Use Alt Text: Always provide descriptive alt text for images. This is vital for users who cannot see the images. Describe the content, function, and context of the image.
- Caption Videos: If you’re using videos, make sure to include captions. This makes your content accessible for those who are deaf or hard of hearing and benefits everyone.
- Transcripts: For all audio content, consider providing transcripts. This allows users to read along or refer back to the content without needing to listen again.
- Use ARIA Landmarks: Accessible Rich Internet Applications (ARIA) landmarks help screen reader users navigate content easily. Use them to mark sections of your media content.
- Choose Color Contrast Wisely: Ensure that any text overlay on images has sufficient color contrast. This makes it easier for users with visual impairments to read your content.
Implementing these image and media accessibility techniques helps create a more inclusive environment. Remember, every user should have access to your valuable content, so take the time to ensure that your visuals support your message effectively.
9. Keyboard Navigation Enhancements
Keyboard navigation is crucial for users with mobility impairments or those who prefer to navigate without a mouse. Fortunately, WordPress offers several free options to enhance keyboard navigation, ensuring that your website is accessible to everyone.
One of the easiest ways to improve keyboard navigation is by ensuring that all interactive elements—like buttons, links, and form fields—are easily reachable using the keyboard. Here are some strategies you can implement:
- Use tabindex: This HTML attribute defines the order in which elements receive focus when navigating with the keyboard. Make sure your tabindex values are set in a logical order to facilitate smooth navigation.
- Accessible Menus: Implement keyboard-friendly dropdown menus. Use ‘Enter’ or ‘Space’ to activate items and ‘Arrow’ keys to navigate. This is particularly useful for complex navigation structures.
- Skip Links: Add “Skip to Content” links at the top of your pages. This allows users to bypass repetitive navigation menus and jump straight to the main content.
- Focus Visibility: Ensure that when elements are focused, they are clearly visible. Use CSS to change the appearance of the focused element, so it’s obvious where the user’s keyboard is positioned.
By integrating these enhancements, you’re not just complying with accessibility standards; you’re also creating a more user-friendly website. Remember, a site that’s easy to navigate keeps users engaged and coming back for more!
10. Testing and Reviewing Accessibility Improvements
Once you’ve made your enhancements, it’s vital to test and review the accessibility features you’ve implemented. This ensures they function as expected and truly benefit all users, especially those with disabilities. Here’s a handy breakdown of how to get started:
- Automated Testing Tools: Use free tools like WAVE or Axe to quickly assess your website for accessibility issues. These tools can identify errors in HTML and CSS that may impact usability.
- User Testing: Consider involving real users, especially those with disabilities. Gather feedback on their experience navigating your site, and adjust based on their input.
- Manual Testing: Navigate your site using only keyboard shortcuts. This will help you identify any roadblocks in navigation and ensure all functionalities are accessible without a mouse.
- Screen Reader Review: Use tools like NVDA or JAWS to test how your website interacts with screen readers. This is crucial for users who rely on audio feedback.
Reviewing these enhancements regularly is essential, especially with website updates or new content additions. Accessibility is an ongoing process, and staying proactive will help you maintain a welcoming digital environment for all users.
11. Resources for Further Learning about Accessibility
With the importance of accessibility growing in the digital world, it’s crucial to arm yourself with knowledge and tools. Whether you’re a developer, designer, or content creator, diving deeper into accessibility can help enhance your skills and your website’s user experience. Here are some invaluable resources to guide you:
- Web Content Accessibility Guidelines (WCAG): These guidelines set the standard for making web content more accessible. Familiarize yourself with the principles of perceivable, operable, understandable, and robust content.
- W3C Accessibility Initiative: The World Wide Web Consortium (W3C) provides a plethora of resources, including tutorials, tools, and community discussions surrounding accessibility.
- A11y Project: This is a community-driven effort to make web accessibility easier. The site offers resources, tips, checklists, and a welcoming community.
- WebAIM (Web Accessibility in Mind): This resource provides foundational information about web accessibility, along with tools like the WAVE Accessibility Evaluation tool that checks your site’s accessibility score.
- Books on Accessibility: Consider picking up books such as “Accessibility for Everyone” by Laura Kalbag or “Inclusive Design Patterns” by Heydon Pickering for deeper insights and practical approaches to accessibility.
- YouTube Channels and Webinars: Platforms like YouTube feature channels dedicated to accessibility. Look for webcasts from accessibility experts who share tips and best practices.
These resources provide not only useful information but also community support. Engaging in dialogues with other accessibility advocates can spark creativity and ignite your commitment to making the web a more inclusive space.
12. Conclusion: Embracing Accessibility for All
As we wrap up this discussion on free accessibility options for WordPress, it’s essential to remember that accessibility is not just a box to check off—it’s a fundamental aspect of our responsibility as web creators. Embracing accessibility means acknowledging that everyone, regardless of their abilities, deserves an equal opportunity to access and enjoy online content.
By implementing the accessibility options discussed in this guide, you’re taking significant steps toward inclusivity. Here are some key takeaways:
- Understanding user needs: Put yourself in the shoes of users with various disabilities. Understanding their experiences will help shape your content and design choices.
- Utilizing WordPress tools: With countless free options available, integrating accessibility features into your WordPress site is easier than ever.
- Continuous learning: Accessibility practices evolve, so stay updated with new trends, tools, and recommendations.
- Community engagement: Share your insights and promote awareness through blogs, workshops, or social media. Be part of the change.
In conclusion, the journey towards an accessible web is one that involves dedication, effort, and passion. Let’s make it our mission to create an online landscape where everyone feels welcome, included, and capable of engaging without hindrance. Embrace accessibility, and let’s build something wonderful together!

