Hey there! If you’ve ever wanted to have more control over file uploads in WordPress, you’re in the right place. Managing file uploads can sometimes feel like a maze, but with custom code, you can simplify the process and tailor it to your specific needs. Whether it’s images, documents, or any other type of file, learning how to implement your own uploading mechanism can save you time and frustration. Let’s dive into the world of custom file uploads in WordPress!
Understanding the Basics of File Uploads in WordPress

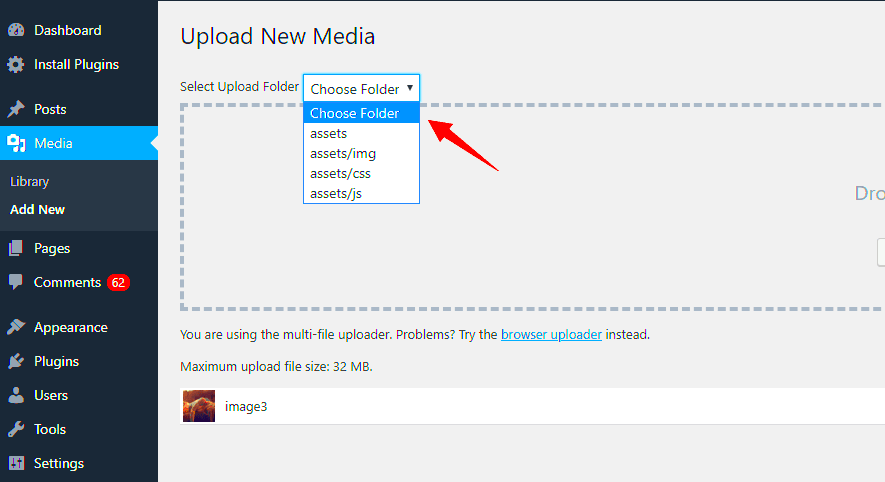
Before we get too deep into custom coding, it’s important to grasp the basics of how file uploads work in WordPress. WordPress offers a built-in media uploader, but customizing it can enhance your site’s functionality. Here’s what you need to know:
- Default File Upload Process: WordPress allows users to upload files through the Media Library or directly in posts and pages. This uses PHP functions that handle file transfers securely.
- File Types: By default, WordPress supports a variety of file formats, including:
- Images: .jpg, .png, .gif
- Documents: .pdf, .docx, .pptx
- Audio: .mp3, .wav
- Video: .mp4, .mov
- Security Measures: WordPress automatically applies certain security checks to ensure that users can only upload permitted file types. This prevents potentially harmful files from being uploaded.
- File Size Limitations: The maximum file size for uploads is determined by your hosting environment and can usually be modified in the php.ini file or your WordPress settings.
By understanding these fundamental aspects, you’ll be better equipped to implement custom file uploads that fit your specific requirements. So, let’s get ready to code!
Setting Up Your Environment for Custom Code

Alright, let’s dive into setting up your environment for custom file upload code in WordPress. This is a crucial step that lays the groundwork for everything you’re going to implement. Picture it like setting the stage before a big performance – you want everything just right!
To begin, you’ll need a local development environment. If you haven’t already, consider using tools like XAMPP, MAMP, or Local by Flywheel. These tools help simulate a server environment on your computer, so you can test your code without affecting a live site. Here’s a quick checklist of what you need to do:
- Install a local server package (XAMPP/MAMP).
- Create a new database for your WordPress site.
- Download WordPress and place it in the server’s root directory.
- Set up WordPress through the installation wizard, linking it to your newly created database.
- Install a theme or just use the default one for testing.
Next, you’ll want to install an Integrated Development Environment (IDE) or a code editor to write your custom code. A few popular options include:
- VS Code: Great for its extensions and community support.
- Sublime Text: Lightweight and highly customizable.
- Atom: Developed by GitHub, it’s very flexible.
Once you’ve got your environment ready, keep your WordPress installation updated. This ensures that your custom code integrates smoothly. With your foundation set, you’re ready to move on to creating that custom upload form!
Creating a Custom Upload Form
Now that your environment is all set, it’s time to flex those coding muscles and create a custom upload form in WordPress! This is where you can get creative and tailor the form to fit your needs. Don’t worry; it’s not as daunting as it sounds!
First things first, let’s think about where this form is going to live. You can create a new template file or add the code to an existing one, like your theme’s functions.php or a custom plugin. Just remember to backup any files you modify!
Here’s a simple structure of what your upload form will look like:
<form action="" method="post" enctype="multipart/form-data"> <input type="file" name="file_upload" /> <input type="submit" name="upload" value="Upload" /></form>
Next, to handle the uploaded file, you need to add some PHP logic. Here’s a rough draft to get you started:
<?phpif(isset($_POST['upload'])) { $uploaded_file = $_FILES['file_upload']; // Your upload logic here.}?>
### Important Considerations
When creating your custom upload form, keep the following points in mind:
- Security: Always validate and sanitize the uploaded files to prevent any malicious uploads.
- File Size Limit: Set limits to avoid overloading your server; you can do this in PHP configuration.
- File Type Restrictions: Specify allowed file types, like images or documents, to keep things in check.
With this structure in place, you’re well on your way to creating a functional and user-friendly file upload system in WordPress. Test your form thoroughly to make sure it operates smoothly, and you’ll be golden! Enjoy coding!
Handling File Uploads in WordPress
When it comes to handling file uploads in WordPress, it’s essential to understand how the platform manages these actions under the hood. WordPress provides a robust framework to facilitate file uploads, making it easier for developers to integrate features while maintaining security and usability.
Firstly, you can handle file uploads by utilizing the built-in WordPress functions such as wp_handle_upload() and wp_read_image_metadata(). Here’s a simple rundown of how it works:
- Form Creation: Start by creating an HTML form that allows users to choose and upload files. Ensure your form has the attribute
enctype="multipart/form-data". - File Upload Handling: Use the
$_FILESsuperglobal array to access the uploaded file details. - Preparing the File: You can use
wp_handle_upload()to streamline the file saving process, as this function automatically manages the upload directory based on file type. - Return Information: After the upload, you’ll get an array containing the URL, file path, type, and more, allowing you to store or display the uploaded file as needed.
Remember, you’ll also want to store metadata for the uploaded files in the database. This entire process enables you to provide a seamless file upload experience to your users while leveraging the WordPress architecture.
Validating and Securing File Uploads
Validating and securing file uploads in WordPress is paramount if you want to protect your site from malicious files and ensure data integrity. Let’s break down some of the essential steps involved in this process:
- File Type Check: Always check the MIME type and file extension to ensure only valid file types are uploaded. You can use functions like
wp_check_filetype()to verify file types against an allowed list. - File Size Limit: It’s vital to set a maximum upload size to prevent oversized files from crashing your server. You can control this with the php.ini settings or directly in your WordPress configuration.
- Nonce Verification: Use WordPress nonces to protect against CSRF attacks. Generate a nonce in your form and verify it on submission to ensure the request is legitimate.
- Sanitization and Escaping: Always sanitize and escape file names and paths before processing them to avoid directory traversal vulnerabilities.
- Secure Upload Directory: Consider restricting access to the upload directory by adjusting permissions to prevent direct access to uploaded files.
By incorporating these validation techniques, you not only enhance the security of your WordPress site but also ensure a reliable experience for users uploading files. Remember that keeping your WordPress installation and all its components up to date is crucial for upholding security standards.
Displaying Uploaded Files on Your Site
Once you have the capability to upload files in your WordPress site, the next step is to display those files effectively. This not only enhances user experience but also allows visitors to interact with your site more dynamically. Depending on the type of files you’ve allowed for upload (like images, documents, or videos), you have several options to showcase these files.
Here are some popular methods to display uploaded files:
- Using Shortcodes: Create a shortcode that fetches and displays the uploaded files. A simple shortcode can be implemented using a function in your theme’s functions.php file.
- Custom Template: Design a custom template that automatically scans a directory for uploaded files and displays them in a gallery or list format.
- Media Library Integration: Leverage WordPress’s native media library to manage and display uploaded files. This integration provides an easily accessible way to insert files into posts or pages.
For images, consider using a grid layout, while documents can be displayed with download links. Adding proper styling will make the displayed files visually appealing. Always remember to include file types and sizes to inform users what they are downloading.
Lastly, don’t forget about user permissions. Ensure that only authorized users are able to upload files, while others can view or download them. This maintains security and ensures a smoother user experience!
Troubleshooting Common Issues with File Uploads
File uploads can occasionally be tripped up by various issues that may hinder the process for users. As a WordPress developer or site administrator, knowing how to troubleshoot these common problems can save you a lot of headaches down the road.
Here’s a list of typical issues and their solutions:
| Issue | Solution |
|---|---|
| File Size Exceeded | Increase the upload limit in php.ini or use a plugin for this setting. |
| Unsupported File Type | Ensure that the file type is included in the allowed file types in your upload function. |
| File Permissions Error | Check the folder permissions for the upload directory; it should be writable (typically 755). |
| Malformed Upload Data | Verify that your upload handling code correctly processes file data and checks for errors. |
If you encounter persistent issues, enable debugging in WordPress. This will help you identify specific errors within the upload process. And remember, testing file uploads on a staging site can help you pinpoint problems before they affect your live site. Don’t forget to keep your WordPress installation and plugins up to date to minimize issues!
Conclusion
In conclusion, implementing file upload functionality in WordPress using custom code can significantly enhance your website’s capabilities. Whether you’re looking to allow users to submit documents, images, or other media files, the method you employ can influence user experience and site performance. By understanding the underlying PHP and WordPress practices, you can tailor the upload process to fit your specific needs.
Remember, security should always be a top priority. Ensuring that only certain file types can be uploaded and validating these files before processing them helps protect your server from potential vulnerabilities. It’s also essential to set proper permissions so that the uploaded files are stored securely.
Additionally, incorporating user feedback features can enhance the experience. For example, providing feedback on the success or failure of an upload allows users to interact with your site more effectively.
As you continue refining your upload functionality, consider exploring plugins for a more robust solution, but don’t hesitate to rely on custom code when your needs require a unique approach. The flexibility of WordPress makes it easy to mix and match both methods to achieve the best results for your site.
Additional Resources and References
To further enrich your understanding of file uploads in WordPress, I’ve compiled a list of helpful resources and references. These materials can provide you with deeper insights, additional code examples, and best practices. Check them out below:
- WordPress Plugin Developer Handbook – File Handling
- WordPress Mime Types – Learn about allowed file types.
- How to Upload Files with the WordPress Media Uploader
- Managing File Uploads with WordPress – A detailed guide on handling uploads seamlessly.
- Creating A File Upload Form in WordPress – Guiding through the steps creatively.
These links should be useful whether you’re a novice developer or an experienced programmer. Remember, continuous learning is key in the fast-evolving world of web development!


