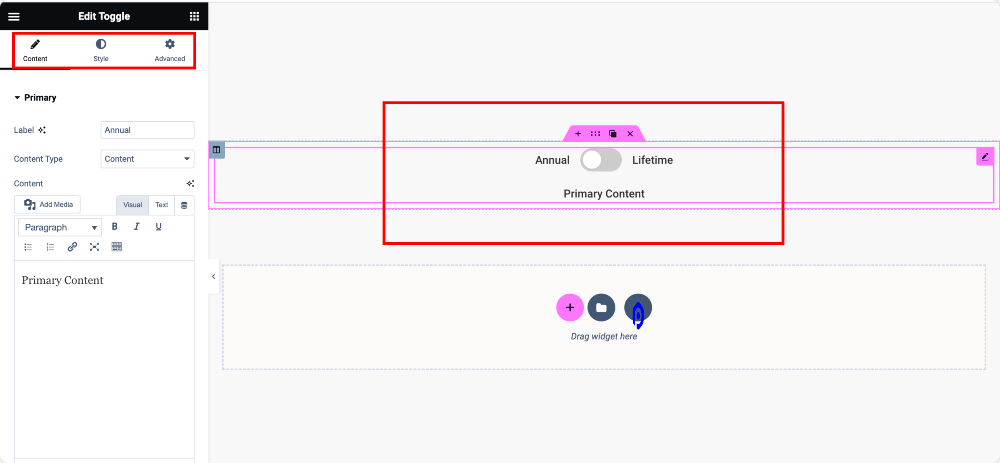
Elementor is a fantastic page builder that allows you to create stunning websites without touching a single line of code. One of its nifty features is the Toggle widget. It’s super handy for organizing information on your site, making it a breeze for visitors to access content without cluttering your page. In this post, we’re going to dive into what toggles are, why they matter, and how you can effectively use them in Elementor without relying on shortcodes.
What is a Toggle in Elementor?
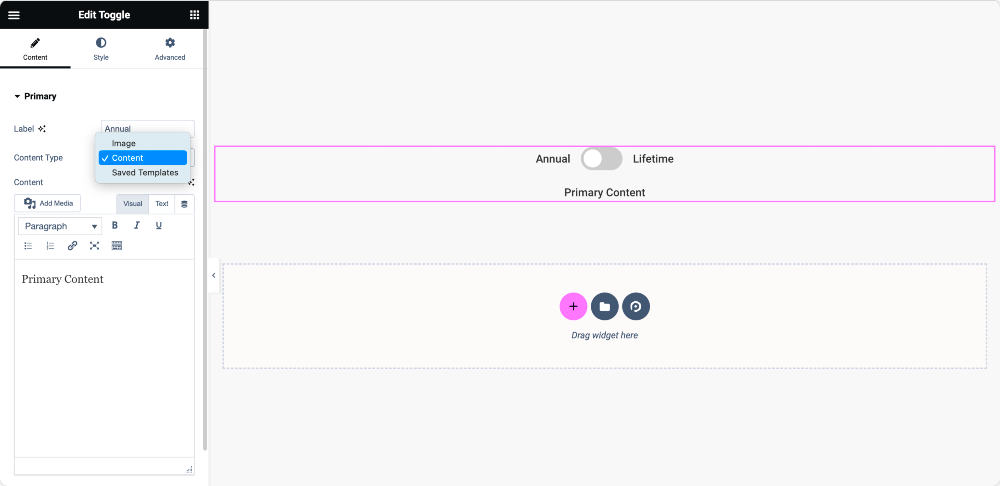
Picture a toggle as a content-switching mechanism! It enables users to view or hide content with a click, enhancing user experience and keeping the page neat. Here’s a breakdown of what a toggle is in Elementor:
- Interactive Element: A toggle allows users to interact with it, revealing or hiding additional information when clicked.
- Efficient Space Usage: By condensing information into collapsible panels, you save space on your web pages, making them look organized and clutter-free.
- Customizable: Toggles can be tailored to fit the design and style of your site, ensuring they blend in seamlessly with your overall aesthetic.
Here’s a small comparison to help you understand how toggles compare to other elements:
| Feature | Toggles | Accordions |
|---|---|---|
| User Control | Users can open multiple panels | Only one panel is open at a time |
| Space Efficiency | Excellent | Very good |
| Ideal Use | FAQs, detailed descriptions | Step-by-step instructions |
In essence, toggles serve a vital function by promoting user engagement and streamlining navigation. They make it easier for your audience to find what they need without sifting through endless text!
Benefits of Using Toggles in Your Web Design
When it comes to web design, having the right elements can greatly influence the user’s experience. One such element that stands out is the toggle. Toggles are not just an aesthetic choice; they offer various practical benefits that can enhance your website significantly.
- Space Efficiency: Toggles allow you to condense large amounts of information into a compact space. Instead of overwhelming your visitors with endless blocks of text, you can present information in a streamlined way. This keeps your pages looking clean and organized!
- User Engagement: By using toggles, visitors are encouraged to interact with your content. The act of clicking to reveal more information keeps users engaged and can make their browsing experience more enjoyable.
- Better Navigation: Toggles can simplify navigation on a page. By categorizing content and allowing users to expand sections that interest them, you can guide them through the information without feeling lost.
- Mobile Friendliness: In today’s mobile-first world, toggles are excellent for responsive design. They allow you to maintain a clean interface on smaller screens while still offering rich content that users can access with a simple tap.
Incorporating toggles in your web design not only elevates your site’s aesthetics but also significantly boosts functionality. Whether you’re a professional web designer or just starting out, using toggles can transform the way your content is presented and experienced.
How to Create a Toggle Manually in Elementor
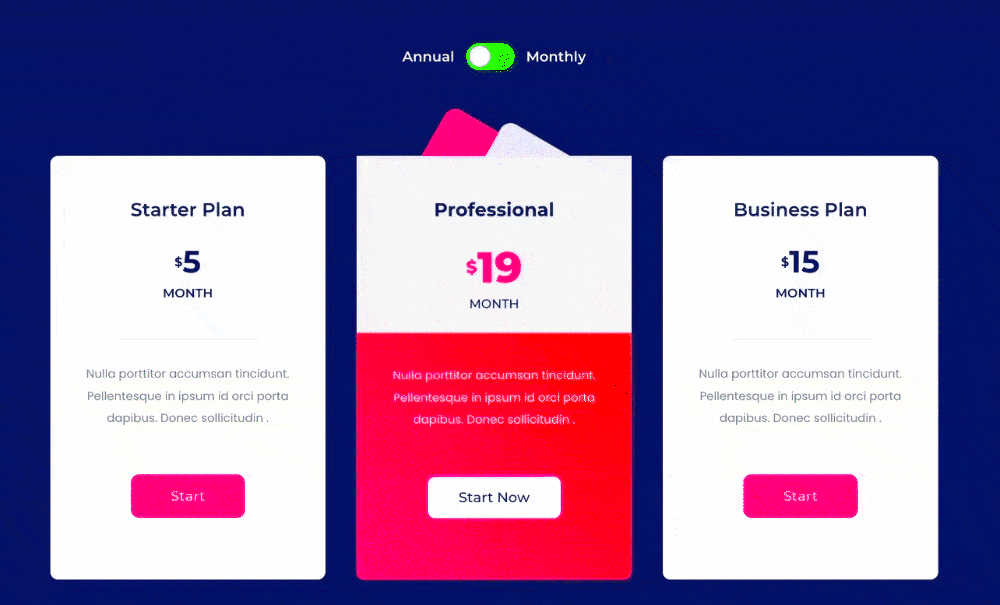
If you’re eager to add a toggle to your Elementor-based site without relying on shortcodes, you’re in luck! Creating a toggle manually is a straightforward process. Follow these simple steps, and you’ll have a stylish toggle ready to go in no time.
- Access Your Elementor Editor: First, open the page you want to edit in Elementor. Click on ‘Edit with Elementor’ to dive into the design interface.
- Drag and Drop the Toggle Widget: On the left panel, look for the “Toggle” widget. You can typically find it under the “General” section. Simply drag and drop it onto the section of the page where you’d like your toggle to appear.
- Customize Your Toggle: Once added, you’ll see default toggle items. Click on one to modify it. You can change the title and content to fit your needs. Customize colors, typography, and other styles in the “Style” tab to maintain brand consistency.
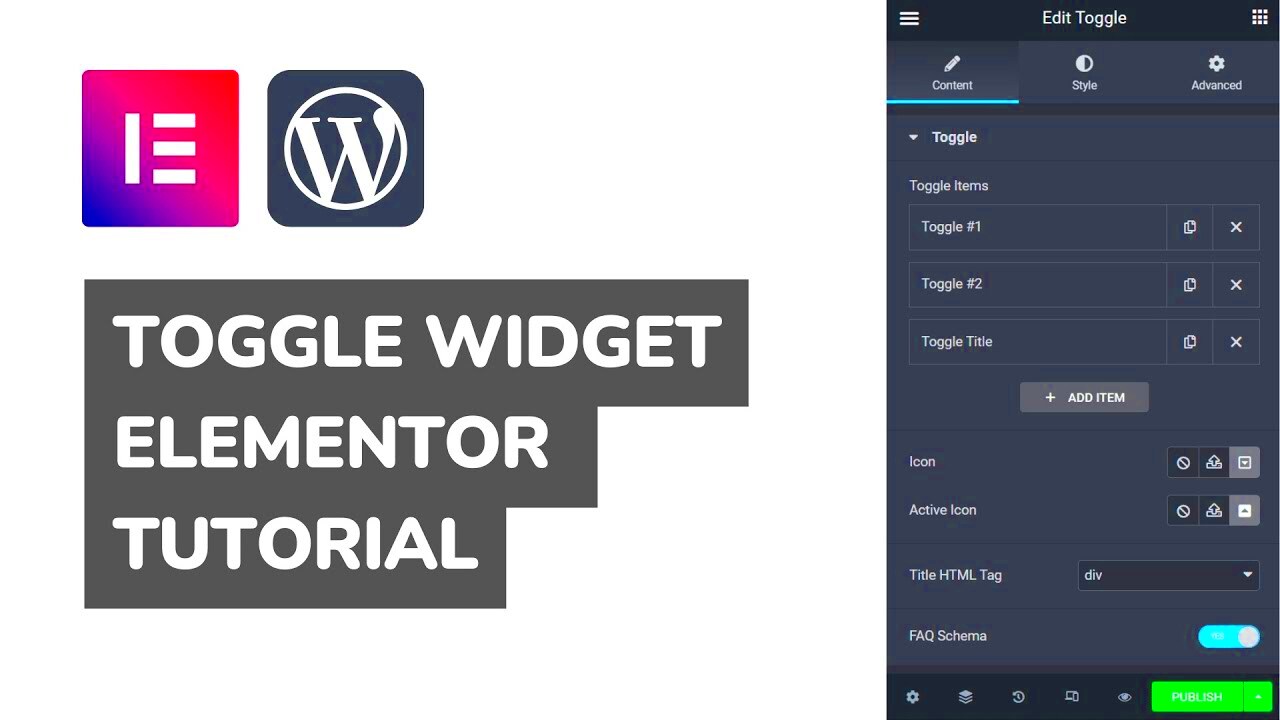
- Add More Items: To add more toggle items, simply click on the “Add Item” button. You can create as many sections as you like – just keep it organized!
- Preview and Publish: Once you’re satisfied with your toggles, hit the “Preview” button to see your design in action. If everything looks good, click “Publish” and make your changes live!
And just like that, you have a toggle ready to enhance your website! By following these steps, you can seamlessly integrate toggles into your design, adding both function and flair to your content presentation.
Styling Your Toggle with Elementor
When it comes to creating engaging webpages, style is everything. Elementor offers a multitude of customization options that can help you style your toggles effortlessly. The Toggle widget allows your visitors to interact with your content meaningfully while also giving you the ability to keep your design consistent and visually appealing.
Here are some essential styling features you can utilize:
- Colors: You have full control over the color scheme of your toggles. Choose background colors for each toggle and text colors that contrast well to improve readability.
- Typography: Adjust font sizes, styles, and spacing to ensure your toggle titles and content are legible and match your overall theme.
- Borders & Shadows: Adding borders can help distinguish your toggles from other content. You can also implement box shadows to give a three-dimensional look to your toggles, making them pop off the page.
- Padding & Margin: Adjust the padding within each toggle to provide a comfortable space for text. Margins can help separate toggles, ensuring they don’t crowd together.
By experimenting with these styling options, you can create a toggle that is not just functional but also visually coherent with your overall site design. Remember, the goal is to maintain usability while making your content vibrant!
Common Issues and Troubleshooting Tips
Even the best tools come with their quirks! As you dive into using Elementor‘s toggle feature, you might encounter a few common issues. Let’s look at some of these challenges and how to tackle them:
| Issue | Solution |
|---|---|
| Toggle not expanding or collapsing | Check your settings. Ensure that the toggle widget is correctly configured, and try re-saving your work. |
| Styling not appearing | Clear your cache or check if another plugin is conflicting with Elementor. Sometimes, a theme update may also require a refresh. |
| Content appearing blurry or distorted | Verify your responsive settings. Ensure that content sizes are fractioned appropriately for mobile and desktop views. |
| Toggle not visible on mobile | Use Elementor’s responsive mode settings to check if the toggle is set to be hidden on mobile devices. |
By keeping these common issues and their solutions in mind, you can make your Elementor experience smoother and more enjoyable. Always stay updated with Elementor’s releases, as fixes and improvements frequently roll out, further enhancing your toggles! Remember, troubleshooting can often lead to learning and better practices for future projects.
7. Advanced Features: Adding Dynamic Content to Toggles
So, you’ve got your basic toggle set up in Elementor, and it looks great! But did you know that you can elevate your toggle game even further by adding dynamic content? This feature is a game-changer as it transforms static toggles into engaging, interactive elements that can draw in your audience.
Dynamic content allows you to display information that can change based on user interaction or other factors. For example, imagine having a toggle that reveals FAQs that dynamically pull answers from your WordPress database. This means you won’t have to manually update content every time there’s a change—how cool is that?
Here’s how you can add dynamic content to your toggles:
- Use ACF (Advanced Custom Fields): Hook up ACF to get custom fields displayed in your toggles without touching a line of code.
- Post Meta Data: If you’re displaying posts, you can integrate post titles or excerpts directly into the toggles.
- User-Generated Content: Allow users to submit questions, and you can display their questions as toggle items, making your site feel personal and responsive.
To utilize dynamic content effectively, go into the toggle settings and look for the dynamic tags option. This will enable you to select a field from which to pull content. By leveraging these advanced features, your toggles can become more than just simple click-to-reveal items; they can be vital tools for engagement and information sharing!
8. Best Practices for Using Toggles in Your Website
Toggles can be incredibly effective, but like any design element, they come with guidelines to ensure they are used wisely and effectively. Here are some best practices to consider when integrating toggles into your website:
- Keep It Simple: Don’t overcrowd your toggle sections. It’s essential to keep the information succinct and relevant. Aim for clarity over complexity.
- Prioritize Content: Place the most important content in the first toggle. Initial impressions matter, and you want visitors to engage with what’s most relevant right away.
- Use Descriptive Titles: Make sure your toggle titles clearly indicate the content beneath them. This avoids confusion and helps users navigate easily.
- Accessibility Matters: Ensure that toggles are accessible to all users. Use proper HTML markup, and consider keyboard navigation for those who may have difficulty using a mouse.
- Test for Mobile: With many users accessing websites from their mobile devices, ensure your toggles are responsive. They should be easy to use, no matter the screen size.
By following these best practices, you’ll ensure that your toggles serve their purpose without overwhelming your site visitors. Remember, the key is creating an enjoyable user experience that encourages interaction and keeps your audience coming back for more!
Conclusion: Enhancing User Experience with Toggles
Utilizing toggles in Elementor without relying on shortcodes can significantly improve user interaction with your website. By integrating toggle features, you can create an engaging layout that keeps your website organized and user-friendly. Here’s what you need to know about enhancing your site with this versatile tool:
- Flexibility: Toggles allow users to open and close sections as needed, offering a clean design while saving valuable screen real estate.
- Improved Navigation: By grouping similar content under toggle headings, you provide a straightforward way for visitors to find the information they are searching for.
- Customizable Design: Elementor provides extensive styling options for toggle widgets, allowing you to synchronize their appearance with your branding, enhancing visual consistency across the site.
- SEO Benefits: Well-structured toggle sections can lead to better user engagement metrics, which positively affects SEO rankings, making your site more discoverable.
Implementing toggle functionality in your Elementor site can transform the user experience, drive better engagement, and help streamline your content presentation. By opting for built-in features over shortcodes, you can easily customize and optimize your elements without the complexities of code. In conclusion, leveraging toggles effectively enhances user experience by simplifying navigation while maintaining a visually appealing layout.

