Welcome to the world of Elementor! If you’re diving into web design, you’ve likely come across Elementor‘s powerful interface, particularly its navigation menus. Navigation menus are crucial for any website, guiding users seamlessly through your content. In
Understanding Link Removal in Navigation Labels
Perhaps you’ve created a navigation menu but found certain links in the navigation labels that aren’t quite fitting for your website’s layout. Removing these links can declutter your menu and create a more user-focused experience. So, how do you go about it? Let’s break it down!
Here are some common reasons for removing links from navigation labels:
- Improved User Experience: Sometimes, less is more. Removing unnecessary links can help visitors find what they need quickly.
- Design Aesthetics: A cleaner menu can enhance your website’s visual appeal.
- Content Strategy: Align your navigation with specific sections of content that are most important to the user.
When you remove links from navigation labels in Elementor, you aren’t just deleting them; you’re crafting a more focused navigation strategy. Here’s a simple step-by-step process:
- Open your Elementor Editor.
- Navigate to the section where your menu is located.
- Click on the Menu widget to access the settings.
- Select the menu item you wish to edit.
- Remove the URL link from the settings panel.
By following these steps, you can effectively clean up your navigation labels and tailor them to your website’s needs!
3. Step-by-Step Guide to Removing Links from Navigation Labels
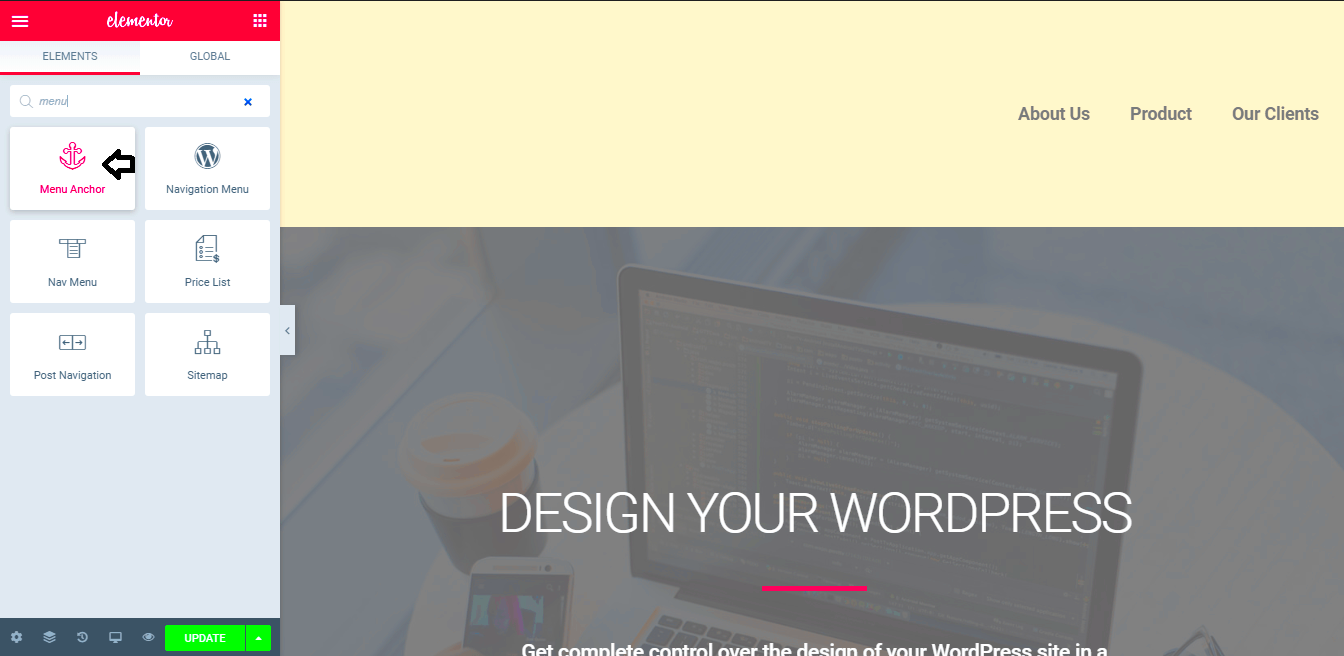
Removing links from navigation labels in Elementor can seem daunting, but it’s relatively simple once you know the steps. Whether you want a clean, unclickable label or a way to highlight specific sections of your site, Elementor makes it easy. Here’s a straightforward guide to help you through the process:
- Access Your Dashboard: Start by logging into your WordPress dashboard. Navigate to your website’s page where the menu is located.
- Edit with Elementor: Once you’re on the desired page, click on the “Edit with Elementor” button at the top. This opens the Elementor interface, where all the magic happens.
- Select the Navigation Menu Widget: Find the navigation menu widget that you want to modify. Click on it to open the settings panel on the left side of the screen.
- Modify Menu Items: In the settings panel, you will see a list of menu items. Click on the menu item you wish to edit.
- Remove the Link: To remove the link, simply delete the URL in the “Link” field. For example, if the field has something like “#”, you should clear this out. This action will make the label non-functional but still visible.
- Customize the Appearance (Optional): If you’d like, you can change how the non-clickable item appears. Adjust fonts, colors, or add hover effects to highlight this label.
- Preview and Update: Once you’re satisfied, preview your changes to ensure everything looks and functions as desired. Hit the “Update” button to save your changes.
And voila! You’ve successfully removed links from your navigation labels. Enjoy customizing your website just how you envision!
4. Alternative Options for Navigation Menu Customization
Customizing your navigation menu doesn’t just stop at removing links from labels. Elementor offers a plethora of options to tailor your site’s navigation to your heart’s content. Here are some alternative options to consider:
- Custom Fonts and Colors: You can personalize your menu appearance through the “Style” tab in the Elementor settings. Change the typography to match your brand and choose colors that stand out.
- Icons as Menu Items: Instead of traditional text labels, you can use icons! This is particularly useful for visual appeal and can provide an intuitive navigation experience.
- Drop-down Menus: Organize your menu with sub-items. This keeps your navigation clean and allows you to showcase more content effectively without cluttering the main menu.
- Mobile Responsiveness: Don’t forget to customize how your navigation menu looks on mobile devices. Elementor allows you to adjust items specifically for smaller screens so that they are accessible and user-friendly.
- Adding Call-to-Action Buttons: Use your navigation to lead users to specific actions on your site. You can add buttons that direct users to important sections or resources.
By exploring these alternatives, you can create a unique and efficient navigation menu that not only enhances user experience but also strengthens your site’s branding. So don’t shy away from experimenting with different features to find what works best for you!
Best Practices for UX with Navigation Labels
When it comes to designing navigation labels in Elementor, adhering to best practices can significantly enhance user experience (UX). A well-organized navigation menu not only guides users through your website but also encourages them to explore more of your content. Below are some essential practices to keep in mind:
- Keep It Simple: Make sure your navigation labels are clear and concise. Aim for one or two words that accurately describe the content behind the link. For example, use “Blog” instead of “Read Our Latest Articles” to keep it straightforward.
- Use Familiar Terminology: Stick to commonly understood terms. Users shouldn’t have to guess what “About Us” means nor should they encounter unusual jargon. Familiarity promotes confidence and ease of navigation.
- Prioritize Important Links: Place your most important links at the top or in a noticeable position. Using a visual hierarchy—like bold text or larger font size—can focus attention on these critical areas.
- Limit the Number of Links: Aim for a limited number of navigation links. Too many choices can overwhelm users and lead to decision fatigue. A good rule of thumb is to keep it around 5-7 main categories.
- Make It Responsive: Ensure that your navigation labels are effective across devices. Test how your labels appear on mobile screens because what works on desktop might not be user-friendly on smaller devices.
- Use Descriptive Labels for Dropdowns: If your navigation has dropdowns, make sure those links also have descriptive labels. This provides users with insight into what they will find below the main categories.
By following these best practices, your Elementor menu can lead to a more enjoyable and effective browsing experience, helping users find what they need without frustration.
Troubleshooting Common Issues with Navigation Links
Even the most well-designed Elementor menus can encounter issues from time to time. If you find that links in your navigation aren’t functioning as expected, here are some common problems and their solutions:
| Issue | Solution |
|---|---|
| Links Lead to the Wrong Page | Double-check the URL settings in the Elementor menu area. Make sure that the link addresses are correct and you didn’t accidentally input an extra character. |
| Mobile Nav Not Displaying | Ensure your responsive settings in Elementor are correctly configured. Test the mobile and tablet views to see if the menu is hidden. |
| Dropdowns Not Working | Check the parent item’s settings to confirm that it is enabled to show the dropdown. Sometimes, CSS (Cascading Style Sheets) might need adjustments. |
| Menu Duplicating | Inspect the menu widget to ensure you haven’t accidentally added the same menu multiple times. Review widget settings to look for duplication. |
| Styling Issues Like Overlapping Text | Look into the CSS settings of your navigation labels. Font sizes or padding may need adjustments to ensure readability. |
By troubleshooting these common issues, you can ensure that your Elementor navigation links work seamlessly, enhancing the overall user experience on your website. Remember, testing and iterating on your navigation is key to finding the perfect setup!
Elementor Menu: Removing Links from Navigation Labels
When customizing your website using Elementor, you may want to create a unique navigation experience by removing links from the menu labels. This technique can be particularly useful when you want to create a cleaner look or when certain menu items serve a different purpose than traditional links, such as triggering modals or expanding sections. Below, we explore the methods to achieve this, ensuring your menu reflects your site’s design preferences.
Steps to Remove Links from Navigation Labels
Follow these steps to remove links from your Elementor menu:
- Open the Navbar Menu: Navigate to the page you want to edit and select the navbar menu in Elementor.
- Select the Menu Item: Click on the menu item you want to modify.
- Remove the Link: In the ‘Link’ field, delete any URL or link text, leaving it blank or inserting a “#” to prevent navigation.
- Customize the Label: Change the label text if necessary to suit your design aesthetic.
- Save Changes: Don’t forget to save your changes to ensure your adjustments are live on the site.
Potential Use Cases
Here are a few scenarios where removing links from navigation labels might be beneficial:
- Dropdown Menus: Create parent items that do not link anywhere but reveal a submenu.
- Custom Events: Use menu items as buttons to trigger JavaScript events or Ajax calls.
- Brand Exposure: Ensure certain labels stand out without being linked, emphasizing branding.
In conclusion, removing links from your Elementor menu labels allows for enhanced design flexibility and can lead to improved user experiences on your website. By following the steps outlined above, you can create a menu that not only looks good but serves a specific function tailored to your site’s needs.

