In the digital age, securing your website from spam and malicious attacks is more important than ever. This is where reCAPTCHA comes into play. Developed by Google, reCAPTCHA acts as a protective barrier, ensuring that the interactions on your website are authentic and not automated bots. By integrating reCAPTCHA with your forms, you protect your site from spam submissions and abuse, improving the overall user experience.
Understanding Elementor Forms

Elementor is a popular WordPress page builder that allows users to create stunning and highly functional websites without needing to code. One of its standout features is Elementor Forms. These forms are user-friendly, customizable, and integrate seamlessly into your site. But why should you consider using
- Simplicity: The drag-and-drop interface makes it easy for even beginners to create forms effortlessly.
- Customization: You can tailor your forms with various field options, button styles, and layout choices.
- Integration: Elementor Forms easily integrate with email marketing services, CRM systems, and other third-party applications.
- Analytics: They provide valuable insights into form submissions, helping you track user responses and improve engagement.
With the increasing reliance on contact forms for user engagement, it’s crucial to ensure they are secure. Combining Elementor Forms with reCAPTCHA not only boosts your site’s security but also enhances user confidence in your forms. So, whether you’re asking for user feedback, scheduling appointments, or gathering leads, integrating reCAPTCHA into Elementor Forms is a smart move to keep spammers at bay.
Prerequisites for Adding reCAPTCHA

Before diving into the exciting world of adding reCAPTCHA to your forms using Elementor, it’s crucial to ensure you have everything set up correctly. Think of this as gathering your tools before starting a DIY project; it makes the process much smoother!
Here’s a quick checklist of prerequisites you’ll want to have handy:
- WordPress Installation: You should have a live WordPress site. Ensure that it’s running smoothly and meets the necessary requirements for using Elementor.
- Elementor Plugin: Have the Elementor plugin installed and activated. If you’re planning to use advanced features, consider getting Elementor Pro.
- Google Account: You’ll need a Google account to access the reCAPTCHA settings. If you don’t have one, creating an account is as easy as pie!
- Access to Your WordPress Dashboard: You’ll be making changes and updates, so make sure you can log into your WordPress dashboard.
- A Form on Elementor: Make sure you have a form created in Elementor, as reCAPTCHA can only be added to existing forms.
Once you’ve ticked all these boxes, you’re all set to move forward! It’s like laying the groundwork for a sturdy building—once you have your prerequisites in place, you’ll find the process of adding reCAPTCHA much more straightforward!
Setting Up reCAPTCHA on Google

Great, now that you have your prerequisites sorted, it’s time to set up reCAPTCHA on Google. This step is where the magic happens, allowing you to generate the key codes that link your Elementor forms to reCAPTCHA.
Follow these simple steps to get started:
- Visit the reCAPTCHA Site: Go to the Google reCAPTCHA page.
- Select Your reCAPTCHA Type: Here, you’ll usually select either reCAPTCHA v2 or v3. For many forms, reCAPTCHA v2 is the go-to option because it offers a “I’m not a robot” checkbox.
- Register Your Site: Provide a label for your reCAPTCHA setup. Think of something descriptive like “MyWebsite Contact Form.” Add your domain name and ensure “Tick the box” is selected if you choose v2.
- Accept Terms and Conditions: It’s essential to read (and accept) the terms and conditions before clicking that “Submit” button.
- Copy the Keys: Once registered, you’ll receive two keys—a Site Key and a Secret Key. Keep these safe as you’ll need them in your Elementor settings.
After completing these steps, you’re pretty much there! The next phase will be linking these keys within your Elementor settings, which will effectively integrate reCAPTCHA into your forms. By following through, you’ll significantly boost your form’s security and reduce spam submissions!
Accessing Your Elementor Form Settings
Alright, let’s dive right into accessing your Elementor form settings. This step is crucial because before we integrate anything like reCAPTCHA, we need to ensure that you’re familiar with how to navigate and modify your form settings within Elementor. Trust me, it’s straightforward!
Firstly, you’ll need to have the Elementor plugin installed and activated on your WordPress site. Once that’s done, follow these steps:
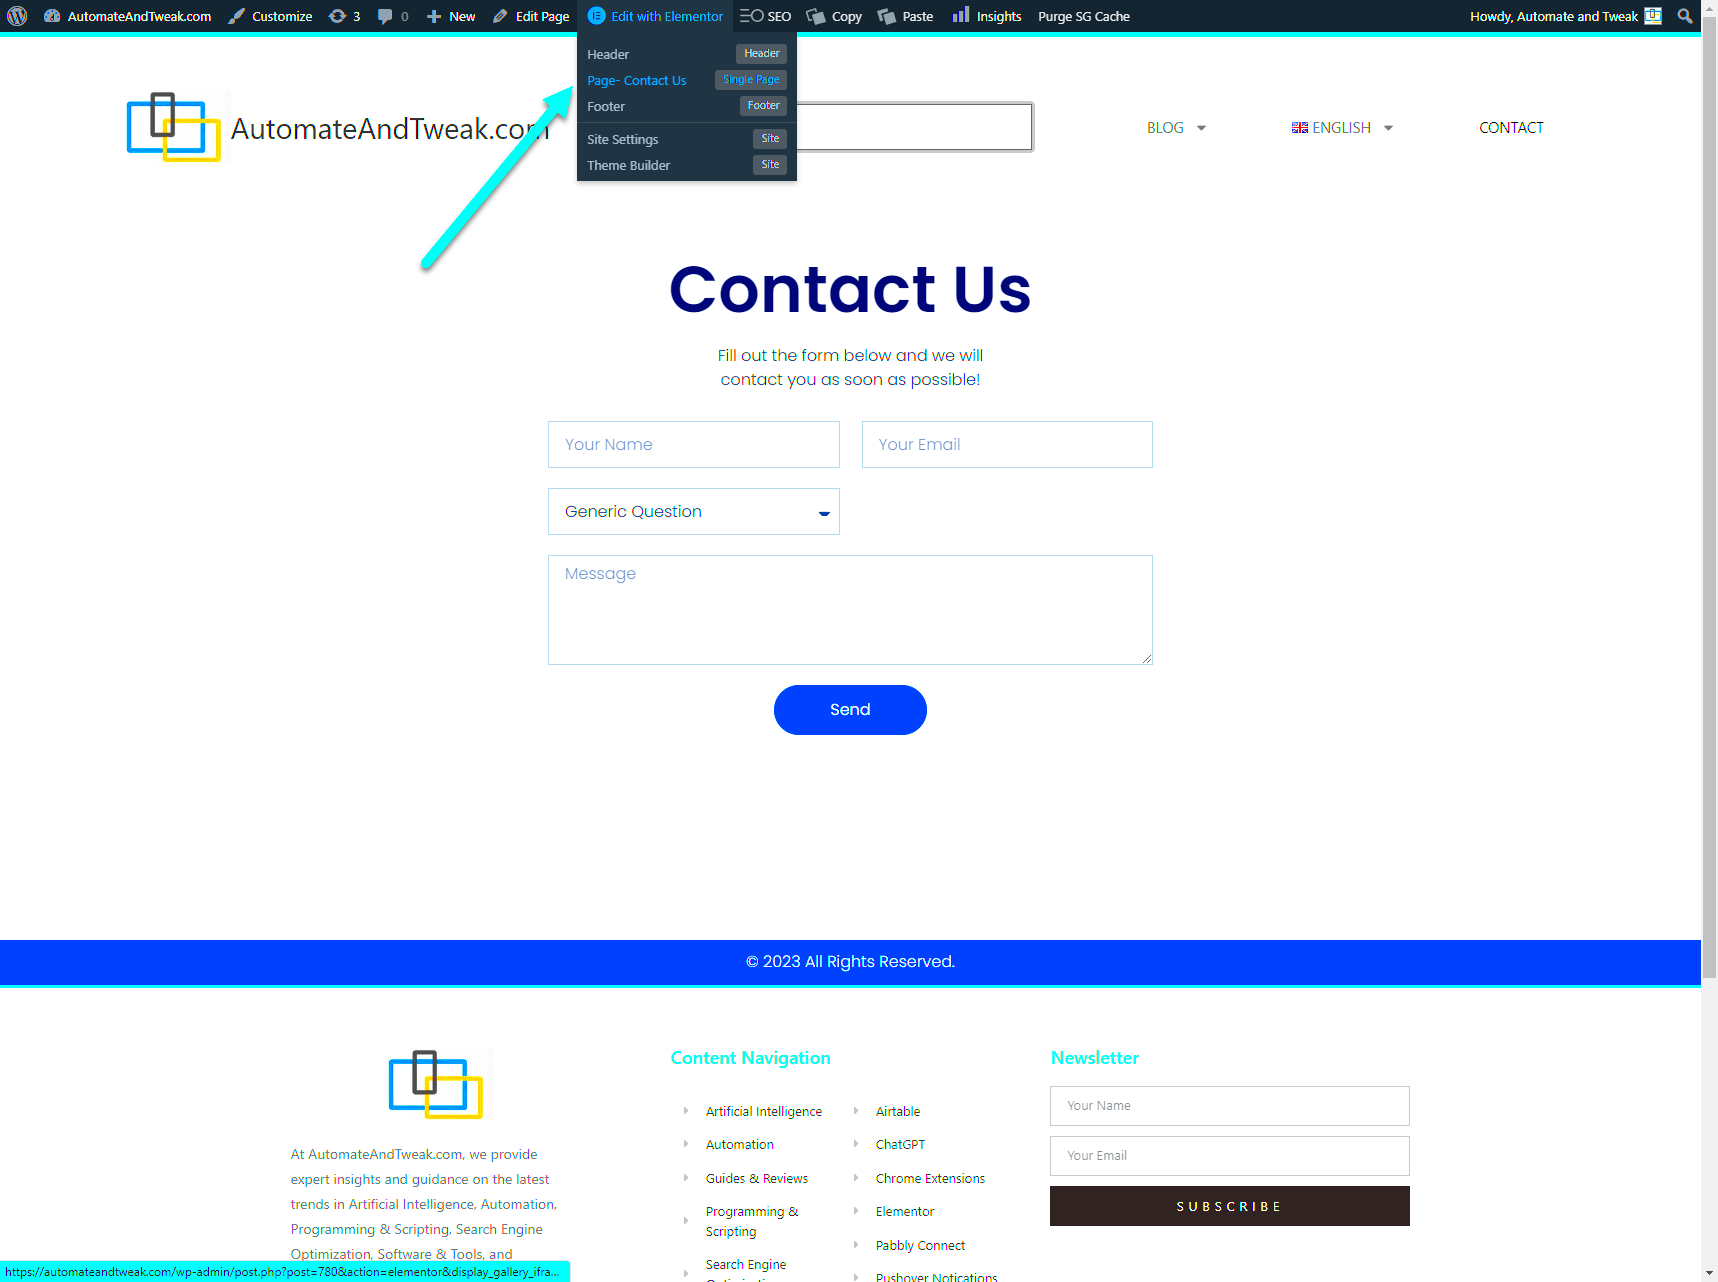
- Open the page or post where your form is located using Elementor editor. You can do this by clicking on “Edit with Elementor”.
- Locate the form widget you’ve already dropped onto your page. If you haven’t added a form yet, just drag the Form Widget from the Elementor panel to your desired section.
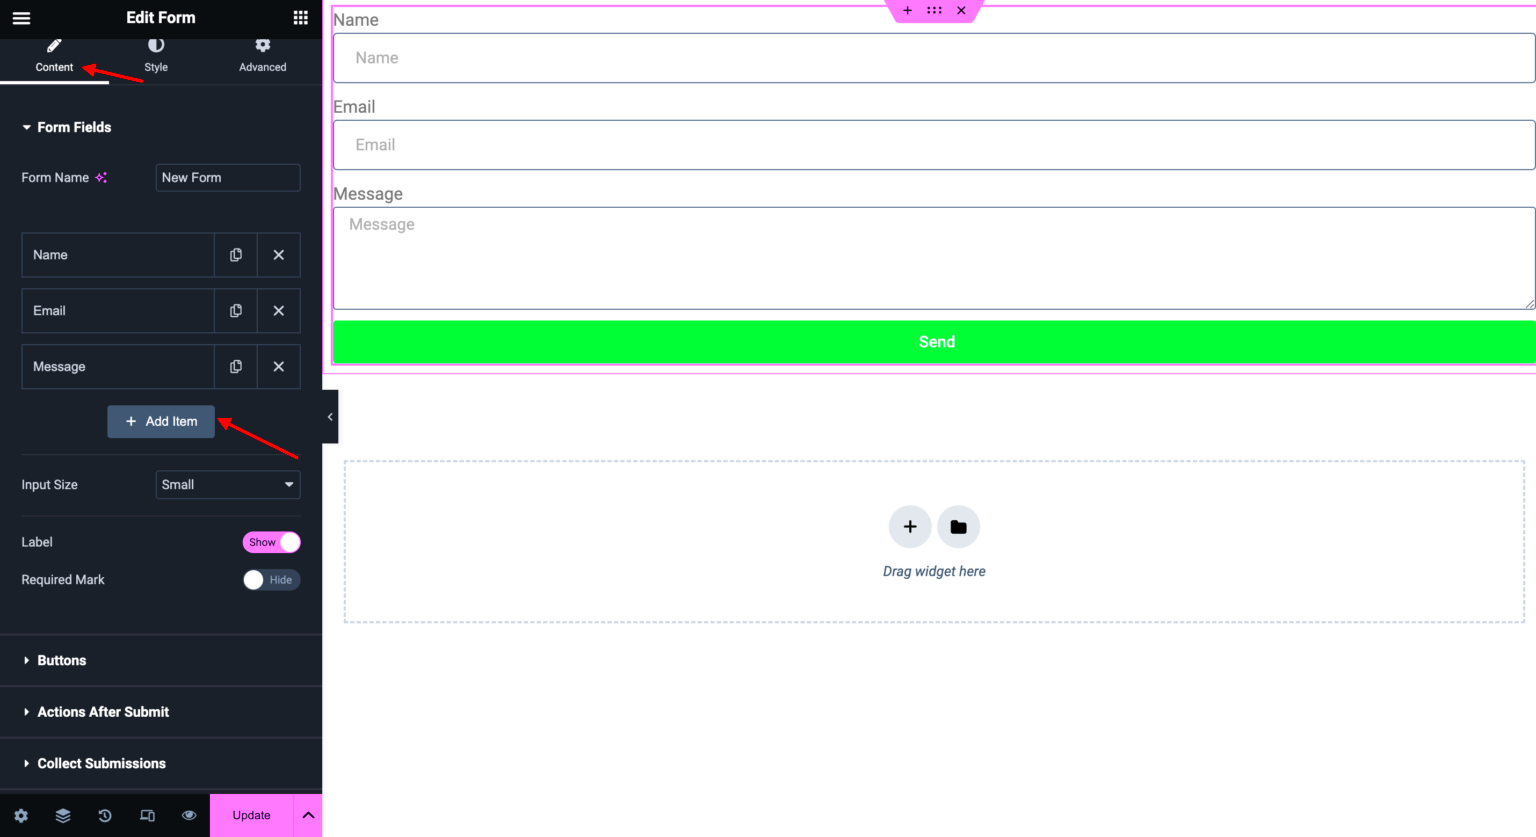
- Click on the form to reveal the panel on the left. Here, you’ll see all the settings related to your form.
- In the left panel, you’ll find various tabs like Content, Style, and Advanced. To modify the form settings, focus primarily on the Content tab.
In the Content tab, you’ll be able to edit details like the field types, labels, and even add new fields. Take a moment to familiarize yourself with these settings, as they provide a multitude of options for customizing your form.
And that’s it! You’ve successfully accessed your Elementor form settings, and you’re one step closer to securing your form with reCAPTCHA. Exciting, right?
Integrating reCAPTCHA with Your Elementor Forms
Now that you’re comfortable with accessing your Elementor form settings, let’s talk about the exciting part: integrating reCAPTCHA! This will add an extra layer of security to your forms by helping to prevent spam and automated submissions. Here’s how you do it:
To begin, you need to ensure that you have reCAPTCHA enabled through Google. Follow these steps:
- Go to the Google reCAPTCHA website and log in with your Google account.
- Register a new site by selecting the appropriate reCAPTCHA version (for Elementor, I recommend using reCAPTCHA v2).
- Fill in the required information, including your domain name, and click on the Submit button.
- Note down your Site Key and Secret Key; you’ll need these in just a moment!
Next, it’s time to head back to your WordPress dashboard:
- Navigate to Elementor in the sidebar and click on Settings.
- Click on the Integrations tab. Here, look for the Google reCAPTCHA section.
- Enter your Site Key and Secret Key in their respective fields and save your changes.
Awesome! With reCAPTCHA integrated into your site, it’s time to configure your form. Go back to the form settings we accessed earlier:
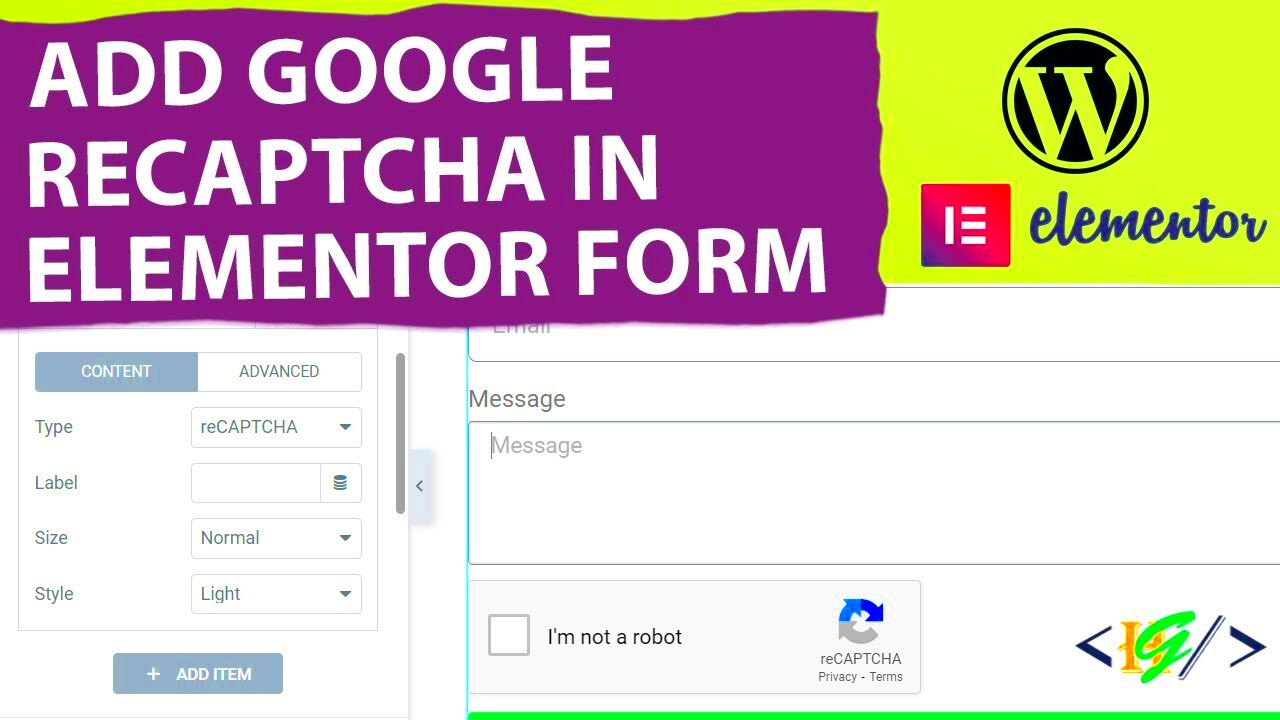
- In the Content tab of your form widget, scroll down until you find the reCAPTCHA option.
- Toggle the reCAPTCHA option and select your reCAPTCHA type (usually v2).
Lastly, make sure to save your changes. Now, your Elementor forms are protected! It’s that easy to integrate reCAPTCHA.
And voila! You’ve done it! Your forms are not just user-friendly but also secure against spam. If you have any more questions or need further assistance, feel free to ask!
7. Testing Your Form with reCAPTCHA
Once you’ve added reCAPTCHA to your form in Elementor, the next step is to ensure everything is working correctly. Testing your form is crucial to confirm that the reCAPTCHA challenge appears as expected and that submissions are processed without a hitch.
Here are some steps to effectively test your form:
- Access Your Page: Start by navigating to the page where your form is located. Make sure you’re not logged in as an admin, as this might affect how the reCAPTCHA is displayed.
- Fill Out the Form: Enter dummy data into all required fields. This will help you see how the form behaves with complete information.
- Complete the reCAPTCHA: Depending on whether you chose Checkbox reCAPTCHA or Invisible reCAPTCHA, either tick the box or simply wait for the verification to process.
- Submit the Form: Hit the submit button and observe what happens. Ideally, you should see a confirmation message, indicating that your submission was successful.
- Check Your Mailbox: If you’ve set up email notifications, verify that you received the email regarding your submission.
If everything works as intended, congratulations! Your reCAPTCHA integration is a success. If not, don’t fret, we’ve got you covered in the next section.
8. Troubleshooting Common Issues
Even with the best setups, sometimes issues can arise when working with reCAPTCHA in Elementor. Fear not! Here are some common problems you might encounter, along with simple solutions:
| Issue | Possible Solution |
|---|---|
| reCAPTCHA Not Displaying | Double-check your reCAPTCHA keys. Make sure you’ve copied them correctly and that they match the domain you are using. |
| Form Submissions Not Going Through | Check if the reCAPTCHA verification is configured properly within Elementor settings. Sometimes a quick refresh of the settings is all it needs! |
| reCAPTCHA Challenge Always Fails | Look into the browser extensions or settings – ad blockers can interfere with reCAPTCHA. Try testing the form in an incognito window. |
| Invalid or Missing reCAPTCHA Response | This often indicates server-side issues. Verify that your web host is not blocking requests needed for reCAPTCHA to function. |
Don’t let these common issues discourage you! With a little troubleshooting, you should be up and running smoothly in no time.
Conclusion
Incorporating reCAPTCHA into your Elementor forms is a critical step in safeguarding your website from spam and abuse. By taking the time to set up reCAPTCHA, you not only enhance the security of your forms but also improve your overall user experience. This guide covered the essential steps to seamlessly integrate reCAPTCHA with your Elementor forms:
- Choosing the Right reCAPTCHA Version: Decide between reCAPTCHA v2 and v3 based on your needs. v2 requires user interaction, while v3 is invisible and scores user interactions to detect spam.
- Registering Your Site: Register your website with Google reCAPTCHA and obtain the necessary API keys.
- Configuring Elementor Settings: Navigate to Elementor settings and input the reCAPTCHA keys to enable the functionality.
- Adding reCAPTCHA to Your Form: Edit the desired form in Elementor and drag the reCAPTCHA widget onto your form layout.
- Customizing Appearance: Customize the appearance of the reCAPTCHA to fit your website’s style, ensuring it’s user-friendly.
- Testing Your Form: Conduct thorough testing to confirm that the reCAPTCHA feature is working properly and that legitimate submissions are not hindered.
By following these straightforward steps, you can effectively protect your forms against unwanted spam and keep your website secure while maintaining a positive user experience.


