Have you ever wanted to tweak the appearance of a specific page on your WordPress site? Maybe you want to change the font size, alter the background color, or hide an element entirely. The good news is, you can easily edit CSS styles for individual pages in WordPress without messing up your entire site’s design. In this post, we’ll explore how to seamlessly apply custom CSS styles to make your pages stand out while keeping your site user-friendly. Let’s dive in!
Understanding CSS in WordPress

Cascading Style Sheets (CSS) are what give your site its visual flair. It’s like the wardrobe for your website; it defines how everything looks, from fonts and colors to margins and layouts. Understanding the basics of CSS in WordPress is crucial for any site owner wanting to make specific design changes.
Here’s a quick overview of how CSS works in WordPress:
- Selectors: These are used to target specific HTML elements on a page. For instance, if you want to change the color of all headings, you would use the h1, h2, h3 selectors.
- Properties: Each CSS rule consists of properties that can be changed. Common properties include color, font-size, margin, and padding.
- Values: This is what you assign to properties. For example, you might set color: blue; for a property.
When you’re working with WordPress, you usually don’t have to worry too much about the underlying HTML structure. Instead, utilize the Inspector tool in your browser to identify the elements you wish to customize. You’ll be able to view the CSS selectors and properties already applied, giving you a clearer picture of what you can modify.
By harnessing the power of CSS, you can ensure your WordPress pages truly reflect your brand’s personality. Now, let’s learn how to implement those changes effectively!
Identifying the Specific Page in WordPress

When you’re looking to edit the CSS styles of a specific page in WordPress, the first step is to accurately identify that page. Fortunately, WordPress makes it relatively straightforward to pinpoint any page within your site.
Here’s how you can do it:
- Log into Your WordPress Dashboard: Start by logging into your WordPress admin area. This is usually done by adding
/wp-adminto your website’s URL. - Navigate to the Pages Section: On the left-hand sidebar, click on
Pages. This will take you to a list of all the pages currently on your site. - Select Your Page: Browse through the pages or use the search function to find the specific page you want to target. Just click on the page title to open it for editing.
- Check the Page URL: Once you’re on the editing screen, look at the permalink (URL) just below the page title. This URL is a vital identifier for the page.
- View the Page on Your Site: To further confirm, you can click the
View Pagebutton, which is usually located at the top. This opens the page in a new tab, allowing you to see how it looks live.
By following these simple steps, you’ll have successfully identified the specific page where you want to edit the CSS. Now that you know where to go, the next step is to figure out how to make those changes!
Methods to Edit CSS for a Specific Page

Editing CSS for a specific WordPress page can seem a bit daunting, but don’t worry! There are several methods you can use, and I’m here to walk you through them.
Here’s a quick list of popular methods:
- Using the WordPress Customizer: This is the most user-friendly method. Go to
Appearance -> Customizein your dashboard, select theAdditional CSSsection, and add your custom styles. To isolate styles for a specific page, you can use the page ID in your CSS selectors. - Page-Specific CSS Plugin: Install a plugin like Simple Custom CSS and JS or CSS Hero. These plugins allow you to add custom CSS that only applies to selected pages, giving you fine-tuned control without messing with the theme’s files.
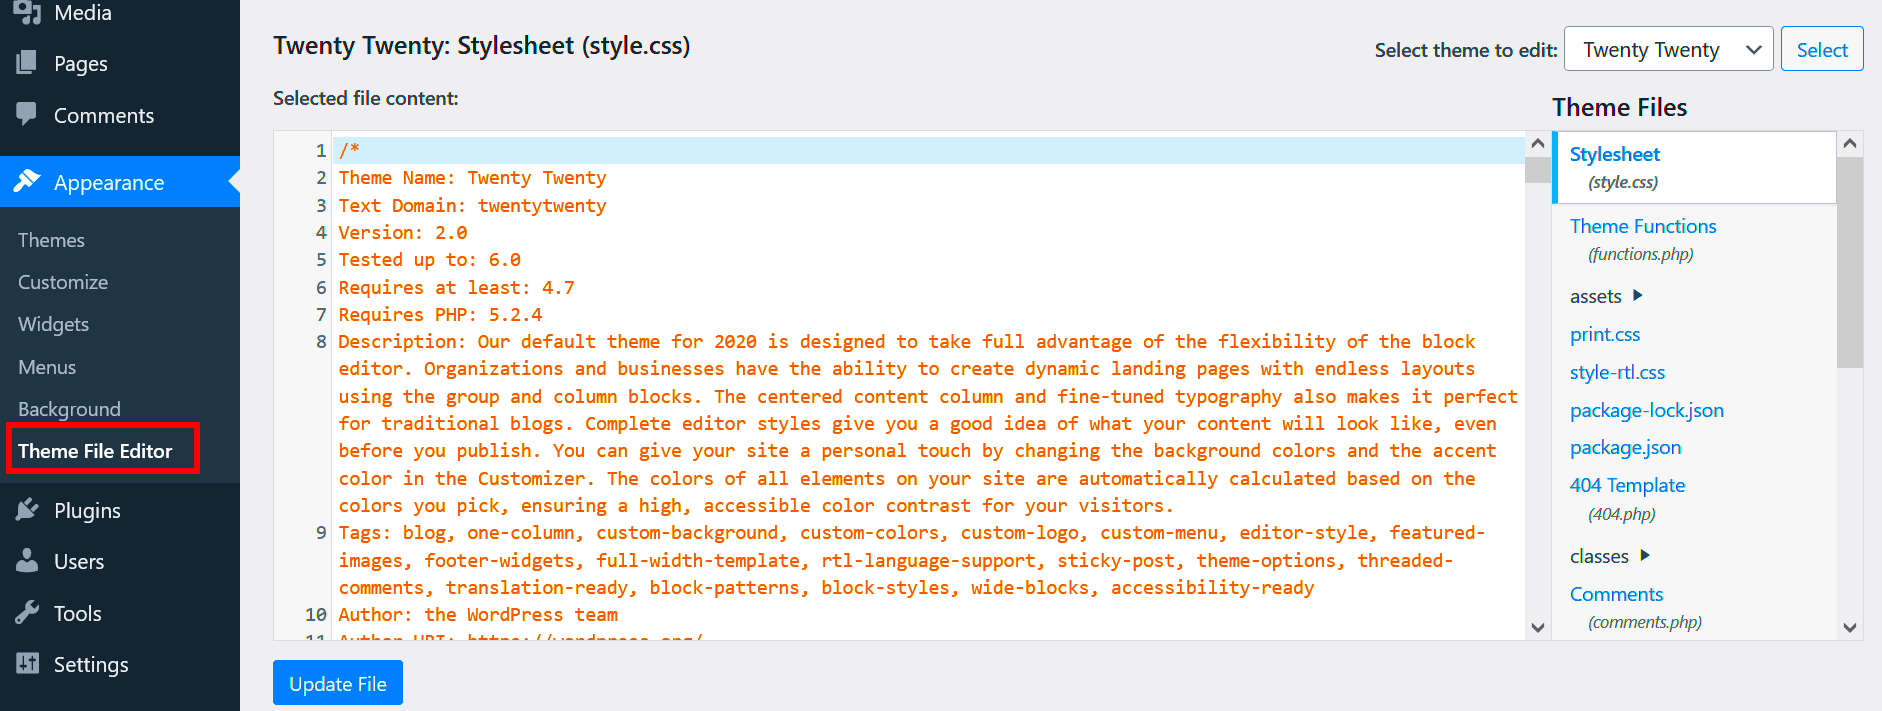
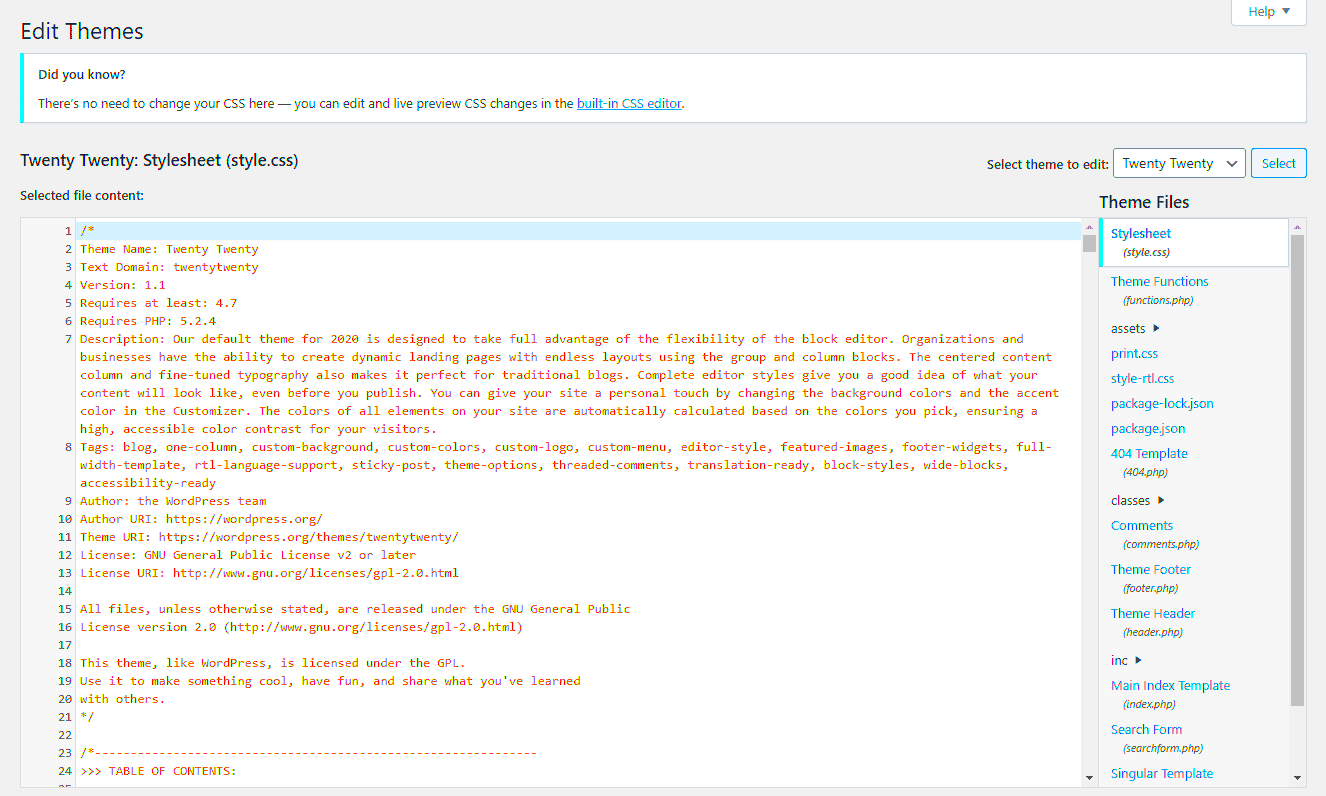
- Editing Your Theme’s CSS File: If you’re comfortable with coding, you can directly edit the
style.cssfile of your theme. Just make sure to isolate your CSS using the page ID or unique class that WordPress provides by default for each page. - Using the Page Editor: In the Gutenberg editor or classic editor, you can utilize a
Custom CSSfield if it’s available. Any CSS styles added here will only apply to that specific page.
Each of these methods provides a different level of complexity and control, so choose the one that fits your comfort level and needs. Remember, before making changes, it’s always a good idea to create a backup of your site. Once you make the necessary adjustments, save your changes and check how they appear on your specific page. Happy styling!
Using Additional CSS in the Customizer
Editing CSS styles directly in WordPress can sometimes feel daunting, especially if you’re not familiar with code. However, WordPress has made it incredibly easy to add your own styles using the Additional CSS feature in the Customizer. This tool lets you preview changes in real time, so you can see how your edits will look before publishing them.
To access this feature, follow these simple steps:
- Go to your WordPress dashboard.
- Select Appearance and then Customize.
- Look for the Additional CSS section in the Customizer menu.
Once there, you’ll see a blank text area where you can start typing your CSS. Here, you can target specific elements of your page. For example:
/* Change the background color of your header */.site-header { background-color: #fafafa;}/* Style your footer text */.site-footer { color: #333333; font-size: 14px;}
As you type, the changes will reflect immediately in the preview pane on the right. This interactive feature helps you fine-tune your site’s look without having to refresh multiple times.
Remember, use descriptive comments in your CSS to keep track of your changes. And when you’re satisfied with your edits, make sure to hit the Publish button to save everything. This method is particularly useful for one-off page styles, and it’s user-friendly for both beginners and seasoned pros!
Adding Custom CSS via Page Builders
If you’re using a page builder like Elementor, WPBakery, or Beaver Builder, you have even more flexibility when it comes to customizing your CSS. These tools are designed to make the styling process smoother and more intuitive, allowing you to edit the styles of specific sections or elements without having to dig into your theme’s CSS files.
Here’s how you can add custom CSS in some popular page builders:
- Elementor: Simply open your page with Elementor, select the element you want to style, go to the Advanced tab, and add your CSS directly in the Custom CSS section.
- WPBakery: Look for the Design Options of the specific element or row, where you can add CSS properties right there.
- Beaver Builder: Under Advanced settings for each module, you can add your custom CSS in the provided field.
Adding CSS this way is especially useful because it isolates the styles to that particular section or element, keeping your changes organized. You can also preview your edits in real-time, so you can make adjustments on the fly. Here’s a quick example of what you might add:
/* Adding a custom border to a button */.custom-button { border: 2px solid #FF5733; border-radius: 5px;}/* Adjusting padding on a specific column */.custom-column { padding: 30px;}
With these user-friendly page builders, tailoring your WordPress site’s look and feel becomes less about coding and more about creative expression. Whether you’re a beginner or an experienced developer, leveraging these tools can be a game-changer for your site’s customization journey!
7. Utilizing a Child Theme for Custom Styles
When it comes to customizing the CSS styles of a specific WordPress page, one of the smartest ways to do this is by using a child theme. But what exactly is a child theme? Simply put, a child theme in WordPress allows you to make modifications or customizations without altering the original “parent” theme. This is particularly useful because if the parent theme gets updated, your changes will still remain intact.
Here’s why you should consider using a child theme for your CSS customizations:
- Safety First: By keeping your changes in a child theme, you reduce the risk of losing your custom CSS when the parent theme is updated.
- Easy Maintenance: Child themes are easier to manage. You can make multiple modifications and keep everything organized neatly in one folder.
- Flexibility: Creating a child theme allows for extensive customization beyond just CSS. You can also change templates, add new functions, and more!
To set up a child theme, you’ll need to:
- Create a new folder in the WordPress themes directory (usually /wp-content/themes/) and name it after your child theme.
- Inside this folder, create a style.css file, and add the necessary header comments to link it to your parent theme.
- Import the parent theme’s CSS file into your child theme’s style.css file using `@import url(“../parent-theme/style.css”);`
- You can now add your custom CSS rules below the import statement.
By using a child theme, you’re paving the way for seamless and secure customization of your WordPress site!
8. Best Practices for Writing CSS
Writing effective CSS is crucial in ensuring that your styles are not just functional but also maintainable in the long run. Whether you are working on an entire site or just a specific WordPress page, adhering to best practices can make a world of difference.
Here are some essential tips to up your CSS game:
- Be Consistent: Stick to a coherent naming convention. Whether you prefer BEM (Block Element Modifier), OOCSS (Object-Oriented CSS), or some other method, consistency helps keep your styles organized.
- Use Classes Instead of IDs: Classes are reusable and more flexible than IDs, especially when multiple elements need similar styles. This keeps your CSS lighter.
- Leverage Comments: Don’t underestimate the power of comments. Use them to explain complex styles or to categorize different sections of your CSS to make it easier to read.
- Minimize Specificity: Avoid overly specific selectors. High specificity can lead to confusion and make it difficult to override styles later.
- Test Responsiveness: Always check how your styles look on different devices. Use media queries to ensure your design adapts beautifully across all screen sizes.
| CSS Practice | Description |
|---|---|
| Consistent Naming | Use a systematic naming convention for easier management. |
| Minimize Specificity | Avoid complex selectors to reduce confusion. |
| Responsive Design | Always account for different screen sizes with media queries. |
By following these best practices, you’ll not only improve your CSS skills but also enhance the overall performance and maintainability of your WordPress site. Happy styling!
9. Testing and Debugging Your CSS Changes
Now that you’ve made your CSS adjustments, it’s crucial to test and debug your changes to ensure everything is functioning smoothly. This process can sometimes feel like searching for a needle in a haystack, especially if your codebase is extensive. However, with a systematic approach, you can effectively identify and resolve issues.
First things first, after applying your changes, always refresh the page to see how your edits look in real time. If you’re not seeing the changes, try clearing your browser’s cache. It might sound simple, but cached data can often trick you into thinking your CSS isn’t working!
Here’s a quick checklist to help with testing:
- Check Different Browsers: Your site should look good on all major browsers like Chrome, Firefox, Safari, and Edge. Test your CSS across these platforms.
- Use Developer Tools: Right-click on your page and select “Inspect.” This tool allows you to see how your CSS is applied and provides an option to edit styles live.
- Responsive Design: Don’t forget about mobile! Use the device toolbar in developer tools to view your page on different screen sizes.
- Look for Overlapping Styles: If changes don’t appear as expected, check if any other CSS is overriding your styles. Use the “Computed” tab in developer tools to see the final applied styles.
Finally, if you encounter a more complex issue, consider using CSS validation tools like the W3C CSS Validation Service. They can help pinpoint mistakes that might not be obvious at first glance. Testing is not just a final step; it’s an integral part of developing perfect CSS!
10. Conclusion
Congratulations! You’ve navigated the ins and outs of editing CSS styles for a specific WordPress page. It might have seemed daunting at first, but with the steps we’ve discussed, you can create a visually appealing and functional webpage that truly reflects your brand’s identity.
To wrap things up, here are a few key points to remember:
- Backup Your Site: Always keep backups before making changes, so you can restore if something goes awry.
- Use the Right Tools: Explore tools like the WordPress Customizer or Elementor for easier CSS edits.
- Test, Test, Test: Never skip the testing phase! It’s your best friend in digging out those pesky bugs.
- Keep Learning: CSS is ever-evolving. As you continue to explore, new techniques and approaches will open up more possibilities for your designs.
So, whether you’re enhancing user experience or keeping up with design trends, don’t shy away from diving into CSS. With a little practice, you’ll become proficient and confident in customizing your WordPress pages to perfectly align with your vision. Happy styling!


