Splunk is a powerful tool that helps organizations manage and analyze machine data, making it easier to monitor and improve system performance. WordPress, on the other hand, is the most widely used platform for creating websites and blogs. Integrating Splunk with WordPress brings together the capabilities of both systems, allowing website owners to monitor user activity, track errors, and enhance security. In this post, we’ll explore how integrating Splunk with
What is Splunk and How Does It Work?

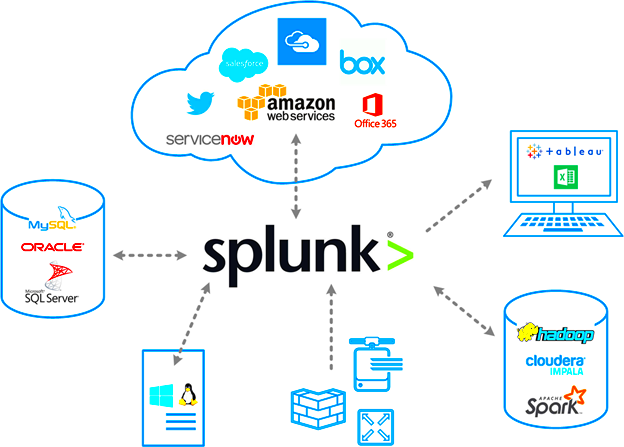
Splunk is a software platform used to search, monitor, and analyze machine-generated big data through a web-style interface. It collects and indexes log files from various systems, such as servers, networks, applications, and websites, making it easy to troubleshoot and track performance issues. Splunk’s power lies in its ability to handle large volumes of real-time data and its intuitive search and reporting features. This helps IT teams gain insights into system behavior, user interactions, and security events.
Here’s how Splunk works:
- Data Collection: Splunk collects data from various sources like servers, applications, and websites (including WordPress) through log files.
- Indexing: It indexes the collected data, making it searchable and easy to analyze.
- Real-Time Monitoring: Splunk allows you to monitor your data in real-time to track issues as they happen.
- Reporting and Visualization: With Splunk, you can create custom reports and dashboards to visualize the performance and trends in your data.
Why Integrate Splunk with WordPress?
Integrating Splunk with WordPress can provide several benefits, especially for website administrators, developers, and security teams. By connecting Splunk to your WordPress website, you can gain valuable insights into how your site is performing, track user activity, and monitor security issues. Here’s why you should consider the integration:
- Improved Site Monitoring: With Splunk, you can keep track of website errors, slow loading times, and other performance issues in real-time, enabling faster troubleshooting.
- Enhanced Security: By analyzing WordPress logs in Splunk, you can detect potential security threats such as failed login attempts or unusual traffic patterns.
- Better User Insights: You can track how users interact with your site, which helps in optimizing user experience and improving conversion rates.
- Data Centralization: Instead of manually checking WordPress logs and analytics, you can centralize all your data in Splunk for easier analysis.
Integrating these two platforms can give you a comprehensive view of your website’s health, security, and user behavior, making it easier to make data-driven decisions and optimize your WordPress site.
How to Integrate Splunk with WordPress
Integrating Splunk with WordPress can seem like a complex task, but with the right steps, it can be a seamless process. Here’s a simple guide on how to get started:
- Step 1: Install Splunk on Your Server – Begin by setting up Splunk on your server. You can download Splunk from their official website. Ensure that your server meets the minimum system requirements to run Splunk smoothly.
- Step 2: Configure Splunk Forwarder – To forward your WordPress logs to Splunk, you’ll need to install the Splunk Universal Forwarder on the same server where your WordPress site is hosted. This will send the log data to Splunk for analysis.
- Step 3: Configure WordPress to Generate Logs – WordPress doesn’t generate detailed logs by default, so you’ll need to enable logging. You can do this by adding a small snippet of code in your wp-config.php file:
- Step 4: Set Up Splunk Inputs – Once Splunk Forwarder is installed, configure it to monitor WordPress log files. Go to your Splunk instance and set up input for your log files by pointing it to the path where your WordPress logs are stored.
- Step 5: Create Dashboards and Alerts – After the data is flowing into Splunk, you can create custom dashboards to visualize your WordPress data and set up alerts for any performance or security issues.
  define('WP_DEBUG', true);
  define('WP_DEBUG_LOG', true);
Once the integration is complete, you’ll be able to monitor WordPress performance and track important metrics from within Splunk’s interface.
Best Practices for Using Splunk with WordPress
To get the most out of the Splunk and WordPress integration, there are some best practices that can help optimize your monitoring and analysis. Follow these tips to make your integration more effective:
- Monitor Key Metrics: Focus on monitoring key performance indicators (KPIs) such as page load times, bounce rates, and error rates. These metrics will help you understand your site’s performance.
- Enable Detailed Logging: For better insights, ensure that WordPress is generating detailed logs, especially for errors, warnings, and user interactions. This will help in identifying issues faster.
- Use Splunk Alerts Wisely: Set up automated alerts for specific events like server downtime, unauthorized access attempts, or plugin issues. This allows for proactive troubleshooting and security monitoring.
- Regularly Review Dashboards: Create custom dashboards that focus on WordPress-specific metrics like login attempts, user actions, and system errors. Regularly review these dashboards to catch any potential issues early.
- Backup Your Data: Always back up your Splunk data and configuration regularly. This ensures you don’t lose important logs and monitoring setups in case of unexpected issues.
By following these best practices, you’ll ensure that your WordPress site is running smoothly and securely, with Splunk offering valuable insights into every part of your website.
Common Challenges When Integrating Splunk with WordPress
Although integrating Splunk with WordPress can offer numerous benefits, it’s not without its challenges. Here are some common issues you might face and how to address them:
- Log File Configuration: One of the most common challenges is correctly configuring WordPress to generate logs and setting up the Splunk Forwarder to capture them. Make sure that log generation is enabled in WordPress and that the log files are in the correct format for Splunk to process.
- Data Overload: Splunk can handle large amounts of data, but when WordPress logs grow too quickly (especially with high-traffic sites), it can lead to data overload. To avoid this, filter out unnecessary logs or set up sampling to capture only important events.
- Performance Issues: Sending large volumes of log data from WordPress to Splunk can sometimes impact website performance, especially on shared hosting or low-resource servers. Consider using a dedicated server or Splunk Cloud for better scalability.
- Cost of Splunk Licensing: While Splunk is a powerful tool, its pricing can be a concern, especially for small businesses or individual website owners. Be mindful of your data usage, as Splunk’s licensing is based on the amount of data indexed. You can reduce costs by filtering out less important data.
- Security Concerns: When transferring logs from WordPress to Splunk, ensure that the data is encrypted during transit to prevent any unauthorized access. Use secure protocols like HTTPS and enable firewall protections on your server.
By addressing these common challenges, you can ensure a smooth and effective integration between Splunk and WordPress, enabling you to monitor and optimize your site with ease.
FAQ about Splunk Integration with WordPress
If you’re considering integrating Splunk with WordPress, you may have some questions. Here are answers to some of the most frequently asked questions about this process:
- What type of WordPress logs can I send to Splunk? – You can send a variety of logs to Splunk, such as error logs, access logs, and custom event logs. These logs can provide insights into website errors, user behavior, and security events.
- Is it necessary to install Splunk on the same server as WordPress? – While it’s not mandatory, it’s recommended to install Splunk on the same server to ensure a smooth and efficient integration. However, if you’re using a third-party hosting service, you may need to forward logs to a centralized Splunk server.
- Can I use Splunk Cloud for WordPress? – Yes, Splunk Cloud is an excellent option for WordPress integration, especially for businesses that don’t want to manage their own infrastructure. It allows you to send data from WordPress to the cloud for processing and analysis.
- Will Splunk affect my website’s performance? – If configured correctly, Splunk should not significantly affect your website’s performance. However, large volumes of log data or improper configuration could cause slowdowns. To minimize impact, monitor server resources and optimize your log data collection.
- How can I create reports and dashboards in Splunk for WordPress data? – Once your WordPress logs are being sent to Splunk, you can create custom reports and dashboards. Use Splunk’s intuitive interface to visualize key metrics like page load times, errors, and security threats in real-time.
- Can I integrate other WordPress data sources with Splunk? – Yes, Splunk can integrate with other data sources like Google Analytics, eCommerce platforms, or custom APIs to provide a more comprehensive view of your website’s performance and user activity.
Conclusion and Key Takeaways
Integrating Splunk with WordPress is a powerful way to gain deeper insights into your website’s performance, security, and user behavior. It allows you to monitor real-time data, track errors, and optimize your website’s efficiency. While there may be some challenges, such as managing large volumes of log data and ensuring server performance, these can be mitigated with proper configuration and best practices. By following the steps for integration, leveraging the benefits of Splunk, and addressing any challenges, you can significantly enhance your website’s monitoring and management capabilities.


