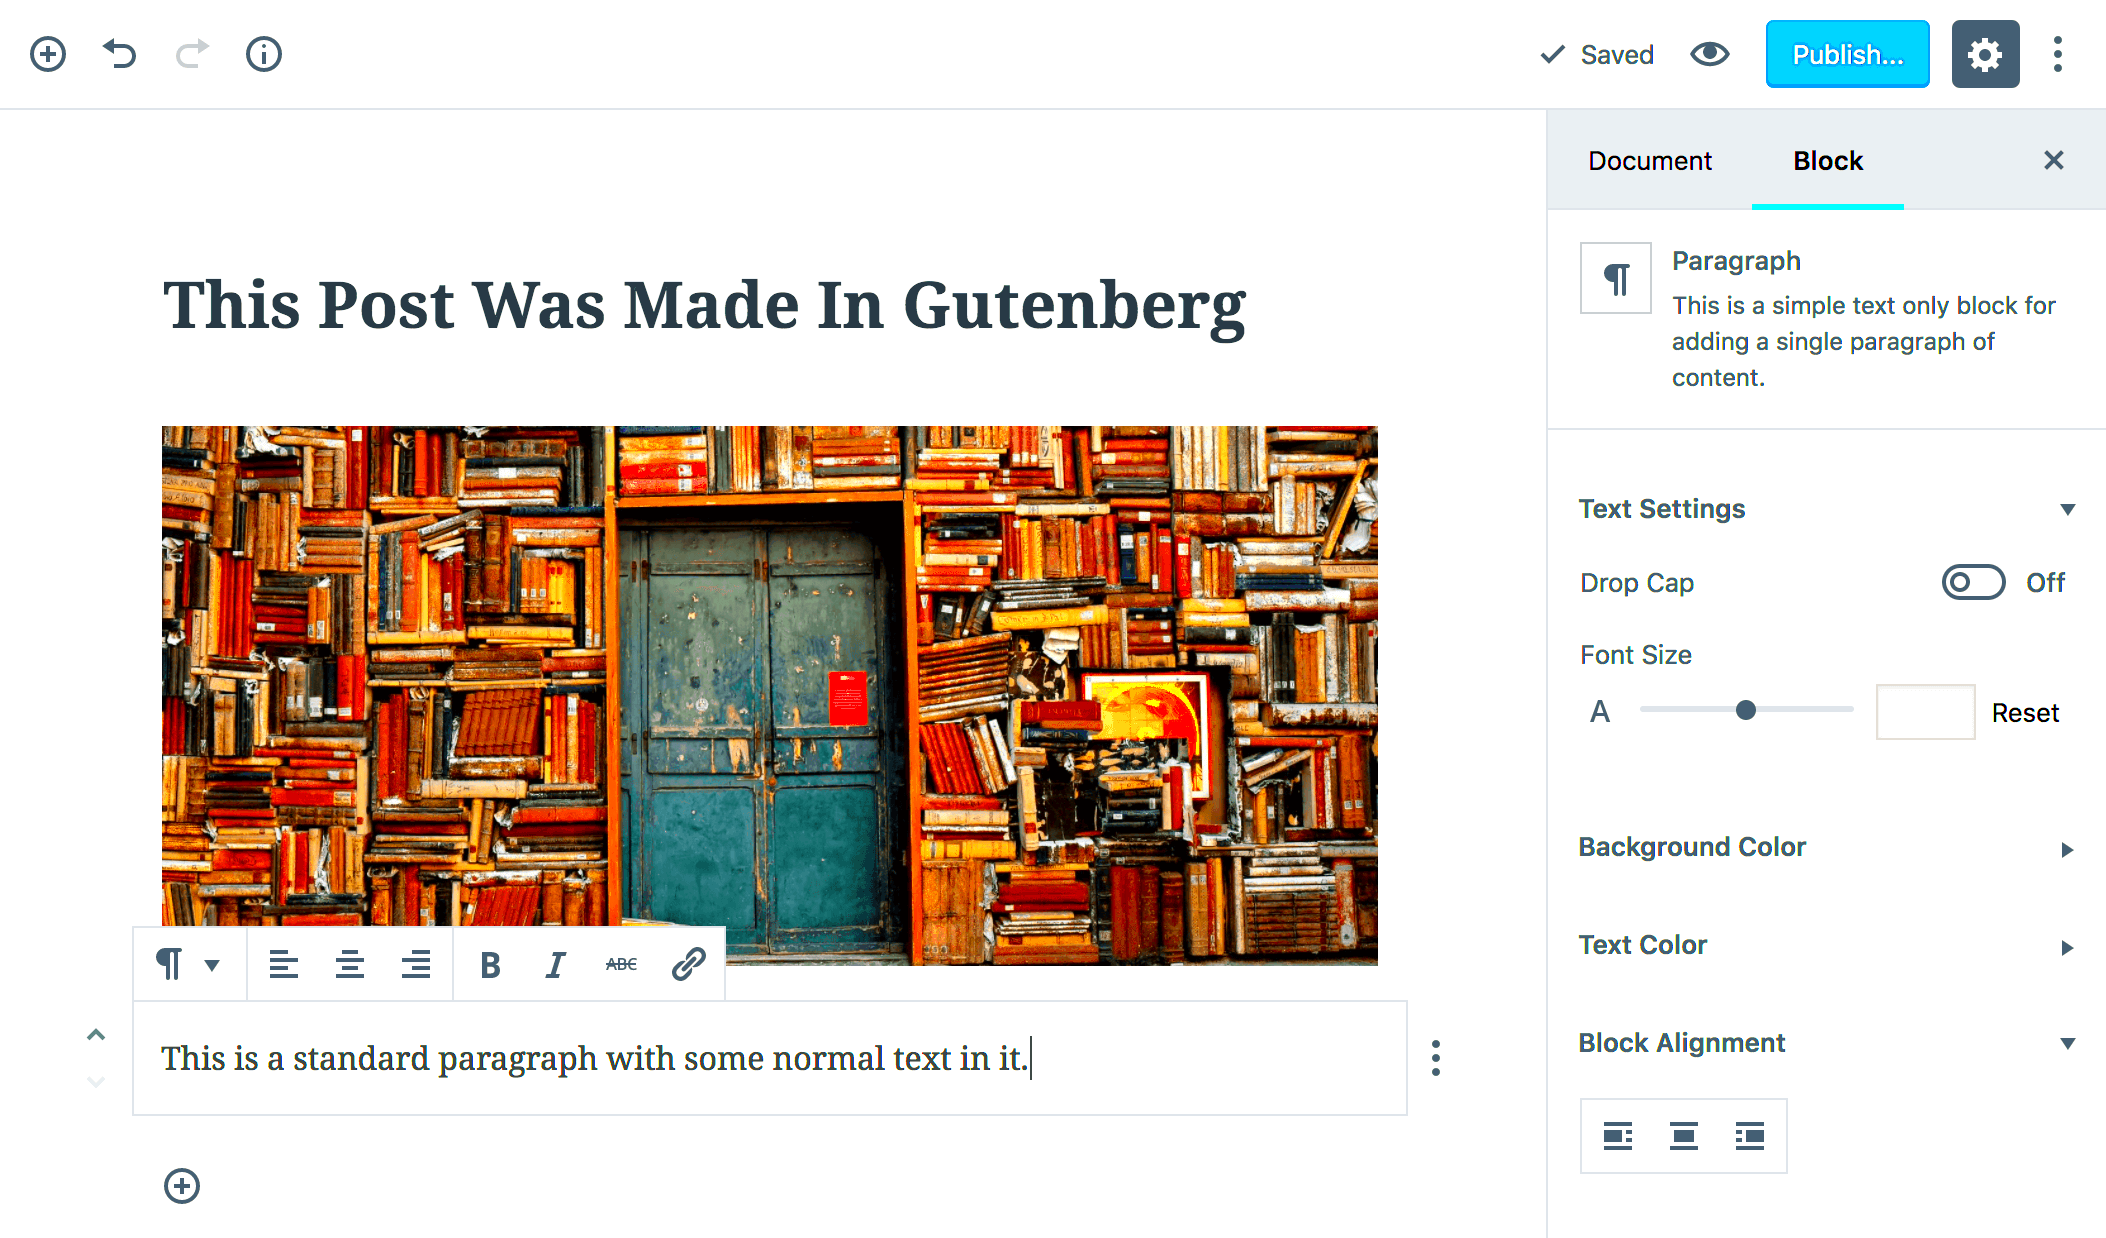
Gutenberg is the powerhouse behind the WordPress block editor, revolutionizing the way we create and manage content. Gone are the days of dealing with clunky interfaces and complicated HTML. With its user-friendly design and intuitive approach, Gutenberg provides a seamless editing experience. One of its standout features is its incredible customization potential. You can create anything from simple text blocks to complex layouts tailored to your branding and vision. Let’s dive into how you can harness this flexibility and unlock the full potential of
Understanding the Block-Based Editor

The block-based editor, introduced by Gutenberg, allows users to create content using distinct “blocks.” Each block is a self-contained unit, meaning you can manipulate it independently without affecting the rest of your content. Here’s a closer look at what makes this editor so powerful:
- Versatile Block Types: Gutenberg offers a variety of built-in block types, such as paragraphs, images, galleries, and buttons. You can also create custom blocks tailored to your specific needs.
- Drag-and-Drop Functionality: Rearranging blocks is as simple as dragging and dropping them into position, allowing for intuitive content arrangement.
- Custom Styles: You can easily customize the appearance of blocks using CSS classes, giving your site a unique flair.
- Reusable Blocks: Create blocks that you can save for reuse across different posts or pages, saving you time and ensuring consistency.
Here’s a quick overview of the primary features:
| Feature | Description |
|---|---|
| Content Creation | Easy block manipulation to create engaging layouts. |
| Customization | Extensive options for styling and personalization. |
| Extensibility | Add custom blocks through code or plugins for specialized needs. |
With all these features at your fingertips, understanding and utilizing the block editor will take your content creation to a whole new level!
3. Setting Up Your Development Environment

Before diving into developing custom features for Gutenberg in WordPress, it’s essential to set up your development environment properly. This ensures you have all the necessary tools and configurations to make the process as smooth as possible. Here’s how to get started:
- Local Development Setup: Start by installing a local web server. You can use tools like XAMPP, MAMP, or Local by Flywheel. These allow you to run WordPress on your machine without needing a live server, giving you a testing ground for your custom blocks.
- Install WordPress: Once your local server is running, download the latest version of WordPress from WordPress.org. Set it up in your local environment following the installation instructions. Don’t forget to configure your database, as you’ll need this for storing your custom features.
- Node.js and npm: To create custom blocks for Gutenberg, you’ll need Node.js and npm (Node Package Manager). Download and install them from nodejs.org. This enables you to use various libraries and tools during development.
- Gutenberg Plugin: To test your custom blocks before integrating them into a theme, install the Gutenberg plugin directly from the WordPress plugin repository. This will give you access to the latest block development features.
- Code Editor: Choose a code editor you’re comfortable with. Options like Visual Studio Code, Sublime Text, or Atom offer great support for JavaScript and React, which are fundamental for Gutenberg development.
By preparing your local development environment with the right tools and plugins, you’ll set the foundation for a productive and efficient WordPress development experience! Ready to get started? Let’s move on to creating custom blocks!
4. Creating Custom Blocks for Gutenberg
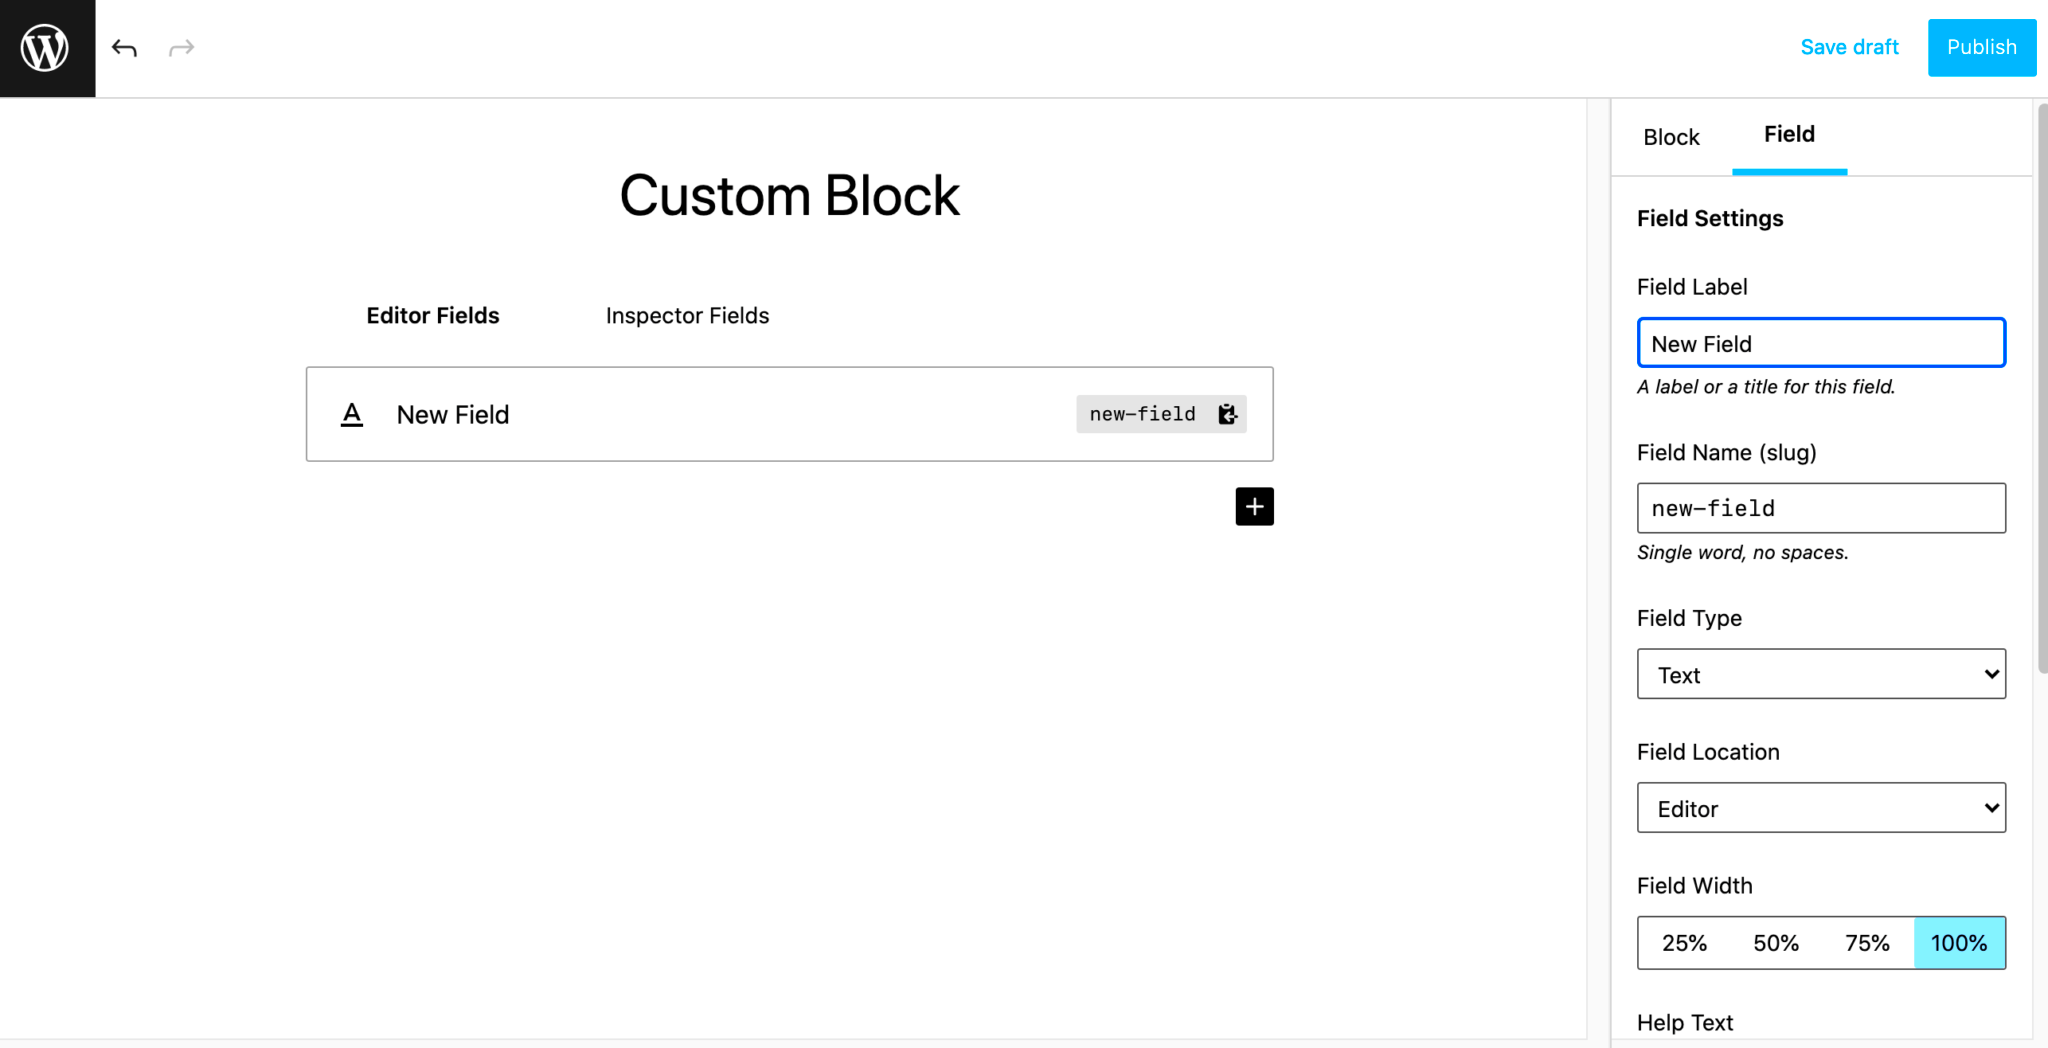
Now that you’ve set up your development environment, it’s time to roll up your sleeves and create custom blocks for Gutenberg! This is where your creativity and coding skills will come into play. Here’s a step-by-step guide on how to create your first custom block:
- Folder Structure: First, create a new folder within the
wp-content/plugins/directory for your custom block plugin. For instance, name itmy-custom-blocks. - Block Manifestation: Inside your plugin folder, create two essential files:
my-custom-blocks.phpandblock.js. The PHP file will handle the registration of your block, while the JS file will define the block’s functionality. - Registering the Block: In the
my-custom-blocks.phpfile, you’ll need to register the block using theregister_block_typefunction. Here’s a simplistic example: - Enqueue Scripts: Don’t forget to enqueue your JS file in the same PHP file. This can be done like this:
- Writing Your Block Code: In your
block.jsfile, use JavaScript, React, or JSX (a syntax extension) to define how your custom block will look and behave. You can create any type of block – be it a simple text block, a gallery, or even complex layouts!
function my_custom_block_init() { register_block_type( 'my-plugin/my-custom-block', array( 'editor_script' => 'my-custom-block-editor-script', ) ); } add_action( 'init', 'my_custom_block_init' );function my_custom_block_assets() { wp_enqueue_script( 'my-custom-block-editor-script', // Unique handle plugins_url( 'block.js', __FILE__ ), // Path to the JS file array( 'wp-blocks', 'wp-element', 'wp-editor' ) // Dependencies ); } add_action( 'enqueue_block_editor_assets', 'my_custom_block_assets' );This is just the beginning! With these basics, you can start creating more complex features, add styles, and enhance the user experience for blocks. Remember, the possibilities are endless, and your imagination is your only limit. Happy coding!
Utilizing Existing APIs for Enhanced Functionality
When you’re diving into the development of custom features for Gutenberg in WordPress, one of the gold mines at your disposal is the existing set of APIs provided by WordPress. Utilizing these APIs not only streamlines your development process but also ensures that your custom features are built on a robust foundation. It’s like having a toolbox filled with high-quality tools that just fit perfectly for the job!
Here are some key APIs you should consider:
- REST API: This allows seamless communication between your WordPress site and any external applications or services. Whether you’re fetching data or sending updates, the REST API has got you covered.
- Block API: This is the backbone of Gutenberg. By leveraging the Block API, you can create, register, and manage your custom blocks efficiently. It allows for rich customization and better integration within the Gutenberg editor.
- Data API: Need to pull in some custom data or manage state within your blocks? The Data API comes in handy for managing global state and fetching data via selectors and actions.
Integrating these APIs into your custom blocks not only enhances their functionality but also improves user experience. For instance, using the REST API, you could create a block that fetches the latest posts from a custom post type, making your blocks dynamic and interactive!
In a nutshell, don’t reinvent the wheel: dive into the existing APIs offered by WordPress. They’re there to help you develop features that are not just functional but also seamless and enjoyable to use!
Styling Your Custom Blocks with CSS
So, you’ve built some spectacular custom blocks, but what’s the point if they look like they’ve come straight from the ’90s? Styling is crucial for making your blocks visually appealing and user-friendly. Thankfully, WordPress allows you to easily style your custom Gutenberg blocks using CSS. But how do you get started?
Here’s a simple guide to styling your blocks:
- Using Block Styles: You can define custom styles directly within your block. This means adding a few extra attributes to your block registration that give users options for different styling in the editor.
- Enqueueing Stylesheets: Make sure to enqueue your custom stylesheets in your plugin or theme. Use the
wp_enqueue_style()function to ensure your CSS gets included when your blocks are rendered. Here’s how you can do it:
function my_custom_block_assets() { wp_enqueue_style('my-custom-blocks-css', plugin_dir_url(__FILE__) . 'css/my-blocks.css', array(), '1.0.0');}add_action('enqueue_block_assets', 'my_custom_block_assets');Now, you can create a `my-blocks.css` file where you can write all the styles you want to apply to your blocks!
Responsive Design: Don’t forget about mobile users. Make sure your blocks are responsive. Use media queries in your CSS to adjust styles based on device sizes.
Lastly, always test your styles! Open the Gutenberg editor and play around with different screen sizes to make sure everything looks just right. With a little bit of CSS magic, your custom Gutenberg blocks will not only be functional but also shine with style!
7. Adding Dynamic Functionality with JavaScript
When it comes to enhancing your Gutenberg blocks, adding dynamic functionality using JavaScript is a game changer. JavaScript allows you to introduce interactivity, real-time updates, and user-specific experiences, making your blocks not only useful but also engaging for users. So, let’s dig into how you can incorporate this magic into your custom blocks!
First off, you’ll want to use JavaScript along with React, as Gutenberg is built on it. This means you can leverage React’s powerful features to manipulate DOM elements, manage states, and create responsive components. Here are some ways you can add dynamic functionality:
- Status Management: Use React’s state management to let users interact with the block, changing its appearance based on actions such as clicks or form inputs.
- API Calls: Make requests to external APIs to fetch data that can be displayed in your block, enabling features like live weather updates or recent posts.
- Real-Time Updates: Utilize WebSockets or long-polling to keep your blocks updated without requiring a page refresh, perfect for displaying notifications or live scores.
For example, consider building a comment block that updates in real-time as users post new comments. By leveraging JavaScript, you could fetch new comments via an API and re-render your block to keep the content fresh without needing to reload the page.
Don’t forget to handle dependencies correctly. You can enqueue your JavaScript files properly using WordPress’ built-in functions, ensuring that all your scripts load smoothly. Adding dynamic functionality doesn’t just elevate the user’s experience; it keeps your website modern and cutting-edge!
8. Testing and Debugging Your Custom Blocks
Now that you’ve successfully created custom blocks with dynamic functionalities, it’s crucial to test and debug them to ensure everything runs smoothly. Testing can be the bridge between a good block and a great one, so let’s explore some effective strategies for making sure your block works as intended.
First things first, use WordPress’ built-in tools to help you along the way. Gutenberg comes with various tools for testing and debugging:
- Console Logging: Leverage the console.log functionality in JavaScript to print out variables and observe what’s happening at different stages of your block’s life cycle.
- Hot Module Replacement: This feature allows you to see changes live without needing to refresh your browser, speeding up your testing process significantly.
It’s also wise to employ tools like browser developer tools to inspect your blocks in real-time. This way, you can identify issues with layout, styling, or JavaScript errors without going through screen after screen. Here are some testing techniques to keep in mind:
| Technique | Description |
|---|---|
| Unit Testing | Test individual components in isolation to ensure they work independently. |
| Integration Testing | Check how different components interact with each other. |
| User Acceptance Testing | Get feedback from real users to observe usability and functionality in real-world scenarios. |
By implementing these testing strategies, you can significantly reduce the number of bugs and usability issues in your custom blocks. Remember, a well-tested block not only performs better but also provides a smoother experience for users, which ultimately reflects positively on your WordPress site! Happy coding!
Publishing and Managing Custom Blocks
Once you’ve developed your custom blocks for Gutenberg, the next step is to publish and manage them effectively. Publishing your custom blocks involves ensuring they are properly registered with the WordPress editor so that users can seamlessly access them whenever they are creating or editing posts and pages. Here’s a quick rundown of how to go about it:
- Register Your Block: Use the `registerBlockType` function in your JavaScript code to define your block. Specify its name, title, category, and attributes to provide the fundamental details that Gutenberg will recognize.
- Enqueue Scripts and Styles: Load your block’s JavaScript and CSS files correctly using WordPress’s built-in enqueue functions, like `wp_enqueue_script` and `wp_enqueue_style`. This ensures that your block has the necessary styling and interactive features.
- Test Your Block: Before publishing, rigorously test your block in various scenarios. Make sure it behaves correctly with different types of content and across various themes and devices. This step is crucial for a smooth user experience.
- Documentation: Keep detailed documentation of how to use your custom blocks. This will assist users in understanding the features and capabilities of your blocks, leading to better user satisfaction.
- Version Control: Make use of versioning in your scripts, especially when you make updates or changes to your blocks. This helps in avoiding conflicts and ensures compatibility with existing installations.
Once everything is in place, your blocks can be published, making them available to other users or clients. Managing custom blocks doesn’t stop after publishing; you’ll want to monitor feedback, update them regularly, and improve their performance based on user interaction.
Best Practices for Developing WordPress Gutenberg Features
When diving into the world of Gutenberg and WordPress block development, keeping best practices in mind is key to ensuring that your features are not only functional but also user-friendly and maintainable. Here are some tried-and-true practices to consider:
- Follow Coding Standards: Adhere to WordPress’s coding standards for PHP, HTML, CSS, and JavaScript. Following these standards helps in maintaining code quality and improving readability for others who may work on your project.
- Use ES6+ Syntax: Embrace modern JavaScript features such as arrow functions, destructuring, and template literals. These can simplify code and enhance performance.
- Focus on Performance: Optimize your blocks for performance. Minimize file sizes, lazy-load assets when possible, and avoid heavy libraries unless absolutely necessary. A fast-loading site improves user experience.
- Accessibility is Key: Ensure your blocks are accessible to all users, including those using assistive technologies. Use semantic HTML and ARIA attributes where appropriate.
- Maintainability: Structure your code in a modular way, allowing easier updates and debugging later on. Consider separating logic from presentation by using React’s component-based architecture.
- User Experience (UX): Think of the end user when designing your blocks. Intuitive controls, clear tooltips, and succinct descriptions help users understand how to utilize your features effectively.
In summary, following these best practices not only aids in the development of robust and efficient Gutenberg features but also contributes to a thriving community of users who benefit from your work.
Developing Custom Features for Gutenberg WordPress
The Gutenberg editor, the heart of the WordPress block-based system, has revolutionized the way we create content on the web. With its focus on a modular approach, developers can now extend and customize the editor to meet the specific needs of users and businesses. Here’s how to effectively develop custom features for Gutenberg:
Understand the Basics of Gutenberg
Before diving into custom development, familiarize yourself with the core concepts:
- Blocks: The building blocks of Gutenberg; each piece of content is represented as a block.
- Block Types: Standard blocks include paragraphs, images, galleries, etc., but developers can create custom types.
- Block Attributes: Data that determines how a block behaves and appears on the front end.
Setting Up Your Development Environment
To create custom features, set up a development environment:
- Install a local server (e.g., XAMPP or Local by Flywheel).
- Set up a new WordPress instance.
- Install the Gutenberg plugin for the latest features.
Creating Custom Blocks
The most powerful aspect of Gutenberg is the ability to create custom blocks. Here’s a brief on how to do it:
| Step | Description |
|---|---|
| 1 | Register your block using registerBlockType. |
| 2 | Define the attributes and edit function. |
| 3 | Utilize JavaScript for interactivity and custom styles. |
Enhancing User Experience
To improve the usability of your custom blocks, consider:
- Custom Styles: Use CSS to make blocks visually appealing.
- Responsive Design: Ensure blocks look good on all devices.
- Intuitive Controls: Provide users with easy-to-understand options.
Conclusion: The Future of Custom Development in Gutenberg
As WordPress continues to evolve, the potential for custom development within the Gutenberg editor will expand, offering developers endless possibilities to enhance functionality, tailor usability, and ultimately create a more engaging content creation experience for users. Staying informed about updates and emerging trends in Gutenberg block development will be essential for leveraging its full potential.


