Have you ever considered how crucial the “Thank You” page is after a customer makes a purchase? It’s not just a simple confirmation; it’s an opportunity to connect with your audience! This guide will walk you through the process of customizing your WooCommerce Thank You message. By the end, you’ll have the skills to create a thank-you experience that reflects your brand’s personality and keeps customers coming back.
Understanding WooCommerce Thank You Page

The WooCommerce Thank You Page is where your customers land after they successfully complete a purchase. It’s the final touchpoint in the buying process and holds significant potential for customer engagement. Here are a few key reasons why this page is so important:
- Reinforcement of Purchase: This page reassures customers that their order has been received successfully, reducing potential anxiety about whether their transaction went through.
- Brand Connection: A customized Thank You message strengthens your brand’s identity, making the shopping experience more memorable.
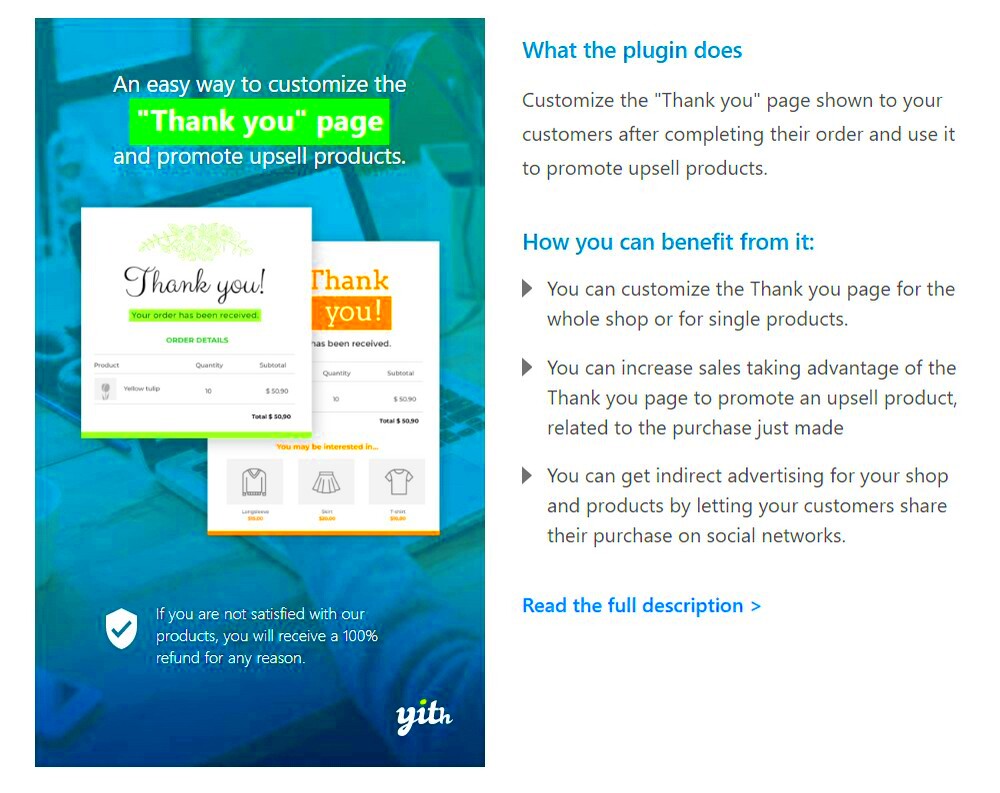
- Upselling Opportunities: Use this space to suggest related products or services, potentially increasing future sales.
- Feedback Request: It’s a great place to encourage customers to leave reviews or feedback, providing you with invaluable insights.
Also, understanding how the WooCommerce Thank You Page works helps you tailor it to meet the specific needs of your business. By default, WooCommerce generates a standard thank-you message and page layout, but this can be modified to better suit your branding. Knowing the components also allows you to seamlessly integrate additional elements such as:
| Component | Description |
|---|---|
| Order Number | Displays the unique order ID for the customer’s reference. |
| Payment Method | Clarifies the method the customer used for the transaction. |
| Next Steps | Information on what customers can expect next, like shipping details. |
With a bit of creativity and the right tools, you can transform the standard WooCommerce thank-you page into a dynamic finishing touch to your customer’s shopping experience.
Why Customize the Thank You Message?

When a customer makes a purchase, the Thank You page is often the last interaction they have with your online store before they complete their journey. This is your golden opportunity to leave a lasting impression! Here’s why customizing the Thank You message is not just a good idea, but a must-do for any serious WooCommerce store owner:
- Enhance Customer Experience: A personalized Thank You message can make your customers feel valued and appreciated. Instead of a generic “Thank you for your order,” you can use their name and maybe even add a small personal note. This shows that you care.
- Drive Future Engagement: The Thank You page is a prime spot to encourage repeat business. Why not add recommendations for related products or a discount code for their next purchase? It’s a subtle nudge that can lead to more sales.
- Gather Feedback: You can use this opportunity to engage with your customers by asking them to fill out a quick survey about their shopping experience. This not only helps you improve but also makes customers feel involved.
- Boost Brand Identity: Your brand’s personality should shine through in every interaction, including the Thank You page. Use your brand colors, and tone of voice, and even add relevant graphics to ensure customers remember your store.
In short, customizing your Thank You message doesn’t just elevate the buyer experience; it provides a platform for further engagement and promotes brand loyalty. In a competitive online marketplace, every little bit of personalization counts!
Accessing the WooCommerce Thank You Page Settings

Okay, so you’re convinced that customizing your Thank You message is the way to go! But where do you start? Let’s dive into the steps to access the WooCommerce Thank You page settings:
- Log in to Your WordPress Dashboard: Start by going to your WordPress admin area. You’ll need admin access to make these changes.
- Navigate to WooCommerce Settings: Once you’re in the dashboard, look for the WooCommerce menu on the left sidebar. Hover over it and click on “Settings.”
- Select the ‘Advanced’ Tab: In the settings menu, you’ll see several tabs at the top. Click on the “Advanced” tab to access more options including those for the Thank You page.
- Edit the Endpoints: Here, you may find options related to endpoints, which are URLs for various parts of your WooCommerce store. The Thank You page usually doesn’t require much tweaking at this level, but it’s good to know where it fits in.
- Access Order Received Page: To customize the Thank You message specifically, you may need to navigate to the actual order confirmation template in your theme files, or you can use a plugin for simpler editing.
Now you’re ready to start customizing your Thank You page! Understanding where to find these settings is crucial before diving into the fun part—creating a message that resonates with your customers and enhances their shopping experience.
Using WooCommerce Settings to Edit the Thank You Message
Customizing the Thank You message in WooCommerce is not just about aesthetics; it’s an excellent opportunity to enhance the post-purchase experience for your customers. Thankfully, WooCommerce provides built-in settings that allow you to tweak the default Thank You message easily. Here’s how you can do it:
- Access WooCommerce Settings: First, navigate to your WordPress dashboard. From the left-hand menu, go to WooCommerce and click on Settings.
- Select the Emails Tab: Once you’re in the WooCommerce settings, click on the Emails tab. This will showcase the various email notifications WooCommerce sends out, including the order confirmation and the Thank You message.
- Edit Order Confirmation Email: Scroll down until you find the Customer Invoice / Order Details email. Click on the Manage button next to it.
- Customize the Email Header: In this section, look for the Additional Content box. This is where you can add a personalized message that will appear in the Thank You email your customers receive.
- Save Changes: After making your changes, don’t forget to hit the Save Changes button at the bottom of the page!
By taking advantage of these WooCommerce settings, you can effectively communicate with your customers post-purchase, enhancing their overall shopping experience.
Customizing with Code: Adding Functions to Your Theme
If you’re looking for more advanced customization options for your WooCommerce Thank You message, diving into some code might be the way to go. While it might seem daunting at first, adding custom functions to your theme is a powerful way to tailor the message to fit your brand’s voice. Here’s a simple step-by-step guide:
- Access the Theme Editor: From your WordPress dashboard, go to Appearance and then click on Theme Editor.
- Select the Functions.php File: In the Theme Files section, look for functions.php. This file is where you can add custom code snippets.
- Add a Custom Function: Insert the following code snippet to customize the Thank You message:
        add_filter('woocommerce_thankyou_order_received_text', 'custom_thank_you_message', 10, 2);
        function custom_thank_you_message($thank_you_title, $order) {
            return 'Thank you for your purchase! Your order number is ' . $order->get_order_number();
} - Save Changes: After you’ve added your custom function, click Update File to save your changes.
With just a few lines of code, you can transform the Thank You message into something truly unique, reflecting your brand’s identity while making your customers feel appreciated. Just always remember to back up your files before making changes, as coding errors can sometimes lead to site malfunctions.
Utilizing Plugins for Advanced Customization
When it comes to personalizing your WooCommerce Thank You message, plugins can be your best friend. They offer a range of features that allow for greater flexibility and creativity than the default settings. So, how do you choose the right plugin, and what do you need to know about using them?
First off, let’s look at some popular plugins that can enhance your Thank You page customization:
- WooCommerce Custom Thank You Pages: This plugin enables you to design unique Thank You pages based on individual products or categories. You can seamlessly redirect customers to tailored pages that enhance their shopping experience.
- YITH WooCommerce Customize My Account Page: Not only does this plugin allow customization for your Thank You message, but it also lets you modify the user account features, making your site more user-friendly.
- Elementor or WPBakery: Page builders like these can help in customizing your Thank You page more visually. With drag-and-drop editing, you can easily craft a thank you page that captures your brand’s essence.
Here are a few steps to get started with plugins:
- Search for your desired plugin in the WordPress Plugin Directory.
- Install and activate the plugin.
- Navigate to WooCommerce settings and locate the plugin options.
- Customize your Thank You message or related features as required.
Using plugins gives you the power to create an engaging post-purchase experience, reflecting your brand voice while providing additional value to your customers.
Testing Your Customized Thank You Message
After customizing your WooCommerce Thank You message, testing it becomes paramount to ensure everything functions as expected. A well-tested Thank You page not only reinforces your brand but also offers a positive customer experience.
Here’s how to go about testing your customized message:
- Checkout Simulation: Conduct a full checkout process as a customer would. Go through the steps of adding a product to the cart, entering payment details, and completing the purchase.
- Multiple Scenarios: Test different scenarios, such as purchasing different products, using various coupons, or selecting various payment methods. This will help you see how the thank you message behaves under different conditions.
- Browser Compatibility: Check your Thank You message in different browsers (Chrome, Firefox, Safari) and devices (desktop, tablet, mobile) to ensure that it displays well everywhere.
- Feedback Loop: Crank up the effectiveness by asking friends, family, or even loyal customers for their impressions. Gather their feedback and make necessary adjustments.
Don’t forget to pay attention to any broken links, typos, or images that aren’t displaying properly. A few minutes spent testing can save you from major customer dissatisfaction in the long run! So go ahead and make sure your Thank You message hits all the right notes before it goes live.
Best Practices for Thank You Messages
Crafting the perfect thank you message in WooCommerce can significantly enhance your customer experience and retention. Here are some best practices to keep in mind:
- Be Personal: Use the customer’s name and personalize the message as much as possible. A simple “Thank you, Sarah!” feels much warmer than a generic “Thank you for your purchase!”
- Be Brief but Informative: Your thank you message should be straightforward. Include a summary of the order, estimated delivery time, and any necessary information about returns or exchanges.
- Add a Call to Action: Encourage further engagement. This can be as simple as inviting customers to follow you on social media or offering a discount on their next purchase.
- Express Gratitude: Use language that expresses genuine appreciation for the customer’s choice to shop with you. Let them know how much their support means to your business.
- Include Contact Information: Ensure customers can reach out easily with questions or concerns. Including a friendly note with contact details can foster trust.
- Use Visual Elements: Incorporate branding elements, such as your logo or colors, to make the message visually appealing and consistent with your business identity.
Incorporating these best practices not only improves the customer experience but can also pave the way for repeat business and loyalty.
Conclusion
Customizing the WooCommerce thank you message is not just a technical task; it’s an opportunity to connect with your customers on a personal level. By following the steps outlined in this guide, you can create a thank you message that reflects your brand’s personality while delivering essential information effectively.
Here are a few key takeaways:
- Customization is key: Tailor the message based on the customer’s interactions and preferences.
- Engagement is vital: Use the thank you message to encourage customers to explore more about your brand.
- Your brand voice matters: Ensure your thank you message aligns with your brand’s tone and values.
- Keep learning: Monitor customer feedback and adapt your messages based on what works best.
By implementing these techniques and best practices, you’ll create a memorable post-purchase experience that helps turn one-time buyers into loyal customers. Happy customizing!


