Creating a WordPress site is an exciting journey, whether you’re starting a blog, an online store, or a portfolio. With WordPress powering over 40% of the internet, it’s a popular choice for anyone looking to establish an online presence. This guide will walk you through the essential steps of setting up your site from scratch, making the process as seamless as possible. Let’s get started on creating a space that reflects your unique voice and vision!
Step 1: Choosing the Right Domain Name
Your domain name is the heart of your online identity. It’s the address where visitors will find you, so it’s vital to choose a name that is memorable, relevant, and easy to spell. Here are some tips to guide you in selecting the perfect domain name:
- Keep it Short and Simple: Aim for brevity. Short domain names are easier to remember and type.
- Use Keywords: Incorporate relevant keywords that describe your business or blog. This helps with SEO and makes your site easily identifiable.
- Avoid Numbers and Hyphens: These can confuse users. Stick to letters for a cleaner look.
- Be Unique: Your domain should stand out among the competition, so check for existing businesses that might have similar names.
- Consider Different Extensions: While .com is the most popular, there are various extensions like .net, .org, and even niche-specific domains that might fit your brand perfectly.
- Check Availability: Use domain registration websites to see if your desired name is available. If not, brainstorm alternatives.
Once you’ve settled on a name you love, the next step is to register it through a reputable domain registrar. Don’t rush this process; remember, your domain name will represent you online for years to come!
Step 2: Selecting a Web Hosting Provider
Choosing a web hosting provider is like picking a home for your WordPress site. It’s a big decision that will impact your site’s performance and user experience, so let’s break down the essentials to help you make the best choice.
There are several factors to consider, and here’s a handy list to guide you:
- Performance: Look for hosting providers that offer high uptime rates and fast loading speeds. A reliable host avoids downtime, ensuring your site is accessible to visitors at all times.
- Customer Support: 24/7 support is crucial! Whether you’re a newbie or an experienced user, having quick access to knowledgeable support can save you a lot of headaches.
- Scalability: Your web hosting should grow with you. Check if they offer different plans that you can upgrade to as your site gains traffic.
- Security Features: Make sure the provider includes features like SSL certificates, firewalls, and regular backups to keep your site safe from cyber threats.
- User Reviews: Take some time to read what others say. Check forums, review sites, and testimonials to get a sense of their reputation.
Popular web hosting providers for WordPress include:
| Provider | Starting Price | Highlights |
|---|---|---|
| Bluehost | $2.95/month | Officially recommended by WordPress, great customer support. |
| SiteGround | $3.99/month | Known for speed and exceptional customer service. |
| HostGator | $2.75/month | Flexible and user-friendly interface. |
Once you’ve considered these factors and selected your host, you’ll be ready to take the next step in creating your WordPress site!
Step 3: Installing WordPress
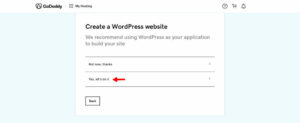
Now that you’ve got your hosting provider in place, it’s time to install WordPress. This step is usually straightforward and can often be completed in just a few clicks. Let’s dive into the process!
Most reputable hosting providers offer a simple, one-click installation option for WordPress. Here’s how to get started:
- Log into your Hosting Dashboard: Once you sign up, log into your hosting account. You’ll typically find a dashboard that allows you to manage your site.
- Find the WordPress Installer: Look for a section like ‘Website’ or ‘Software,’ and find the option for WordPress. You might see something like ‘Install WordPress’ or ‘One-Click Install.’
- Fill in the Details: During the installation, you’ll need to fill in some details such as your site name, admin username, and password. Keep this information secure!
- Choose Your Domain: If you have multiple domains, select the one where you want to install WordPress. Some hosts even let you register a new domain during this step.
- Install & Wait: Click on ‘Install’ and let the process run. It won’t take long; just a few moments, and voila! WordPress is ready to go.
If your hosting provides a manual installation option, you can download WordPress from the official site and upload it via FTP. However, we recommend the one-click method for its sheer simplicity!
Once WordPress is installed, you can access your site’s dashboard by visiting yourdomain.com/wp-admin. From there, the fun really begins as you can start customizing your site to fit your vision!
Step 4: Configuring Basic Settings
Once you have your WordPress site up and running, it’s time to dive into the basic settings. This is where you’ll customize how your site looks and operates right from the get-go. Understanding these settings can significantly enhance the user experience and boost your site’s performance.
You’ll find the basic settings under the WordPress dashboard by navigating to Settings. Here are a few essential configurations to focus on:
- General Settings: This includes your site title, tagline, and time zone. Think of your site title as your brand name—make it catchy! The tagline is a brief description that can help visitors understand what your site is about.
- Reading Settings: This allows you to choose what your homepage should display. You can opt for your latest posts or a static page, which is helpful for businesses that want to display specific information upfront.
- Discussion Settings: Here, you can manage how comments work on your site. You can enable or disable comments for specific posts and choose whether you want to moderate comments before they become visible.
- Permalink Settings: A crucial step for SEO! Setting permalinks to a format that includes your post name is a great way to make your URLs friendlier and easier to remember.
Don’t rush through this step! Proper configuration can save you headaches later on and ensure your audience enjoys their experience on your site.
Step 5: Choosing and Installing a WordPress Theme
Now that your basic settings are configured, it’s time to make your site visually appealing with a WordPress theme. The look and feel of your site can greatly influence how visitors perceive your brand, so choose wisely!
WordPress offers a plethora of themes to match virtually any style or purpose. Here’s a simple approach to selecting and installing the perfect one:
- Define Your Purpose: Think about what kind of website you’re building—be it a blog, e-commerce site, or portfolio. This will guide your choice of theme.
- Browse the Theme Directory: Navigate to Appearance > Themes > Add New in your dashboard. Here, you can filter themes based on features and styles.
- Preview and Test: Before making a selection, click on the ‘Preview’ button to see how the theme looks with your content and photos. Test its responsiveness on mobile and desktop views.
- Install Your Theme: Once you’ve made a decision, click Install, and then Activate it. Now your site has a whole new look!
Don’t forget! Many themes are customizable, so feel free to tweak colors, fonts, and layouts to best reflect your brand. Enjoy experimenting with different themes—it’s one of the most rewarding parts of building your WordPress site!
7. Step 6: Adding Essential Plugins
Once you have your WordPress site set up, it’s time to take it to the next level by adding plugins. Plugins are the tools that enhance the functionality of your site, allowing you to do everything from optimizing for SEO to adding contact forms. With thousands of plugins available, it might feel overwhelming to choose. But don’t worry – I’m here to guide you through this process!
First, let’s talk about why plugins are so essential:
- Customization: Plugins allow you to personalize your site and add unique features, like social media buttons or custom contact forms.
- SEO Optimization: Tools like Yoast SEO help you improve your site’s visibility in search engines, which is crucial for attracting visitors.
- Performance Improvement: Caching plugins can speed up your site, making it more enjoyable for users.
- Security: Security plugins protect your site from malicious attacks, ensuring your data and that of your visitors remains safe.
Here’s a quick list of some essential plugins you might want to consider:
| Plugin Name | Purpose |
|---|---|
| Yoast SEO | Optimize your site for search engines. |
| Wordfence Security | Enhance your site’s security. |
| WP Super Cache | Improve your site’s speed. |
| Contact Form 7 | Create and manage contact forms. |
| Elementor | Build beautiful pages with a drag-and-drop builder. |
Remember to only install plugins you truly need. Too many can slow your site down or conflict with each other. Once installed, don’t forget to activate them and configure your settings. With these plugins, your site will be functioning at its best in no time!
8. Step 7: Creating Your First Pages and Posts
Now that you’ve set up your essential plugins, it’s time for the fun part: creating content! Whether you’re sharing your thoughts through posts or showcasing your services on pages, this step is where your site really starts to come to life.
First, let’s differentiate between pages and posts:
- Pages: Static content that doesn’t change often, like your About Us or Contact page.
- Posts: Timely articles that are listed in reverse chronological order, perfect for blogs and news updates.
To create your first page, follow these steps:
- Navigate to the WordPress dashboard.
- Select Pages and click on Add New.
- Enter your page title, like “About Us.”
- Add content in the editor. You can use headings, lists, images, and more!
- Once satisfied, click Publish!
Creating your first post is just as simple:
- Go to the dashboard and select Posts, then click on Add New.
- Write your post title and start crafting your content.
- Use categories and tags to organize your post.
- Insert any media like images or videos.
- Hit Publish when it’s ready for the world!
Don’t forget to preview your pages and posts before publishing. This step ensures everything looks just the way you want it. With your pages and posts complete, you’re well on your way to building an engaging WordPress site!
Step 8: Customizing Your Site’s Design
Customizing the design of your WordPress site is where the magic truly happens! This step allows you to put your personal touch on the website, making sure it resonates with your brand identity and the message you want to convey. Whether you prefer a minimalist aesthetic or something vibrant and colorful, WordPress gives you the tools to express your creativity.
Here’s how you can effectively customize your site’s design:
- Pick a Theme: Choose a theme that suits your style and purpose. You can find both free and premium themes in the WordPress Theme Directory or third-party websites.
- Customize the Theme: Use the WordPress Customizer to adjust your site’s colors, fonts, and layout. This feature allows you to see changes in real-time, so you can achieve the look you want.
- Add Widgets: Widgets are small blocks of content that can enhance your site. You can add them to sidebars and footers for additional functionality, such as recent posts, social media links, or calendars.
- Include Images and Graphics: Visuals play a crucial role in web design. Make sure to use high-quality images and graphics that complement your site’s theme and content.
- Responsive Design: Ensure that your design is mobile-friendly. A responsive design adjusts seamlessly across various devices—this isn’t just good design; it’s essential for modern web users!
Finally, don’t forget to preview your changes. Once you’re happy with everything, hit that ‘Publish’ button and see your vision come alive!
Step 9: Setting Up Navigation Menus
Now that your site looks great, it’s time to make it user-friendly by setting up navigation menus. A well-structured navigation menu is crucial for guiding visitors through your site, helping them find what they’re looking for quickly. An intuitive menu enhances user experience, keeps visitors on your site longer, and can even boost your SEO.
Here’s a simple guide to setting up your navigation menus effectively:
- Go to the Menu Section: From your WordPress dashboard, navigate to Appearance → Menus. Here you’ll create and manage your menus.
- Create a New Menu: Click on Create a new menu, name your menu (like “Main Menu”), and click Create Menu.
- Add Pages: On the left side, you’ll see a list of available pages. Check the boxes next to the pages you want to include and click Add to Menu.
- Organize Your Menu Items: Drag and drop the menu items to arrange them in the order you want. You can also create sub-menus by dragging items slightly to the right under a parent item.
- Select Menu Location: Depending on your theme, you might be able to choose where your menu displays (like in the header or footer). Make sure to check the desired location before saving.
- Save Your Menu: Don’t forget to hit the Save Menu button to apply your changes!
And there you have it! A well-structured navigation menu will ensure your visitors can effortlessly explore your site. Happy navigating!
Step 10: Optimizing Your Site for SEO
Alright, so you’ve built your WordPress site, and it looks fantastic! But what’s the point if no one can find it? This is where optimizing for SEO (Search Engine Optimization) comes into play. Let’s break it down into simple steps.
First things first, you want to ensure your WordPress site is search engine friendly. Here are some key practices to consider:
- Install an SEO Plugin: One of the best plugins is Yoast SEO. It helps you optimize your content by providing suggestions on keywords, readability, and more.
- Choose the Right Keywords: Identify keywords related to your niche using tools like Google Keyword Planner or Ubersuggest. Focus on long-tail keywords — they’re less competitive and often convert better.
- Create Quality Content: Content is king! Make sure your posts are informative, engaging, and relevant to your audience. Aim for a mix of text, images, and videos.
- Optimize Images: Use relevant alt text and file names for your images to help them rank in search results.
- Internal Linking: Create links within your posts that point to other posts or pages on your site. This helps with navigation and keeps users engaged longer.
- Mobile Optimization: Ensure your site is responsive and looks great on all devices since a significant amount of web traffic comes from mobile.
Lastly, consider submitting your sitemap to search engines like Google and Bing. This helps them index your site effectively. By taking these steps, you’ll not only make your site more appealing to search engines but to users as well!
Step 11: Launching Your Website
Congratulations! You’ve put in the hard work, and it’s time to launch your masterpiece into the digital world. But hold your horses; there are a few final checks before you hit that glorious “Publish” button.
Here’s a handy checklist to make sure everything is in place:
- Proofread Everything: Check your content for spelling and grammatical errors. It might help to have a second pair of eyes or use tools like Grammarly.
- Test All Links: Click through every link on your site. Nothing is worse than a broken link on launch day!
- Optimize for Speed: Tools like GTmetrix or Google PageSpeed Insights can help you assess loading times. Users bounce quickly if a site is slow.
- Set Up Google Analytics: This is essential for tracking your visitors and understanding their behavior. Make sure you have it all hardwired in before launch.
- Backup Your Site: Before you go live, take a backup of your site. Use plugins like UpdraftPlus for an easy backup solution.
- Announce Your Launch: Share your new website on social media, newsletters, or even through a press release to get the word out!
Once you’ve ticked every box on your checklist, it’s time to go live! Hit that button and watch as your creation comes to life. Don’t forget, launching is just the beginning; monitor your site’s performance, engage with users, and keep an eye on SEO to continue growing your online presence.
Conclusion
Creating a WordPress site can be a straightforward and enjoyable process when approached step-by-step. By following the guidelines outlined in this guide, you can establish a professional-looking website that meets your needs. Remember, your website is not just a collection of pages; it’s a platform to express your ideas, connect with your audience, and potentially grow your business.

