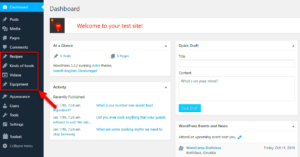
Have you ever wanted to create a page that shares the same name as your Custom Post Type (CPT) archive in WordPress? If so, you’re in the right place! It can be a bit tricky due to WordPress‘s unique handling of URLs, but don’t worry—we’ll guide you through the process. In this blog post, we’ll explore what Custom Post Types are, why you might want to create a page under the same name as a CPT archive, and the intricacies involved in setting it up correctly. So, let’s get started!
Understanding Custom Post Types (CPT)
To get the ball rolling, let’s break down what Custom Post Types are. In WordPress, when we refer to “post types,” we’re talking about different types of content that you can create. The default options include:
- Posts: Typically used for blogs and articles.
- Pages: Static content like “About Us” or “Contact” pages.
- Attachments: Media files like images and documents.
- Menus: Used for navigation.
However, sometimes you might need more flexibility. This is where Custom Post Types (CPT) come into play. A CPT allows you to create content that caters specifically to your needs. For example, if you run a movie review site, you might want to create a CPT called “Movies” to manage and organize that content. Here’s a concise overview of the benefits:
| Benefit | Description |
|---|---|
| Organization | Keep related content grouped together for better management and user experience. |
| Customizable | Tailor the input fields, features, and appearance to match your content’s needs. |
| SEO Advantages | Create specific landing pages and improve your site’s visibility on search engines. |
In summary, Custom Post Types are a powerful feature in WordPress that allow you to create unique content structures. Understanding CPTs is essential before diving into creating pages that share their names.
Why You Might Want a Page with the Same Name as a CPT Archive
When it comes to WordPress, the flexibility to create Custom Post Types (CPTs) allows you to tailor your site to your specific needs. However, you might find yourself in a situation where you want to create a page that carries the same name as one of your CPT archives. Here’s why that might be beneficial:
- Enhanced User Experience: Having a dedicated page can provide a more polished, navigable experience for your visitors. Instead of just displaying a list of posts, you can curate content, add valuable resources, or provide context about the archive.
- SEO Advantages: When a page and a CPT archive share the same name, they can both benefit from similar keywords, potentially boosting your site’s visibility in search engines. This is especially useful if you provide additional, unique content on the page that complements the archive.
- Custom Design and Layout: A page can be designed with greater flexibility than a default archive page. You can choose custom layouts, styles, and functionalities that may not be available through the standard archive settings.
- Focused Call-to-Actions: If you have specific actions you want your visitors to take (like signing up for a newsletter, making a purchase, or accessing exclusive content), having a separate page allows you to emphasize those elements without competing with the list of posts.
Essentially, by creating a page with the same name as your CPT archive, you not only leverage branding consistency but also elevate your site’s functionality and visitor engagement.
Steps to Create a Page with the Same Name as a CPT Archive
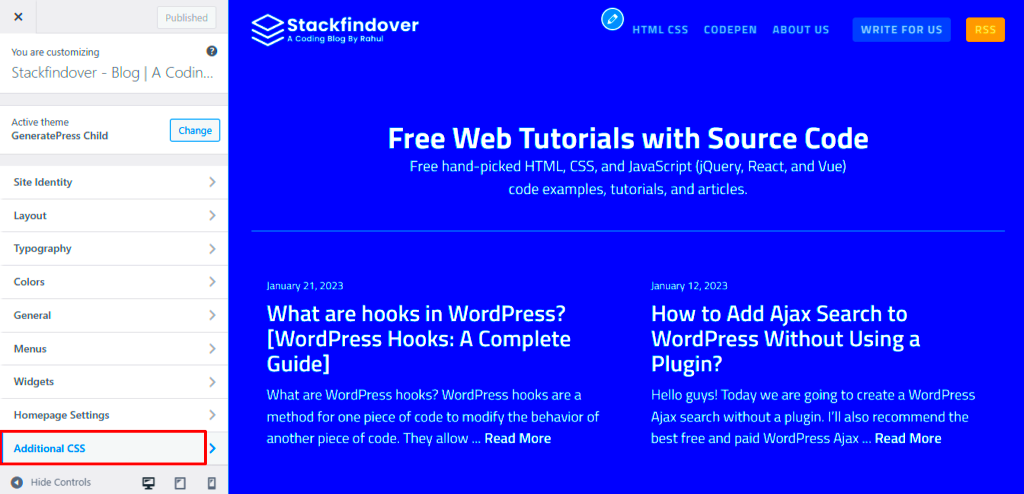
Creating a page that shares the same name as a Custom Post Type (CPT) archive in WordPress is relatively straightforward, but it requires a bit of attention to detail. Follow these steps to accomplish this:
- Identify Your Custom Post Type: Before anything, confirm the exact name of your CPT archive. You can find this in your WordPress dashboard under Custom Post Types.
- Create the Page: Navigate to Pages > Add New. Here, enter the same name as your CPT archive. For instance, if your CPT archive is called “Projects,” your page title should also be “Projects.”
- Customize Your Page: Use the WordPress block editor to add content that complements your CPT archive. You might want to include an introduction, images, or links to related resources.
- Set Up Permalinks: Go to Settings > Permalinks to ensure your URL structure is optimized. WordPress usually handles this, but it’s good to double-check for conflicts.
- Update Your Site Navigation: Don’t forget to add the new page to your site’s menu for easy access. Go to Appearance > Menus, and select your page to include it in your primary navigation.
- Test Your Setup: Finally, visit both the page and the CPT archive to ensure everything works effectively. Check links, content, and layout to see that they’re coherent and accessible.
By following these steps, you can successfully create a page that shares a name with your CPT archive, enhancing your site’s coherence and user experience!
5. Setting Up Your Custom Post Type

Creating a custom post type (CPT) in WordPress can seem a bit daunting at first, but it’s actually a pretty straightforward process. Why would you want to create a CPT? Well, if you’re looking to organize content that doesn’t fit neatly into the standard posts or pages, a CPT can be your best friend. Examples might include portfolios, testimonials, events, or any special content type that showcases unique information.
So, let’s dive into the steps necessary to get your custom post type up and running. Here’s how to do it:
- Decide on Your CPT Name: Before you get into the technical aspects, decide what your custom post type will be called. For example, if you’re setting up a portfolio, you might want to call it “Portfolio Items.”
- Add Code to functions.php: You’ll need to add some code to your theme’s functions.php file. Here’s a basic snippet you can use:
function create_post_type() { register_post_type('portfolio', array( 'labels' => array( 'name' => __('Portfolio'), 'singular_name' => __('Portfolio Item') ), 'public' => true, 'has_archive' => true, 'supports' => array('title', 'editor', 'thumbnail') ) );}add_action('init', 'create_post_type');
After adding the above code, you should see your new CPT appear in the WordPress dashboard. Make sure to visit the page to check if everything’s in order!
6. Creating the Page in WordPress
Now that you have set up your Custom Post Type, it’s time to create a page that shares the same name as your CPT archive. This step is particularly important for SEO and usability. By having a dedicated page, visitors can access a specific landing area for that content directly.
Here’s a simple, step-by-step guide to creating your page:
- Navigate to Pages: Go to your WordPress dashboard and click on ‘Pages’ in the sidebar.
- Add New Page: Click the ‘Add New’ button to create your new page.
- Select a Title: Make sure the title matches exactly with your CPT. For example, if your CPT is “Portfolio,” your page should also be titled “Portfolio.”
- Set Your Permalink: WordPress will automatically generate a permalink based on your title. Ensure it reads something like
yourwebsite.com/portfolio. - Add Content: Use the page editor to provide an introduction or other relevant information about your CPT. This could be an enticing description or even a hero image.
- Publish Your Page: Hit the ‘Publish’ button when you’re happy with everything!
Once your page is live, you can start linking it to your navigation menu or referencing it in blog posts! This will help people find their way to your CPT’s content easily. Happy publishing!
Configuring Permalinks
When creating a page with the same name as a Custom Post Type (CPT) archive in WordPress, one crucial step to ensure everything works smoothly is to configure your permalinks properly. Permalinks are the permanent URLs to your individual pages and posts, and having the right structure can make a significant difference in how your content is accessed.
To configure your permalinks, head to Settings in your WordPress dashboard and select Permalinks. You’ll be presented with several options for structuring your URLs. Here are some popular choices:
- Plain: ?p=123
- Day and name: /2023/10/07/sample-post/
- Month and name: /2023/10/sample-post/
- Numeric: /archives/123
- Post name: /sample-post/
For most situations, the Post name option is ideal, especially when dealing with CPTs. It keeps URLs clean and user-friendly. However, if you use a custom structure, ensure that it doesn’t interfere with your CPT slugs.
Once you choose your permalink setting, hit the Save Changes button. This is crucial because WordPress needs to flush the rewrite rules to accommodate your new setup. Sometimes, using the same name for a page and a CPT can lead to confusion in these rules, so it’s important to double-check that everything is functioning as expected.
Finally, test your URLs! Visit both your CPT archive and the new page to confirm they’re accessible and that there’s no overlap or conflict. If done correctly, your content will shine!
Resolving Potential Conflicts
Creating a page with the same name as a Custom Post Type archive can lead to potential conflicts, especially when it comes to URLs and how WordPress routes requests. Understanding and resolving these conflicts is key to ensuring that both your page and your CPT archive function correctly without causing errors or confusion for your visitors.
Here are a few common conflicts you might encounter and how to address them:
- URL Conflicts: WordPress needs to differentiate between your page and CPT archive when both share the same name. To resolve this, consider altering the slug of either the page or the CPT. For instance, if your CPT is called portfolio and you have a page called portfolio, you could change the page slug to portfolio-info.
- Priority Issues: WordPress resolves certain requests based on hierarchy. The system may refer to the CPT first before the page. If you’re experiencing issues where the wrong content appears, try changing your permalinks or slugs. Sometimes just re-saving your permalinks can do wonders!
- Redirection Problems: If you’ve renamed or moved your CPT or page in the past, you could inadvertently create issues. Use a redirection plugin to manage any old URLs that no longer function properly, ensuring users find what they expect to see without encountering 404 errors.
- Caching Issues: Sometimes, browser caches can confuse things. If you’ve made changes and don’t see them reflected, try clearing your browser cache or using a different browser altogether.
By proactively addressing these potential conflicts, you’ll create a seamless user experience for your visitors while maintaining the integrity of both your page and your Custom Post Type archive. After all, your goal is to provide valuable content without any bumps along the way!
9. Testing Your Setup
Alright, you’ve done the heavy lifting in setting up your new page with the same name as your Custom Post Type (CPT) archive. Now it’s time to ensure everything is working as it should. Testing your setup is a crucial step to confirm that your new page and CPT archive play nicely together.
Here’s a simple checklist to guide you through the testing process:
- Access the Page: Start by navigating to your newly created page. Type the URL in your browser and see if it loads correctly.
- Check for CPT Content: Make sure your CPT archive shows up under the correct settings. You can do this by adding a few test entries in your CPT and checking if they appear on the archive page.
- Review Permalinks: Go to Settings > Permalinks and simply click ‘Save Changes’ to refresh your permalinks. This can often resolve issues related to conflicting slugs.
- Look for Conflicts: Sometimes themes or plugins may create conflicts. Disable plugins one by one and check if the issue persists. Don’t forget to test with your default WordPress theme.
- Browser Testing: Check your site on different browsers and devices. Consistency is key to a smooth user experience!
Once you’ve gone through this checklist, you should have a good idea if everything is functioning as it should. If you notice any hiccups, revisiting your settings or seeking help from forums may be beneficial.
10. Conclusion
And there you have it! Creating a page with the same name as a CPT archive in WordPress can seem daunting at first, but with the right steps, it’s entirely achievable. From setting up your CPT to crafting that all-important page, each step was a piece of the puzzle that fits perfectly into the WordPress framework.
Remember, the reasons for wanting this setup can vary. Perhaps you want to enhance your site’s navigation or provide users with a more refined experience. Whatever your motivation, ensuring that these two components coexist harmoniously is key to achieving your goals.
To wrap it all up, here’s a quick summary:
| Step | Description |
|---|---|
| 1. Create Custom Post Type | Utilize plugins or code to define your custom post type. |
| 2. Name Your Page | Create a new page using the same slug as your CPT archive. |
| 3. Test Thoroughly | Verify that both the page and the archive work as expected. |
With perseverance and the right approach, you’ve successfully navigated the intricacies of WordPress. Now, get out there and create something amazing! Whether it’s a portfolio site, a blog, or an e-commerce platform, the possibilities are endless. Happy WordPressing!


