Are you ready to take your website from concept to reality? If you’ve chosen WordPress as your content management system, and Namecheap as your domain registrar, you’re in the right place! This guide will walk you through connecting WordPress with Namecheap, step by step. Whether you’re a beginner or just need a refresher, we’ve got you covered. Let’s dive into the essential prerequisite steps before we get started!
Prerequisites

Before we jump into the nitty-gritty of connecting WordPress with Namecheap, there are a few things you’ll need to have in place. Ensuring you have the right setup will make the process smoother and more efficient. Here’s what you need:
- A Namecheap Account: First things first! You’ll need a Namecheap account where your domain name is registered. If you don’t have an account yet, you can easily create one.
- A Domain Name: Make sure you have a domain name purchased from Namecheap. Whether it’s a .com, .net, or any other extension, it’s essential for setting up your WordPress site.
- WordPress Installation: You should have a WordPress installation ready to go. This can be on your own server or through Namecheap’s hosting services. If you need help installing WordPress, Namecheap offers great tutorials!
- Access to Domain Settings: Ensure you have access to your domain’s DNS settings. This will allow you to update nameservers or DNS records as needed.
With these prerequisites covered, you’re all set to move forward! Let’s get ready to connect your WordPress site with Namecheap to kickstart your online presence.
Step 1: Purchase a Domain from Namecheap
So, you’ve decided to create your own website, and the first step on this exciting journey is purchasing a domain name. Namecheap is a fantastic option for this! Let’s walk through the process together.
Here’s a quick list of steps to get you started:
- Visit the Namecheap website: Start by heading over to Namecheap.com.
- Search for your desired domain: Use the search bar to enter the name you wish to purchase. Make sure it reflects your brand or purpose! If it’s available, great! If not, Namecheap will suggest alternatives.
- Add to Cart: Once you find the perfect domain, click on the “Add to Cart” button.
- Choose your options: Namecheap offers various add-ons like WHOIS protection (which keeps your personal details safe) and email hosting. Consider what you need.
- Proceed to checkout: Click on the cart icon at the top right and review your purchase. Don’t forget to apply any promo codes if applicable!
- Create an account: If you don’t have a Namecheap account, you’ll need to set one up. It’s quick and only requires a few details.
- Complete your purchase: Enter your payment details and confirm your order. Voila! Your domain is officially yours!
You’re now the proud owner of a domain name. Remember, this is just the beginning, but you’re on the right track!
Step 2: Set Up Hosting for Your WordPress Site
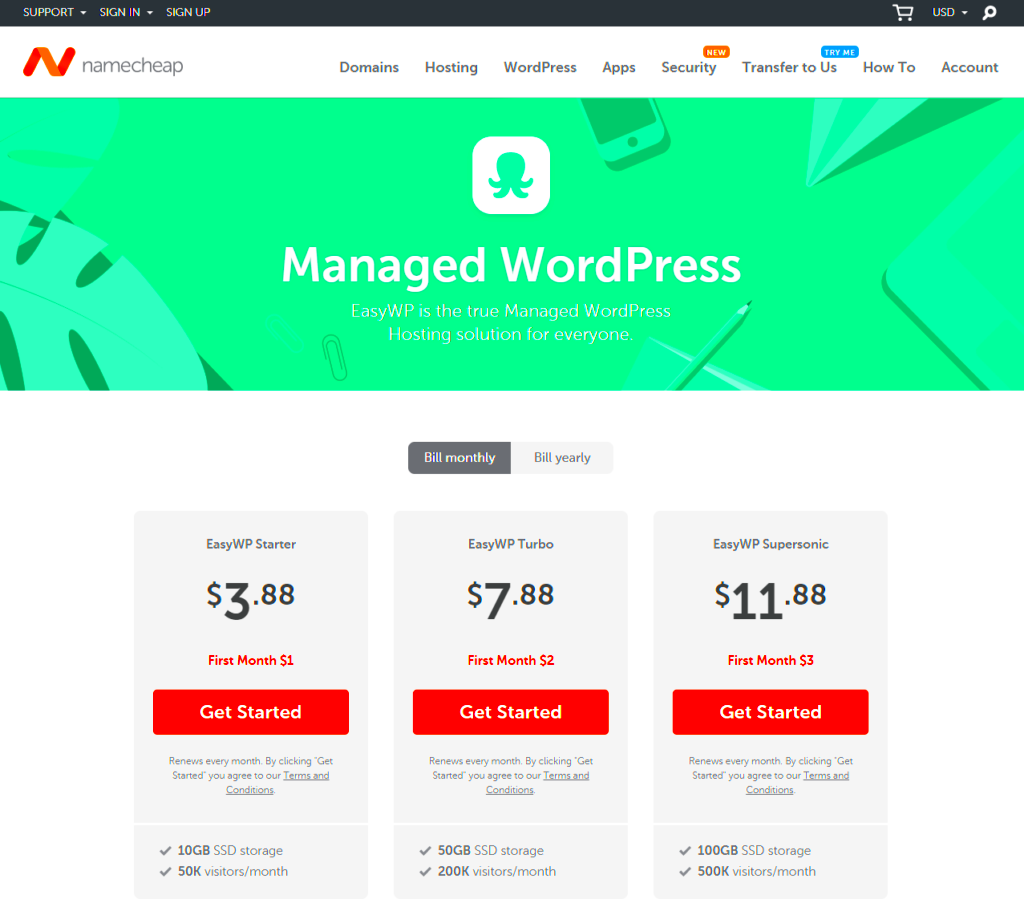
Now that you’ve snagged a catchy domain name, it’s time to set up hosting for your WordPress site. Hosting services provide the space for your website to live in the online world. Let’s dive into the process of getting your hosting set up with Namecheap.
Follow these steps to select your hosting plan:
- Access the Namecheap hosting page: Navigate to the hosting section on the Namecheap website.
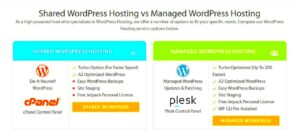
- Choose a hosting type: Namecheap offers several types of hosting, including shared, VPS, and dedicated hosting. For WordPress, shared hosting is usually the most cost-effective option to start. Just check out the differences!
- Pick a plan: Browse the available plans. Consider factors like storage, bandwidth, and whether you need multiple websites. Sign up for the plan that best suits your needs.
- Add to Cart and Checkout: After selecting a plan, just like with the domain, add it to your cart and review your order.
- Set up your account: If you haven’t already, create or log into your Namecheap account. Make sure the domain is linked to your hosting account.
- Make your payment: Follow the prompts to enter your payment details, and complete the purchase. Now you’ve got both a domain and hosting!
Once your hosting is set up, you’ll receive an email with your account details. You’re now ready to install WordPress and bring your website to life!
Step 3: Install WordPress on Your Hosting Account
Awesome, you’re almost there! Now that you have your hosting account ready, it’s time to install WordPress. Don’t worry; this process is straightforward and can be done in just a few clicks. Most hosting providers, including Namecheap, offer a one-click installation feature which makes this task super easy. Here’s how to do it:
- Log into your Namecheap account: Go to the Namecheap website and log into your account. Navigate to the hosting section of your dashboard.
- Access the cPanel: Once you’re in your hosting dashboard, locate the cPanel option. This is your control center where you can manage various aspects of your hosting account.
- Select WordPress installer: Look for the “Softaculous Apps Installer” or similar options. You’ll find WordPress listed there. Click on it to begin the installation process.
- Fill in the installation details: You’ll need to specify details like your domain name, admin username, and password. Choose a strong password, as this secures your website later on.
- Choose your settings: You can also customize options like your site name, tagline, and admin email address during the installation process.
- Click Install: After reviewing your configurations, click the install button, and voilà! You’ll see a progress bar and notification once WordPress is successfully installed.
And just like that, you have installed WordPress! You can now access your site by going to yourdomain.com/wp-admin to start customizing your new website.
Step 4: Point Your Domain to Your Hosting Server
Now that WordPress is installed, it’s time to point your domain name to your hosting server. This step is crucial because it tells the internet where your website is hosted. Don’t worry; it’s not as daunting as it sounds! Here’s a simple breakdown of how to do this:
- Login to Your Namecheap Account: Just like before, log into your Namecheap account and navigate to the “Domain List” section.
- Find Your Domain: Locate the domain that you want to point to your new hosting. Click on the “Manage” button next to it.
- Update Nameservers: In the domain management page, scroll down to the “Nameservers” section. Change the nameservers to Namecheap’s default hosting nameservers, which typically look something like this:
- dns1.namecheaphosting.com
- dns2.namecheaphosting.com
- Save Changes: Don’t forget to save the changes you just made! It will take some time for the changes to propagate, generally within a few hours, but it can take up to 48 hours.
Once this is done, congratulations! Your domain is now pointed at your hosting server, which means when visitors type your domain, they’ll see your WordPress site! Just remember to be patient during the propagation time, and soon you’ll be able to showcase your website to the world!
Step 5: Configure DNS Settings on Namecheap
Alright, so you’ve got your WordPress site all set up on your hosting, and now it’s time to connect your domain from Namecheap. This part might sound a little techy, but don’t worry—I’ll break it down for you step by step!
First things first, you need to access your Namecheap account:
- Log in to your Namecheap account.
- Go to the “Domain List” on the left sidebar.
- Find the domain you want to connect with WordPress and click on the “Manage” button next to it.
Once you’re in the management area for your domain, it’s time to adjust some DNS settings:
- Under the “Domain” tab, locate the “Nameservers” section.
- Choose the option to “Custom DNS.” This will allow you to enter the nameservers provided by your hosting service.
| Nameserver Type | Example |
|---|---|
| Primary Nameserver | ns1.yourhost.com |
| Secondary Nameserver | ns2.yourhost.com |
Just fill in your *specific nameservers*, which you should have received when you purchased your hosting. After entering the nameservers, hit the green checkmark to save changes.
That’s it! Your DNS settings on Namecheap are now configured to point to your hosting service, which means your domain can finally recognize your WordPress site!
Step 6: Finalizing Your WordPress Setup
We’re almost there! You’ve done a great job so far, and now it’s time to wrap things up and finalize your WordPress setup. This is the part where you get to customize your site and make it your own!
Once your DNS changes have propagated (which can take anywhere from a few minutes to 48 hours), type your domain name into your browser. You should see the WordPress installation page. Let’s go through the final steps:
- Select your language: Choose the language you’re comfortable with and hit “Continue.”
- Database setup: Here, enter the database name, username, password, and host information. The hosting provider usually sends this via email when you set up your hosting. Once you’ve filled in the details, click “Submit.”
- Run the installation: WordPress will check the configuration. If everything looks good, click “Run the installation.”
- Site title & admin account: Fill in parameters like your site title, admin username, password, and your email address. Make sure to note down the admin credentials!
- Privacy settings: Decide whether you want search engines to index your site. You can always change this later.
- Click “Install WordPress”: And just like that, your site will be set up!
Woohoo! You’ve successfully finalized your WordPress setup. You can now log in to your dashboard and start customizing your website to match your vision. Enjoy the process—you’ve earned it!
Troubleshooting Common Issues
Even the most tech-savvy among us may experience hiccups when connecting WordPress with Namecheap. Don’t fret! Here’s a handy guide to troubleshoot some of the most common issues you might encounter.
- DNS Propagation Delay: After changing your nameservers on Namecheap, it can take up to 48 hours for DNS changes to propagate around the globe. If your website isn’t visible immediately, be patient and check back later.
- Connection Errors: If you see a message like “Error establishing a database connection,” double-check your database credentials in the
wp-config.phpfile. Ensure your database username, password, and database name are correct. - Incorrect Site URL: If your site is displaying incorrectly, your WordPress address settings might not match your actual URL. Go to your WordPress dashboard, navigate to Settings > General, and verify the values in “WordPress Address (URL)” and “Site Address (URL).”
- File Permission Issues: If you’re encountering errors while uploading files to your WordPress site, it could be due to incorrect file permissions. Ideally, directories should have permissions set to
755and files set to644. - Plugins Conflicts: New plugins can sometimes conflict with existing software. If you’ve just installed a new plugin and chaos has erupted, disable it to see if that resolves the issue.
If problems persist, consider reaching out to Namecheap or WordPress support for more tailored advice. Remember, the WordPress community is vast and supportive, so you’re never alone in your troubleshooting journey!
Conclusion
Successfully connecting your WordPress site with Namecheap is more than just an essential task; it’s the key to unlocking your online presence. With the right steps and a little patience, you can have your domain and hosting set up smoothly.
Throughout this guide, we’ve navigated the process from selecting your hosting package to troubleshooting common issues you may face along the way. Here’s a quick recap of what we’ve covered:
| Step | Description |
|---|---|
| 1 | Choose your hosting plan and register your domain on Namecheap. |
| 2 | Install WordPress via the Namecheap dashboard. |
| 3 | Configure your WordPress settings to match your needs. |
| 4 | Troubleshoot issues as they arise. |
Your online journey is just beginning, and with this information, you’re now well-equipped to navigate through the process! If you enjoy writing, blogging, or sharing your ideas, remember that each step leads you closer to your goals. Happy blogging!

