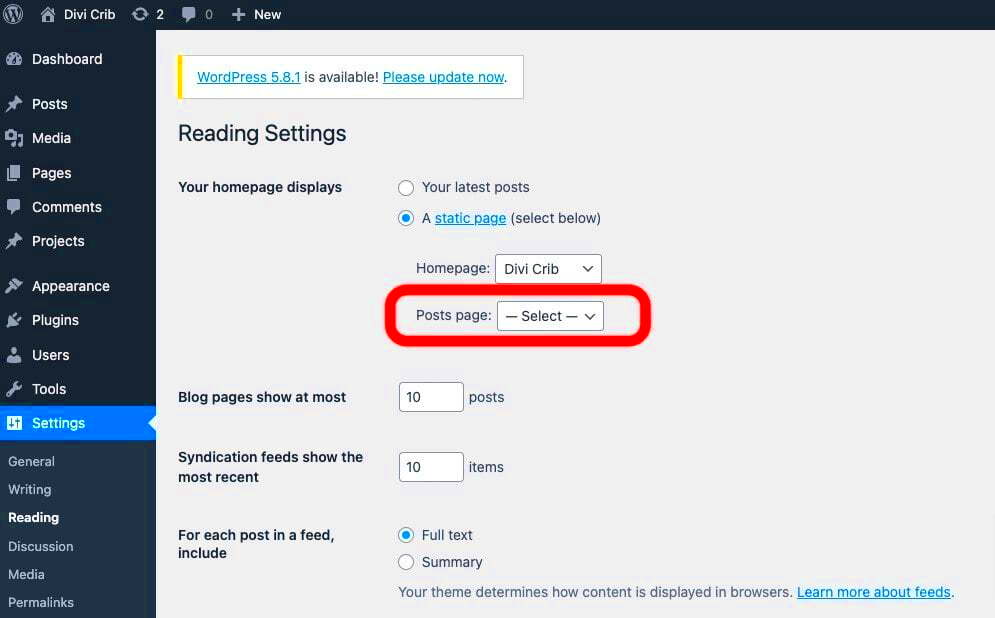
Switching from a standard page to a blog post in WordPress can seem a little tricky, especially if you’re new to the platform. Don’t worry, though! In this blog post, we’ll walk you through the process and help you understand why you might want to make the switch. Whether you’re looking to share your thoughts, showcase updates, or engage with your audience more interactively, turning a page into a blog can be a game changer. Let’s dive right in!
Understanding the Difference Between Pages and Posts
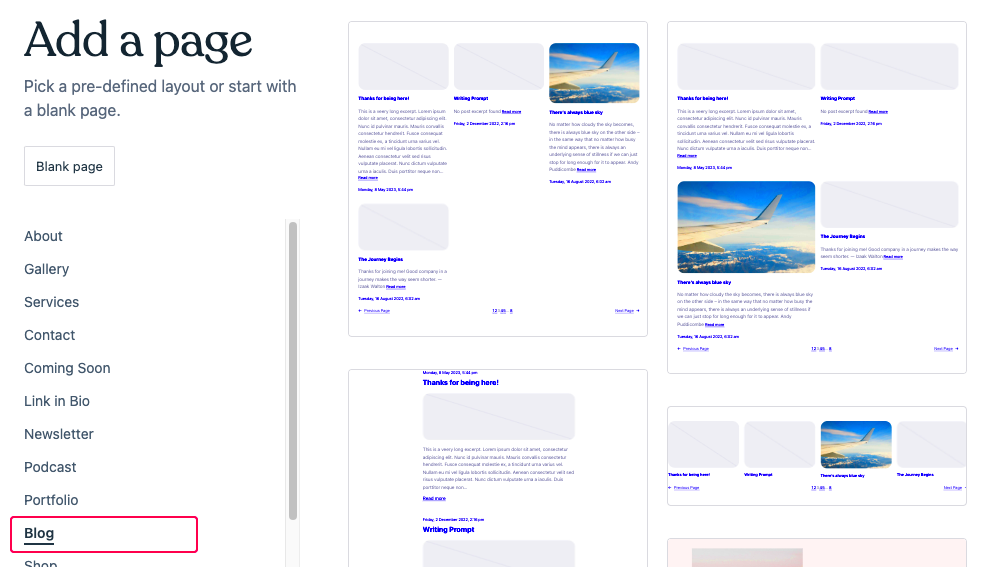
Before you change a page to a blog, it’s crucial to grasp the fundamental differences between pages and posts in WordPress. Here’s a quick overview:
- Pages:
- Static content
- Not time-sensitive
- Hierarchical structure (can have parent/child relationships)
- Best for important information, such as an “About” page or Contact page
- Posts:
- Dynamic content
- Time-sensitive and often organized chronologically
- Automatically assigned to categories and tags for easier organization
- Engagement features like comments and sharing capabilities
To summarize:
| Feature | Pages | Posts |
|---|---|---|
| Content Type | Static | Dynamic |
| Publication Date | Not displayed | Displayed |
| Categories/Tags | No | Yes |
| Comments | No | Yes |
Understanding these differences will help you decide why a blog post might be a better fit for your content, as well as effectively utilize the opportunities that WordPress offers for engagement and interaction with your audience!
Why Change a Page to a Blog Post?
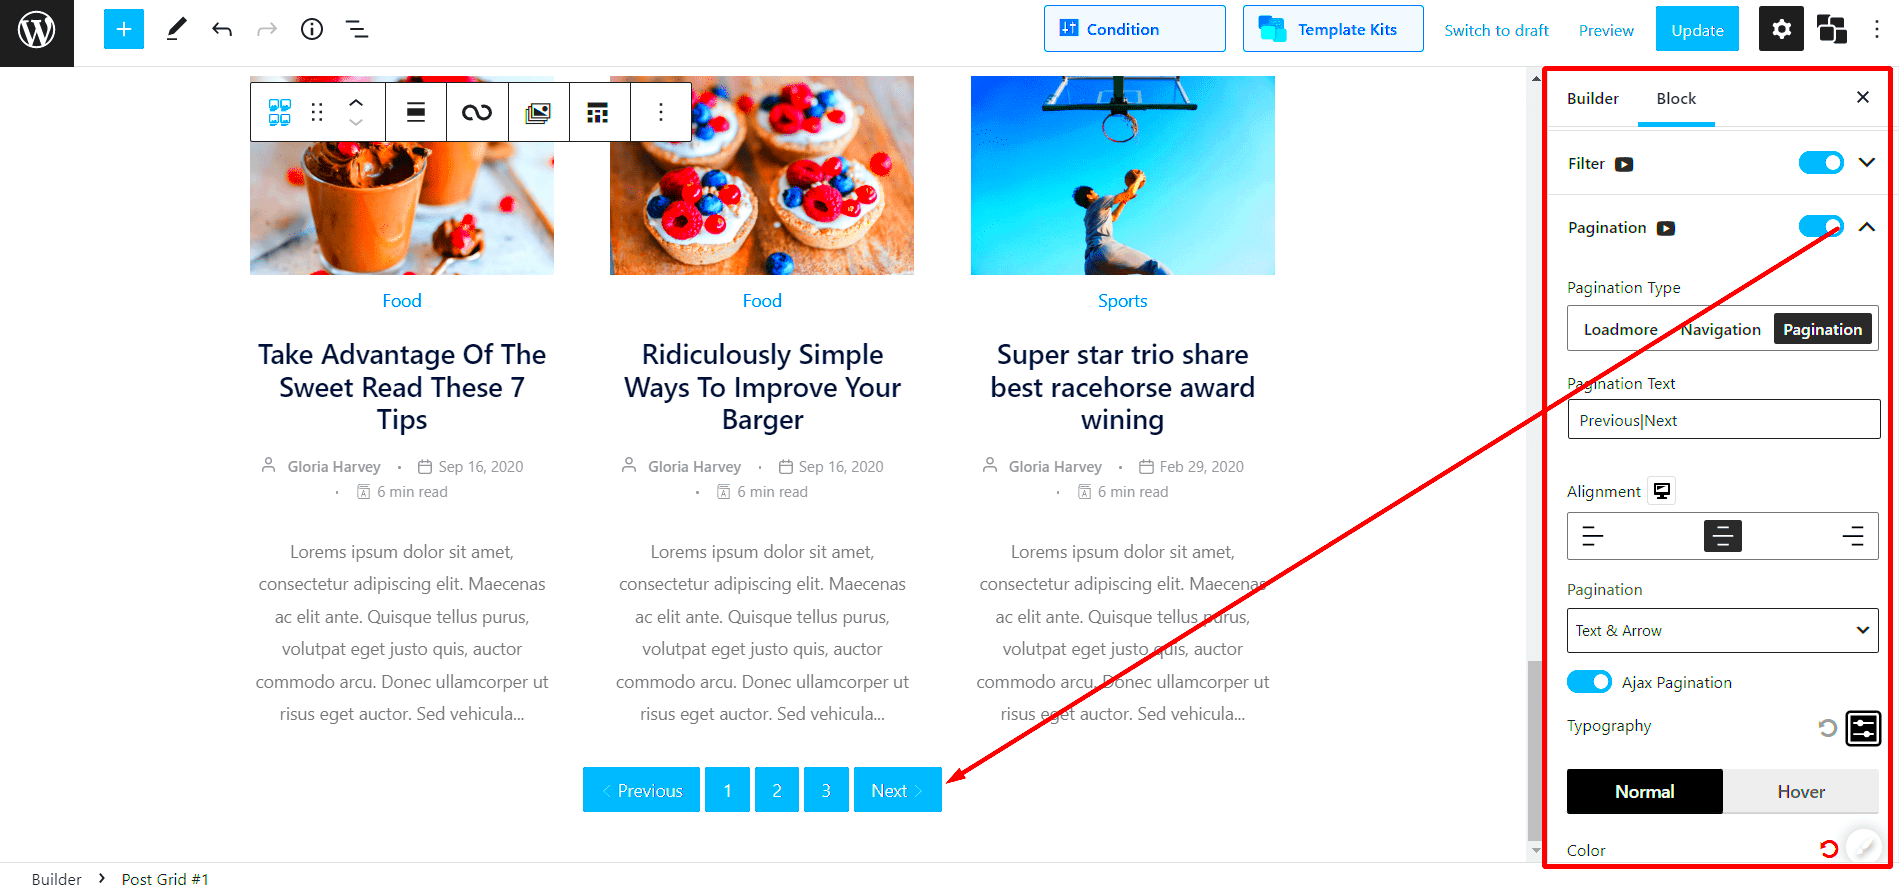
Changing a static page to a blog post in WordPress might seem trivial at first, but there are several compelling reasons to consider this transition. Let’s dive into a few of the top benefits.
- Improved Engagement: Blog posts often encourage discussions through comments, social media shares, and interactions, making them more engaging than static pages.
- Enhanced SEO Opportunities: Blog posts are excellent for SEO. Regularly updated content signals to search engines that your website is active, helping to improve your rankings.
- Content Organization: Transitioning a page to a blog can help in organizing your content better. Categories and tags can be used, making it easier for visitors to find related topics.
- Dynamic Content: Unlike static pages, blog posts allow for easier updates, making it simple to keep content fresh and relevant, which retains user interest.
- Broader Reach: Blogs can be shared more easily across social media platforms, potentially reaching a larger audience and driving more traffic to your site.
In summary, converting a page to a blog fosters better interaction, improves your site’s SEO, and allows for easier content updates—all of which can contribute to a more vibrant and effective online presence.
Preparing to Change Your Page
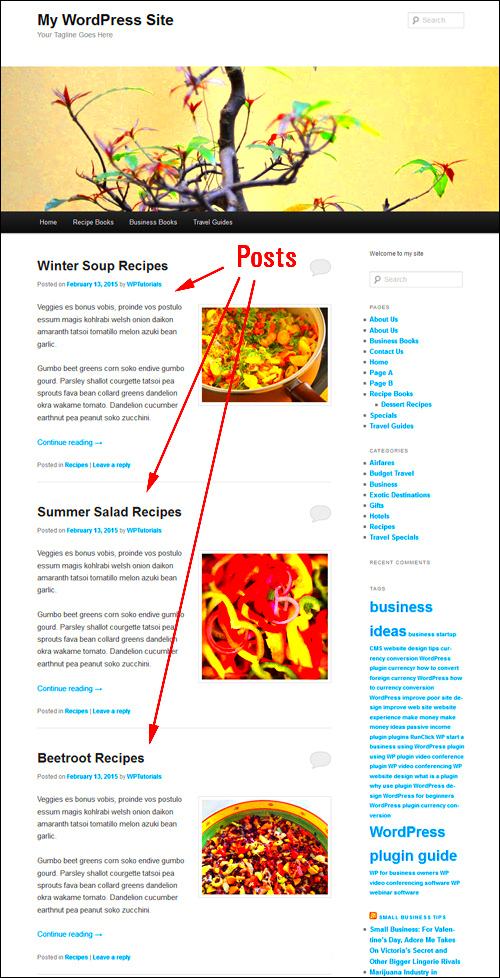
Before diving headfirst into changing a static page into a blog post, preparation is key. To ensure a seamless transition, consider these essential steps:
- Review Your Current Page: Take a good look at the content of your existing page. Determine which aspects are still relevant, what needs updates, and what could easily be used as a blog structure.
- Backup Your Content: Always back up your WordPress site. Use plugins like UpdraftPlus or BackWPup to save your data before making changes.
- Choose the Right Category: Decide where your new blog post will fit within your site’s hierarchy. Choose a category that aligns with your site’s overall content strategy.
- Optimize Your Content: Review the content for SEO optimization. Use keywords relevant to the topic, and ensure it includes headings, images, and links where applicable.
- Update Visuals: If your page includes static images, consider replacing or enhancing them to better suit your newly formatted blog post. Eye-catching visuals can increase retention and engagement.
By following these preparatory steps, you’re setting yourself up for a successful transformation from a static page to a lively blog post. Preparation may take a bit of time, but it’s well worth the effort to ensure your new content truly shines!
5. Step-by-Step Guide to Changing a Page to a Blog Post
Changing a page to a blog post in WordPress can seem daunting if you’re new to the platform, but it’s actually quite simple. Let’s walk through the steps together!
- Log in to Your WordPress Dashboard: Start by logging into your WordPress site. Once you’re in, you’ll land on the dashboard where all the magic happens.
- Locate Your Page: Navigate to the ‘Pages’ section on the left sidebar. Here, you’ll find a list of all the pages you’ve created.
- Edit the Page: Find the page you want to change into a blog post. Click the ‘Edit’ button beneath the page title. This will open the page editor.
- Change the Post Type: Unfortunately, WordPress doesn’t offer a direct feature to convert a page into a post. However, an efficient way to do this is to copy the entire content of the page.
- Create a New Post: Now, go to the ‘Posts’ section in the sidebar and click ‘Add New.’ This opens a new post editor.
- Paste the Content: In the new post editor, paste the copied content from your page into the content area. Don’t forget to give your post an engaging title!
- Format Your Post: Make any necessary adjustments to the text. You can add images, links, or any other elements to enhance your post. Remember, engaging content is key to attracting readers!
- Assign Categories and Tags: Before publishing, assign relevant categories and tags to your post. This helps readers find your content later on.
- Publish: Once you’re satisfied with everything, hit the ‘Publish’ button. Congratulations! You’ve successfully changed a page into a blog post!
6. Updating Categories and Tags
Now that you’ve converted your page into a blog post, it’s essential to categorize and tag your content effectively. This not only enhances the organization of your blog but also boosts the visibility of your content in search results. Let’s dive into how to do this!
Categories and tags are important for several reasons:
- Categories: These act as broad labels that help organize your blog into various sections. Think of them as the chapters of a book, giving readers an overview of what your blog covers.
- Tags: These are more specific keywords that relate to the content within a post. They help provide further context and allow readers to find related topics more easily.
Here’s how to update categories and tags for your new blog post:
- Locate the Categories and Tags Section: While you’re editing your post, scroll down to the right sidebar where you’ll see the ‘Categories’ and ‘Tags’ sections.
- Select Categories: Click the checkboxes next to the categories that best fit your post. If needed, you can also add a new category directly here.
- Add Tags: In the tags section, you can type in relevant keywords that describe your post. Separate tags by commas. Aim for 5-10 specific tags for maximum effect!
- Save Changes: Once you’ve selected your categories and tags, don’t forget to save or update your post!
By carefully categorizing and tagging your posts, you enhance user experience and improve your blog’s SEO. Happy blogging!
7. Adjusting URL Structure and Permalinks
When transitioning a page to a blog post in WordPress, one of the key steps you can’t overlook is adjusting your URL structure and permalinks. This step is crucial for SEO and ensuring that your content is easily accessible to your readers.
First things first, let’s talk about what permalinks are. Permalinks are the permanent URLs to your individual blog posts. By default, WordPress sets these up as a plain date and post name format, like:
- https://yourwebsite.com/2023/10/12/sample-post/
However, many bloggers prefer a cleaner, more user-friendly URL structure that better reflects the content of the post. To change this, follow these steps:
- Go to your WordPress dashboard.
- Navigate to Settings > Permalinks.
- Choose your preferred permalink structure. Some popular options include:
- Post name: https://yourwebsite.com/sample-post/
- Custom structure: Use tags like %category% and %postname%.
Once you’ve made your selection, don’t forget to click Save Changes. Remember, updating your permalinks can affect existing links to your content, so consider setting up redirects for any pages you’ve changed. This will help maintain your SEO and make sure your readers can still find your posts.
8. Editing the Post Content
Now that you’ve converted your page into a blog post and adjusted the URL structure, it’s time to focus on editing the post content. This is where you’ll truly showcase your voice and provide value to your audience. But editing is not just about text; it’s about enhancing reader engagement.
When editing your content, consider the following key points:
- Hook Your Readers: Start with a captivating introduction. Ask a question, share an interesting fact, or make a bold statement that draws the readers in.
- Break Up Text: Use short paragraphs, bullet points, and headings to make your content easy to digest. Long blocks of text can overwhelm readers.
- Include Visuals: Images, infographics, and videos can enhance the reader experience. They provide visual breaks and can emphasize key points.
- Call to Action: Encourage your readers to engage with your content. Whether it’s leaving a comment, sharing the post, or checking out related articles, clear CTAs guide your audience.
As you edit, don’t forget to keep your tone and style consistent. You want your readers to feel like they’re having a conversation with you. Lastly, proofread your content carefully to avoid typos and grammatical errors, as these can detract from your authority and professionalism.
Publishing Your New Blog Post
So, you’ve spent hours crafting the perfect blog post and are finally ready to share it with the world. But wait! Before you hit that all-important “Publish” button, there are a few things you might want to check off your list to ensure everything goes smoothly.
First things first, let’s talk about final edits. Take a moment to proofread your post for grammatical errors and typos. You want your content to reflect your professionalism. You might also consider using tools like Grammarly or Hemingway to help with clarity and readability.
Next, are you making use of categories and tags? This is crucial for organizing your blog content and helping visitors find related posts. Make sure you assign relevant categories and tags that encapsulate the essence of your blog thoughtfully.
Once you’re happy with the content and SEO elements, it’s time to think about your featured image. A captivating image can draw more readers in, so choose one that complements your post and resonates with your audience. Don’t forget to add alt text for accessibility and SEO benefits.
Finally, after all the preparation, you can click that “Publish” button! But remember, publishing is just the beginning. You might want to schedule your post for a later date if you’re planning a series or aligning with a theme. Check all your settings and confirm everything is ready to go. Happy blogging! 🎉
Promoting Your Blog Post
So you’ve published your blog post—now what? Promotion is essential to ensure your hard work reaches a wider audience. Here are some effective strategies to get your content in front of as many eyes as possible.
First off, share your post on social media platforms like Facebook, Twitter, Instagram, and LinkedIn. Each platform attracts different demographics, so tailor your message accordingly. Here’s a quick checklist:
- Use relevant hashtags to increase visibility.
- Tag influencers or brands mentioned in your post.
- Engage with your audience through comments and shares.
You can also leverage email marketing to promote your blog. If you have a mailing list, send out a newsletter featuring your new post, complete with a catchy subject line to entice clicks. Consider also including a brief snippet or a unique takeaway to whet their appetite.
Another effective promo strategy is collaborations. Partner with other bloggers or influencers in your niche. Guest posts or mutual promotions can help you tap into new audiences who may not have discovered your blog otherwise.
Lastly, don’t underestimate the power of SEO. Optimize your posts using keywords that your audience may be searching for. Tools like Yoast SEO can assist in improving your visibility on search engines. The goal is to create content that not only informs but also draws readers in!
Conclusion
Changing a static page to a blog in WordPress can significantly enhance your website’s interactivity and engagement. By following a straightforward process, you can transform a page into a dynamic blog that allows for regular updates and user interaction. Below are the key points to consider while making this change:
- Assess Your Content: Before initiating the change, evaluate what content you have on the static page and how it can be adapted for a blog format.
- Set Up Blog Categories: Organize your new posts by creating relevant categories to help visitors navigate easily.
- Choose the Right Permalink Structure: This enhances SEO and ensures your blog URLs are readable and user-friendly.
- Check Your Theme Compatibility: Ensure your current theme supports blog features, or consider making adjustments to enhance functionality.
Once you have made the above adjustments, test the new blog setup to ensure everything operates smoothly. Customize widgets, menus, and sidebars to optimize user experience. Remember to promote your new blog on social media and other platforms to attract more visitors.
Making this transition not only revitalizes your existing content but also keeps it fresh and relevant, encouraging repeat visitors. In the end, updating your static page to a blog can create a vibrant community around your niche.

