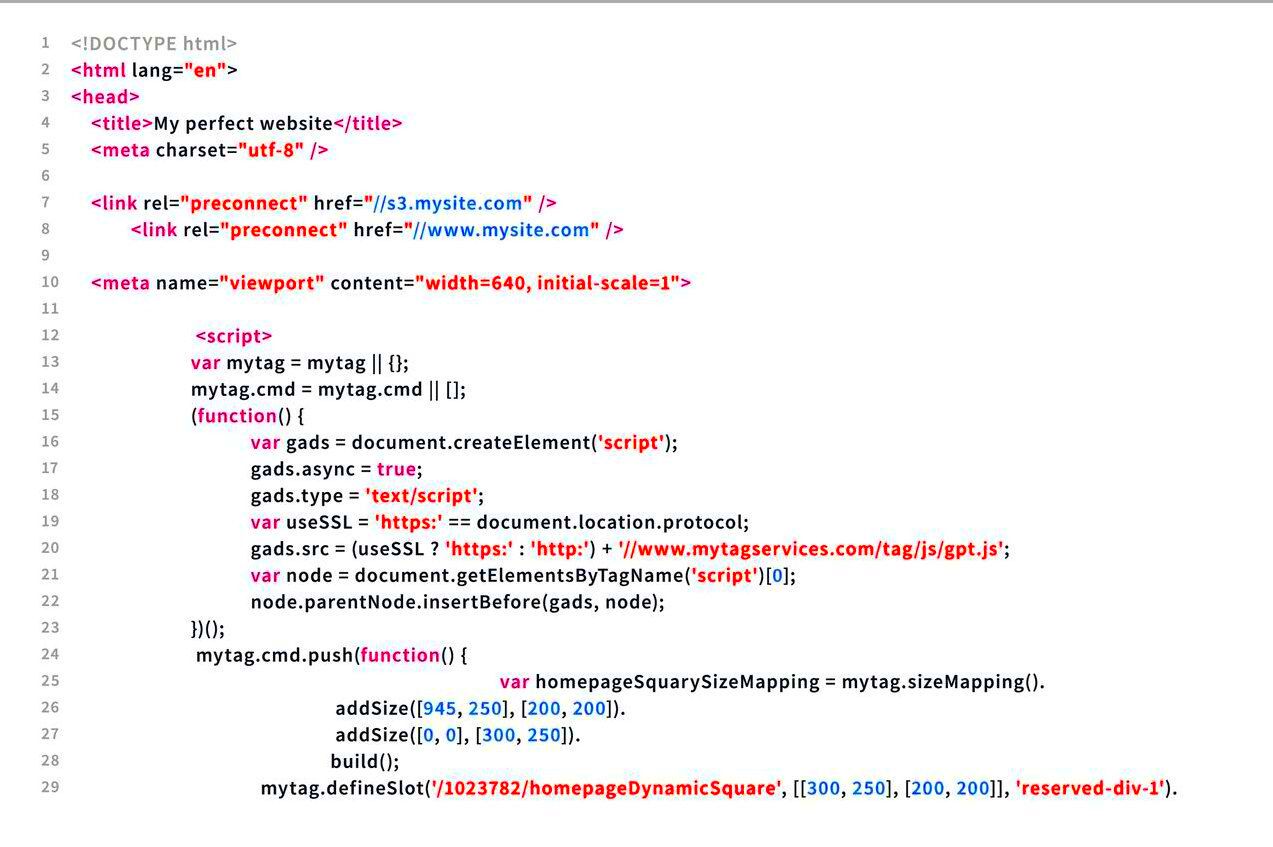
Are you curious about how to enhance your WordPress website by using HTML? You’re in the right place! Copying and pasting HTML code into your WordPress website can seem daunting at first, but it opens up a world of possibilities for customization. Whether you want to add unique features, style elements, or even functionalities, understanding how to work with HTML in
Understanding WordPress and HTML
Before we get into the nitty-gritty of copying and pasting HTML, it’s essential to grasp what WordPress and HTML are. WordPress is a powerful content management system (CMS) that powers over 40% of the web. It allows users to create, manage, and modify content effortlessly, making it super accessible even for those without a technical background.
HTML, or HyperText Markup Language, is the standard language for creating web pages. It structures content on the internet, allowing you to format text, add links, insert images, and create other interactive elements. To put it simply, you can think of HTML as the skeleton of a webpage, while WordPress is the skin that covers it.
Here are some key points to understand:
- WordPress Editors: You can use either the Block Editor (Gutenberg) or the Classic Editor to add HTML. Both have options for integrating custom HTML.
- Flexible Customization: Adding HTML allows you to bypass the limitations of standard WordPress formatting options, giving you more control over your site’s appearance.
- Preview and Test: Always preview your changes to ensure your HTML integrates well with your current theme and doesn’t break your design.
So, whether you’re a blogger wanting to jazz up your content or a business owner looking to offer interactive elements, understanding how to copy and paste HTML in WordPress will empower you greatly!
3. Steps to Copy and Paste HTML Code
Copying and pasting HTML code into your WordPress website is quite straightforward. Here’s how you can go about it in just a few simple steps:
- Find the HTML Code: First, you need to locate the HTML code you want to use. This could be from another website, a code snippet you’ve written yourself, or any other source.
- Copy the HTML Code: Once you’ve found the desired HTML code, highlight it with your mouse and right-click to select Copy (or use the keyboard shortcut Ctrl + C on Windows or Command + C on Mac).
- Log into Your WordPress Dashboard: Open a new tab and log in to your WordPress site by entering your credentials.
- Choose Where to Paste: Navigate to the post or page where you want the HTML to appear. You can do this by clicking on Posts or Pages from the left-hand sidebar.
- Switch to Text/HTML Editor: If you’re using the Gutenberg block editor, add a new block and select the Custom HTML option. If you’re using the Classic Editor, switch from the Visual tab to the Text tab.
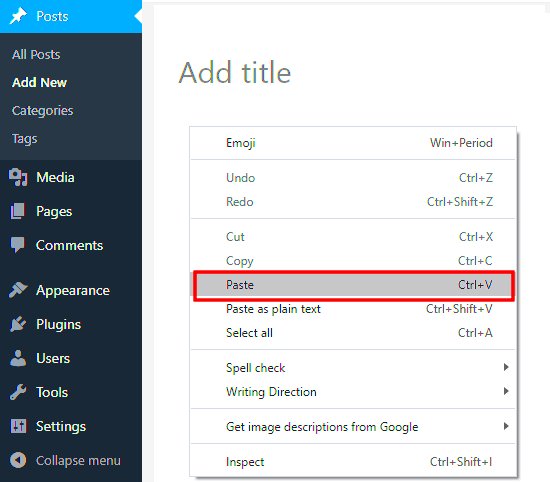
- Paste the Code: In the designated area, right-click and select Paste (or use Ctrl + V on Windows or Command + V on Mac).
- Preview and Publish: Click on Preview to see how your code looks on the page. If you’re satisfied with it, go ahead and publish or update the post/page.
And that’s it! You’ve successfully copied and pasted HTML code into your WordPress site. Easy, right?
4. Where to Paste HTML Code in WordPress

When it comes to WordPress, you have several options for where to paste your HTML code, each serving different purposes. Here’s a breakdown of the primary locations where you can add your custom HTML:
- Posts and Pages: You can easily integrate HTML directly into your posts or pages. This is done by using the Custom HTML block in the block editor or switching to the Text tab in the classic editor, as mentioned in the previous section.
- Widgets: If you want the HTML code to appear in a sidebar or footer, widgets are a great place to paste it. Go to Appearance > Widgets, then add a Custom HTML widget to your desired widget area.
- Theme Files: For more permanent changes, you may consider modifying your theme files. Use a child theme to safely apply HTML to files like header.php or footer.php. Just go to Appearance > Theme Editor, and choose the appropriate file (but be cautious as this can affect your site layout!).
- Shortcodes: Sometimes, you may encounter a scenario where you want to execute a piece of HTML code through a shortcode. Check if your theme or a plugin provides this capability for even smoother integration.
Each of these options has its own benefits depending on what you want to achieve. Whether you’re embedding a custom form, adding Google Maps, or inserting some flashy buttons, WordPress has ample flexibility to accommodate your HTML.
Using the Block Editor vs. Classic Editor
When it comes to editing your WordPress site, you’ll encounter two primary editing options: the Block Editor (also known as Gutenberg) and the Classic Editor. Each of these has its unique features and functionalities that cater to different preferences and use cases.
The Block Editor is a modern approach to content creation. Here’s what you should know:
- Modularity: The Block Editor is built around blocks—individual pieces of content can be easily manipulated, updated, or moved. You can embed HTML snippets as custom blocks, which allows for more flexibility.
- Interactivity: It’s built with intuition in mind, allowing for a more visual and interactive content-editing experience. You can see how your blocks look while editing.
- Customization: You can customize each block’s settings, making it easier to adjust elements like alignment, colors, and borders without needing to delve into HTML.
On the other hand, the Classic Editor is where many WordPress veterans still find their comfort zone.
- Familiarity: If you’re used to working with traditional word processing software, the Classic Editor maintains a familiar interface.
- Simplicity: If you need to copy and paste straightforward HTML code without concern for blocks, the Classic Editor can make this a simpler process.
- Raw HTML Handling: It allows you to switch to a Text view where you can paste your HTML code directly without the risk of format changes that happen in the Block Editor.
Choosing between these two largely depends on your comfort level with WordPress. If you want a more modern experience, the Block Editor is your friend. If you prefer a simpler approach, the Classic Editor may be the way to go.
Common Issues When Copying HTML Code
Copying and pasting HTML code into WordPress can seem straightforward, but it may come with its fair share of hiccups. Here are some common issues you might encounter:
- Formatting Errors: Sometimes, the HTML code you copy may not render correctly when you paste it into WordPress. This can lead to visual discrepancies in your posts or pages.
- Loss of Styles: If you’re copying styles or classes from external sites, these may not work as expected in WordPress. WordPress might have its own styling that overrides your copied styles.
- Security Restrictions: WordPress has built-in security features that might strip certain HTML tags and attributes for safety reasons. Tags like
<script>or<iframe>are often removed automatically. - Overlapping HTML: If you’re not careful, you might end up with overlapping HTML that can break your layout. This is especially common when embedding code from various sources.
To minimize these issues, always preview your content before publishing. This helps you catch any errors and ensures that everything looks just right. Familiarizing yourself with both the Block and Classic Editors can also help you navigate these challenges better.
Best Practices for Adding HTML to WordPress
When it comes to adding HTML to your WordPress website, there are several best practices you should keep in mind to ensure everything runs smoothly. First and foremost, always back up your website before making any changes. This way, if something goes wrong, you can easily revert to the previous version.
Another tip is to use the WordPress Block Editor or Classic Editor effectively. In the Block Editor, you can use the “Custom HTML” block to paste your code safely. This helps to avoid any unwanted formatting issues that may arise from directly pasting HTML into a post. Here are some additional best practices:
- Sanitize Your Code: Make sure your HTML code is clean and free from errors. Tools like the W3C Validator can help you check your code’s validity.
- Test in a Safe Environment: If you’re unsure about how your HTML will behave, consider testing it in a staging environment first.
- Use Custom CSS for Styling: Instead of adding inline styles, consider using the WordPress customizer or a child theme to better manage your styles.
- Be Cautious with Scripts: Avoid using JavaScript or any code that could conflict with WordPress’s core features.
Following these practices will ensure a smoother process when adding HTML to your WordPress site. Remember, a well-structured site improves the user experience and contributes to better SEO performance.
Alternatives to Directly Pasting HTML
If you’re hesitant about directly pasting HTML code into your WordPress website, there are several alternatives that can help maintain the integrity of your site while still allowing for customization. Here are some great options:
- Using a Page Builder: Tools like Elementor, Beaver Builder, or WPBakery allow you to create custom pages without needing to dive deep into HTML. These page builders use a drag-and-drop interface, allowing you to visually see your changes.
- Shortcodes: Many themes and plugins offer shortcodes, which are simple snippets that allow you to add complex functionalities without writing HTML. Check your theme documentation to see what shortcodes are available.
- Custom HTML Widgets: If you want to add HTML to a sidebar or footer, using a Custom HTML widget within the Appearance > Widgets section can be a great option.
- Site-Specific Plugins: If you require repeated HTML snippets, consider creating a small plugin or using existing plugins that allow you to insert custom code across your site.
By using these alternatives, you can achieve the desired effect without the complexities and risks of directly copying and pasting HTML. Always prioritize the health of your WordPress site while experimenting with code!
Conclusion: Effective Use of HTML in WordPress
Utilizing HTML code within your WordPress website provides a powerful way to enhance your content, improve styling, and integrate functionality. Here are some key considerations when copying and pasting HTML code:
- Content Editing: WordPress allows you to use the block editor (Gutenberg) or classic editor, which supports HTML editing in custom HTML blocks or text views.
- Custom Styling: You can add CSS styles directly within your HTML tags to create unique designs that aren’t achievable through standard themes.
- Third-Party Integrations: Many services (like forms, analytics, or social media widgets) provide HTML code snippets that can be seamlessly integrated into your site.
- SEO Benefits: Properly structured HTML can improve your site’s SEO, helping search engines to better understand your content.
However, it’s essential to maintain best practices when working with HTML in WordPress:
| Dos | Don’ts |
|---|---|
| Use valid HTML code to avoid display issues. | Avoid pasting large blocks of code without understanding its function. |
| Test changes in a staging environment before going live. | Don’t ignore security; ensure code snippets come from reputable sources. |
| Back up your website before making changes. | Don’t overwrite essential files without proper precautions. |
In summary, while copying and pasting HTML code into a WordPress site can significantly enhance its capabilities, it must be approached with caution and best practices in mind to ensure a smooth and successful user experience.

