Landing pages are specific web pages designed with a single focus: to convert visitors into leads or customers. Unlike regular web pages that offer multiple pieces of content and navigation, landing pages streamline the user experience, guiding your visitors toward a specific goal. Whether you’re promoting a new product, hosting a webinar, or gathering email subscribers, a well-crafted landing page can significantly boost your conversion rates.
A landing page essentially removes distractions and focuses on an action, such as signing up for a newsletter or completing a purchase. This tactful approach ensures that visitors know exactly what you want them to do. In the world of digital marketing, having an optimized landing page can mean the difference between a potential customer clicking away or engaging with your brand. So, let’s dive deeper into the reasons why building landing pages using WordPress is a smart choice!
Why Use WordPress for Landing Pages?
If you’re considering creating a landing page, WordPress is a fantastic platform to use, for several compelling reasons:
- User-Friendly Interface: WordPress is designed with usability in mind, making it accessible for users of all skill levels.
- Customizability: With a wealth of themes and plugins, you can easily customize your landing page’s design and functionality.
- SEO-Friendly: WordPress offers excellent built-in SEO capabilities, helping your landing pages rank higher in search engine results.
- Responsive Design: Many WordPress themes are responsive, ensuring your landing page looks great on any device, which is crucial in today’s mobile-first world.
- Cost-Effective: Setting up a landing page on WordPress can be very affordable, as many tools are either free or low-cost.
Integrating WordPress with powerful design tools like Divi can further enhance your landing page creation process, allowing you to build visually stunning and high-converting pages effortlessly. Whether you’re a small business owner or run a large enterprise, WordPress equips you with everything you need to make your landing pages thrive.
Understanding Divi: An Overview
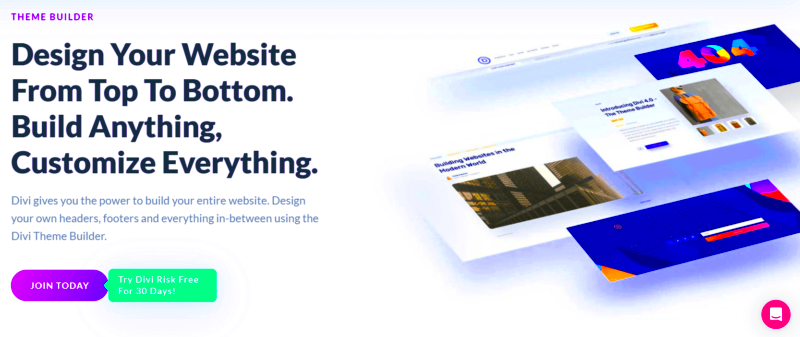
Divi is more than just a theme; it’s a powerful website building platform that enables users to create striking landing pages with ease. Developed by Elegant Themes, Divi is known for its user-friendly drag-and-drop interface, which allows anyone, regardless of their technical skills, to design beautiful websites without writing a single line of code.
What sets Divi apart is its versatility. Whether you’re a sole entrepreneur looking to bolster your online presence or a seasoned designer building websites for clients, Divi has something to offer. Here are some of its standout features:
- Visual Builder: Divi’s visual editor allows you to see changes in real time. You can drag modules, adjust layouts, and customize styles right on the page.
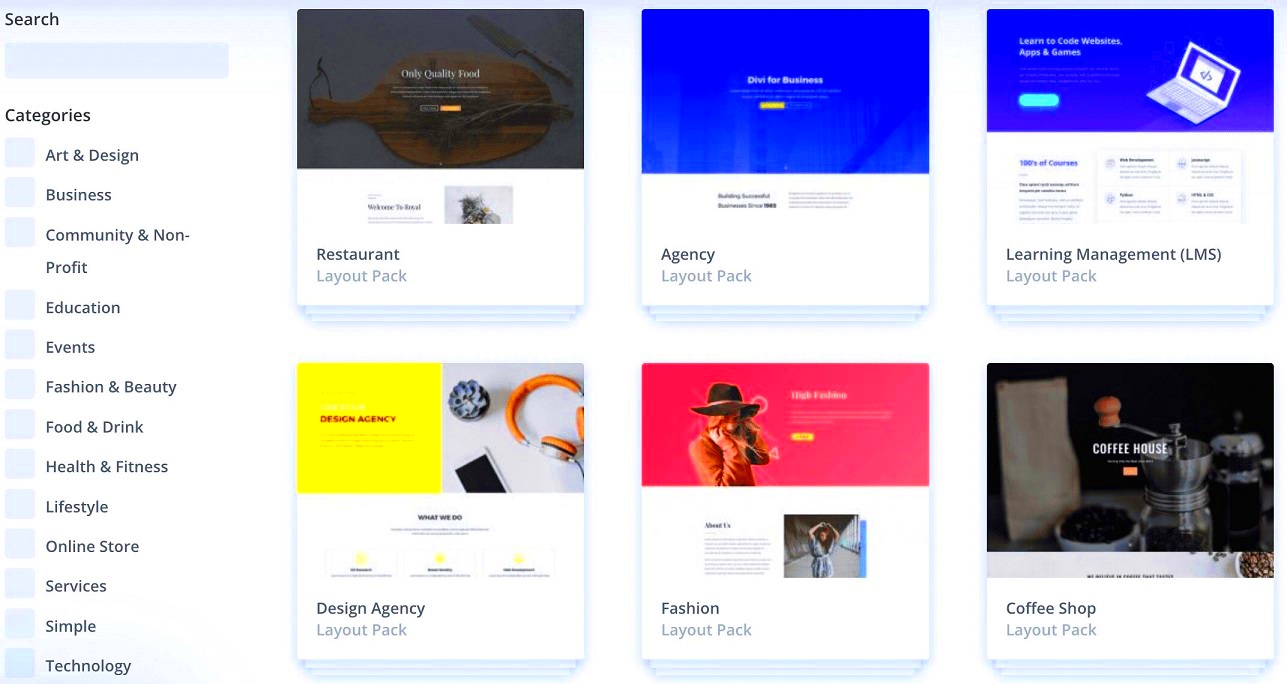
- Pre-made Layouts: With hundreds of pre-designed layouts available, you can kickstart your landing page creation process. Choose a layout that fits your brand and customize it in minutes.
- Responsive Editing: Ensuring your landing page looks great on all devices is a breeze with Divi’s responsive design controls. You can tweak your design for desktops, tablets, and mobiles all within the same interface.
- Conversion-focused Modules: Divi offers a variety of modules specifically designed to enhance conversions, such as call-to-action buttons, forms, testimonials, and more.
- Customization Options: With endless customization options from colors to font styles, you can create a truly unique look for your landing pages.
In summary, Divi is a comprehensive tool that empowers users to build stunning landing pages easily. Its sophisticated features and flexibility make it the go-to choice for many WordPress users.
Setting Up WordPress for Your Landing Page
Ready to create your landing page? The first step is properly setting up your WordPress site. Don’t worry if you’re new to this; I’ll walk you through the process step by step.
Here’s what you need to do:
- Choose a Hosting Provider: Select a reliable hosting service that offers one-click WordPress installation. Popular options include:
- Bluehost
- SiteGround
- WP Engine
- Install WordPress: Follow the hosting provider’s instructions to install WordPress on your domain. This process is usually straightforward.
- Select a Domain Name: Choose a domain name that reflects your brand or the message of your landing page. Keep it short and memorable.
- Install Divi Theme: Purchase and download Divi from Elegant Themes. In your WordPress dashboard, go to ‘Appearance’ → ‘Themes’ → ‘Add New’ → ‘Upload Theme’ to upload the Divi zip file and activate it.
- Configure General Settings: Head to ‘Settings’ → ‘General’ in your WordPress dashboard to set your site title, tagline, and timezone.
- Set Permalinks: For better SEO, navigate to ‘Settings’ → ‘Permalinks’ and choose the ‘Post Name’ option for cleaner URLs.
Now that your WordPress setup is complete, you’re on the right track to creating your standout landing page. Remember, a well-configured WordPress site is the foundation for a successful landing page!
5. Installing the Divi Theme
If you’re ready to dive into building stunning landing pages with WordPress, installing the Divi theme is your first step. This remarkably popular WordPress theme, developed by Elegant Themes, gives you the flexibility and power to create any kind of layout you desire. Here’s a simple guide on how to get started:
- Purchase the Divi Theme: First things first, head over to the Elegant Themes website and purchase the Divi theme. You’ll find several pricing options depending on whether you want a yearly subscription or a one-time payment for a lifetime access.
- Download the Theme: Once you’ve completed your purchase, log in to your Elegant Themes account and go to the “Downloads” section. Here, you can download the Divi theme file as a .zip file.
- Log into Your WordPress Dashboard: Next, navigate to your WordPress site and log into your dashboard.
- Upload the Theme: In the dashboard, go to “Appearance” > “Themes” and click on the “Add New” button. Choose “Upload Theme,” then select the .zip file you just downloaded and click “Install Now.”
- Activate Divi: After the installation is complete, you’ll see an “Activate” button. Click it to activate your new theme!
And just like that, you’re ready to start creating with Divi. What’s great about Divi is that it’s not just a theme; it’s a robust page builder that lets you design stunning pages without needing to touch a single line of code!
6. Exploring the Divi Builder Interface
Once you’ve got the Divi theme installed, it’s time to get familiar with the powerful Divi Builder interface. The first time you open it up, you might feel a bit overwhelmed by all the options available—but don’t worry! Once you get to know the layout and features, you’ll find it’s user-friendly and intuitive. Here’s a breakdown of the Divi Builder interface:
- Top Bar: The top bar is where you’ll find your main navigation. It contains options to save your work, publish the page, and even switch between the Visual Builder and Backend Editor.
- Sections, Rows, and Modules:
- Sections: This is the largest organizational element in Divi. You can create multiple sections on your page to hold different content.
- Rows: Within each section, you can create rows that will house your modules. Rows can be structured in different column layouts to enhance your design.
- Modules: These are the building blocks of your content. You can add text, images, buttons, sliders, and more by dragging and dropping modules into your rows.
- Settings Panel: When you click on any section, row, or module, a settings panel will pop up on the left side. Here you can customize every aspect—be it text size, color, spacing, and more.
- Visual Builder: One of the coolest features of Divi is the Visual Builder that allows you to edit on the front end. You can see changes in real-time, which makes designing much more interactive and fun!
By understanding these components, you’ll unlock the creative potential of the Divi Builder. Take your time, explore each option, and enjoy the process of building your perfect landing page!
Creating Your First Landing Page with Divi
Creating a landing page with Divi is super exciting and not as daunting as it may seem. Once you dive into the process, you’ll realize that Divi’s intuitive builder is designed to make your life easier. Here’s a step-by-step guide to get you started:
- Set Up Your Divi Theme: First things first, make sure you have the Divi theme installed on your WordPress site. This is the foundation for your landing page.
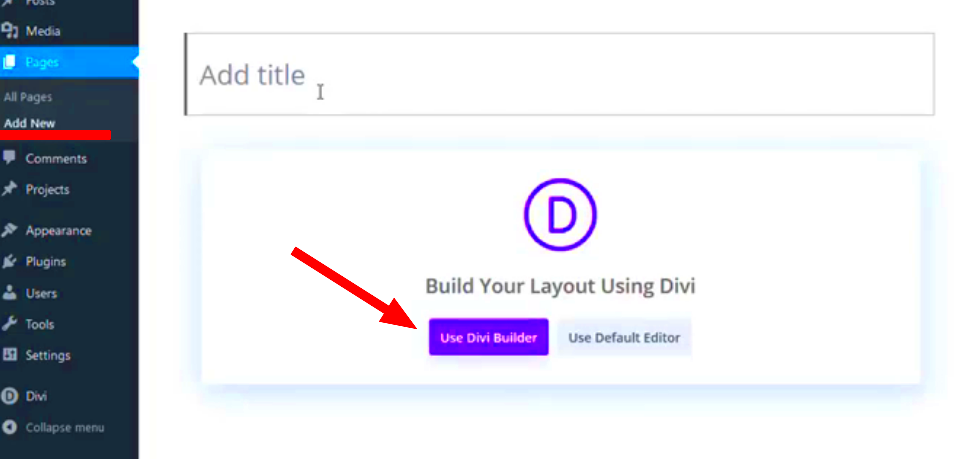
- Create a New Page: In your WordPress dashboard, go to “Pages” and click “Add New.” Give your landing page a catchy title that reflects its purpose.
- Enable the Divi Builder: Once your page is created, click the “Enable Divi Builder” button. You’ll be greeted by a blank canvas where the magic begins!
- Choose a Layout: Divi offers pre-made templates specifically designed for landing pages. Browse through the available options and select one that resonates with your vision.
- Customize Content: With Divi, you can easily customize each module. Click on the sections to edit text, images, and buttons. Make sure your messaging is clear and compelling.
- Add Call-to-Actions: Every landing page needs a strong call-to-action (CTA). Whether it’s a button to sign up or a form to fill out, ensure it stands out and guides users toward the desired action.
- Preview and Publish: Once you’re satisfied with the design and content, use the preview feature to see how it looks on various devices. If everything is perfect, hit the publish button!
And just like that, you’ve created your first landing page with Divi. With practice, you’ll develop your style and learn to leverage Divi’s powerful features to their fullest extent.
Design Tips for Effective Landing Pages
A well-designed landing page can significantly impact your conversion rates. Here are some tried-and-true design tips to ensure your landing page not only looks great but also effectively converts visitors into leads or customers:
- Keep It Simple: Avoid clutter! A clean and straightforward design draws attention to your key message and call-to-action (CTA). Remember, less is often more.
- Engaging Headlines: Your headline is your first impression. Make it catchy and relevant to capture attention immediately. Use power words that evoke emotion, such as “Free,” “Limited,” or “Save.”
- High-Quality Images: Use high-resolution images that complement your content. Images should relate to your message and elicit an emotional response from your audience.
- Strategic Color Choices: Color psychology plays a crucial role in design. Use contrasting colors for CTAs to make them pop, and choose a color palette that aligns with your brand identity.
- White Space is Key: Don’t be afraid of white space! It enhances readability and helps to focus the visitor’s attention where you want it—on your content and CTAs.
- Mobile Optimization: With the rise of mobile web browsing, ensure your landing page is fully responsive. Test it on various devices to guarantee it looks great everywhere.
- Include Testimonials: If possible, incorporate testimonials or social proof. Authentic feedback from previous customers can instill trust and significantly boost your conversion rates.
Implementing these design tips will enhance the overall user experience, making it more likely for visitors to take the desired action on your landing page. Happy designing!
9. Optimizing Your Landing Page for SEO
When it comes to creating a high-performing landing page, promoting it through SEO is as crucial as the design itself. Landing pages are often the first point of interaction for potential customers, so you want to make sure they’re easily discoverable by search engines. Here’s how you can optimize your landing page for SEO effectively:
- Keyword Research: Start by identifying relevant keywords that align with your landing page’s content. Tools like Google Keyword Planner or SEMrush can help you find terms that users are searching for.
- Use Keywords Strategically: Incorporate your target keywords naturally into the title, headings, meta descriptions, and throughout the content. However, avoid keyword stuffing, as it can negatively impact readability and SEO.
- Meta Tags: Don’t forget about meta titles and descriptions! They should be compelling and include your primary keywords to encourage users to click through from search results.
- Alt Text for Images: Optimize any images you include by using descriptive alt text. This not only improves accessibility but also gives search engines more context about your page content.
- Internal and External Links: Consider linking to relevant internal pages and credible external sources. This improves your site’s authority and provides additional value to your visitors.
- Fast Loading Times: A key factor for SEO is page speed. Compressed images, using caching plugins, and a reliable hosting service can improve load times significantly.
By following these SEO best practices for your landing page, you’ll not only enhance its visibility on search engines but also improve user engagement and conversion rates.
10. Mobile Responsiveness: Ensuring Compatibility
In today’s digital age, having a mobile-responsive landing page isn’t just an option—it’s a necessity. More than half of global online traffic comes from mobile devices, so it’s critical that your landing page looks and functions flawlessly on smartphones and tablets. Here’s how to ensure your landing page is mobile-friendly:
- Use Divi’s Mobile Editing Tools: Divi offers integrated settings that allow you to customize your layout for mobile devices easily. You can adjust typography, margins, and visibility settings without creating a separate mobile version.
- Responsive Design: Ensure your design elements, from images to buttons, adapt seamlessly to various screen sizes. This helps maintain a user-friendly experience regardless of the device used.
- Test, Test, Test: Always preview your landing page on different devices. Tools like Google Mobile-Friendly Test can help you check how well your page performs on mobile.
- Simplify Navigation: Mobile users appreciate snappy, straightforward navigation. Consider using a hamburger menu or collapsible sections to keep your interface clean.
- Fast Loading Times on Mobile: Just like desktop users, mobile users expect quick load times. Optimize images and minimize external scripts, as these can drastically slow down your page.
By ensuring your landing page is mobile-responsive, you not only enhance user experience but also improve your chances of converting visitors into customers. In a world where users are always on the go, meeting their needs on their preferred devices is more important than ever!
Integrating Call-to-Actions and Forms
When it comes to building effective landing pages, the importance of integrating strong call-to-actions (CTAs) and forms cannot be overstated. CTAs guide visitors to take specific actions, like signing up for a newsletter, purchasing a product, or downloading a resource. With WordPress and Divi, creating and customizing these components can be a breeze!
1. Choosing the Right Call-to-Action: Your CTA needs to stand out and entice users. You could use phrases like “Get Started,” “Join Now,” or “Download Free Guide.” Make sure they’re clear and action-oriented.
2. Design Matters: Make your buttons large enough to click easily, use contrasting colors to make them pop, and consider using hover effects for that extra touch. Divi allows for easy customization. For example, you can style buttons with gradients, shadows, and animations.
3. Creating Effective Forms: Forms are crucial for collecting user information. Keep them simple; only ask for necessary details. A common strategy is to request first name and email address. Using Divi’s form module, you can integrate your forms seamlessly with various email marketing platforms.
4. Placement and Visibility: Place your CTAs above the fold, ensuring they’re visible without scrolling. You can also include multiple CTAs throughout your page to increase engagement. Consider a sticky button that remains visible while scrolling.
In conclusion, integrating CTAs and forms effectively on your landing page could significantly boost your conversion rates. With the flexibility of WordPress and Divi, you can quickly test different designs and placements to find what works best for your audience.
Testing and Analyzing Your Landing Page Performance
All the hard work you put into designing your landing page will be in vain if you don’t test and analyze its performance. The beauty of using WordPress and Divi is that you have numerous tools at your disposal to monitor how well your landing page is doing.
1. A/B Testing: This is a method where you create two versions of a landing page (Version A and Version B) to see which one performs better. You can change elements like headlines, CTAs, or images. Tools like Google Optimize or specific WordPress plugins make this simple.
2. Analyzing Metrics: Keep an eye on important metrics such as conversion rate, bounce rate, and average time on page. These indicators give you insight into how visitors interact with your content. Google Analytics can help you gather this data effectively.
3. User Behavior Tracking: Tools such as heatmaps (e.g., Hotjar or Crazy Egg) can visually represent where users are clicking or scrolling. This information is invaluable for understanding how to better serve your audience’s needs.
4. Making Changes: Based on your testing and analysis, don’t hesitate to make adjustments. Landing pages aren’t set-it-and-forget-it solutions; they require ongoing tweaks and optimizations. Keep iterating until you find the sweet spot.
In summary, testing and analyzing is not just a one-time task; it’s a continuous process that ensures your landing pages remain effective. With the tools available through WordPress and Divi, you have everything you need to refine and enhance your landing pages until they reach their full potential.
Conclusion and Next Steps
Building landing pages with WordPress and Divi provides you with a powerful combination of flexibility and ease of use. By leveraging the unique features and capabilities of Divi, you can create visually appealing and highly customizable landing pages that are tailored to your specific goals, whether that be generating leads, promoting a product, or increasing subscriptions.
Next steps to enhance your landing page creation process include:
- Explore Divi Modules: Familiarize yourself with the various modules available in Divi to add functionality such as contact forms, sliders, and testimonials.
- Implement A/B Testing: Test different landing page designs or content to determine which performs better in terms of conversions.
- Optimize for SEO: Use SEO-friendly practices to enhance visibility on search engines, such as optimizing images and using relevant keywords.
- Utilize Analytics: Monitor your landing page’s performance through tools like Google Analytics to understand user behavior and make data-driven improvements.
- Responsive Design: Ensure your landing pages are fully responsive and look great on mobile devices, as mobile traffic is increasingly dominant.
In conclusion, by mastering WordPress and Divi, you can efficiently build landing pages that not only attract visitors but also convert them into leads or customers. Remember to continuously refine your approach based on user feedback and analytics for the best results.

