Building a WordPress site on localhost is an exciting journey for anyone looking to explore the depths of web development without the pressure of a live environment. Localhost refers to your own computer, where you can create, test, and play around with WordPress without the need for an internet connection. This is a fantastic way for beginners to learn and for more experienced developers to experiment with new features and designs. In this guide, we’ll walk you through every step, ensuring that you feel confident as you bring your ideas to life.
Why Use Localhost for WordPress Development?

Using localhost for WordPress development comes with a myriad of benefits. Here are several compelling reasons why it could be the perfect choice for you:
- Cost-Effective: There’s no need to pay for hosting. All you need is your computer and some software, and you can run WordPress for free.
- Safe Testing Environment: Localhost allows you to experiment with themes, plugins, and custom coding without risk. You can break things without worrying about affecting a live site!
- Fast Development: Since everything is stored locally, you won’t encounter internet speed issues. This means quicker load times for your site when you’re developing.
- Easy to Set Up: Getting a local development environment running is easier than you might think. Tutorials are widely available, making it accessible even for beginners.
- No Downtime: When you’re developing on localhost, any mistakes or errors won’t affect your users. This means you can take your time to perfect every detail.
In summary, localhost serves as a powerful platform for anyone interested in WordPress development, providing ample opportunities to learn, create, and innovate without the usual constraints of a live environment. So, are you ready to dive in?
3. Prerequisites for Setting Up a Local WordPress Site
Setting up a WordPress site on your localhost can be an exciting venture, and getting it right from the start can save you a lot of headaches later on. Before diving into the installation, it’s key to make sure you have a few essential prerequisites in place. Let’s go through what you need:
- A Computer: This might seem obvious, but you’ll need a desktop or laptop with enough processing power and memory to run a local server environment smoothly. Most modern computers should handle this without any issues.
- Operating System: Whether you’re on Windows, macOS, or Linux, you’ll want to ensure your OS is updated to the latest version. This ensures compatibility with various server management tools.
- Software for Local Server: To run WordPress, you need a local server environment. Tools like MAMP, XAMPP, or Local by Flywheel provide everything you need to get started, including PHP, MySQL, and Apache server.
- Text Editor: While WordPress has a built-in editor, having a separate text editor (like VS Code or Sublime Text) can be handy for making code tweaks or editing theme files.
- Browser: Any modern web browser will do! Chrome, Firefox, or Safari will provide the best experience for accessing your local site.
Once you’ve ticked off all these prerequisites, you’ll be well on your way to creating a fantastic WordPress site right from the comfort of your own computer!
4. Choosing the Right Local Server Environment
Choosing the proper local server environment is crucial for a smooth WordPress setup. With several options available, it can feel a bit overwhelming to decide which one suits your needs best. Let’s break down some of the most popular choices:
| Server Environment | Platforms | Key Features | Best For |
|---|---|---|---|
| MAMP | Windows, macOS | Easy installation, built-in PHP versions, and a MySQL database manager. | Beginners and users who appreciate simplicity. |
| XAMPP | Windows, macOS, Linux | Cross-platform, includes Perl, and has a dashboard with easy access to components. | Users looking for versatility and control. |
| Local by Flywheel | Windows, macOS | One-click installation, user-friendly interface, and team collaboration features. | Freelancers and agencies collaborating on projects. |
When making your choice, consider your level of experience, the type of projects you’ll be working on, and any specific features you may need. Each option has its strengths, and picking the right one can elevate your local development experience. Happy hosting!
5. Installing a Local Server on Your Computer
If you’re hoping to create a stunning WordPress site on your own computer, the first step you’ll need to tackle is setting up a local server. This local server is essential for running websites locally without the need for an Internet connection, making it a perfect solution for development and testing. Fortunately, installing a local server isn’t as complicated as it sounds!
There are several local server environments available, with the most popular ones being:
- XAMPP – A completely free open-source cross-platform web server solution that allows you to create a local server for testing PHP applications.
- WampServer – This one is particularly Windows-friendly, offering an easy way to set up Apache, PHP, and MySQL on your machine.
- MAMP – Favored by macOS users, MAMP simplifies the process of running a local web server.
Here’s a quick outline of how to install a local server using XAMPP:
- Go to the XAMPP website and download the latest version for your operating system.
- Run the installer and follow the on-screen instructions. Make sure to select Apache and MySQL when prompted.
- Once installed, launch the XAMPP Control Panel and start the Apache and MySQL modules.
And just like that, you have a local server ready for action! Now you’re set up and can move on to downloading WordPress for your local installation.
6. Downloading WordPress for Local Installation
Now that your local server is all set up, it’s time to get WordPress on your machine! The process is straightforward, and you’ll have your own personal WordPress installation running in no time. Let’s dive into the steps to download WordPress.
WordPress, being one of the most popular content management systems, is available for free download. To get started, follow these steps:
- Visit the official WordPress website.
- Click on the “Download WordPress” button to grab the latest version (a .zip file).
- Once the download completes, navigate to your local server’s directory. For XAMPP, this would typically be located in C:\xampp\htdocs\.
- Create a new folder to hold your WordPress files, perhaps named ‘mywordpresssite’ or something similar.
- Extract the contents of the downloaded .zip file into this new folder.
And voilà! You now have WordPress installed locally. The next steps will involve creating a database and configuring your wp-config.php file, setting you up to unleash your creativity in building your WordPress site without any constraints!
7. Setting Up Your Local WordPress Site
Setting up a local WordPress site is easier than you might think, and it’s a fantastic way to develop, test, and refine your website before it goes live. Here’s a step-by-step process to get you started on your journey.
Step 1: Install a Local Server Environment
Before you can start using WordPress locally, you need a local server. This could be something like:
- XAMPP – A free and open-source cross-platform web server solution.
- WAMP – Designed for Windows users; great for beginners.
- MAMP – Ideal for Mac users; simple and straightforward.
Download and install one of these local servers based on your operating system, then follow the prompts to set it up.
Step 2: Create a Database
After your local server is up and running, you’ll need to create a database for your WordPress installation. Here’s how you can do it via phpMyAdmin:
- Open your local server’s control panel (XAMPP, WAMP, or MAMP).
- Look for phpMyAdmin and click on it.
- Select the “Databases” tab and create a new database. Give it a name that makes sense, like my_local_wp.
Step 3: Download WordPress
Visit the official WordPress download page, grab the latest version, and extract the files into the local server’s htdocs (for XAMPP) or www (for WAMP) directory.
Step 4: Configuring WordPress
Now, navigate to http://localhost/your-folder-name in your browser. Follow the setup wizard:
- Select your language.
- Input your database name, username (typically root), and password (usually blank).
- Run the installation and then set up your site credentials.
And voilà! Your local WordPress site is ready.
8. Configuring Your Local WordPress Site Settings
Once your local WordPress site is up and running, the next step is to configure the settings to suit your needs. This isn’t just about making it look nice; it’s about preparing your site for development. Here’s how to get started.
Step 1: Access the Dashboard
To access your dashboard, go to http://localhost/your-folder-name/wp-admin. Log in with the credentials you set up earlier. Your dashboard is your main control center for everything on your site.
Step 2: General Settings
Head over to Settings > General. Here, you can customize essential aspects of your site:
- Site Title: What do you want to call your site?
- Tagline: A short description of your site. This can be compelling for SEO!
- Timezone: Make sure this is set to your local time zone.
- WordPress Address (URL): This is typically http://localhost/your-folder-name.
- Site Address (URL): Same as above for local development.
Step 3: Writing and Reading Settings
Under Settings > Writing and Settings > Reading, tweak the settings to control how content is created and displayed. For example, you might want to set a static front page or allow posts to be categorized by date.
Step 4: Permalinks
Finally, don’t forget about your permalinks! Navigating to Settings > Permalinks, you can choose how your URLs will look. A common choice for SEO and user-friendliness is the “Post name” option.
By following these steps, you’ll have a well-configured local WordPress site that’s ready for development, testing, or just plain fun! Enjoy building your site!
9. Installing Themes and Plugins Locally
One of the fantastic things about building your WordPress site on localhost is the ease with which you can install themes and plugins. You get to experiment without worrying about breaking a live site! Let’s dive into how you can do this step-by-step.
First off, you need to log into your WordPress dashboard. This is usually accessible by going to localhost/your-site-name/wp-admin. Once you’re in, here’s how you can install themes and plugins:
Installing Themes
- Go to Appearance > Themes.
- Click on Add New at the top of the page.
- You can either browse the featured, latest, or popular themes or use the search bar to find a specific theme.
- Once you find a theme you like, click on Install.
- After the installation is complete, click on Activate to make it live on your site.
Alternatively, if you have a theme in a .zip file, you can upload it:
- In the same Themes section, click on Add New then Upload Theme.
- Choose the .zip file by clicking on Choose File.
- Hit Install Now and then Activate the theme.
Installing Plugins
The process for installing plugins is quite similar:
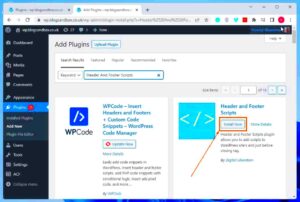
- Navigate to Plugins > Add New.
- Like with themes, you can browse or search for a plugin you want.
- Once found, click Install Now and then Activate.
If you have a plugin in a .zip format, you can upload it too:
- Click on Upload Plugin.
- Select the .zip file and click Install Now.
- Activate it once installed.
Now you’re all set with themes and plugins on your localhost WordPress site! Feel free to play around with different styles and functionalities to see what works for you.
10. Testing Your Site From Different Browsers
Once you’ve added some flair to your WordPress site with themes and plugins, it’s crucial to ensure that everything appears and functions as expected. Testing your site from different browsers is a great way to ensure compatibility and a smooth user experience. Let’s break down how to approach this.
Why Test Across Browsers?
Different browsers can interpret HTML, CSS, and JavaScript differently. Thus, what looks great on one browser might not display correctly on another. Here are some browsers you should consider testing on:
- Google Chrome
- Mozilla Firefox
- Safari
- Microsoft Edge
- Opera
Steps to Test Your Site
- Open your preferred browser.
- In the address bar, type in localhost/your-site-name and hit enter.
- Navigate through your site, checking different pages, features, and forms.
- Pay attention to layout, fonts, colors, and responsiveness.
- Repeat these steps in each browser you want to test.
Using Browser Developer Tools
Each browser has built-in developer tools that can help you diagnose issues:
- In Chrome, right-click and select Inspect to access the developer console.
- Look for error messages, inspect elements, and test responsive design.
To conclude, testing your WordPress site on various browsers is an essential step to ensure a good user experience. It’s like ensuring your outfit looks great from every angle before stepping out. So take your time, check those details, and don’t hesitate to go back to your WordPress dashboard to make adjustments!
Making Changes and Customizing Your Site
Congratulations! You’ve set up your WordPress site on localhost, and now it’s time to make it your own. Customizing your site is one of the most exciting parts of the process, where you can transform your blank canvas into a unique masterpiece that reflects your brand and style.
First things first, let’s explore how to make changes:
- Themes: WordPress offers a plethora of themes, both free and premium. You can find these by navigating to Appearance > Themes. Here, you can install new themes that suit your vision, and don’t forget, you can preview them before activating!
- Plugins: Enhance your site’s functionality with plugins. Go to Plugins > Add New and search for any features you want to add—be it SEO, security, or even contact forms.
- Pages and Posts: Create engaging content by heading to Pages or Posts. Use the visual editor to add media, and don’t hesitate to format the text for better readability.
- Widgets and Menus: Customize the layout using widgets. Head to Appearance > Widgets and drag-and-drop your preferred widgets. Also, set up your menu by navigating to Appearance > Menus.
Remember, the beauty of customizing your site is that you can always preview your changes before making them live. Don’t forget to check how it looks on different devices—mobile responsiveness is crucial nowadays!
Exporting Your Local WordPress Site to a Live Server
So, you’ve crafted an amazing site locally, and the next step is to share it with the world. Exporting your local WordPress site to a live server may sound daunting, but it’s quite manageable with the right steps.
Here’s a straightforward guide to get your site live:
- Backup Your Local Site: Before anything, ensure you back up your local WordPress files and database. Use tools like UpdraftPlus or simply manually copy the files for safety.
- Choose a Web Host: Select a reliable web hosting provider. Many popular options include Bluehost, SiteGround, and HostGator. They often come with WordPress installation features that can be quite handy.
- Upload Files: Using an FTP client like FileZilla, connect to your web hosting account. Upload all the files from your local WordPress directory to the root folder on your server (usually public_html).
- Import Your Database: You’ll need to export your local database using phpMyAdmin. Go to phpMyAdmin, select your database, click on Export, and save it. Then, in your live server’s phpMyAdmin, create a new database, select it, and click on Import to upload your SQL file.
- Update wp-config.php: Edit the wp-config.php file in your local files to reflect your live database credentials (name, username, password, and host).
- Site URL Update: Sometimes, you may need to update the site URL in your database. In phpMyAdmin, locate the wp_options table and change the site URL to your new live URL.
And voilà! You’ve successfully moved your WordPress site from your local environment to a live server. Don’t forget to check your site thoroughly to ensure everything works perfectly before celebrating your hard-earned success!
Troubleshooting Common Issues on Localhost
When diving into WordPress development on localhost, things don’t always go as planned. You may find yourself encountering a slew of common issues. But fear not! Let’s walk through some troubleshooting tips to help you get back on track.
1. Cannot access local site:
- Ensure that your local server (like XAMPP, MAMP, or WAMP) is up and running.
- Check your browser’s URL bar. Make sure you’re using the correct address, often
http://localhost/your-folder-name/.
2. Error establishing a database connection:
- Double-check your
wp-config.phpfile. Make sure the database name, username, and password are correct. - Ensure that your MySQL server is running.
3. White screen of death:
- Clear your browser’s cache, as it might be holding onto an outdated version of your site.
- Try disabling plugins. Rename the
pluginsfolder via FTP to disable them all at once, then reactivate them individually.
4. 404 errors on permalinks:
- Go to Settings > Permalinks in your WordPress dashboard and resave your settings.
- Check your
htaccessfile for any incorrect rules, or regenerate it if needed.
Remember, troubleshooting can be frustrating, but taking a methodical approach usually leads you to the solution. Don’t hesitate to consult WordPress forums or seek help from the active community online!
Conclusion: The Benefits of Local WordPress Development
Building a WordPress site on localhost can be a game-changer for developers and enthusiasts alike. Here are some compelling benefits that might just persuade you to stick with local development:
- Speed: Local environments are typically faster than remote servers. Changes you make are reflected immediately, which makes for a more fluid development process.
- Cost-effective: No need to purchase hosting while you’re still working on your site. You can experiment and test without incurring costs.
- Complete control: Customizing your setup is easy. You have the freedom to choose server settings, PHP versions, and databases according to your needs.
- Safe experimentation: Making mistakes is part of learning! On localhost, you can play around without fear of affecting a live site. Try out new plugins or themes without any risk.
In addition to these benefits, local development also enhances your learning process. You can gain hands-on experience with database management, file organization, and debugging right from the comfort of your own computer.
So, if you haven’t already embarked on your local WordPress journey, now might be the perfect time to give it a shot!


