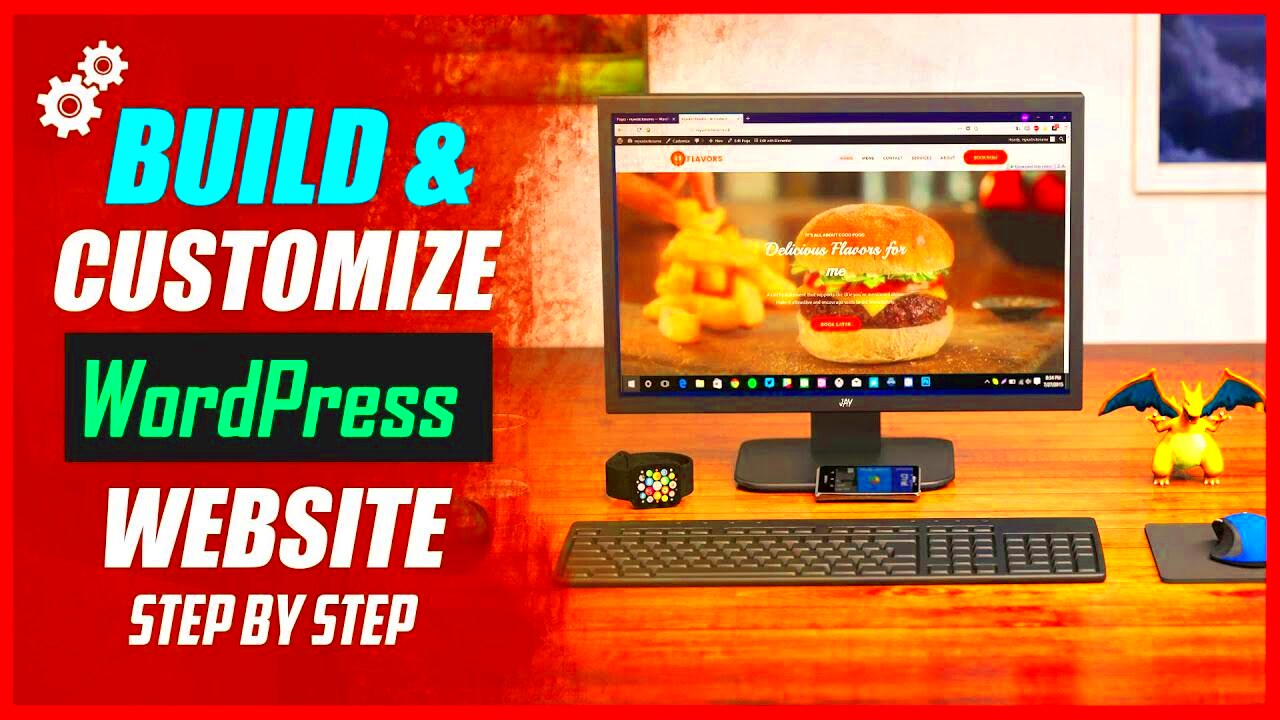
Hey there! If you’re looking to build a website, you’ve probably heard of WordPress. It’s one of the most popular content management systems (CMS) out there, and for good reason! In this section, we’ll introduce you to what WordPress is all about and why it’s such a game-changer for both newbies and seasoned web developers alike. From blogs to business sites,
Why Choose WordPress for Your Website?

So, you might be wondering, why should I choose WordPress? Well, there are plenty of reasons to do so! Here’s a quick rundown of the benefits:
- User-Friendly Interface: WordPress is super easy to use, even if you’re not a tech whiz. The intuitive dashboard lets you add posts, pages, and media without any coding knowledge!
- Customizable Themes: With thousands of themes available, you can easily find one that fits your brand. Plus, most themes are customizable, so you can tweak them to match your style.
- Extensive Plugin Library: Need to add a contact form, SEO optimization, or social sharing? Plugins make it easy peasy! You can extend your site’s functionality without fuss.
- SEO Friendly: WordPress offers several built-in features that make it easier for search engines to crawl your site, improving your chances of ranking well.
- Responsive Design: Most WordPress themes are mobile-friendly right out of the box, ensuring that your site looks great on any device.
- Large Support Community: With millions of users worldwide, the WordPress community is vast. You can find help via forums, blogs, and videos whenever you need it.
In summary, WordPress is a powerful yet approachable platform that can help you create a stunning website tailored to your unique vision. Whether you’re starting a blog, an online store, or a portfolio, WordPress is worth considering. Ready to get started? Let’s go!
Setting Up Your WordPress Account
Alright, so you’ve decided to jump into the world of WordPress—fantastic choice! Setting up your WordPress account is your first step towards creating an amazing website. Let’s break it down into simple steps to get you started.
Firstly, you’ll need to visit the official WordPress website. There, you’ll see two options: WordPress.com and WordPress.org. If you’re looking for a simpler, more guided experience, go for WordPress.com. If you want more flexibility and control (and don’t mind getting your hands a bit dirty), you’ll want WordPress.org. For this guide, let’s stick with WordPress.com.
Once you’ve made your choice, click on the “Get Started” button. You’ll be prompted to fill out some basic information:
- Email Address: Make sure it’s one you’ll check regularly.
- Username: Choose something catchy but professional.
- Password: Create a strong password to keep your account safe.
After you fill in these details, hit “Create your account.” You’ll receive a confirmation email. Click the link in that email to activate your account. Easy peasy, right?
Once your account is activated, you can log in to your new WordPress dashboard! From here, you can start customizing your site, choosing themes, and adding posts. Take your time to explore; WordPress is full of features that will help you create a stunning website.
Selecting a Domain Name and Hosting
Navigating the world of domain names and hosting can feel a bit overwhelming, but don’t sweat it! We’ll simplify this for you. Your domain name is like your website’s address on the internet (think of it as your digital street name), while hosting is where your site lives. You need both to get your site up and running.
First, let’s talk domain names. Here are some tips to consider:
- Keep it Short: Aim for something easy to remember and type.
- Make it Relevant: Your domain should reflect your brand or the content you’ll offer.
- Choose the Right Extension: While .com is popular, consider others like .net, .org, or specific industry extensions.
Once you’ve brainstormed some names, it’s time to check their availability through a domain registrar like GoDaddy, Namecheap, or even through WordPress itself.
Now onto hosting! Choosing a reliable hosting provider is crucial since it can affect your site’s speed and uptime. Some popular hosting options for WordPress include:
| Hosting Provider | Best For | Starting Price |
|---|---|---|
| Bluehost | Beginners | $2.95/month |
| SiteGround | Performance | $3.99/month |
| WP Engine | Managed Hosting | $20/month |
Read reviews and check for features that meet your needs (like customer support, bandwidth, and security). Once you’ve settled on a domain name and hosting provider, you’re all set to link them together and give your website its unique identity! Exciting stuff, right?
5. Installing WordPress: A Step-by-Step Guide
Installing WordPress might sound complicated, but it’s actually pretty straightforward! Whether you’re setting up a personal blog, a business website, or just a space to share your thoughts, here’s how to get WordPress up and running in no time.
Here’s a simple step-by-step guide:
- Choose a Hosting Provider: First things first! You’ll need web hosting. Look for providers that offer one-click WordPress installations, like Bluehost, SiteGround, or DreamHost.
- Get Your Domain Name: This is your website’s address on the internet. Many hosting providers offer a free domain name when you sign up, so grab one that reflects your brand or interests!
- Access Your Hosting Account: After purchasing your hosting, log in to your hosting account. You should find an option for a one-click installation of WordPress.
- Start the Installation: Click on the WordPress installation option. You’ll usually need to fill in some details like your desired username, password, and the name of your site.
- Configure Your Settings: After installation, you’ll have some configuration options. Set your site’s title, tagline, and other essential settings—feel free to adjust these later if needed.
- Complete the Installation: Click on install and wait for the process to finish. Once complete, you should see a success message with your admin login link!
- Log In to WordPress: Head to the provided admin link, use your credentials, and get ready to start building your site!
Congratulations! You now have WordPress installed and are ready to make your mark on the web!
6. Exploring the WordPress Dashboard
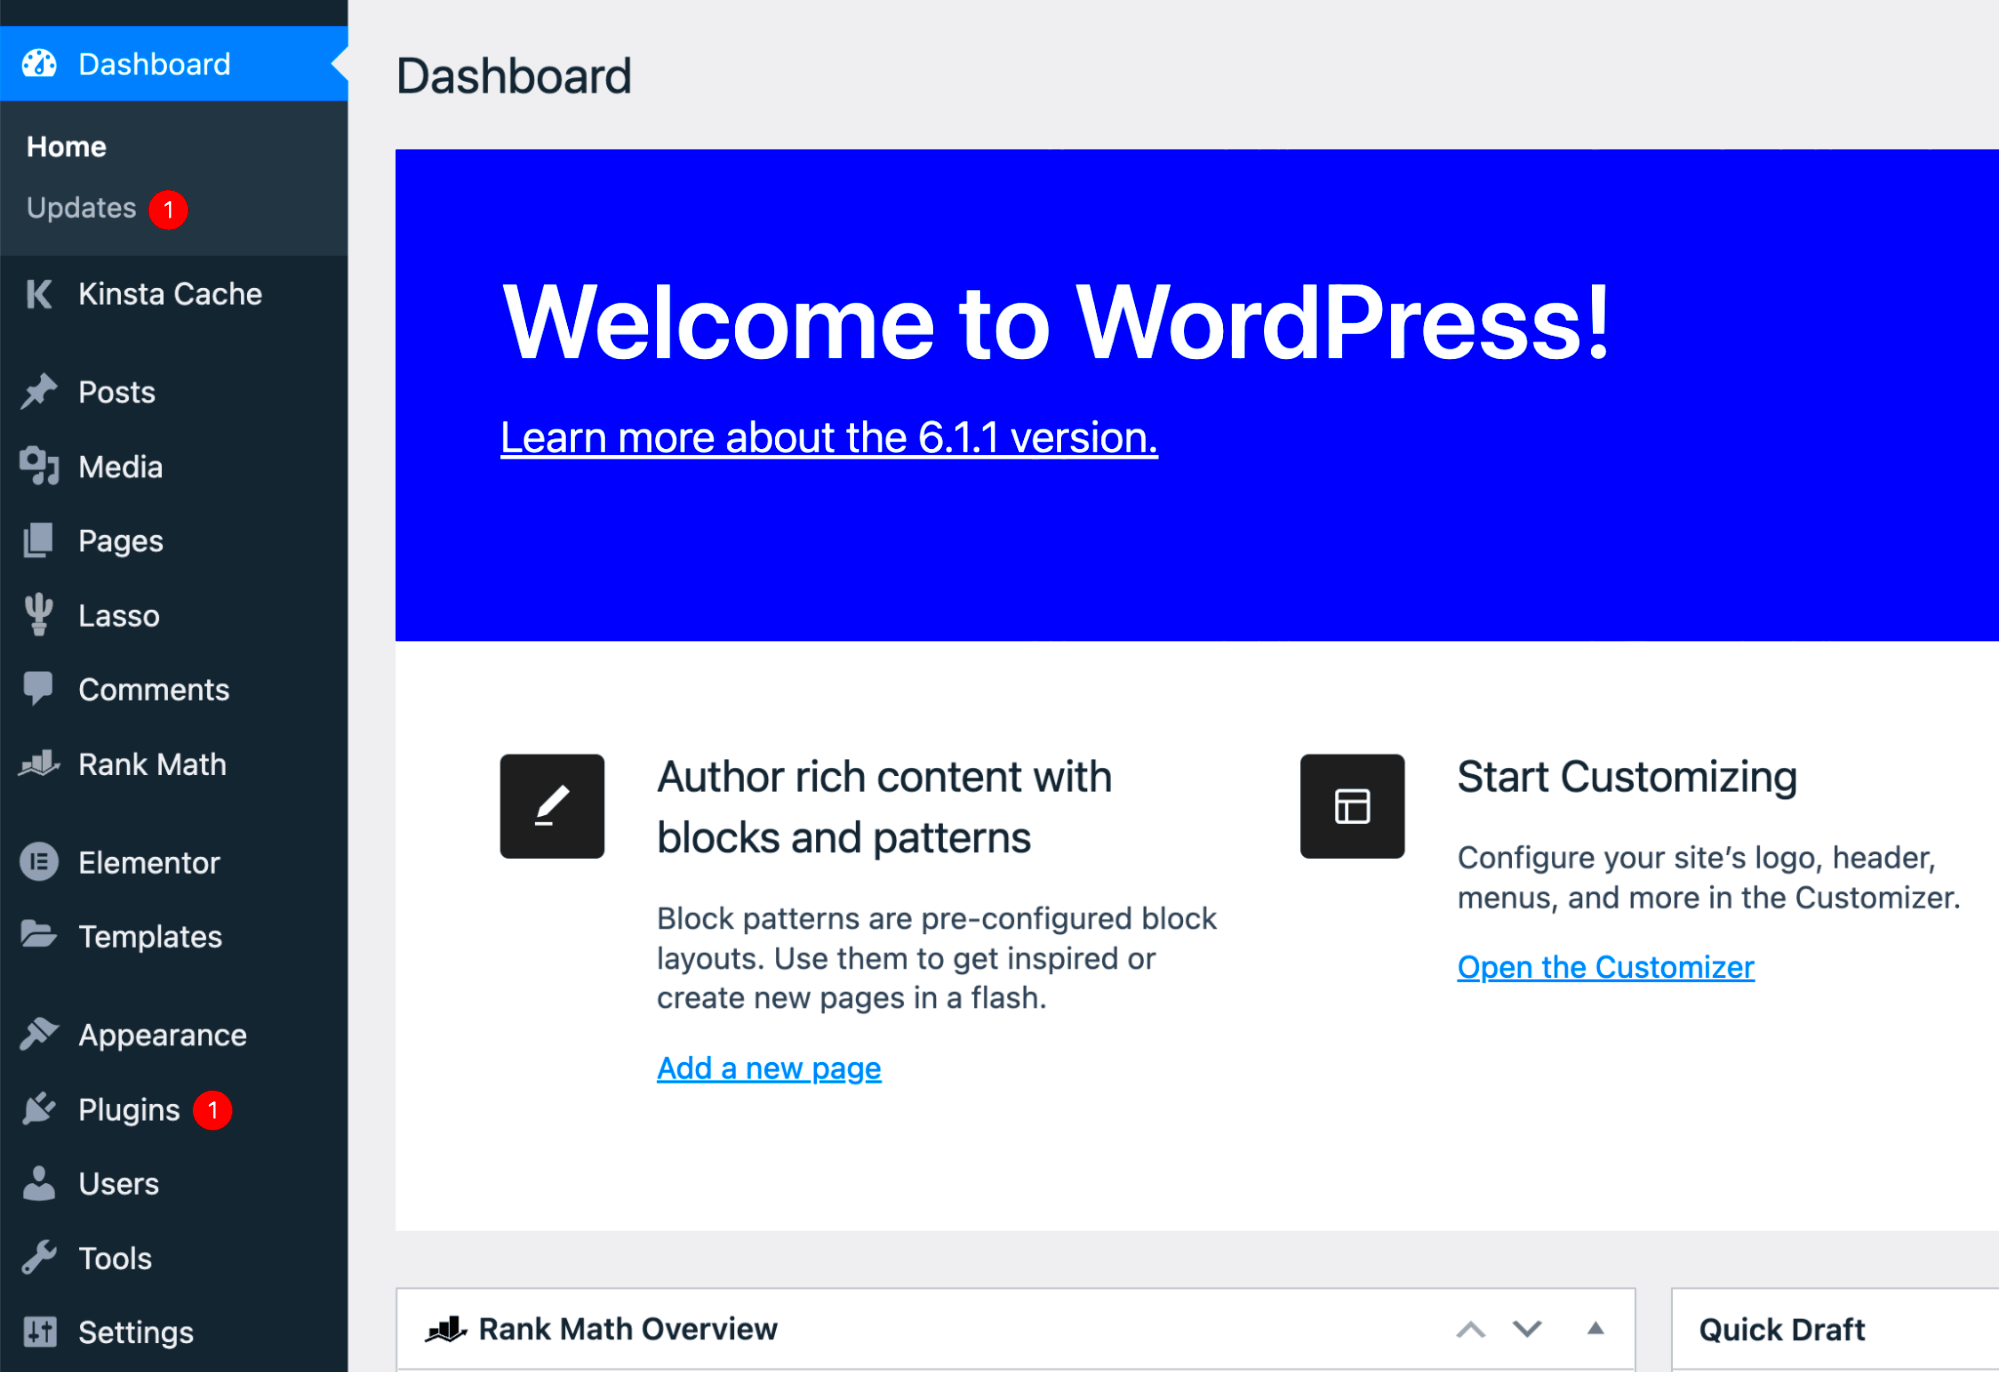
Welcome to the WordPress Dashboard – your command center! Once logged in, you’ll find a clean, user-friendly interface that gives you all the tools you need to manage your site. Let’s take a quick tour!
The dashboard is divided into several sections:
- Home: This is your welcome page with news, updates, and useful tips from WordPress.
- Posts: Here, you can create, edit, and manage blog posts. You’ll also find categories and tags to help organize your content.
- Media: Upload images, videos, or documents. You can easily edit and manage your media library from here.
- Pages: Similar to posts but meant for static content like ‘About Us’ or ‘Contact’ pages.
- Appearance: Customize the look of your site! You can choose a theme, manage widgets, and modify your menus here.
- Plugins: Expand your site’s functionality by adding plugins – tools that can perform a range of additional tasks.
- Users: Manage user profiles and permissions. You can add users and determine what they can do on your site.
- Settings: Here, configure your site’s general settings, writing preferences, reading settings, and even discussions.
As you navigate the dashboard, don’t hesitate to explore! You’ll find numerous customization options and features that can help you tailor your site to your needs. Plus, you can always return to the dashboard by clicking ‘Dashboard’ in the top left corner.
In no time, you’ll be a WordPress pro, ready to create stunning content for your audience!
Choosing and Customizing Your Theme
When you embark on the journey of building a website with WordPress, choosing the right theme is crucial. Your theme is essentially the face of your website; it dictates how everything looks and feels. Thankfully, WordPress offers a vast library of themes, giving you plenty of options to select from. But here’s the twist: not all themes are created equal! Some may focus more on aesthetics while others prioritize functionality. Here’s what to consider when picking a theme:
- Purpose: What’s the primary goal of your website? Are you creating a blog, an online store, or a portfolio? Choose a theme that aligns with your purpose.
- Customization: Ensure the theme is customizable so that you can tweak colors, fonts, and layouts to match your brand’s identity.
- Responsive Design: With mobile traffic on the rise, your theme should be responsive, making your site look great on any device.
- SEO-Friendly: Look for themes that are optimized for search engines to give your website a head start in ranking.
- Support and Updates: Choose themes that receive regular updates and have robust support from developers.
Once you’ve chosen your theme, it’s time to customize it. Here are some steps you can take:
- Navigate to Appearance > Themes in your WordPress dashboard.
- Select your theme and click on Customize to open the WordPress Customizer.
- Change the site identity, colors, menus, widgets, and more within the customization options.
Finally, remember that consistency is key in branding. Make sure your theme reflects your website’s purpose and keeps your audience engaged!
Essential Plugins for Your WordPress Site
If themes are the exterior of your WordPress site, plugins are the powerful engines that drive functionality. With thousands of plugins available, you can tailor your site to meet your specific needs. But with this freedom comes the dilemma of choosing the right ones. Here are some essential plugins that every WordPress site should consider:
| Plugin Name | Functionality |
|---|---|
| Yoast SEO | Improves your site’s SEO and helps you optimize content. |
| Wordfence Security | Provides robust security features to protect your site from threats. |
| WooCommerce | Transforms your site into an online store for selling products. |
| Contact Form 7 | Creates customizable forms for user inquiries or feedback. |
| Elementor | A drag-and-drop page builder for easier design customization. |
It’s essential to only install the plugins that are necessary for your website. Too many plugins can slow down your site, cause conflicts, or even lead to security issues. When you finally select your plugins, installation is a breeze:
- Go to the Plugins section in your WordPress dashboard.
- Click on Add New and search for the plugin you want.
- Install and activate the plugin to start using it right away!
Remember, plugins can significantly enhance the user experience and functionality of your WordPress site. So, it pays to choose wisely!
9. Creating Your First Pages and Posts
Now that you have WordPress up and running, it’s time to dive into creating your very first pages and posts. This is where you’ll bring your content to life and make your website truly shine. Let’s break it down step by step.
Pages vs. Posts: Before we begin, it’s important to understand the difference between the two. Pages are static content that usually doesn’t change, like your “About” or “Contact” page. On the other hand, posts are more dynamic and often updated, suitable for blogs or news articles.
Creating a Page:
- Log in to your WordPress dashboard.
- Click on “Pages” in the left menu and then select “Add New.”
- You’ll see an editor window. Here, you can enter a title and start typing your content.
- You can also add images, videos, or other media by clicking on the “Add Media” button.
- Once you’re satisfied, click “Publish” to make the page live.
Creating a Post:
- From your dashboard, click “Posts” and then select “Add New.”
- Just like with pages, you’ll find an editor where you can enter your title and content.
- Make sure to use categories and tags to help organize your posts effectively.
- When you’re done, hit “Publish” to share it with the world!
And there you have it! You’re now ready to start populating your website with engaging content that resonates with your audience.
10. Configuring Your Site Settings
Once your pages and posts are up and running, it’s crucial to configure your site settings to ensure a smooth user experience and optimal performance. Let’s explore the essential configurations you’ll want to consider.
General Settings: This section sets the foundation for your site. Here’s what you can adjust:
- Site Title: This is the name of your website, and it should be descriptive yet catchy.
- Tagline: A brief statement about your site’s purpose.
- Timezone: Set your local timezone for accurate timestamps.
- Admin Email Address: Ensure this is correct so you can receive important notifications.
Reading Settings: In this section, you can customize how your content is displayed:
- Homepage Displays: Choose whether to show a static page or your latest posts.
- Blog Pages Show at Most: Define how many posts display on your blog page.
Permalinks: One often overlooked, but critical setting. Adjust your permalink structure to make URLs SEO-friendly. A popular choice is the “Post name” option, which keeps URLs short and descriptive.
After you’ve fine-tuned these settings, don’t forget to hit “Save Changes.” And just like that, your website is on its way to being a well-oiled machine!
Understanding SEO Basics for WordPress
When diving into the world of WordPress, one can’t overlook the importance of Search Engine Optimization (SEO). Simply put, SEO is about making your website more visible on search engines like Google, helping you attract the right audience. Let’s break down some key SEO concepts specifically for WordPress users.
- Keywords: These are the terms or phrases your potential visitors are searching for. It’s crucial to conduct keyword research to discover what your audience is looking for.
- Content Quality: Search engines prioritize high-quality, relevant content. Make sure your blog posts, pages, and products provide valuable information that keeps users engaged.
- Meta Tags: These include title tags and meta descriptions that summarize your content. They’re what often show up in search results, so make them captivating!
- Permalinks: Ensure your URL structures are clean and descriptive. A good permalink could look like this:
www.yourwebsite.com/your-keyword-rich-title. - Responsive Design: Google favors sites that are mobile-friendly. WordPress themes often come with responsive designs, but it’s good to double-check.
- Plugins: Utilize SEO plugins like Yoast SEO or All in One SEO Pack. These tools offer guidance on optimizing your content, making the process much easier.
Incorporating these SEO basics into your WordPress site won’t make you an overnight sensation, but they will set you on the right path! Remember, SEO is a marathon, not a sprint. Regularly updating your content and keeping up with SEO trends is part of maintaining your website’s visibility.
Launching Your Website
You’ve put in the hard work—crafted valuable content, optimized for SEO, and designed your website. Now, it’s time for the moment you’ve been waiting for: launching your website. Here’s a step-by-step guide to ensure everything goes smoothly!
- Final Checks: Before hitting that publish button, perform a thorough review. Check for broken links, grammatical errors, and ensure all images load correctly.
- SEO Settings: Revisit those SEO plugins and make sure everything is correctly set up. Don’t forget to submit your sitemap to search engines like Google.
- Social Media Integration: Connect your website to social media platforms. It’s a powerful way to promote your content right from the start!
- Test on Different Devices: Launching your site is exciting, but make sure you test it on various devices to ensure compatibility and a great user experience.
- Soft Launching: Consider doing a soft launch by sharing it with family and friends before the full public launch. Gather feedback and make any necessary adjustments.
- Promote: Once you’re ready, announce your launch across social media, email newsletters, and other marketing channels to draw traffic to your site.
And there you go! Launching your website is a significant milestone and should be celebrated. Cheers to your new online adventure! Just remember, the process doesn’t end here; regularly updating and engaging with your audience is key to long-term success.
Maintaining Your WordPress Site
Maintaining your WordPress site is crucial for ensuring its long-term success and functionality. Just like a well-tended garden, your website needs regular care to thrive. Here are some essential maintenance tasks that you should incorporate into your routine:
- Regular Backups: Data loss can occur due to various reasons like server crashes or cyber-attacks. Use plugins like UpdraftPlus or BackupBuddy to automatically back up your site. Schedule these backups frequently for peace of mind.
- Update Everything: Keeping your WordPress core, themes, and plugins up to date is vital. Not only do updates provide new features, but they also enhance security and fix bugs. Look for the notifications in your admin dashboard and update promptly.
- Optimize for Speed: A slow website can deter visitors. Utilize caching plugins like W3 Total Cache and optimize images with tools like Smush. Regularly check your site’s speed using tools like Google PageSpeed Insights.
- Manage Comments: If you allow comments, make sure to moderate them. Keeping an eye on spam and inappropriate comments maintains a positive user experience.
- Review User Permissions: If multiple users have access to your site, periodically review their permissions. Remove access for anyone who no longer needs it to enhance security.
- Check SEO Settings: Make sure your SEO settings are up to par. Use plugins like Yoast SEO to optimize your content and ensure it’s search engine-friendly.
By diligently performing these tasks, you’ll maintain a healthy and robust WordPress site that can withstand the test of time.
Conclusion and Next Steps
Congratulations on reaching the end of this beginner’s guide to building a website with WordPress! You’ve learned the basics of setting up your site, customizing it, and maintaining it. But this is just the beginning of your journey. Here’s how you can propel yourself forward:
- Experiment and Explore: Don’t be afraid to try out different themes and plugins. The WordPress ecosystem is vast, and experimentation can lead to exciting discoveries tailored to your needs.
- Join the Community: Engage with the WordPress community through forums, Facebook groups, or local meetups. You’ll find a wealth of knowledge and support among fellow users.
- Continuously Learn: Websites and digital trends are always evolving. Consider enrolling in online courses, following blogs, or watching tutorials to keep your skills sharp.
- Consider a Professional Audit: If your website begins to grow, consider hiring a professional to audit its performance and security. They’ll provide insights that you might overlook.
- Set Goals: Decide what you want to achieve with your website. Whether it’s starting a blog, selling products, or showcasing your portfolio, having clear goals will keep you motivated.
As you take the next steps, remember that patience and persistence are key. Building a successful website is a marathon, not a sprint. Good luck, and enjoy the process!


