Adding a music streaming widget to your WordPress site can enhance the user experience by allowing visitors to listen to music directly from your website. Whether you’re a musician, podcaster, or simply a fan of sharing music, a streaming widget provides a convenient way to feature audio content. These widgets allow you to integrate your favorite music service into your site, offering seamless playback and a professional touch.
Why Add a Music Streaming Widget to Your WordPress Site

Adding a music streaming widget to your WordPress site brings numerous benefits. Here are some of the key reasons:
- Engagement: Music streaming encourages visitors to spend more time on your site, which increases engagement and repeat visits.
- Easy Integration: Many music services offer plugins or widgets that are simple to integrate into your WordPress site with minimal effort.
- Share Your Music: Whether you’re a musician or podcaster, embedding music helps you share your content with a wider audience without the need for them to leave your site.
- Monetization: Some music streaming services allow you to monetize content, providing an opportunity to generate revenue through ads, subscriptions, or pay-per-play.
Overall, a music streaming widget is a powerful tool to enhance your website’s appeal, increase user interaction, and share your musical content seamlessly.
Choosing the Right Music Streaming Service for Your Website
When selecting a music streaming service for your WordPress site, it’s important to consider various factors to ensure compatibility and meet your goals. Here’s what you need to look for:
- Compatibility: Choose a service that easily integrates with WordPress. Look for plugins or widgets that are designed to work smoothly with the platform.
- Music Library: If you’re a musician, ensure the service supports uploading your tracks, or if you’re sharing existing music, check that it has the content you want.
- Customization Options: Pick a service that offers customization options like color schemes, sizes, and the ability to add album artwork to make the widget fit your site’s theme.
- Performance and Load Speed: Music streaming can impact your site’s load time. Ensure the service is reliable and won’t slow down your site.
- Monetization Features: If generating income is a priority, choose a service that offers monetization options like ads or subscription models.
Some popular music streaming services to consider include:
| Service | Features |
|---|---|
| Spotify | Easy integration, large music library, free and premium options |
| SoundCloud | Good for independent artists, customization options, embed features |
| Apple Music | High-quality audio, large catalog, subscription-based |
| Bandcamp | Ideal for musicians, supports selling music, customization options |
Take the time to evaluate your needs and select the streaming service that will best suit your website and audience.
Steps to Add a Music Streaming Widget to Your WordPress Site
Adding a music streaming widget to your WordPress site is a simple process that can be done in just a few steps. Here’s how you can do it:
- Choose Your Music Streaming Service: First, pick the music streaming service you want to use (Spotify, SoundCloud, YouTube, etc.). Make sure it supports embedding widgets for WordPress.
- Install the Plugin: Many music streaming services offer dedicated plugins for WordPress. You can find them in the WordPress plugin directory. Simply go to your WordPress dashboard, click on “Plugins,” then “Add New,” and search for the streaming service plugin. Click “Install” and “Activate.”
- Configure the Plugin: Once the plugin is installed, go to its settings page. You’ll typically need to log in with your account (e.g., Spotify or SoundCloud) to connect your profile and music library.
- Add the Widget to Your Site: After configuring the plugin, navigate to the page or post where you want to add the widget. You’ll usually find an option to insert the widget via a shortcode or a dedicated block. Paste the widget code where you want it to appear on your site.
- Save and Preview: Save your changes and preview the page. Make sure the music widget displays correctly and plays the content as expected.
By following these steps, you’ll have a fully functional music streaming widget on your WordPress site, ready for your visitors to enjoy!
Customizing the Music Widget for Better User Experience
Customizing your music streaming widget can make a huge difference in how your visitors experience your site. It’s important to tailor the widget to fit your website’s style and ensure it’s easy to use. Here’s how to customize your widget:
- Choose the Right Size: Ensure the widget is the right size for your site’s layout. You don’t want it to take up too much space or be too small to notice. Most music widgets come with adjustable width and height settings.
- Use Custom Colors: Match the widget’s colors to your website’s design. Many widgets allow you to change the background and button colors to create a seamless look.
- Add Album Artwork: If your widget supports it, add album artwork or artist images. This can make the widget more visually appealing and help visitors recognize the music they’re listening to.
- Enable Autoplay and Loop: Some widgets allow you to enable autoplay (music starts as soon as the page loads) or loop (music plays continuously). This is especially useful for creating a more immersive experience.
- Hide Unnecessary Features: Some music widgets come with extra features (like share buttons or tracklists). If these aren’t necessary for your site, hide them to keep the interface clean and simple.
By customizing the widget, you can ensure that it fits well with your website’s overall aesthetic while providing a user-friendly experience for your visitors.
Ensuring Compatibility with Your WordPress Theme
Before adding a music streaming widget to your WordPress site, it’s important to ensure that it’s compatible with your theme. If there are compatibility issues, it could affect the widget’s appearance or performance. Here’s how to ensure smooth integration:
- Check the Theme’s Layout: Make sure your theme has a flexible layout that can accommodate external widgets. Some themes have specific spaces for media players, while others might need customization.
- Test the Widget in Different Browsers: Test how the widget looks in multiple browsers (Chrome, Firefox, Safari, etc.) and on mobile devices to ensure it displays correctly. Some themes or widgets may have issues with certain browsers.
- Ensure Responsiveness: Your music widget should adapt well to different screen sizes. Make sure it’s responsive, so it works on desktops, tablets, and smartphones. Most modern WordPress themes are responsive, but it’s always good to check.
- Use a Theme-Compatible Plugin: Some plugins are specifically designed to work with certain themes. Check the plugin documentation to see if there are any known issues with your theme or if additional configuration is needed.
- Contact Theme Support: If you run into any issues, reach out to your theme’s support team. They may offer advice or updates to improve compatibility with third-party plugins like music streaming widgets.
By following these tips, you can avoid common compatibility issues and ensure that your music streaming widget works perfectly with your WordPress theme.
Optimizing Performance with Music Streaming Widgets
While music streaming widgets can enhance the user experience on your WordPress site, it’s important to ensure that they don’t slow down your website’s performance. A slow site can negatively affect user engagement and SEO rankings. Here are some tips to optimize your music widget’s performance:
- Use Lightweight Widgets: Choose a music widget that is lightweight and doesn’t require excessive resources. Avoid widgets with too many features that could impact page load speed.
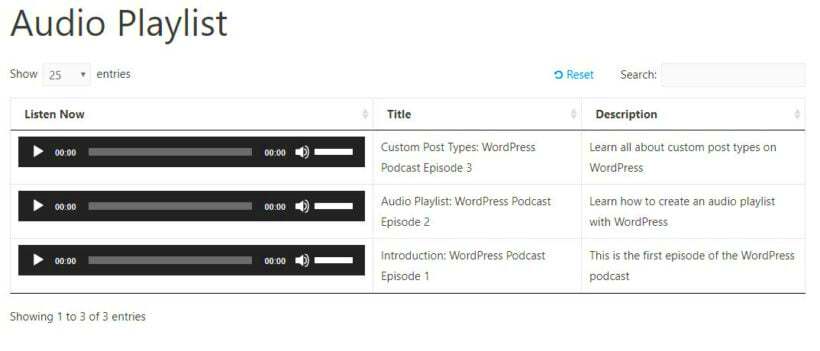
- Limit the Number of Widgets: Avoid using multiple music widgets on a single page, as they can slow down loading times. If you need multiple audio streams, consider using a single widget that can play multiple tracks.
- Enable Lazy Loading: Lazy loading is a technique where content is loaded only when it’s needed. For widgets, this means the audio player will only load when the user scrolls to it. This helps improve the initial page load speed.
- Optimize Your Media Files: If you’re hosting music files yourself, make sure they are optimized for the web. Use compressed audio files like MP3 with low bitrates to keep file sizes small without compromising sound quality too much.
- Minimize Third-Party Requests: Some widgets rely on third-party servers to load audio content. Be mindful of the number of requests your widget makes to external servers, as this can impact page load speed.
By optimizing your music streaming widget, you’ll provide a better user experience without compromising your site’s performance. A faster website leads to higher user satisfaction and improved SEO.
FAQ
Here are some frequently asked questions about adding music streaming widgets to your WordPress site:
- Q: Can I use music streaming widgets with any WordPress theme?
A: Yes, most modern WordPress themes are compatible with music streaming widgets. However, it’s important to check for any specific compatibility issues, especially with custom themes. - Q: Do I need a paid account to add a music widget to my WordPress site?
A: It depends on the service. Platforms like Spotify and SoundCloud offer free options, but for advanced features, higher-quality streams, or monetization, you might need a premium account. - Q: Will adding a music streaming widget slow down my site?
A: Adding too many widgets or large audio files can slow down your site. It’s important to choose lightweight widgets, optimize your media files, and use techniques like lazy loading to maintain site speed. - Q: Can I customize the design of my music widget?
A: Yes, most music streaming services allow you to customize the widget’s appearance to match your site’s theme, including adjusting the size, colors, and layout. - Q: How do I add multiple tracks to a music widget?
A: Many services offer the ability to create playlists or albums that can be embedded as a widget, allowing you to showcase multiple tracks within a single player.
Conclusion
Adding a music streaming widget to your WordPress site is a fantastic way to engage visitors, share your music, and enhance the overall user experience. By carefully selecting the right streaming service, customizing the widget to suit your site’s style, and ensuring compatibility with your theme, you can create a seamless integration that adds value to your site. Additionally, optimizing the performance of your widget ensures that your website remains fast and user-friendly, even with music content. With these tips in mind, you’re ready to enhance your WordPress site with a music streaming widget that your visitors will love!


