In the ever-evolving world of web design, incorporating audio elements can significantly enhance your site’s user engagement. Elementor, a popular WordPress page builder, makes it super easy to add audio players to your site, allowing you to share music, podcasts, or any audio content with just a few clicks. In this post, we’ll explore how to seamlessly integrate and customize audio players in Elementor, elevating the overall visitor experience.
Why Use an Audio Player on Your Website?
Adding an audio player to your website can offer numerous benefits. Here are some reasons why you should consider it:
- Engagement: Audio can capture your audience’s attention more effectively than text or images alone. It adds an auditory element that can help keep users on your site longer.
- Multimedia Experience: By providing audio content, you create a rich multimedia experience that caters to different learning styles and preferences.
- Brand Voice: Using an audio player allows you to share your unique voice, whether through background music that complements your content or spoken word that conveys your look and feel.
- Versatile Content Delivery: Whether it’s music, a podcast, or audio instructions, audio players let you deliver your content in a dynamic way that can summarize key info or share stories effectively.
- SEO Benefits: Quality audio content can improve your SEO rankings as it encourages visitors to stay longer and interact more with your site, lowering your bounce rate.
Incorporating an audio player is not just about aesthetics; it’s about enhancing your overall website functionality and connecting deeper with your audience. So, let’s dive into how you can integrate and customize these players in Elementor!
Step 1: Adding an Audio Player to Your Elementor Page
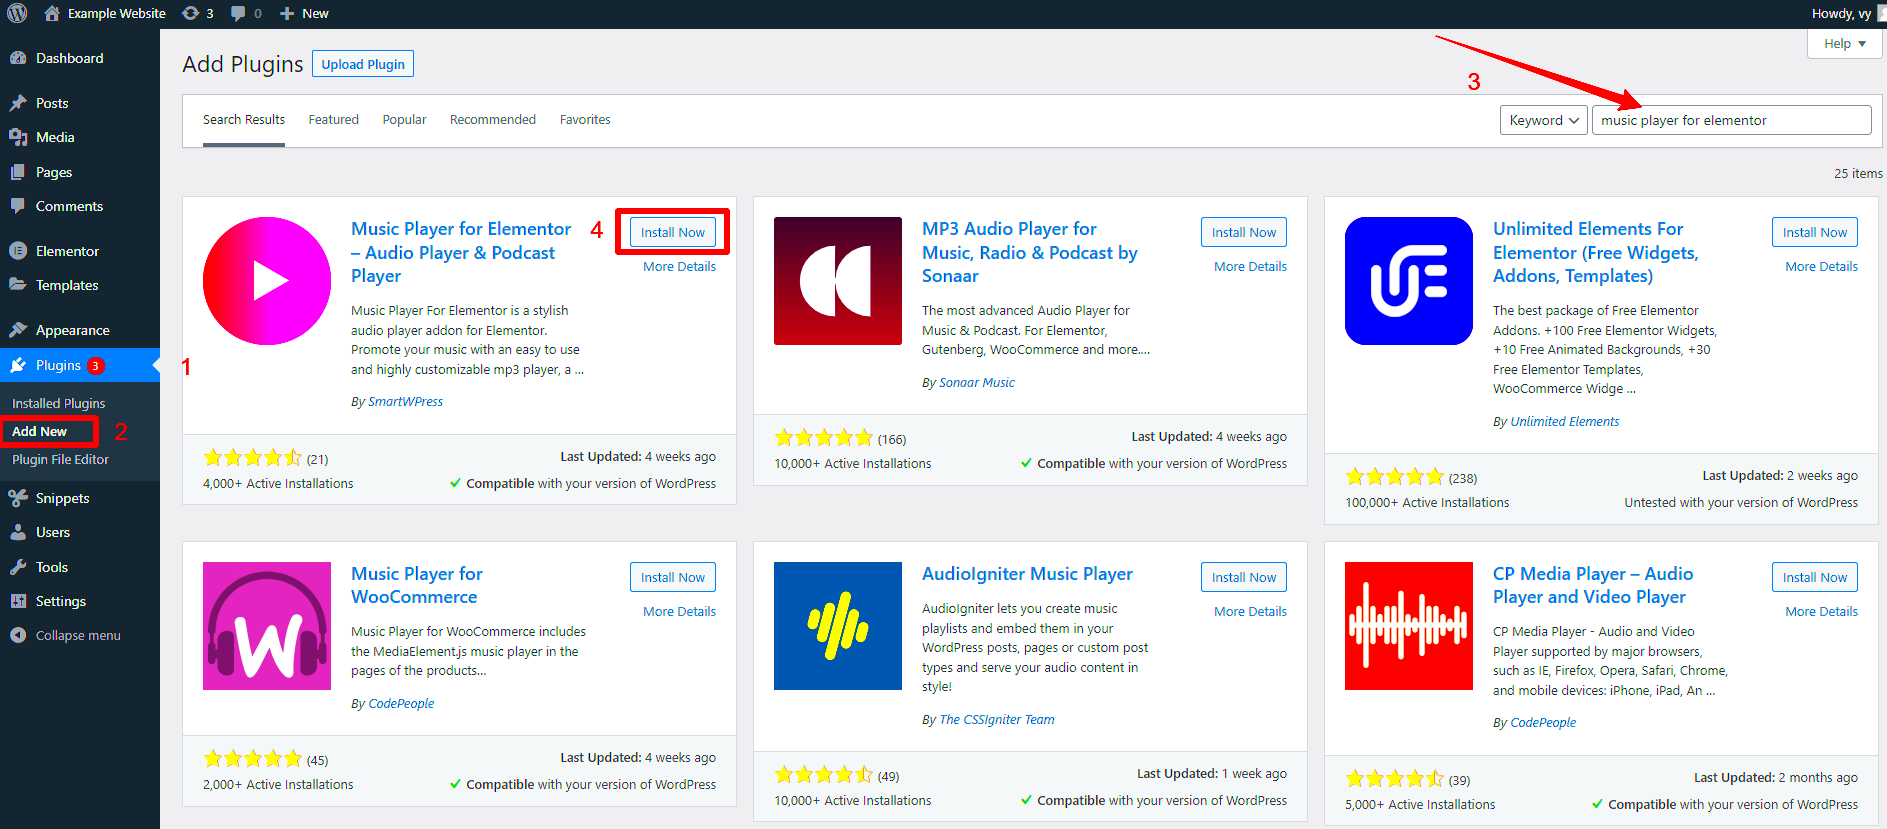
If you’re looking to enrich your website with audio content, adding an audio player to your Elementor page is a breeze. Here’s how to do it step-by-step, ensuring you get that audio playing in no time!
First things first, make sure you have the Elementor plugin installed and activated on your WordPress site. Once you’re in the Elementor editor, follow these steps:
- Drag and Drop the Audio Widget: Locate the “Audio” widget in the Elementor panel. You can find it either by scrolling down the list of widgets or by using the search bar. Once located, simply drag and drop it to where you want it on your page.
- Choose Your Audio Source: After placing the widget, you’ll see a settings panel on the left. Here, you can upload your audio file directly from your computer or select an existing file from your WordPress media library. Support for formats like MP3 and WAV is available, so you have some flexibility!
- Set a Cover Image: If you want to add a personal touch, you can select a cover image that will display alongside the audio player. This could be an album cover, an event poster, or something visually engaging that compliments the audio.
Once you’ve added your audio file and cover image, you can move on to the customization process. But first, let’s ensure the audio player has been added correctly—hit the “Update” button to save your changes!
Step 2: Customizing the Audio Player Settings
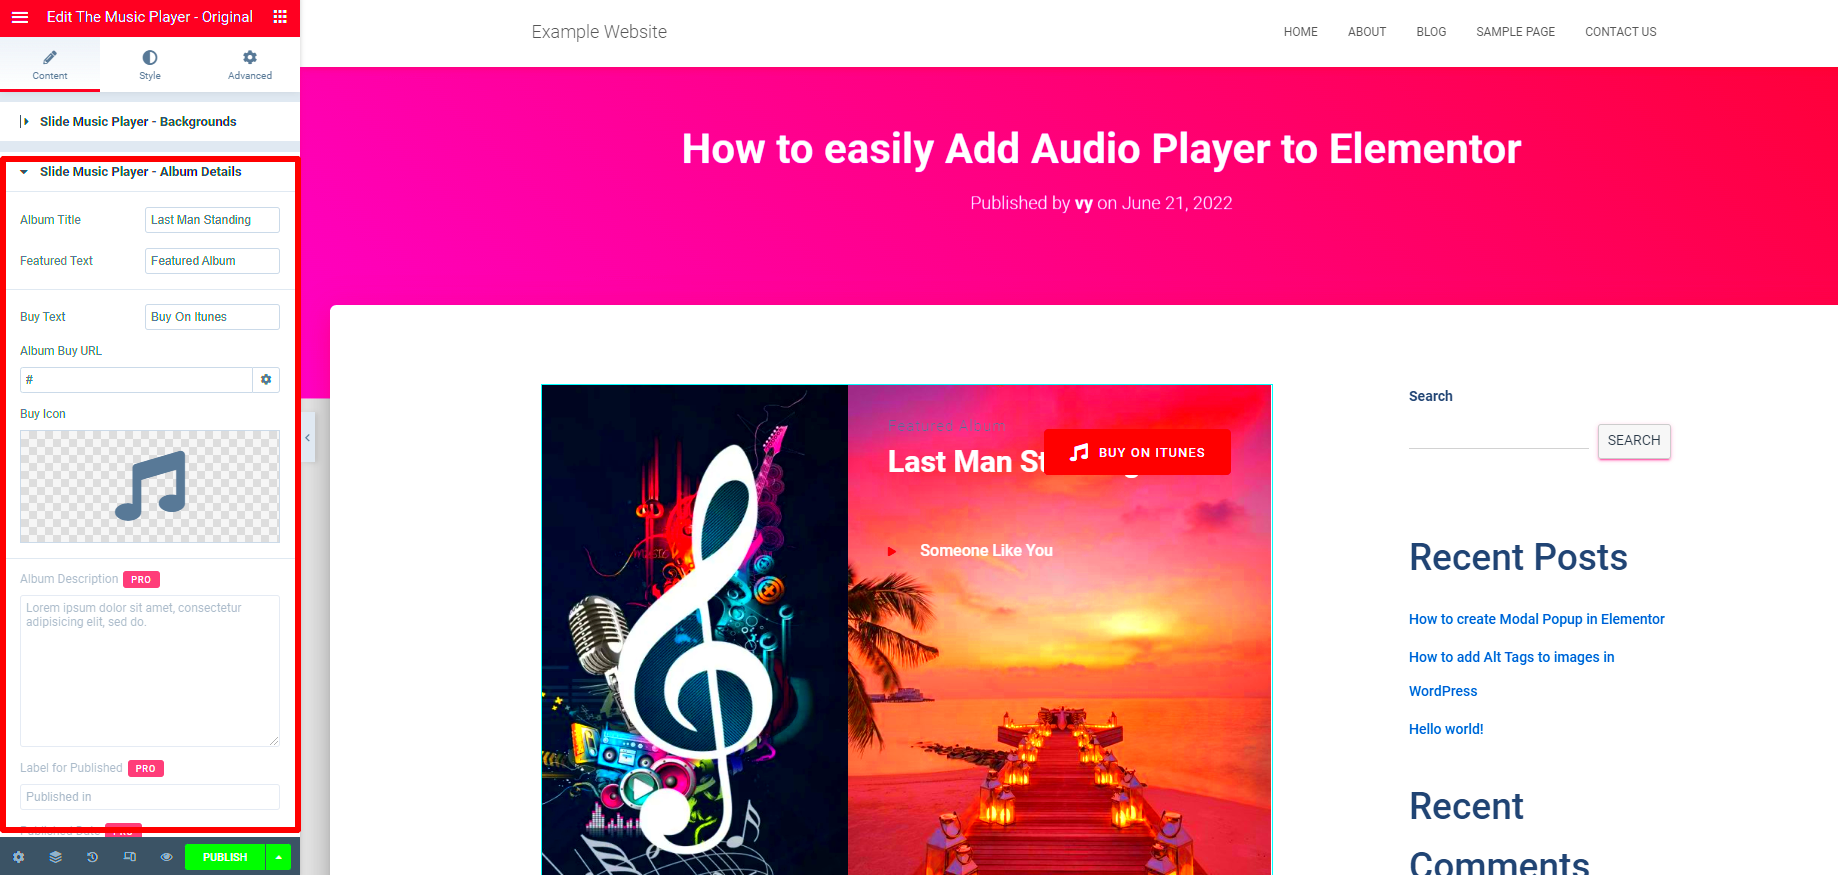
Now that you’ve successfully added your audio player, it’s time to customize it to fit your brand and improve user experience. Customization can make your audio player visually appealing and functional—here’s how to get started!
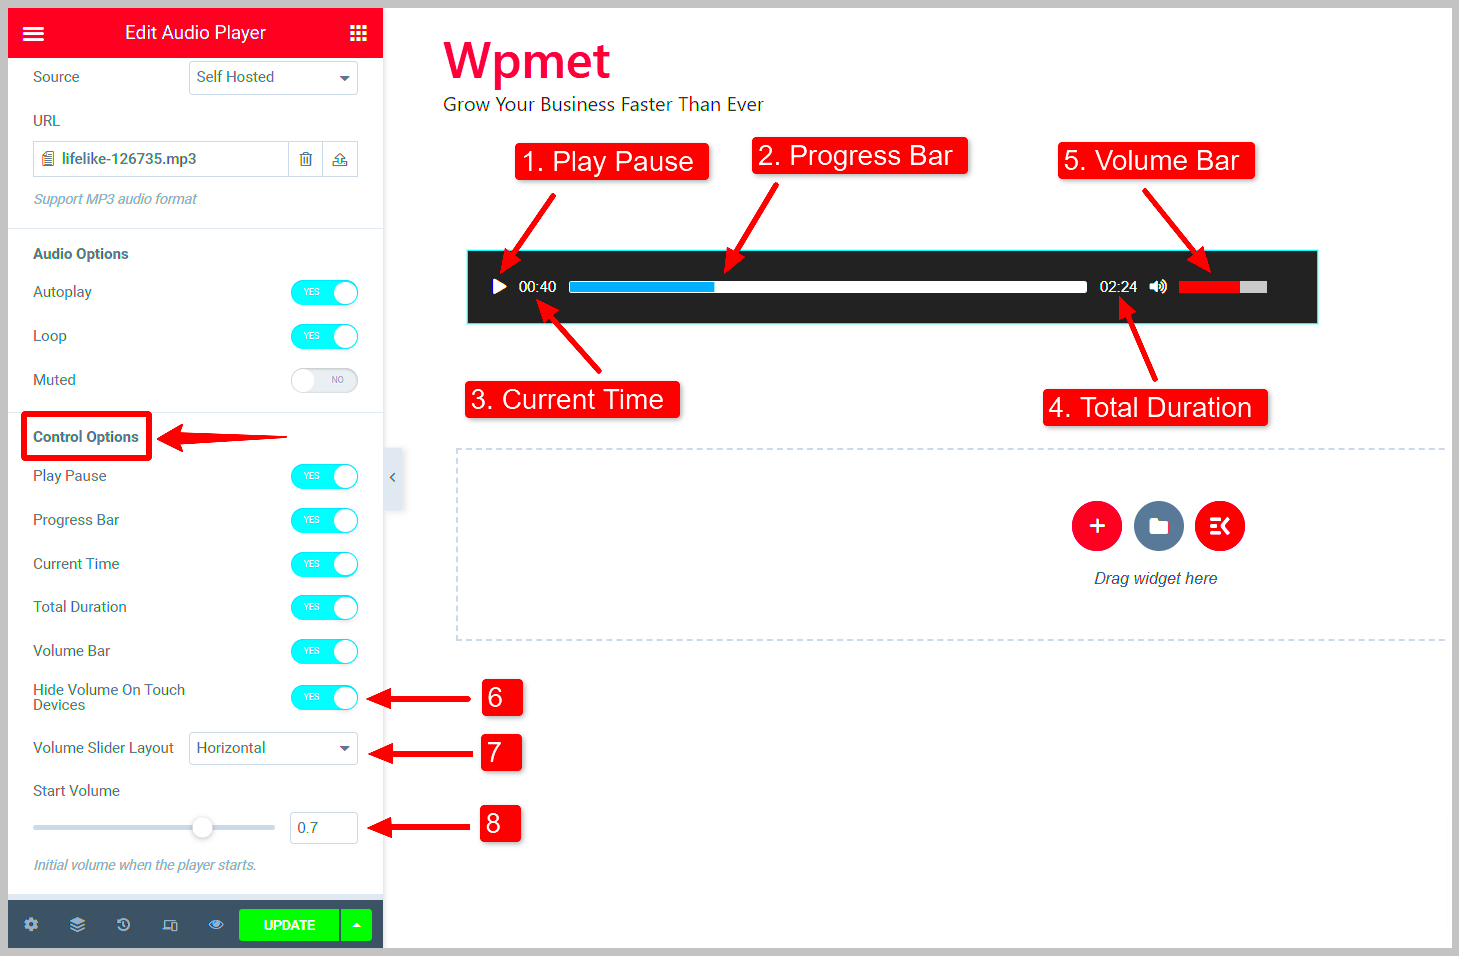
In the Elementor settings panel (where you added the audio file), you will notice various options for customization. Here’s a breakdown:
- Player Style: Choose from different styles for your audio player. You can adjust the overall width, height, and alignment to fit your design. Make sure it matches your site’s theme!
- Playback Options: You may want to customize playback settings such as enabling autoplay or looping the audio. This is especially useful for background music or podcasts that you want to keep playing without user input.
- Volume Control: Some players allow you to show or hide volume controls. This is great if you want to give users control over their listening experience.
- Custom CSS: For those who are more tech-savvy, you might want to add custom CSS to further personalize your player. This allows for advanced customization that can truly make your audio player unique.
After fine-tuning these settings, always remember to preview and test the audio player. Ensure it looks great and functions smoothly. When you’re satisfied, hit “Update” again to save your changes. With these customizations, your audio player will not only serve its purpose but enhance the overall user experience on your site!
Design Options for Your Audio Player
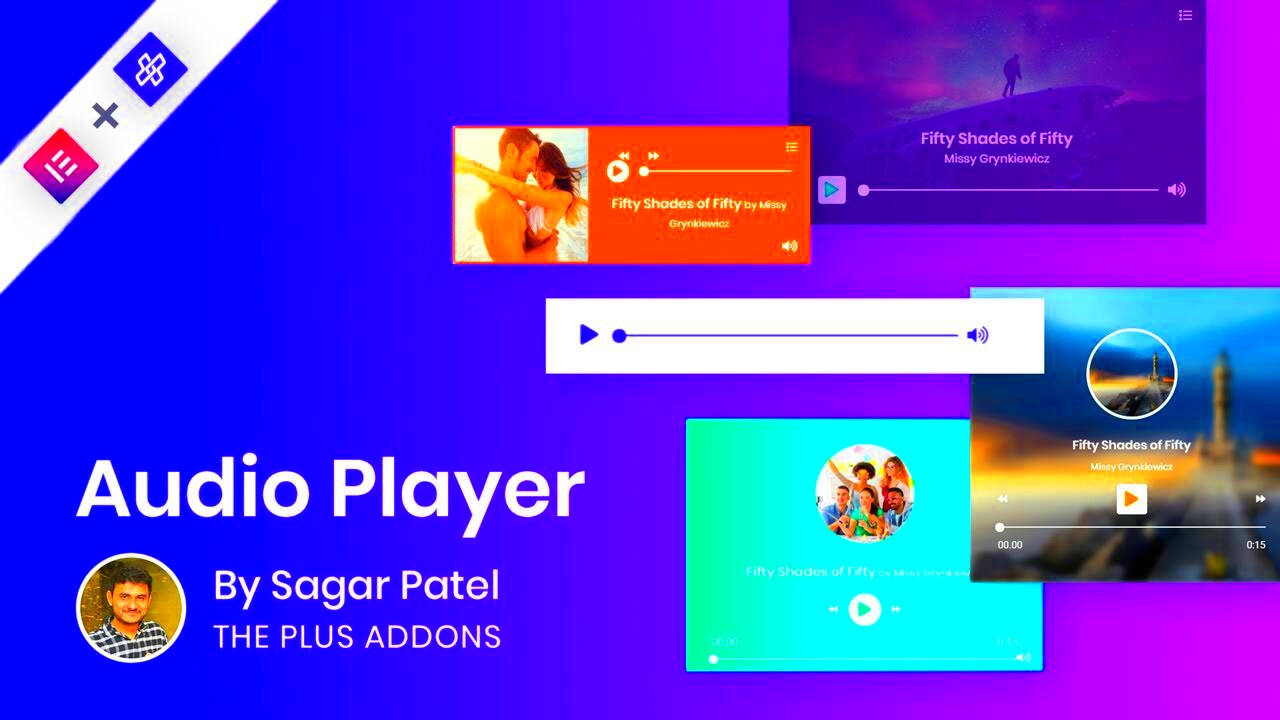
One of the great advantages of using Elementor for adding an audio player to your website is the plethora of design options available. Whether you want a minimalist look or something more vibrant and colorful, Elementor provides endless customization possibilities.
First things first, let’s talk about the layout. You can choose to have the audio player in a simple horizontal format or a more elaborate vertical style. You can also position the player in various locations on your page, whether you prefer it centered or aligned to the left or right side. Here are some design elements you can customize:
- Colors: Change the background and text colors to match your website’s theme.
- Fonts: Opt for distinct font styles for the track title and artist name to give your audio player a personal touch.
- Buttons: Customize the play, pause, and skip buttons’ appearance, allowing you to use different shapes, sizes, and colors.
- Progress Bar: Tailor the progress bar’s look by adjusting its height and color, making it visually appealing.
Moreover, you can even add visual elements like images or icons beside the audio player to make it more interactive. Don’t forget, the key here is to keep accessibility in mind while you customize. Ensure that all users can easily interact with your player and appreciate your audio content. Play around with these options until you find the perfect balance between aesthetics and functionality!
Responsive Design: Ensuring Compatibility Across Devices
In today’s mobile-first world, having a responsive audio player is non-negotiable. Ensuring that your audio player works seamlessly on various devices—like smartphones, tablets, and desktops—can significantly enhance user experience and engagement. Here’s how to make your audio player responsive in Elementor.
One of the first steps is to utilize Elementor’s built-in responsive controls. This allows you to customize the visibility of your audio player based on device type. For instance, you might choose to display larger buttons on mobile devices for easier tapping. Consider these tips for achieving a responsive design:
- Custom Width: Set custom widths for your audio player to ensure it looks good on all screen sizes. You can opt for percentages instead of fixed pixels to maintain flexibility.
- Media Queries: Use CSS media queries to fine-tune your audio player’s look across devices. This way, you can adjust fonts, colors, and layouts according to screen size.
- Test Across Devices: Always test your audio player on real devices and screen sizes. Make sure it’s functional and visually appealing on everything from a smartphone to a large desktop monitor!
By paying attention to responsive design, you’ll not only enhance aesthetics but also boost user satisfaction, leading to increased playtime and interaction with your audio content. Remember, the ultimate goal is to offer a seamless listening experience—regardless of the device your visitors are using!
Integrating Audio Players with Other Elementor Widgets
Integrating audio players with other Elementor widgets can amplify your website’s interactivity and user engagement. Whether you’re running a podcast, sharing music, or simply want to add an audio flair to your content, combining multiple elements can create a seamless and enriching experience for your audience.
Here’s how you can effectively integrate audio players with other Elementor widgets:
- Using the Text Editor Widget: Pairing an audio player with the Text Editor widget allows you to provide context or commentary about the audio. Consider adding a brief description or a breakdown of the track that plays.
- Image and Audio Player Combo: Want to engage visually as well as audibly? Use the Image widget alongside your audio. This is perfect for album covers, event posters, or product images, adding a visual reference to the sound!
- Button Widget for Downloads: If you’d like your visitors to download your audio files, integrate a Button widget for added convenience. You can link it directly to the audio file download or to a landing page.
- Social Share Buttons: It’s always great to encourage sharing! Integrate social media buttons that let users share the audio clip or the related page, thereby increasing your reach.
By harmoniously blending audio players with other Elementor widgets, you’re not just adding sound; you’re enriching the user’s experience on your site, making it more engaging and informative!
Common Issues and Troubleshooting Tips
When using an audio player in Elementor, you may occasionally run into some bumps in the road. But don’t fret! Most issues can be resolved easily with the right approach. Here are some common problems you might face along with troubleshooting tips:
| Issue | Solution |
|---|---|
| No Sound Playing |
First, check if your audio file is correctly linked. Ensure that it’s in a supported format like MP3 or WAV. Also, make sure that the volume is turned up, both in the player and on your device. |
| Audio Player Not Displaying |
If your audio player doesn’t show up, clear your cache and refresh the page. Sometimes, browser caches can cause display issues. If that doesn’t work, try toggling your Elementor settings or check for plugin conflicts. |
| Audio Player Layout Issues |
Layout problems can often be fixed by adjusting the padding and margin settings in Elementor. Ensure that your audio player is properly aligned within its container. |
If you encounter any other issues, don’t hesitate to consult Elementor’s documentation or forums. The community is a great resource for solutions and tips!
Audio Player in Elementor: How to Add and Customize
Adding audio content to your website can significantly enhance user engagement, making your content more interactive and vibrant. Elementor provides an intuitive way to integrate audio players directly into your web pages, allowing for easy customization and seamless integration. Below, we will discuss how to effectively add and customize an audio player using Elementor.
Steps to Add an Audio Player in Elementor
- Open Elementor Editor: Navigate to the page where you want to add the audio player and click on “Edit with Elementor.”
- Locate the Audio Widget: In the Elementor panel, search for the “Audio” widget and drag it into your desired section.
- Upload Your Audio File: Click on the audio file field to upload your own audio file or select one from the Media Library.
Customizing the Audio Player
Once you have placed the audio player widget on your page, you can customize it in several ways:
- Style Options: Modify colors, typography, and spacing to match your website design.
- Player Height: Adjust the height of the audio player for better visibility.
- Alignment: Set the alignment of the player (left, center, or right) for optimal placement.
Responsive Settings
Don’t forget to check the responsive settings to ensure your audio player looks great on all devices. Elementor allows you to tweak styles specifically for mobile or tablet views.
Accessibility Considerations
Ensure that your audio player is accessible by providing text descriptions or captions for your audio content to ensure inclusivity.
Table of Features
| Feature | Description |
|---|---|
| Custom Upload | Upload audio files directly or select from media library. |
| Styling Options | Change color schemes, fonts, and spacing to match your design. |
| Responsive Design | Ensure audio player is mobile-friendly. |
| Accessibility | Incorporate audio descriptions for inclusivity. |
In conclusion, integrating audio content into your Elementor website can significantly enhance user experience and engagement. By utilizing the audio player widget, you can easily upload and customize your audio, ensuring it aligns seamlessly with your site’s design. Start incorporating audio content today to create a more dynamic and inviting online presence!

