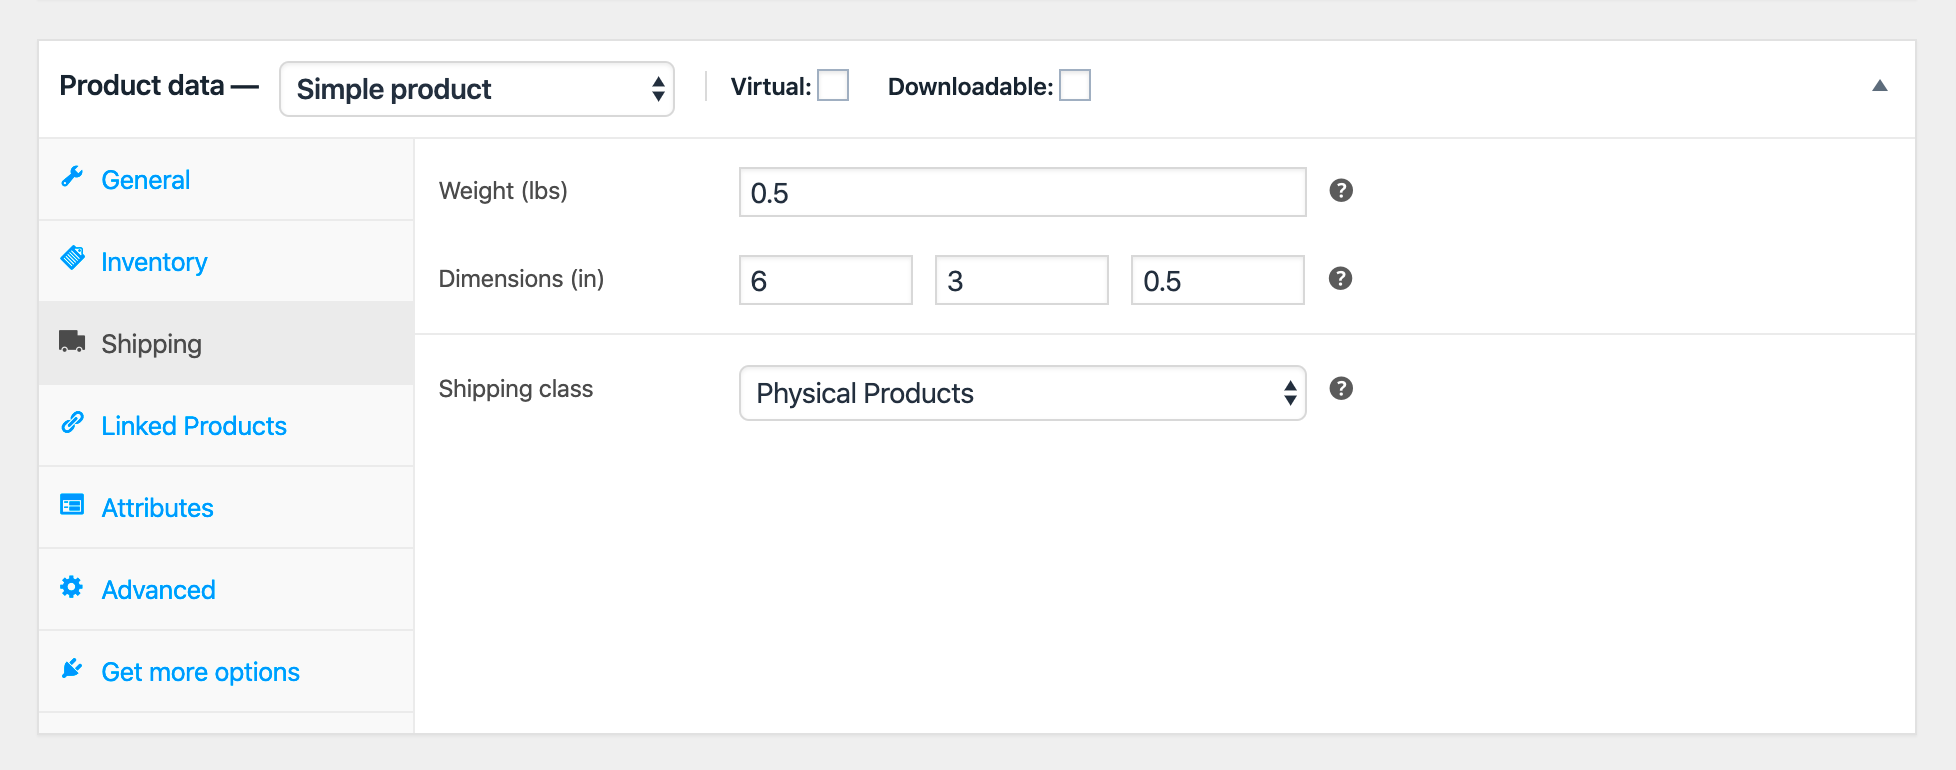
If you run an e-commerce store on WooCommerce, you know that shipping can be a bit tricky. One essential aspect is assigning shipping rates based on dimensions. This not only helps ensure that you’re covering the costs involved, but it also provides a better buying experience for your customers. By calculating shipping costs according to the size and weight of the item, you can avoid unexpected fees and delays in delivery. In this post, we’ll dive into how to manage this feature effectively.
Understanding WooCommerce Shipping Settings
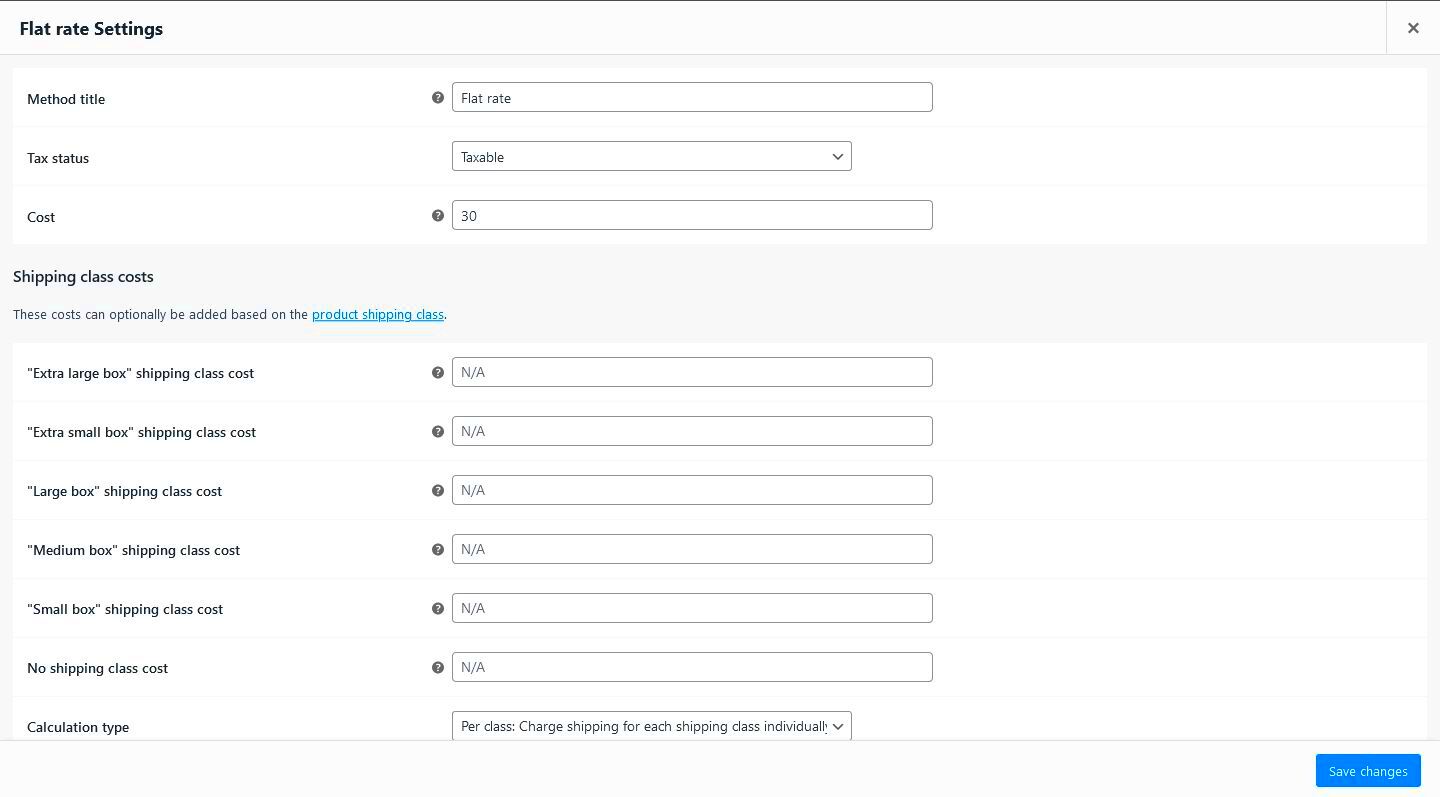
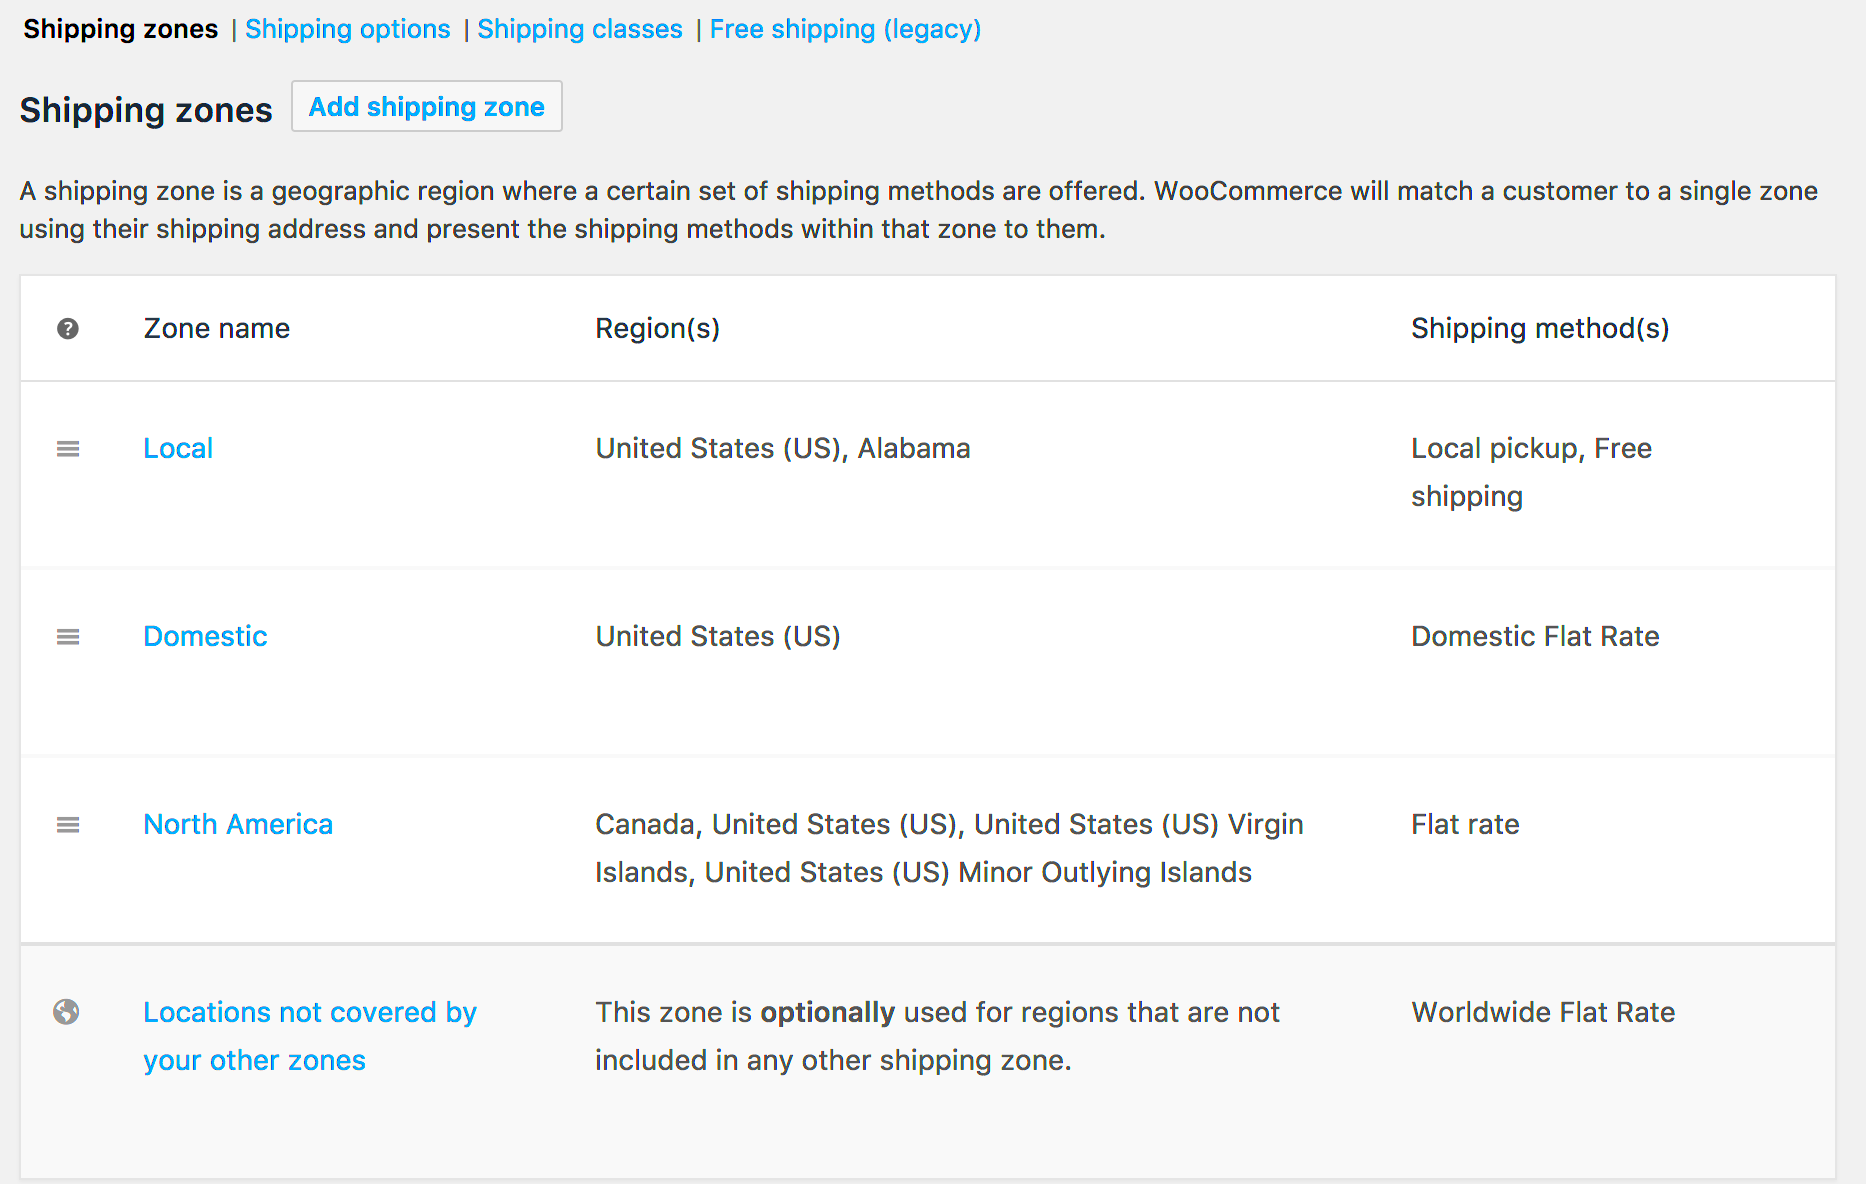
To get started with assigning shipping by dimensions in WooCommerce, it’s crucial to have a solid grasp of the shipping settings available within the platform. Here’s a breakdown of the key components:
- Shipping Zones: Shipping zones allow you to define specific geographic locations where you ship your products. For example, you might have different shipping rates for local, national, and international customers. This helps tailor shipping costs based on distance.
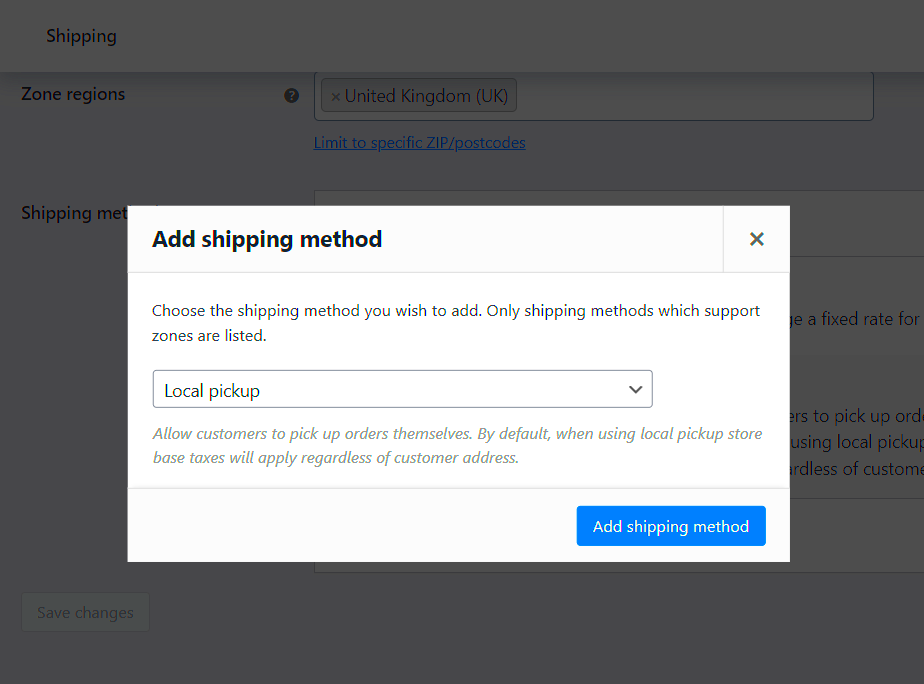
- Shipping Methods: Once you’ve set your zones, the next step is to assign shipping methods. These can include flat rate shipping, free shipping, or local pickup. Each method can be tailored to different shipping zones as well.
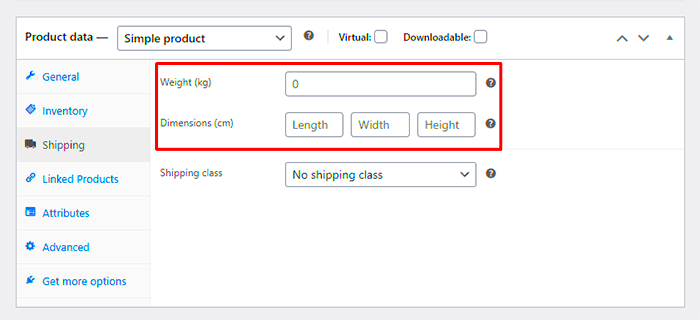
- Dimensions Settings: When you add a product in WooCommerce, you’ll find an option to input its dimensions (length, width, and height). This is where the magic happens! Ensure that you enter accurate measurements so the shipping calculations can be precise.
- Weight Settings: In addition to dimensions, weight is another critical factor for determining shipping costs. Make sure your products have the correct weight values to avoid discrepancies in shipping fees.
After entering your dimension and weight settings, WooCommerce will generate shipping costs based on the combined data, which will be displayed to customers during checkout. Understanding these settings is essential for providing transparent and fair shipping rates.
Why Use Dimension-Based Shipping?
When it comes to running an online store, shipping costs can often be the make-or-break factor for a customer’s purchase decision. So, why should you consider using dimension-based shipping for your WooCommerce store? Let’s dive into a few compelling reasons that may just sway you!
- Accuracy in Shipping Costs: Dimension-based shipping ensures that your shipping calculations are as precise as possible. Instead of relying on weight alone, you can take into consideration the actual size of the packages. This allows you to avoid overcharging customers (and consequently losing sales) or undercharging and cutting into your profits.
- Avoiding Shipping Surprises: Customers hate hidden fees. By providing a shipping rate based on dimensions upfront, you enhance transparency and trust in your brand. When customers see clear, dimension-based rates during the checkout process, they’re more likely to complete their purchase.
- Accommodating Large or Irregular Items: Some products are large, bulky, or oddly shaped. By using dimension-based shipping, you can tailor your shipping rates to reflect the true cost of shipping those items. This is especially useful for furniture, large electronics, or any product that doesn’t conform to standard shipping metrics.
- Improving Customer Experience: By implementing a user-friendly shipping system, you improve the overall shopping experience. When customers can easily identify shipping costs that reflect the size of their orders, it creates satisfaction and encourages repeat visits.
- Enhancing Competitiveness: Many e-commerce businesses have adopted dimension-based shipping. By doing the same, you can compete on a level playing field without losing out on potential customers who might be deterred by inflated or confusing shipping costs.
Step-by-Step Guide to Setting Up Dimension-Based Shipping
Ready to dive into dimension-based shipping in WooCommerce? With a straightforward setup process, you’ll be on your way to accurately calculating shipping costs based on product dimensions in no time. Let’s break it down step-by-step.
- Step 1: Install and Activate the Plugin
First, you’ll need a plugin that supports dimension-based shipping, such as Table Rate Shipping or WooCommerce Advanced Free Shipping. You can find these by navigating to Plugins > Add New in your WordPress dashboard. After installation, make sure to activate the plugin. - Step 2: Configuring the Plugin Settings
Go to the settings for the shipping plugin you’ve just activated. You’ll typically find these settings under WooCommerce > Settings > Shipping. Here you can set up various shipping zones and methods. - Step 3: Adding Product Dimensions
For dimension-based shipping to work, each product needs its dimensions listed. Edit each product by ensuring you fill in the Length, Width, and Height fields. This will enable the plugin to calculate shipping accurately. - Step 4: Setting Up Shipping Rates
In your plugin settings, select the methods you want to use for dimension-based calculations. You can set rules based on size ranges (small, medium, large) and provide corresponding shipping rates for each category. Make sure to save your settings! - Step 5: Testing Your Setup
Lastly, conduct a few test transactions. Add different items to your cart, check that the shipping costs are calculated correctly based on dimensions, and ensure a smooth checkout process. This is key to making any necessary adjustments before going live.
By following these steps, you’ll not only enhance your shipping process but also improve overall customer satisfaction. Happy shipping!
Adding Dimensions to Your Products
When it comes to selling products online, especially in an eCommerce platform like WooCommerce, providing accurate product dimensions is crucial. Not only does it help in calculating shipping costs more accurately, but it also improves the customer experience by giving your buyers the information they need to make informed decisions.
To get started, you’ll need to add dimensions to your products. Here’s how you can do it:
- Access your WooCommerce Dashboard: Log in to your WooCommerce account and navigate to the products section.
- Edit your product: Select the product you want to add dimensions to. If you’re creating a new product, click on the ‘Add New’ button.
- Scroll to the product data section: Here, you will find various tabs. Click on the ‘Shipping’ tab.
- Input the dimensions: You’ll see fields labeled ‘Length’, ‘Width’, and ‘Height’. Fill these fields with the appropriate measurements in your preferred unit (like inches or centimeters).
- Save changes: After you’ve added your dimensions, don’t forget to click on the ‘Update’ or ‘Publish’ button to save your changes.
It’s important to ensure that the dimensions you enter are as accurate as possible, as this will directly influence shipping calculations. If you’re unsure about the dimensions, take the product measurements with a tape measure for the best accuracy. Your customers will appreciate detailed information, and it will minimize the chances of returns due to size-related issues!
Configuring Shipping Classes for Dimension-Based Rates
Once you’ve added dimensions to your products, the next step is to configure shipping classes that will allow you to set specific rates based on these dimensions. This can be particularly useful if you offer a variety of products with varying sizes and weights that affect shipping costs differently.
Here’s a straightforward guide to help you configure shipping classes for dimension-based rates:
- Navigate to WooCommerce Settings: From your dashboard, go to ‘WooCommerce’ and click on ‘Settings’.
- Go to the Shipping tab: Once in settings, find the ‘Shipping’ tab and click on it to view your existing shipping zones and methods.
- Add a Shipping Class: Under ‘Shipping Classes’, you’ll see an option to add a new class. Click on ‘Add shipping class’, and give it a relevant name based on dimensions, such as ‘Small’, ‘Medium’, or ‘Large’.
- Assign Products to Shipping Classes: Go back to your product pages and assign the newly created shipping class to specific products based on their dimensions.
- Set Rates for Each Shipping Class: You can then configure your shipping methods to reflect different rates for each class. For example, larger items may have a higher shipping fee compared to smaller ones.
Using shipping classes effectively allows you to have a more organized approach to handling shipping costs, enhancing customer satisfaction while maximizing your shipping efficiency. Plus, it tackles the challenges that arise when dealing with a diverse product inventory. Don’t forget to test your shipping settings to ensure everything works smoothly before going live!
7. Testing Your Settings: Ensuring Accurate Shipping Charges
Once you’ve configured your WooCommerce settings for dimension-based shipping, it’s essential to test everything to ensure your customers are charged the correct shipping fees. Running a few test transactions can save you from potential headaches down the line. Here’s how to do it:
- Create Test Products: Start by adding a couple of products with different dimensions. Make sure you cover various weight categories and sizes to fully test your settings.
- Set Up a Test User: Create a test user account if you don’t already have one. This helps you simulate the customer experience from start to finish.
- Add Products to Cart: Go through the process of adding your test products to the cart. Pay attention to how the shipping charges appear at checkout.
- Choose Different Shipping Options: If you’ve set up multiple shipping methods (like standard, express, etc.), be sure to select each option. This will help you verify if the correct charges are being applied based on your configured dimensions.
- Review Order Summary: Before completing the purchase, thoroughly review the order summary. Check that the shipping charges align with your expectations based on the product dimensions.
- Place the Order: Finally, complete the order. Don’t forget to check your email for an order confirmation and review the shipping details included in it.
Remember, the goal here is to make it as seamless as possible for your customers. If you find discrepancies during your tests, go back and adjust your settings accordingly.
8. Common Issues and Troubleshooting Tips
Even with a robust system like WooCommerce, you might encounter a few hiccups along the way when assigning shipping by dimensions. Here’s a handy list of common issues you might face and some troubleshooting tips to get you back on track:
| Issue | Possible Solution |
|---|---|
| Shipping Charges Not Showing Correctly | Double-check your dimension settings for each product. Ensure the shipping class is correctly assigned to the product. Also, review your shipping zone settings. |
| Shipping Charges Too High/Low | Revisit your shipping method setup and ensure that the rates are set thinking about the product dimensions and weights accurately. |
| Confusion with Multiple Shipping Options | Clarify your shipping options on the checkout page. Clear descriptions can help customers make informed choices, reducing confusion. |
| Invalid Address Errors | Verify that the address is being validated correctly. Sometimes, caching plugins can interfere with this process, so try disabling them temporarily. |
By knowing these common pitfalls and solutions, you can create a smoother experience for both yourself and your customers. Remember, patience and thoroughness are your best friends in navigating these challenges!
Assigning Shipping by Dimensions in WooCommerce
When managing an online store with WooCommerce, one crucial aspect that can significantly impact your business is the shipping strategy. Assigning shipping by dimensions allows you to provide accurate shipping rates based on the actual size of your products. This ensures that customers receive fair shipping costs and helps prevent unexpected charges that could discourage purchases.
To implement dimensional shipping in WooCommerce, you need to consider several factors:
- Product Size & Weight: Accurately measure your products and input the correct dimensions and weights into your WooCommerce settings.
- Shipping Methods: Choose appropriate shipping carriers that offer dimensional weight pricing, which may vary from traditional weight-based shipping.
- Shipping Classes: Create shipping classes for different product categories or sizes, allowing you to group similar items for more efficient shipping management.
Here’s a simple table summarizing the steps to assign shipping by dimensions:
| Step | Description |
|---|---|
| 1 | Add dimensions to your products in the product data section. |
| 2 | Configure the shipping settings to handle dimensional shipping. |
| 3 | Test the shipping calculations for accuracy before going live. |
By setting up dimensional shipping effectively in WooCommerce, you can enhance your customer experience, reduce cart abandonment, and provide transparent pricing, leading to increased sales and customer satisfaction.
Conclusion: Optimizing your shipping process by considering dimensions not only benefits your business by reducing shipping discrepancies but also ensures a seamless and trustworthy shopping experience for your customers, ultimately driving loyalty and repeat purchases.

