WordPress makes it easy to manage images, videos, and other media on your website. However, sometimes you might need to add extra information or metadata to your media files, such as captions, descriptions, or custom notes. This is where adding text fields to your media attachments comes in handy. By doing so, you can better organize your content, add important details, and even improve SEO. In this post, we’ll walk you through how to add and manage these text fields on your WordPress media attachments, whether you’re using built-in options or plugins.
Why Add Text Fields to Media Attachments

Adding text fields to media attachments can offer several benefits, particularly for organizing and enhancing your media files. Here are a few reasons why you should consider it:
- Improved Organization: By adding custom text fields, you can categorize and tag your media files more effectively. This makes it easier to search and filter media content within WordPress.
- Better SEO: Descriptive text in the media files helps search engines understand the context of images or videos, improving your content’s discoverability online.
- Custom Metadata: If your website requires specific data (like image dimensions, product details, or event dates), custom text fields allow you to store this information alongside the media file.
- Enhanced User Experience: Providing additional information through text fields can improve the visitor’s experience by offering more context about the images or videos they see.
Steps to Add Custom Text Fields to Media Attachments

Adding custom text fields to your media attachments might seem complicated at first, but it’s quite straightforward. You can do it manually or with a plugin. Here’s how:
- Using Custom Fields: WordPress has a built-in feature called “Custom Fields” that you can enable to add extra text fields to media attachments.
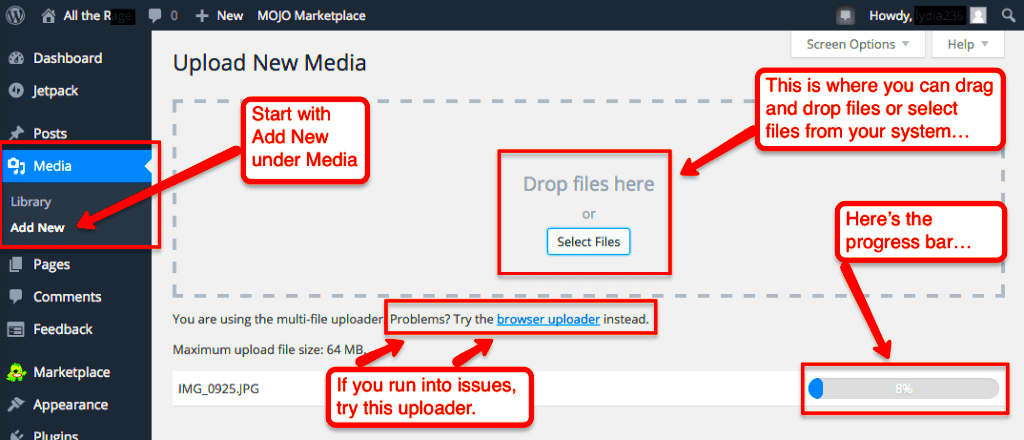
- Go to your WordPress dashboard and navigate to Media > Library.
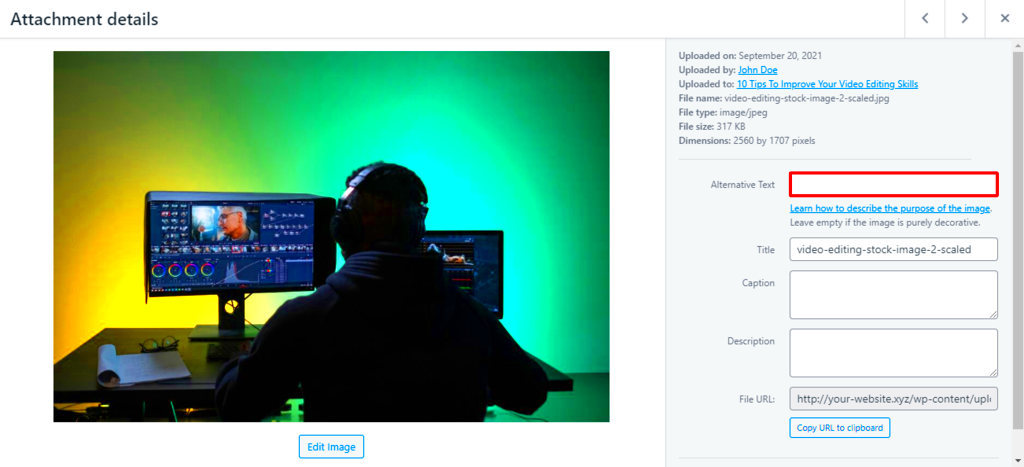
- Click on an image or video to edit it.
- At the bottom of the attachment details, you’ll see the Custom Fields section. If it’s not visible, you can enable it from the “Screen Options” in the top-right corner.
- Add a new custom field by entering a name and value (the text you want to store).
- Using a Plugin: If you prefer a more user-friendly approach, there are several plugins designed to add custom fields to media files. Some popular ones include:
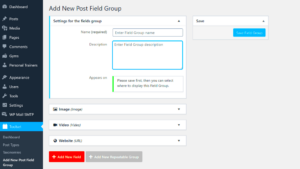
- Advanced Custom Fields (ACF): This powerful plugin allows you to add custom fields with ease. Once installed, you can create custom field groups and assign them to your media attachments.
- Media Library Assistant: This plugin helps organize your media files and lets you add custom fields to each file for better categorization and searchability.
Both methods allow you to easily store extra text information with your media files and can be used depending on your preference and needs.
Using Plugins for Adding Text Fields
If you’re looking for a simpler, more flexible way to add custom text fields to your media attachments, plugins can be a game changer. WordPress offers various plugins that allow you to easily manage custom fields and add more functionality to your media files without writing any code. Below are a couple of popular plugins that can help you get started:
- Advanced Custom Fields (ACF): ACF is one of the most powerful and user-friendly plugins for adding custom fields to any post type, including media attachments. With ACF, you can create fields for text, numbers, images, and much more. You can display these fields on your media library pages and attach them to your media files, making it easier to manage and retrieve extra information when needed.
- Media Library Assistant: This plugin adds advanced features to your media library, including the ability to add custom fields to media attachments. It also provides extra search capabilities, taxonomy management, and more. If you’re looking to organize and add rich metadata to your media library, this plugin is a great option.
- Custom Field Suite: Similar to ACF, this plugin allows you to add custom fields to posts, pages, and media files. It also has a user-friendly interface and supports various field types like text, checkboxes, and more, making it a versatile tool for customizing your media library.
Using any of these plugins, you can easily add and manage custom text fields for your media attachments without needing any coding knowledge. Simply install the plugin of your choice, configure the fields, and start adding extra text to your media files to enhance organization and accessibility.
Customizing Text Fields to Fit Your Needs
Once you’ve added custom text fields to your media attachments, you may want to customize them further to fit your specific needs. Whether you’re organizing media by category, adding SEO-related details, or storing custom metadata, customizing text fields can help you get the most out of your media library. Here’s how you can tailor these fields to your requirements:
- Define Field Labels and Descriptions: When creating custom fields, you can define a label and description for each field to help other users understand its purpose. This makes it easier to manage the data in the future and prevents confusion.
- Set Field Types: Custom fields support various data types such as text, numbers, dates, and more. Choosing the right field type based on the data you want to store will help keep everything organized. For example, if you’re adding a date for an event, using a date-picker field is more efficient than a plain text field.
- Conditional Logic: Some plugins like ACF allow you to add conditional logic to fields. This means you can show or hide fields based on specific conditions, making the form more dynamic and tailored to the content.
- Display Fields on Media Library: Depending on the plugin you use, you can customize the layout of the media library to display the custom fields directly on the media list. This allows you to see all the important details at a glance, saving time when managing large media libraries.
By customizing your text fields, you can make your media library more efficient and organized, ensuring that you can easily access the information you need when working with media files.
Common Issues and How to Solve Them
While adding text fields to your media attachments can greatly improve organization and workflow, you might run into a few common issues. Don’t worry—these are usually easy to solve. Here are some of the most frequent problems and their solutions:
- Custom Fields Not Showing Up: One of the most common issues is that custom fields are not visible in the media attachment edit screen. This can happen if you haven’t enabled the custom fields option in the screen options tab. To fix this, go to your media library, click on the “Screen Options” in the top-right corner, and ensure that “Custom Fields” is checked. You should now see the custom fields section when editing a media file.
- Text Fields Not Saving: Sometimes, custom text fields may not save properly. This can be due to plugin conflicts or incorrect field configurations. To solve this, check for plugin conflicts by disabling all other plugins and testing if the issue persists. If the problem is still there, review your field settings to ensure you’re using the correct data types and validation rules.
- Slow Media Library Performance: Adding too many custom fields, especially for large media libraries, can slow down your WordPress site. To avoid this, try to limit the number of custom fields you use, or consider optimizing your database by regularly cleaning up unused fields and metadata.
- Incorrect Field Output: Sometimes, custom fields may not display the data correctly on the frontend of your website. This can happen if you’re using a custom theme or need to edit the template files. Ensure that you’re using the correct WordPress functions like
get_post_meta()to retrieve and display the custom field data.
With the right adjustments, these issues can be easily resolved, ensuring that your custom text fields work seamlessly and help you manage your media more effectively.
Best Practices for Managing Media with Custom Text Fields
Once you’ve added custom text fields to your media attachments, it’s essential to manage them effectively to ensure that your media library stays organized and efficient. Here are some best practices to follow when managing media with custom text fields:
- Keep it Simple: Don’t overcomplicate your custom fields. Only add fields that are necessary for organizing or displaying relevant information. Too many custom fields can make your media library harder to manage and slow down your website.
- Use Consistent Field Labels: Always use clear and consistent labels for your custom fields. This helps both you and your team quickly understand what information is stored in each field. For example, use labels like “Image Description” or “SEO Keywords” to make their purpose clear.
- Standardize Data Entry: If you’re adding information like dates, locations, or product details, it’s helpful to standardize how data is entered. For instance, use a date picker field for event dates or a dropdown list for predefined categories. This ensures that data is entered consistently, making it easier to search and filter media later.
- Regularly Clean Up Unused Fields: As your media library grows, it’s important to clean up old or unused custom fields to prevent clutter. This can be done manually or through database optimization tools. Removing unnecessary fields ensures better performance and organization.
- Utilize Search and Filter Options: Many plugins allow you to search and filter media based on custom fields. Take advantage of this feature to quickly find specific media files based on the data you’ve added, such as filtering images by event date or product category.
By following these best practices, you’ll ensure that your media library remains efficient, organized, and easy to manage, making your WordPress site run smoothly and effectively.
FAQ
Here are some frequently asked questions about adding custom text fields to media attachments in WordPress:
- Q: Can I add multiple custom text fields to a single media attachment?
A: Yes, you can add as many custom fields as needed to each media attachment, depending on the plugin or method you’re using. Just ensure that the fields are relevant and helpful for your media management. - Q: Will custom text fields affect the performance of my website?
A: Adding too many custom fields can potentially slow down your website, especially if your media library is large. However, if you manage the fields properly and remove unused ones regularly, performance issues can be minimized. - Q: How do I display custom fields on the frontend of my site?
A: To display custom fields on your website, you’ll need to edit your theme files. You can use WordPress functions likeget_post_meta()to retrieve the custom field data and display it in the desired location on your site. - Q: Can I use custom text fields for SEO purposes?
A: Absolutely! You can use custom fields to store SEO-related data like image alt text, keywords, or descriptions. This can help improve your content’s visibility in search engines. - Q: Is there a plugin to help me add and manage custom fields easily?
A: Yes, there are many plugins available, such as Advanced Custom Fields (ACF) and Media Library Assistant, that make it easy to add and manage custom fields for media attachments in WordPress.
Conclusion
Adding custom text fields to media attachments in WordPress is a simple yet powerful way to organize your media and enhance the functionality of your website. Whether you’re adding metadata for SEO, categorizing media files, or storing specific product details, custom fields can make managing your media library more efficient and user-friendly. By following the best practices outlined here, you can ensure that your media management remains clean, organized, and optimized. If you’re looking to take full advantage of custom fields, don’t hesitate to explore some of the plugins available to make the process even easier. With a bit of planning and organization, you can enhance both the backend and frontend of your website, making it easier to manage and present your content.


