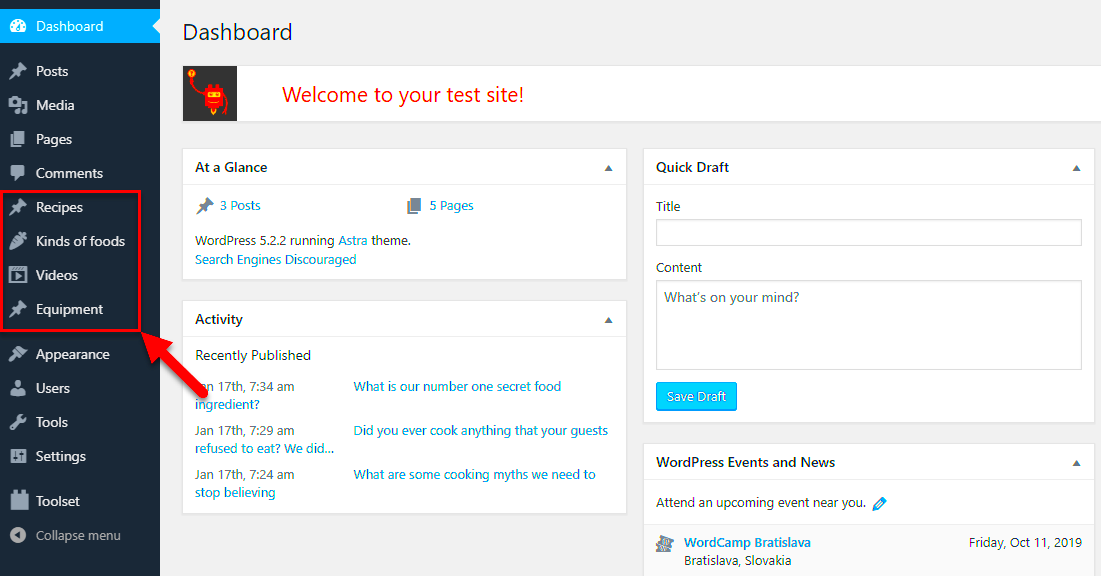
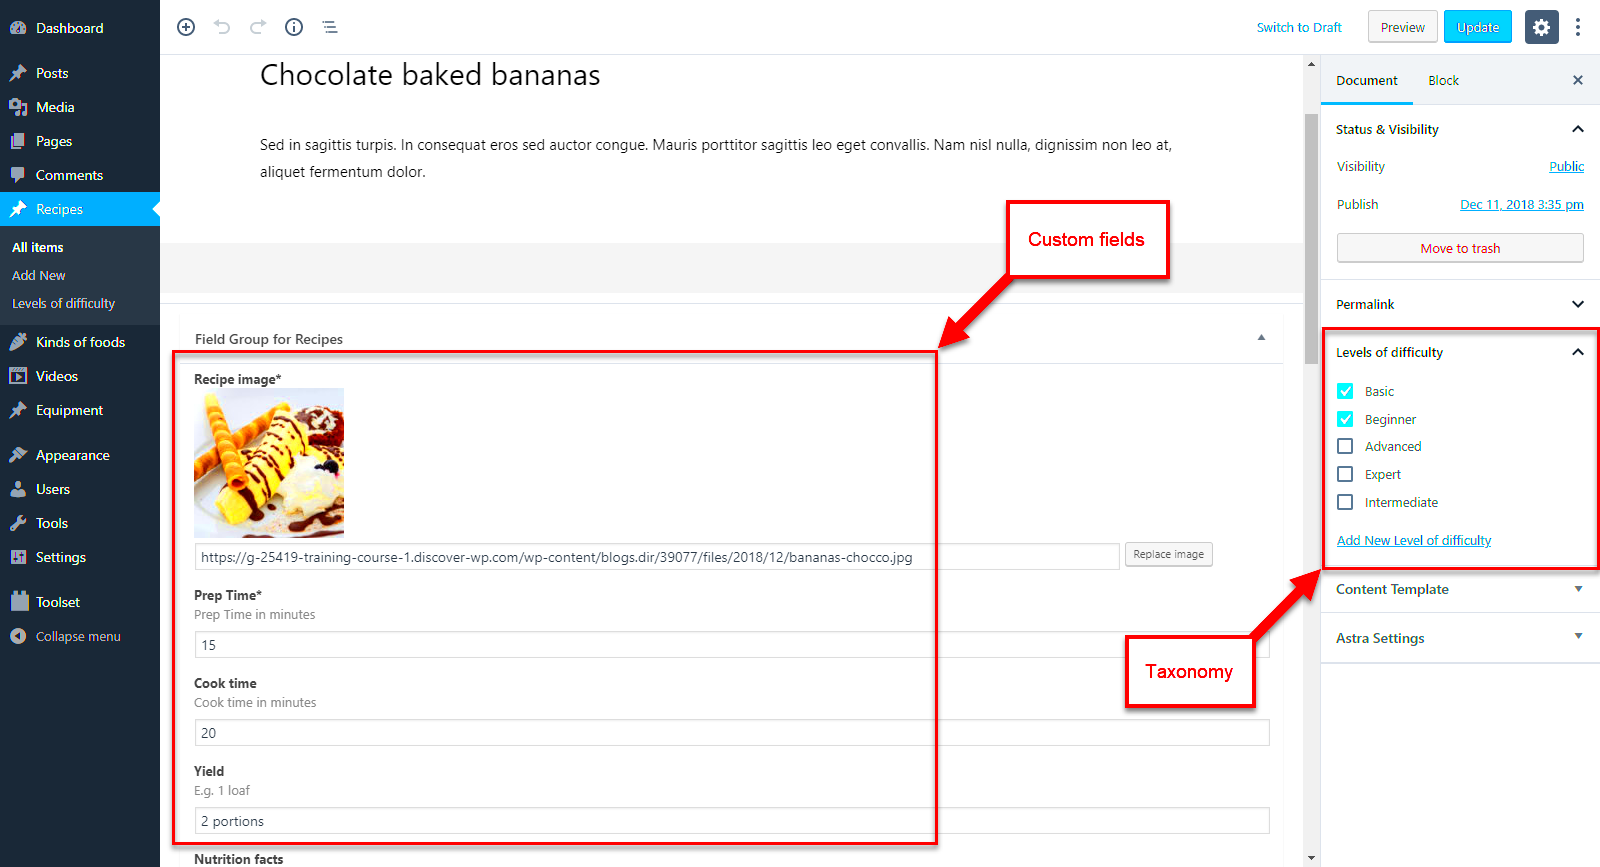
Custom fields are a powerful feature in WordPress that allow you to add extra metadata to posts, pages, and custom post types. They let you store additional information that’s not part of the main content. For example, if you’re running a blog about books, you could use custom fields to store author names, publication dates, or ISBN numbers. These fields help extend the functionality of your WordPress site without the need for additional plugins.
Why Custom Fields Matter for Post Types

Custom fields are essential for adding flexibility and structure to your content. They allow you to organize and display extra data in a way that makes sense for your site’s needs. Post types in WordPress are typically used to define different types of content like posts, pages, or custom content types (e.g., portfolios, products, etc.). By adding custom fields to these post types, you can manage and display custom data in a user-friendly way, improving your site’s functionality and user experience.
Here’s why custom fields are important:
- Customization: They give you the ability to add and display unique data relevant to each post type.
- Improved Content Management: Custom fields allow you to better categorize and manage the information on your site.
- Enhanced Flexibility: With custom fields, you can design your WordPress site to meet specific business needs or personal preferences.
For example, for a real estate website, custom fields could hold property details like square footage, price, and location, which can then be displayed neatly on each property listing.
Understanding the Different Types of Custom Fields

WordPress custom fields come in various forms, and understanding the different types helps you choose the right one for your needs. Here are the main types of custom fields:
- Text: Simple text fields that let you input small pieces of data like names or numbers.
- Textarea: Similar to text fields but larger, ideal for longer pieces of information like descriptions or notes.
- Checkbox: Allows users to select a yes/no option or multiple options from a predefined list.
- Radio Button: Lets users choose one option from a list of predefined choices, ideal for settings where only one selection is allowed.
- Dropdown: Similar to radio buttons but in a dropdown format, useful for compact forms with multiple choices.
- File Upload: Lets users upload files such as images or documents, which can then be linked to the post or page.
Each of these custom fields serves a specific purpose, allowing you to create custom content management structures tailored to your website’s needs. For instance, a dropdown field could be used for selecting a category, while a file upload field could be used for uploading product images.
How to Add Custom Fields to WordPress Post Types
Adding custom fields to WordPress post types doesn’t require coding expertise, but it does offer a wealth of functionality to enhance your content. WordPress makes it easy to integrate custom fields into both standard posts and custom post types. This enables you to collect and display additional information for each content type, like an author’s biography, price of a product, or review ratings. Below is how you can easily add custom fields to your
Follow these steps to add custom fields:
- Step 1: Go to your WordPress Dashboard and open a post or create a new one.
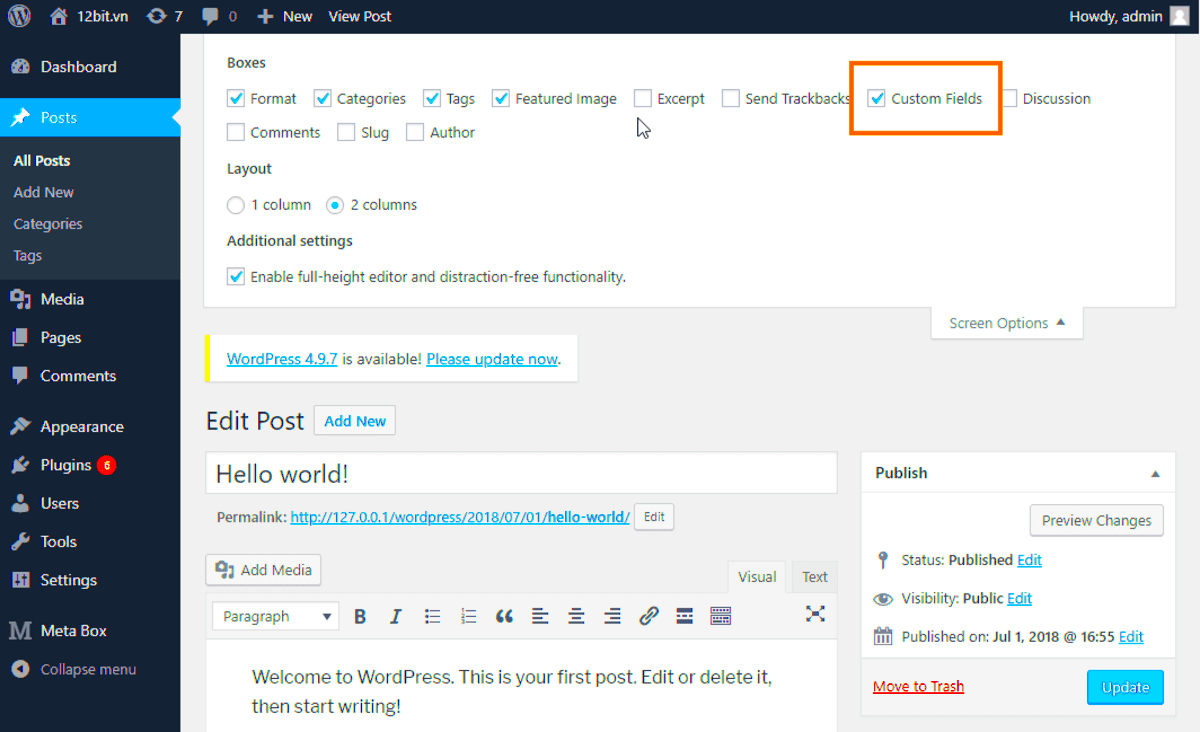
- Step 2: In the editor, scroll down until you see the Custom Fields section. If you don’t see it, click on the Screen Options tab at the top right and check the box for Custom Fields.
- Step 3: Click Add New to create a custom field. You will need to assign a Name and Value for your field. For example, the name might be “Price” and the value could be “$100”.
- Step 4: Once added, click Update or Publish your post.
After these steps, you can display the custom fields on your website using code, or with a plugin. If you want to show the custom fields on the front-end of your site, you will need to modify your theme’s templates or use a plugin to do so automatically.
Steps for Creating Custom Fields Manually in WordPress
Creating custom fields manually is a great way to add specific data to your posts and pages without relying on plugins. This process involves editing your theme files to include custom fields in a way that best suits your website’s needs. Here’s a simple, step-by-step guide for adding custom fields manually.
Here’s how you can do it:
- Step 1: Go to your WordPress Dashboard and open the post or page editor.
- Step 2: In the post editor, scroll to the bottom of the screen where the Custom Fields section is located (as explained in the previous section).
- Step 3: Add a custom field by clicking Add New. Enter the field’s Name and its Value (e.g., Name: “Book Author” Value: “John Doe”).
- Step 4: Save your custom field by clicking Update or Publish.
- Step 5: Next, you’ll need to modify your theme files to display the custom field. You can do this by editing the theme’s single.php or page.php file. Insert the following code in the location where you want the field to appear:
This code retrieves and displays the value of the custom field in the post or page. You can use this approach for any custom field, whether it’s for displaying a price, location, or any other data type.
Customizing Post Types with Custom Fields
Custom fields allow you to enhance WordPress post types by adding additional layers of content that help structure your site more efficiently. Whether you’re creating a product listing or managing a portfolio, customizing post types with custom fields enables you to present data in an organized, dynamic way. With a little effort, you can make your WordPress website more functional and user-friendly for both admins and visitors.
Here’s how you can customize your post types with custom fields:
- Step 1: First, you need to create a custom post type. You can do this by adding a code snippet in your theme’s functions.php file or using a plugin like Custom Post Type UI.
- Step 2: Once you’ve created your custom post type, you can then add custom fields to it using the steps mentioned earlier. For example, you might add a “Location” field to a real estate post type or a “Price” field to a product post type.
- Step 3: After adding custom fields, you’ll want to display these fields on the front-end. To do this, edit the template files associated with your custom post type (such as single-{post_type}.php) and insert the PHP code to show the custom field values.
- Step 4: Customize the layout and styling of the fields so they align with the rest of your site’s design. You can use CSS to adjust how the custom fields appear on the front end.
Here’s a simple example for a product post type:
- Price: $29.99
- Brand: ExampleBrand
- Color: Red
By adding these fields, you create a more informative and engaging experience for visitors, while giving site administrators a more structured way to manage content. Customizing post types with custom fields opens up endless possibilities for creating dynamic, data-driven websites tailored to your needs.
Benefits of Adding Custom Fields to Your WordPress Site
Adding custom fields to your WordPress site offers many benefits, providing both flexibility and control over how you manage and display content. Custom fields allow you to extend the capabilities of WordPress without relying on plugins. You can create tailored content types, improve site functionality, and even enhance user experience.
Here are some key benefits of using custom fields:
- Increased Flexibility: Custom fields allow you to manage additional data, making your WordPress site more dynamic and tailored to your specific needs.
- Better Data Organization: By organizing data into custom fields, you create a clearer structure that’s easier to maintain, especially for complex sites like eCommerce platforms or real estate websites.
- Improved Content Display: Custom fields let you present content in a more structured and visually appealing way, making it easier for your visitors to find information.
- Cost-Effective: Using custom fields eliminates the need for additional plugins, reducing potential conflicts and site bloat. This also leads to faster website performance.
- SEO Advantages: By using custom fields to add metadata such as keywords, descriptions, or ratings, you can optimize your content for search engines, improving visibility.
Custom fields offer endless possibilities, whether you’re creating a product catalog, an event calendar, or even managing client information. They help streamline your content management, improve SEO, and ultimately enhance the user experience on your site.
FAQ About Adding Custom Fields Without Plugins
If you’re new to WordPress custom fields, you may have questions about how to use them effectively, especially when doing so without relying on plugins. Here are some frequently asked questions (FAQs) that can help clear up any confusion.
- What are custom fields? Custom fields are additional pieces of data you can add to your posts or pages to store and display extra information, like product prices, event dates, or custom notes.
- How do I add custom fields? You can add custom fields through the WordPress post editor. After enabling the Custom Fields option, simply create a new field with a name and value and save your changes.
- Can I add custom fields to custom post types? Yes, you can add custom fields to both default post types (like posts and pages) and custom post types (like portfolios, products, etc.).
- Do I need to modify my theme to display custom fields? Yes, to show custom fields on the front end of your site, you’ll need to modify your theme files by using PHP code to retrieve and display the custom field values.
- Are there any limitations to using custom fields? Custom fields are extremely flexible but might require some coding knowledge, especially if you need to modify your theme templates to display them effectively. However, once set up, they offer powerful customization without extra plugins.
By answering these common questions, we hope to help you better understand the process of adding custom fields and their importance for your WordPress site. Remember, custom fields are an efficient and cost-effective way to extend your site’s functionality.
Conclusion: The Power of Custom Fields in WordPress
Custom fields are one of the most powerful tools in WordPress for creating personalized, dynamic websites. Whether you’re building an eCommerce store, a real estate site, or even a personal blog, custom fields allow you to store and display extra information in a structured, easy-to-manage way.
By adding custom fields, you can:
- Enhance the functionality of your site without relying on plugins.
- Display additional, valuable data that makes your content more engaging.
- Improve site performance by reducing plugin bloat.
- Better organize your content, making it easier to maintain in the long run.
Custom fields also offer flexibility to customize post types, create tailored content types, and optimize your site for SEO. With just a few simple steps, you can start adding custom fields to your WordPress site and unlock its full potential. Don’t hesitate to explore this feature—it could transform the way you manage your website and deliver a more personalized experience for your visitors.


