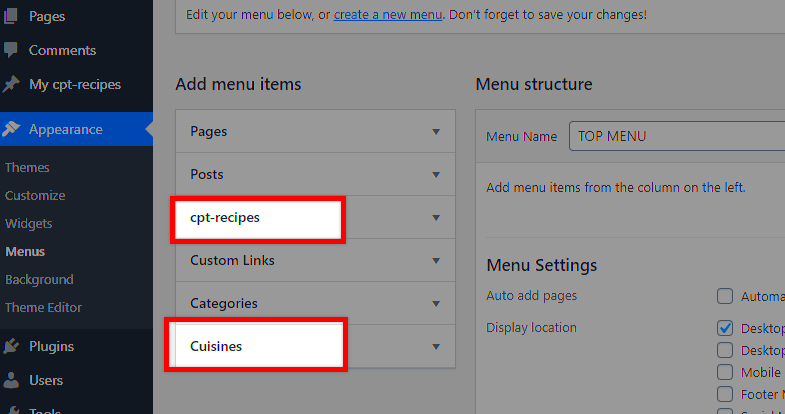
Custom Post Types (CPTs) are a powerful feature in WordPress that allows you to create content types beyond the default ones like Posts and Pages. By using CPTs, you can better organize your content, tailor your website’s functionality, and enhance user experience. Whether you’re running a portfolio, an e-commerce site, or a blog that covers various topics, recognizing the potential of CPTs can revolutionize your site’s structure.
Why You Might Want to Recreate Custom Post Types
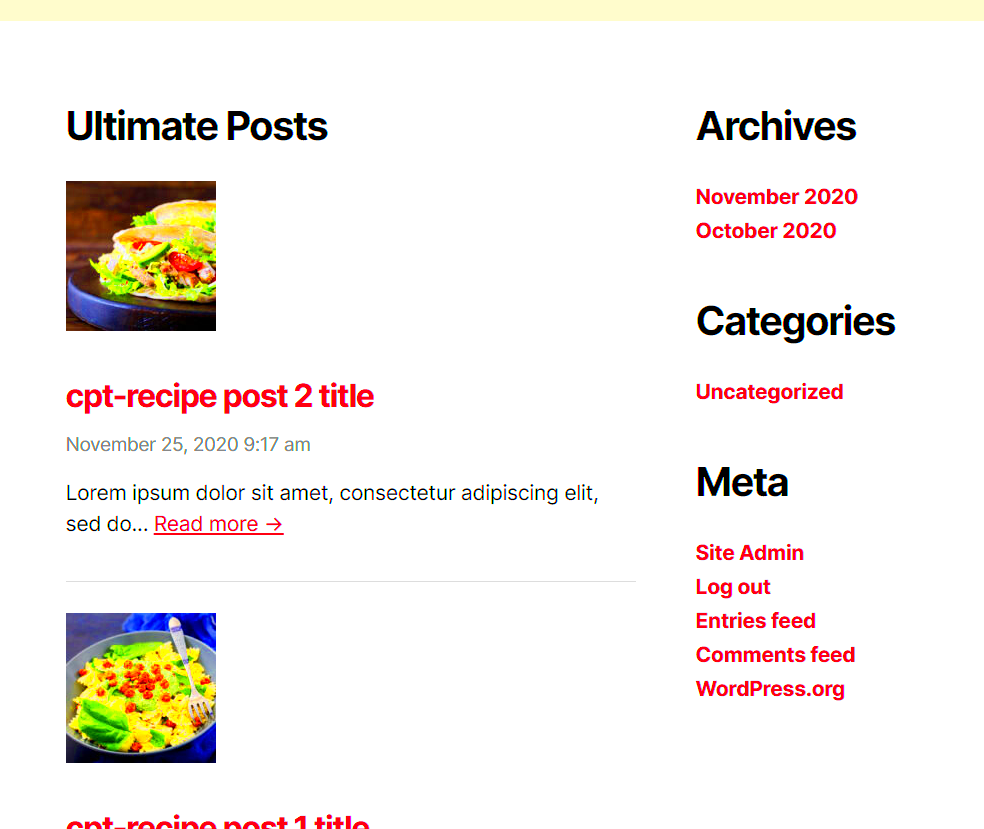
Recreating Custom Post Types can be a game changer for enhancing your WordPress site. Here’s why you might want to consider this:
- Seamless Transition: If you’re switching from one plugin to another, recreating your CPTs can ensure that your content remains organized and easily accessible.
- Improved Functionality: Different plugins offer various features and functionalities. By recreating CPTs, you can leverage these new tools to enhance your site’s capabilities.
- Better Performance: Some plugins might be more resource-efficient than others, leading to improved loading times and site performance.
- User Experience: A fresh CPT setup can lead to better navigation and user interaction, making it easier for visitors to find the content they need.
- Integration with New Features: Plugins often come with unique features that can enrich your site. By recreating CPTs, you can take advantage of these offerings for enhanced functionality.
Ultimately, recreating Custom Post Types allows you to tailor your site precisely to your needs while maximizing flexibility and usability for your users. So, if you’re thinking about switching things up with your WordPress setup, you’re on the right track!
Choosing the Right Plugin for Custom Post Types
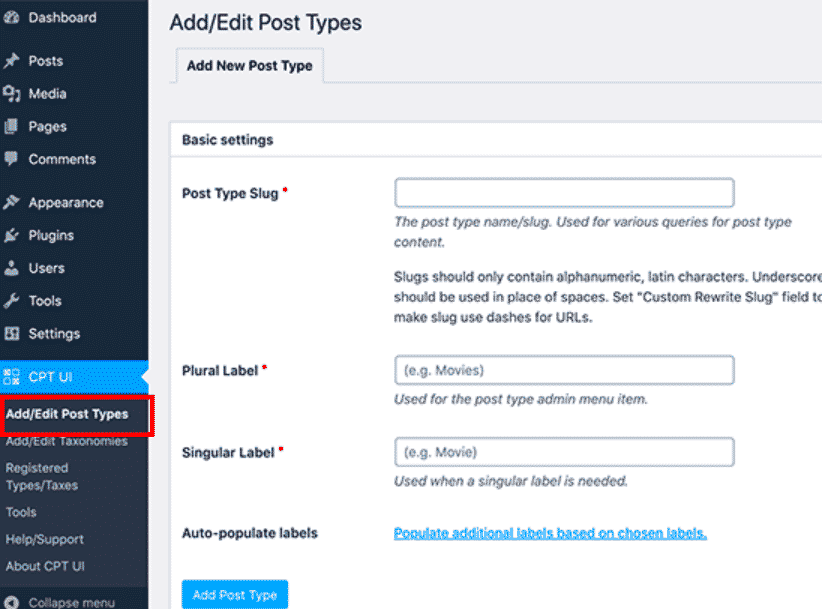
When it comes to choosing the right plugin for recreating custom post types (CPTs), you’ll want to weigh several factors to ensure you make the best decision for your website. Not all plugins are created equal, so let’s dive into what you should consider:
- Compatibility: Make sure the plugin is compatible with your current theme and other plugins. Compatibility issues can lead to headaches and even site crashes!
- Features: Look for a plugin that offers the specific features you need. Some popular plugins, such as Custom Post Type UI and Pods, allow extensive customization, including taxonomies and custom fields.
- User-Friendly Interface: If you’re not technically savvy, opt for a plugin with an intuitive interface. A user-friendly design will save you time and frustration while recreating your CPTs.
- Support and Updates: Choose a plugin that offers regular updates and reliable customer support. A robust support system means you’ll have someone to turn to when you hit a roadblock.
- Performance: Evaluate how the plugin affects your site’s performance. Too many plugins can slow down your website. Opt for lightweight options that won’t bog your site down.
By considering these factors, you’ll set yourself up for success in recreating your custom post types with ease. Remember, the right plugin can make a world of difference!
Step-by-Step Guide to Recreating Custom Post Types
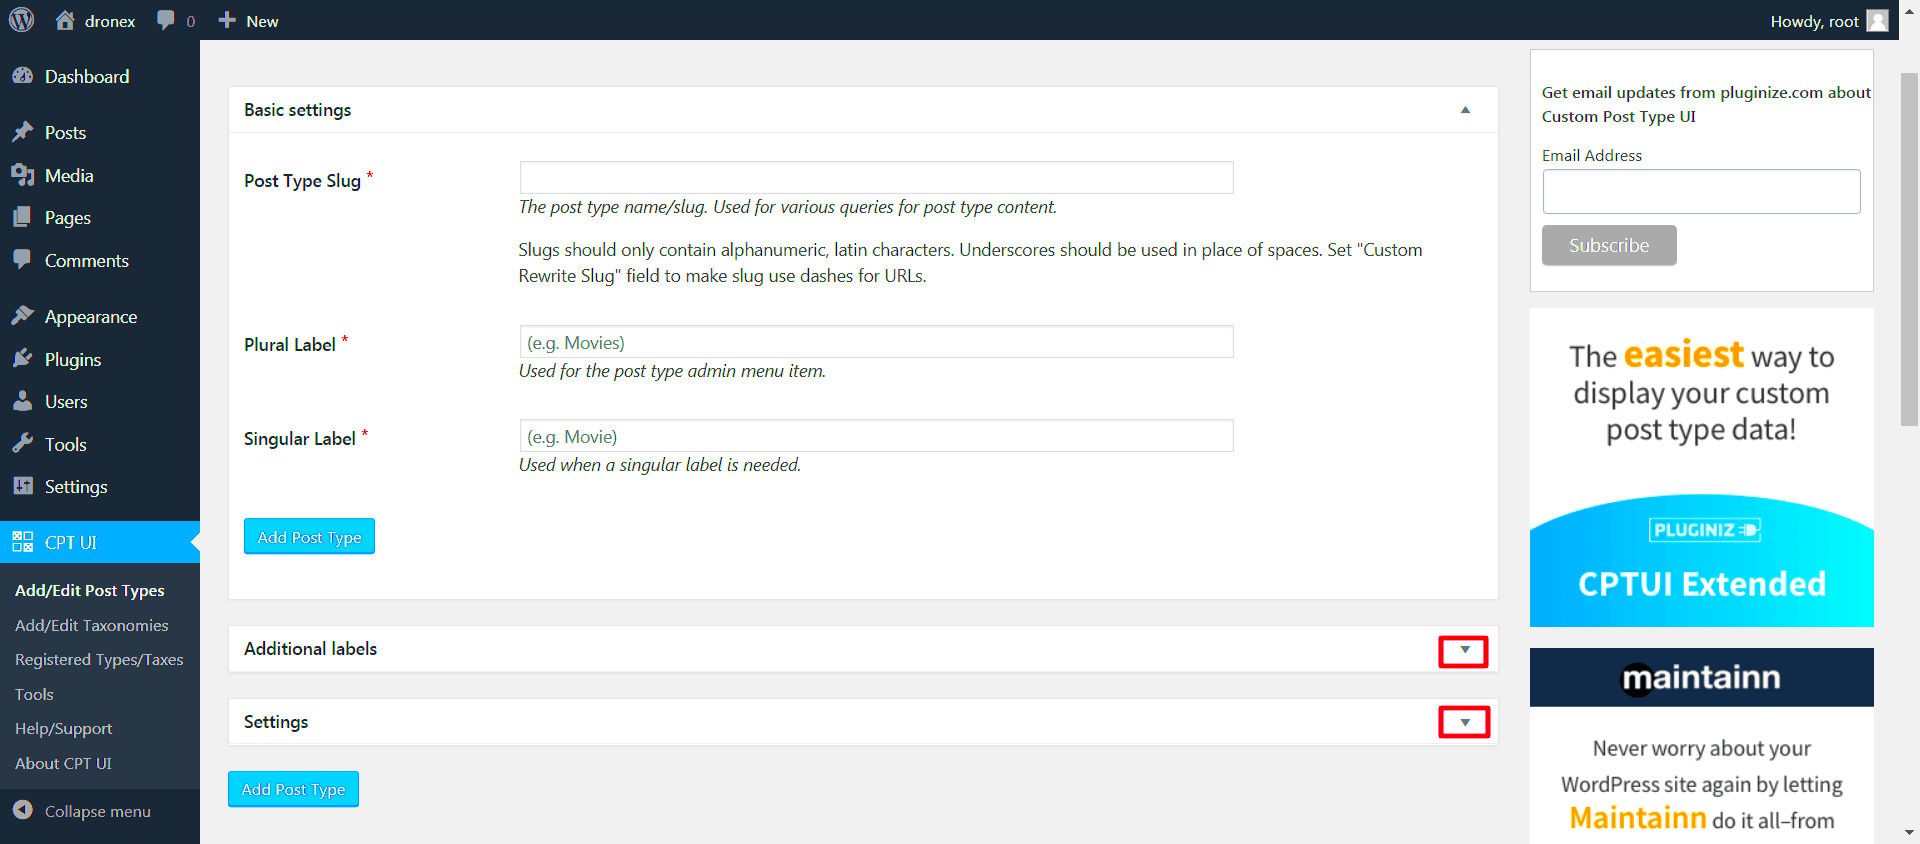
Are you ready to dive into the nitty-gritty of recreating custom post types? This step-by-step guide will walk you through the process, ensuring that you create exactly what you need without breaking a sweat.
- Install and Activate Your Chosen Plugin: Head to your WordPress dashboard and navigate to Plugins > Add New. Search for the plugin you’ve chosen, install it, and activate it.
- Create a New Custom Post Type: After activation, find the plugin’s settings in your dashboard. Look for an option like Add New or Create Custom Post Type. Fill in the required fields, such as the name and description of your CPT.
- Configure Settings: Customize your CPT settings, like defining roles and capabilities, enabling categories or tags, and deciding whether to allow comments. You might want to keep things simple or go all out, depending on your needs.
- Add Custom Fields: If your plugin supports it, add custom fields to your CPT. This is a great way to collect additional information and make your post types more versatile.
- Test Your Custom Post Type: Once everything is set up, create a few sample entries for your new CPT. This will help you confirm that everything is working as expected.
- Display Your Custom Post Type: Finally, use shortcodes or widgets provided by the plugin to display your new CPT on the front end of your site. Don’t forget to check its responsiveness!
And there you have it! By following these steps, you’ll successfully recreate your custom post types and enhance your website’s functionality. Cheers to a more organized and engaging web experience!
Key Considerations When Migrating Data
Migrating data, especially for custom post types, is no small feat. There are several factors you need to take into account to ensure a smooth transition. After all, you want everything to work just as it did before, or even better! Here are some key considerations to keep in mind:
- Data Integrity: Always back up your database before you start migrating. This ensures that if anything goes wrong, you can restore your data to its original state.
- Field Mapping: Custom post types usually come with specific fields. Make sure you understand how each field in your old plugin corresponds to the new one. You might find a handy table like this useful:
| Old Plugin Field | New Plugin Field |
|---|---|
| Old Custom Field A | New Custom Field A |
| Old Custom Field B | New Custom Field B |
- Post Status: Ensure that the post statuses (like published, draft, etc.) remain consistent during the migration. Review what statuses the new plugin supports and adjust accordingly.
- Taxonomies: Custom taxonomies are often tied to post types. Confirm that you’ve properly attached these taxonomies after migration, so your posts are organized just right.
- SEO and Permalinks: If your old plugin had specific SEO setups, double-check that these configurations have been carried over. You wouldn’t want to lose valuable search traffic in the process!
Getting all these considerations right will make your migration process a lot smoother, so take the time to plan it out!
Testing Your Custom Post Types After Migration
Once the migration is done, you might be tempted to sit back and relax. But hold on! Testing is a critical part of the process to ensure everything works as expected. Here’s a streamlined approach for testing your custom post types after migration:
- Check Data Accuracy: Start by reviewing the content you’ve migrated. Are all posts present? Are the fields filled with the correct information? Spot-check several entries to confirm that everything looks good.
- Functionality Testing: Click through the custom post types on your website. Ensure that functionalities like adding, editing, and deleting posts work smoothly. Are all buttons responding correctly?
- Permissions and Access: If your site has different user roles, ensure that each role has the right permissions for the custom post types. Create a table to track roles and their permissions:
| User Role | Permissions |
|---|---|
| Administrator | Full Access |
| Editor | Add, Edit, Delete |
| Subscriber | View Only |
- Links and Integrations: If your custom post types interact with other areas of your site or with other plugins, make sure those integrations still work post-migration. Test out any links, shortcodes, or API connections.
- User Experience: Consider having a few trusted users navigate the site and provide feedback. Are there any issues with the interface? Do they encounter any bugs?
To wrap it up, thorough testing after your migration gives you confidence that the new setup is solid. It’s worth investing that time to ensure your new custom post types are functioning beautifully!
Troubleshooting Common Issues
When you’re delving into the world of custom post types, you might encounter some hiccups along the way. Don’t worry though! Most issues are quite manageable with a bit of troubleshooting. Here’s a handy guide to help you identify and resolve common problems:
- Missing Custom Post Type: One of the most frequent issues is the custom post type not showing up as expected. Double-check your registration code to ensure that it’s correctly added and there are no syntax errors. Also, don’t forget to flush your rewrite rules by visiting the permalinks settings in your WordPress dashboard.
- Access Denied Errors: If certain users can’t access the custom post type, it’s likely a permissions issue. Make sure that the capabilities are correctly defined in your custom post type registration function. Check user roles and what they’re allowed to do.
- Conflicting Plugins: Sometimes, plugins can conflict with your custom post types. If something seems off, try deactivating plugins one by one to see which one might be causing the problem.
- Display Issues in the Admin Area: If your custom post type doesn’t display correctly in the admin area, it might be due to your admin columns setup. Ensure that you’ve properly registered your admin columns and that they’re set to display the information needed.
- Template File Issues: If your custom post type isn’t displaying as anticipated on the front end, check the associated template files. Make sure you’ve created the appropriate single and archive templates. If you’re uncertain, look for files named like `single-{post_type}.php` and `archive-{post_type}.php`.
Remember, the WordPress community is vast and there are many resources available online. If you’re stuck, don’t hesitate to reach out for help in forums or communities. You’ll often find someone who’s been through the same issues!
Best Practices for Managing Custom Post Types
Creating custom post types is just the beginning of the journey. Proper management and adherence to best practices ensure that your content remains structured and your website runs smoothly. Here are some essential best practices to consider:
- Consistent Naming Conventions: Use clear and consistent naming for your custom post types and taxonomies. This improves readability and maintenance. Stick to lowercase letters and underscores to separate words.
- Utilize Custom Taxonomies: Don’t forget to leverage custom taxonomies. They allow you to categorize and tag your custom post types effectively, enhancing the organization and searchability of your content.
- Keep User Permissions in Mind: When registering your custom post types, pay attention to user capabilities. Ensure that your audience has the right access levels, and promote security by avoiding over-permissive settings.
- Implement UI/UX Considerations: Make it easy for users to interact with custom post types in the dashboard. Provide helpful descriptions and tips within the admin screens, which can guide users and reduce confusion.
- Regular Backup and Documentation: Always back up your site before making major changes. Keep documentation for the custom post types you’ve created. This will save you time during updates or transfers, allowing for smooth transitions.
- Performance Monitoring: Regularly check the performance of your custom post types. Look for issues related to loading speed, database queries, and overall performance. Utilize performance plugins to help with monitoring.
Following these best practices helps keep your website well-organized and user-friendly. It enables you to leverage the full potential of your custom post types while minimizing friction for both site administrators and users.
A Guide to Recreating Custom Post Types with a Different Plugin
Creating a website involves various tasks, including managing content effectively. One essential aspect of content management in WordPress is the use of Custom Post Types (CPTs). These enable you to organize your content into specific types based on your needs, making it easier for users to navigate. However, there may be situations where you need to recreate Custom Post Types using different plugins. This guide outlines the steps required to achieve this.
Why Recreate Custom Post Types?
There are several reasons you might want to recreate CPTs:
- Improved Compatibility: Switching to a more compatible plugin that aligns with your website’s needs can enhance performance.
- Feature Enhancements: New plugins may offer advanced features that the current plugin lacks.
- Ease of Use: Some plugins boast a more user-friendly interface, simplifying the content creation process.
Steps to Recreate Custom Post Types
Here’s a simple guide to help you transfer your existing CPTs to a new plugin:
- Backup Your Database: Always start with a backup to avoid data loss.
- Disable the Current Plugin: Temporarily disable the plugin that manages your existing CPTs.
- Install the New Plugin: Choose and install the plugin you’ll be using to recreate your CPTs.
- Define Custom Post Types: In the new plugin settings, create your desired CPTs by specifying various parameters such as labels and capabilities.
- Import Existing Content: If your current plugin supports export, use it to import data into the new CPTs.
- Customize and Test: Customize your CPTs within the new plugin and thoroughly test for functionality.
Common Plugins for Creating Custom Post Types
| Plugin Name | Features | Ease of Use |
|---|---|---|
| Custom Post Type UI | Simple UI, taxonomy management | Very Easy |
| Pods | Advanced content types, relationship management | Moderate |
| Advanced Custom Fields | Custom fields and complex layouts | Easy |
By recreating CPTs with a different plugin, you’re not just changing tools; you’re enhancing your website’s functionality and user experience. This process can yield a more organized, efficient, and tailored environment for both administrators and end-users. Embrace the flexibility that Custom Post Types provide, and streamline your workflow effectively.

