Bullet points are a simple yet effective way to organize content, making it more readable and engaging for your website visitors. Whether you’re writing a blog post, creating a product list, or sharing important tips, bullet points help break down information into digestible pieces. In WordPress, adding bullet points is an easy task that enhances the structure of your content. This guide will walk you through the process of adding and customizing bullet points in the WordPress Text Editor, helping you make your content clearer and more professional.
Understanding the WordPress Text Editor
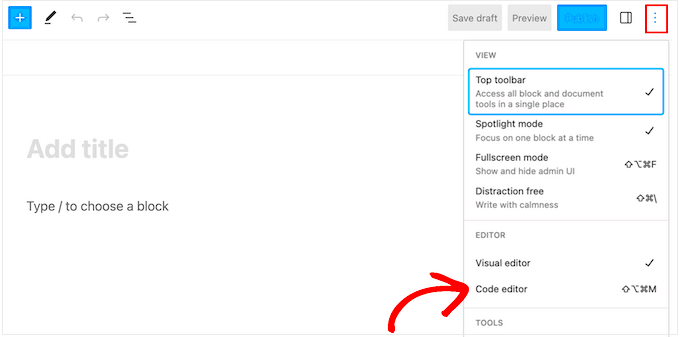
The WordPress Text Editor is where you create and edit your website’s content. It consists of two main modes: the Visual Editor and the Text Editor. The Visual Editor is the default option that gives you a WYSIWYG (What You See Is What You Get) experience, making it easier for beginners. Here, you can add text, images, links, and formatting like headings or bullet points with just a click. The Text Editor, on the other hand, lets you work with raw HTML, which is more suitable for advanced users.
Bullet points can be added in both modes, though the steps vary slightly depending on which one you’re using. While the Visual Editor offers a toolbar with a bullet list button, the Text Editor requires you to write HTML code. No matter which editor you use, both options allow you to create neat and well-structured content that grabs attention and makes your information easier to digest.
Types of Bullet Points You Can Use in WordPress
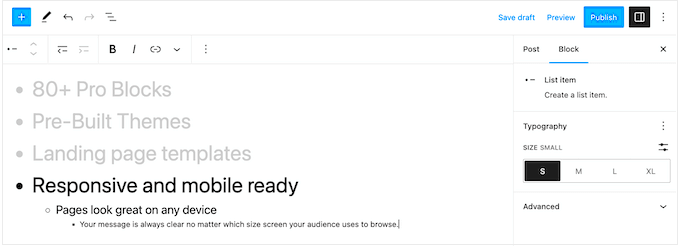
WordPress offers several types of bullet points to choose from, each with its own unique style. Here are the most common types:
- Unordered Lists: The default type of bullet points. They are simple circles that help group related items without a specific order.
- Ordered Lists: These use numbers instead of bullet points, making them ideal when you want to show a specific sequence or ranking of items.
- Custom Bullet Points: You can also use custom images or icons as bullets for a more personalized look. This is especially useful for branding or creating unique styles.
In the Visual Editor, the bullet point styles are typically pre-set, but in the Text Editor, you have the flexibility to choose between these options and even apply custom styles using CSS. If you want more variety, there are also plugins available that give you greater control over your bullet points’ design.
How to Add Bullet Points Using the Visual Editor
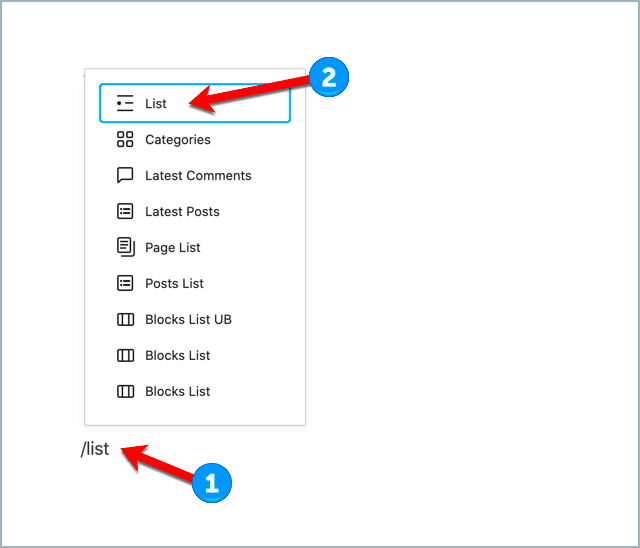
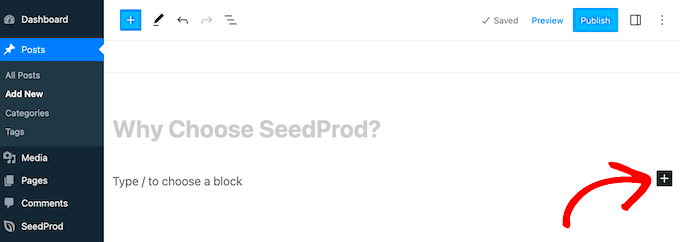
The Visual Editor in WordPress makes it incredibly easy to add bullet points to your posts or pages without needing to deal with any code. If you’re a beginner or simply prefer a more straightforward method, this is the way to go. Here’s a simple step-by-step guide:
- Open the Visual Editor: When you’re editing a post or page, make sure you’re in the Visual Editor. You should see a toolbar with various formatting options at the top.
- Select Your Text: Highlight the text that you want to turn into bullet points.
- Click the Bullet Point Icon: On the toolbar, look for the icon that looks like a bulleted list. It’s usually represented by a small circle. Click on it, and your selected text will turn into bullet points.
- Adjust the List as Needed: You can continue to add more items to the list by pressing Enter after each point. If you want to add a sublist, hit Tab to indent the text.
That’s it! Adding bullet points using the Visual Editor is quick and intuitive, making it the perfect method for most users who want to structure their content easily.
Using the Text Editor to Add Bullet Points
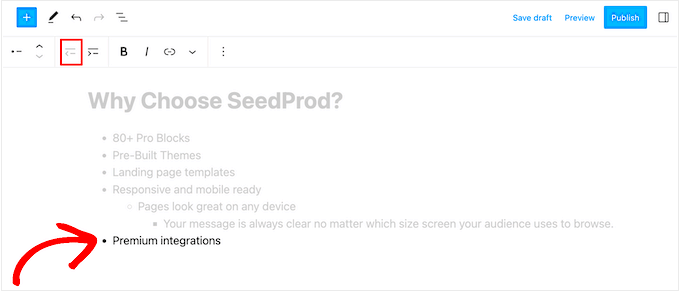
If you’re comfortable working with HTML, the Text Editor in WordPress gives you full control over the code. While this method is more advanced, it’s great if you want to create custom lists or adjust the design of your bullet points. Here’s how to add bullet points using the Text Editor:
- Switch to the Text Editor: On the top right of your post or page editor, you’ll see two tabs—Visual and Text. Click on the Text tab to switch to the HTML view.
- Use HTML List Tags: To create bullet points, you’ll need to use the
<ul>(unordered list) tag for the overall list and the<li>(list item) tag for each point. For example:
<ul>
    <li>First item</li>
    <li>Second item</li>
    <li>Third item</li>
</ul>
Each list item should be wrapped in <li> tags, and the entire list should be wrapped in <ul> tags. This method offers flexibility if you need to customize your bullet points further.
Once you add your bullet points in the Text Editor, you can return to the Visual Editor to see how your list looks. If you need to make adjustments, just switch back to the Text Editor and tweak the code.
Customizing Bullet Points in WordPress
If you want to make your bullet points stand out, WordPress offers several options for customizing them. Whether you want to change the size, color, or even use custom images instead of traditional bullets, the flexibility is there. Here’s how to customize your bullet points:
- Change the Bullet Style: You can use custom CSS to change the appearance of the bullet points. For instance, you can replace the default circle with a square or an image of your choice.
- Adjust the Bullet Size: By modifying the CSS, you can change the size of the bullet points. For example, you can increase their size for better visibility or decrease it for a more minimalist design.
- Use Custom Images as Bullets: To add custom icons or images as bullets, you’ll need to use the
list-style-imageproperty in your CSS. Here’s an example:
ul {
    list-style-image: url('path-to-your-image.png');
}
This code will replace the default bullet with your custom image, making the list unique and aligned with your site’s branding.
Additionally, you can adjust the spacing, indentation, and alignment of your list using CSS, giving you complete control over how your bullet points appear in relation to the text around them.
In summary, customizing bullet points in WordPress allows you to fine-tune your site’s design, creating a more cohesive and visually appealing user experience.
Common Issues and How to Solve Them
When adding bullet points in WordPress, some users run into a few common issues. Fortunately, these problems are usually easy to fix. Below are some typical issues and their solutions:
- Bullet Points Not Displaying Correctly: Sometimes, bullet points might not show up as expected. This could be due to a CSS conflict or incorrect HTML tags. To solve this, check the HTML code in the Text Editor and ensure the list is properly wrapped in
<ul>and<li>tags. Additionally, check your theme’s CSS for any custom styles that might be affecting the list’s display. - Unwanted Numbered List Style: If your bullet points turn into a numbered list, it’s likely because you’ve used an
<ol>(ordered list) tag by mistake. Switch back to<ul>(unordered list) to get your bullet points back. - Spacing Issues: Bullet points may sometimes appear too close to the text or too far apart. Adjusting the padding or margin in your theme’s CSS can resolve this. You can add the following code to your CSS to control the spacing:
ul {
    margin-left: 20px; /* Adjusts the left margin */
    padding-left: 10px; /* Adjusts the space between bullet and text */
}
These simple fixes can resolve most of the issues that users face when adding bullet points to their WordPress posts or pages. If the problem persists, consider checking your theme or any active plugins that could be affecting the layout.
FAQ
Here are some frequently asked questions about adding bullet points in WordPress:
- Can I use bullet points in WordPress for tables? Yes! You can add bullet points inside a table by simply using the
<ul>and<li>tags within the table cells. - How can I make my bullet points more creative? You can use custom CSS or plugins to change the bullet style, such as replacing default bullets with images or icons that match your website’s theme.
- Why are my bullet points not showing in the mobile view? This could be a CSS issue, where the bullet points are hidden in mobile views. Check your theme’s CSS for any media queries that might hide the bullet points on smaller screens.
- Can I change the color of my bullet points? Yes, you can change the color using CSS. Use the
colorproperty to style the bullet points, such aslist-style-type: square;or change the bullet color withcolor: red;.
Conclusion
Bullet points are a powerful tool in WordPress that help make your content more organized, readable, and engaging. Whether you’re using the Visual Editor or Text Editor, adding and customizing bullet points is an easy process that doesn’t require advanced skills. If you run into any issues, the solutions are usually simple to implement. Remember, you can always use custom CSS to adjust the appearance of your bullet points, making them fit seamlessly with your site’s design.
Incorporating bullet points in your WordPress posts and pages can significantly improve the clarity and flow of your content. By following the tips and solutions in this guide, you’ll be able to enhance your website’s user experience while maintaining a clean, professional look.

