Introduction to Vector Graphics and Illustrator

Vector graphics are essential for creating scalable and detailed artwork. Unlike raster images, vector graphics are composed of paths defined by mathematical equations, allowing them to be resized without losing quality. Adobe Illustrator is a powerful tool for vector design, offering various features and tools for precision drawing. In this section, we will explore the importance of vectors, the benefits of using Adobe Illustrator, and its interface fundamentals. This knowledge is crucial for mastering palm tree design, ensuring that your artwork is both visually appealing and adaptable for different applications.
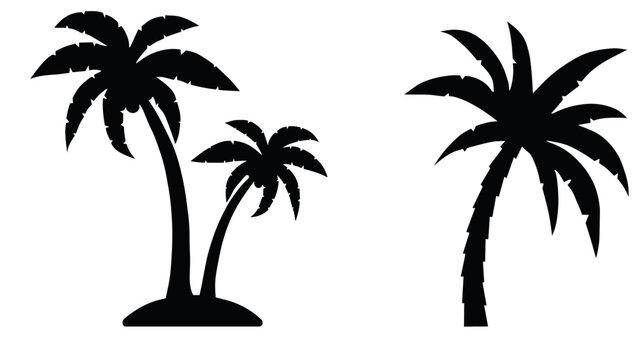
Understanding the Basics of Palm Tree Design

Designing a California palm tree vector involves understanding its unique characteristics. Here are some key points to consider:
- Shape: California palm trees typically have a tall, slender trunk and a crown of arching fronds, which can be depicted in varying styles.
- Color Palette: The color scheme often includes greens for the fronds and browns or grays for the trunk to replicate a realistic look.
- Detailing: Adding texture and shading can create depth, making the vector more dynamic. Consider using gradients or patterns for realism.
When creating your palm tree vector in Illustrator, start with basic shapes using the Pen tool or Shape tool, gradually refining your design. Pay close attention to proportions and angles to achieve an accurate representation. Utilizing Illustrator’s layers can help in organizing your design elements effectively.
Additionally, remember to explore the Pathfinder panel for merging shapes and creating custom silhouettes. Incorporating unique styles, like artistic strokes or outlines, can make your vector stand out. Always preview your design at different scales to ensure clarity and aesthetic appeal. Experimenting with various techniques will help you develop your signature style in palm tree illustrations.
Setting Up Your Illustrator Workspace for Vector Creation
Before you dive into creating your custom California palm tree vectors, it’s essential to set up your Adobe Illustrator workspace for optimal drawing and design. A well-organized workspace can significantly enhance your productivity and creativity. Here are some tips to get started:
- Choose the Right Document Size: Go to File > New and select a suitable document size. If you’re planning to use these vectors online, a standard width of 1080 pixels is a good choice.
- Enable Rulers and Grids: Press Ctrl + R (or Cmd + R on Mac) to toggle rulers. To enable grids, go to View > Show Grid and adjust your grid settings in Preferences > Guides & Grid for a more tailored experience.
- Utilize Panels: Make sure you have the essential panels open: Layers, Color, Swatches, and Pathfinder. You can access them through Window in the menu bar.
- Create Custom Shortcuts: Streamline your workflow by setting up keyboard shortcuts for your most-used tools. Go to Edit > Keyboard Shortcuts to customize them according to your preferences.
- Set Up Your Tool Palette: Depending on your drawing style, consider customizing your tool palette. Keep the Pencil, Pen, and Brush tools readily accessible for drawing different aspects of the palm tree.
Finally, remember to save your workspace layout. You can do this by navigating to Window > Workspace > New Workspace. A personalized setup can make your vector creation process much smoother, allowing you to focus on what you do best – creating beautiful palm trees!
Step-by-Step Guide to Drawing a Palm Tree
Now that your workspace is ready, let’s get into the fun part: drawing your California palm tree. Follow this easy step-by-step guide to create a stunning palm tree vector:
- Start with the Trunk: Select the Pen Tool (P) and draw the trunk by creating curved lines to give it a natural look. Adjust the stroke weight to make it thicker at the base and thinner towards the top.
- Add the Fronds: Use the Pencil Tool (N) to draw the fronds, which can be composed of long, curved lines stemming from the top of the trunk. Fronds typically fan out and can vary in shape, so feel free to experiment!
- Create Layered Leaves: Duplicate your frond shapes and rotate them for a fuller appearance. You can group these layers together for easier manipulation.
- Add Textures: To give your palm tree more character, consider using gradients and textures. Select the trunk and apply a gradient fill that mimics the bark texture, while using a lighter green for the fronds.
- Final Touches: Check your composition. Adjust the colors and shapes until you’re happy with the overall look. You might want to add some shadows using a darker shade to give depth.
And there you have it! By following these steps, you’ll create a vibrant palm tree vector that exemplifies the sunshine and beauty of California. Happy designing!
Adding Color and Texture to Your Palm Tree Vectors
Once you’ve created the basic shapes for your California palm tree vectors, it’s time to bring them to life with color and texture! Choosing the right color palette can make all the difference in creating a vibrant and realistic design. Here’s how to do it:
- Selecting Colors: Start with a rich green for the fronds. You might want to use different shades to create depth—think about dark greens for the undersides of the leaves and lighter shades for the tops.
- Color Harmony: Utilize tools like Adobe Color to create a harmonious color palette. Consider a sunny yellow or light brown for the trunk to mimic the natural hues seen in California palm trees.
- Using Gradients: Gradients can add a beautiful transition of colors. Apply a gradient fill to your fronds to give them a more three-dimensional look, which can be done easily in Illustrator’s gradients panel.
- Texturing: If you want to take it a step further, consider adding texture. You can use Illustrator’s Effect menu to add a grainy texture, or overlay a textured image (like a bark pattern) to give the trunk a more realistic feel.
Finally, play around with the transparency settings. A touch of opacity can allow you to blend colors smoothly and add further depth to your design!
Incorporating Custom Details and Unique Features
Adding custom details and unique features to your palm tree vectors can really make them stand out. By infusing personal touches or local elements into your designs, you’re not only enhancing their look but also making them more meaningful. Here are some tips on how to do that:
- Frond Variations: Experiment with different leaf shapes and sizes to mimic the natural variations found in palm trees. You can create some fronds that are wider, some that have a slight curve, or even add some that are in various stages of growth.
- Lighting Effects: Think about the time of day and how that affects color. Adding shadows or highlights can create a dynamic look. Try using the Drop Shadow effect for added depth.
- Natural Elements: Incorporate elements like coconuts, birds, or even small critters, which can give your vector a lively touch. These little details can be drawn or sourced from vector libraries.
- Setting the Scene: Consider placing your palm tree in a contextual background—like a beach, sunset, or a California landscape. This not only provides context but can also enhance the overall composition of your artwork.
Remember, the goal is to let your creativity flow! The more unique features you incorporate, the more your palm trees will reflect your personal style and the beauty of California’s environment.
Exporting Your Palm Tree Vectors for Different Uses
Once you’ve created your stunning palm tree vectors in Illustrator, the next step is exporting them in formats that suit your needs. Whether you’re using them for web design, print projects, or even merchandise, knowing how to export properly is crucial for maintaining quality and usability.
Here’s a quick guide to exporting your vectors:
- For web use: Export your vectors as SVG files. This format retains the scalability and is perfect for responsive designs, making it ideal for websites.
- For print materials: Save your vectors in PDF or EPS. Both formats are widely accepted in the printing industry and can handle high-resolution images, ensuring your designs look crisp on physical media.
- For raster use: If you need to use your palm trees in a specific raster size, export as a PNG or JPEG. Remember to set a high DPI (at least 300) for print quality.
If you’re unsure about which format to choose, think about where you’ll use your graphics. Always keep a master copy of your .AI file to make adjustments later, and remember to check color profiles if you’re working on print projects to ensure vibrant, accurate colors!
Tips for Optimizing Your Vectors for SEO
Optimizing your palm tree vectors for search engines might not be the first thing on your mind when creating art, but it can significantly increase your visibility online. Here are some practical tips to ensure your vectors reach the right audience effectively!
1. Use Descriptive Filenames: When saving your vector files, use filenames that reflect their content, such as “california-palm-tree-vector.ai” instead of a generic name like “image1.ai.” This helps search engines understand your files better.
2. Add Alt Text: If you’re uploading your vector files to a website, include alt text that describes the image. For example, “A vector illustration of a California palm tree.” This improves accessibility and SEO.
3. Create a Relevant Blog Post: Share your palm tree vectors in a blog post. Use keywords relevant to your audience, such as “California palm tree designs” or “vector graphics for tropical themes.” This will help increase your page’s authority and drive traffic.
4. Optimize File Sizes: Large files can slow down your website, negatively impacting SEO. Use tools to compress your SVG or PNG files without losing quality, so they load faster.
By following these optimization techniques, you can ensure your beautifully crafted palm tree vectors don’t just look fantastic but also get the attention they deserve!