Ever wondered how designers create stunning graphics so effortlessly? One secret weapon they often rely on is EPS templates. EPS, or Encapsulated PostScript, files are versatile vector graphics that can be scaled infinitely without losing quality. Shutterstock offers a vast library of these templates, making it easier than ever to jumpstart your design projects. Whether you’re crafting logos, posters, or social media graphics, using EPS templates can save you time, ensure consistency, and give your work that professional touch. Let’s explore why EPS templates are a game-changer and how they can elevate your creative process!
Steps to Download an EPS Template from Shutterstock
Getting your hands on an EPS template from Shutterstock is straightforward, but a few steps can help you navigate the process smoothly. Here’s a simple guide to help you download your perfect template:
- Create an Account or Log In: Head over to Shutterstock and sign up if you’re new, or log into your existing account. Having an account is necessary for downloading files and managing your licenses.
- Search for EPS Templates: Use the search bar at the top and type in keywords related to the type of template you need, like “logo EPS,” “flyer EPS,” or “business card EPS.” You can also filter results by category, style, or orientation to narrow down your options.
- Preview and Select a Template: Browse through the options and click on any template to see a larger preview. Pay attention to details like design style, customization options, and compatibility. When you find one you like, click the Add to Cart button.
- Review Your Cart and Purchase: Once you’ve added your chosen templates, go to your cart. Here, you can review your selections, check the licensing terms, and proceed to checkout. Shutterstock offers flexible licensing options, so choose what fits your needs best.
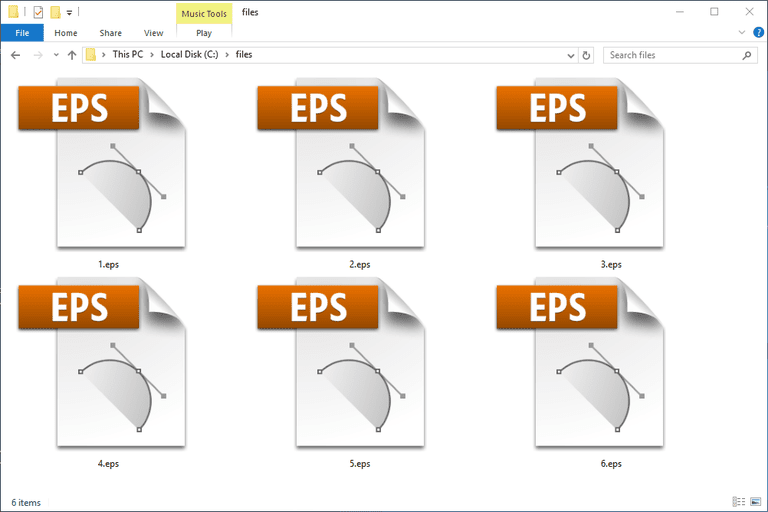
- Download the EPS File: After completing your purchase, navigate to your downloads section. Find the template you purchased, click the download button, and select the EPS format if prompted. The file will be saved to your computer, ready for editing in your favorite design software.
And that’s it! Now you’re ready to open your EPS template and start customizing it to fit your project. Remember, always keep a backup of the original file, and enjoy the creative process!
How to Open and Edit EPS Files Using Design Software
So, you’ve downloaded an EPS template from Shutterstock and you’re eager to start customizing it. The first step is knowing how to open and edit those EPS files. The good news is, most professional design software tools support EPS files, but your choice of software can make a big difference in how smoothly your editing process goes.
Popular Software Options:
- Adobe Illustrator: This is the industry standard for working with EPS files. It offers a robust set of tools that allow you to easily manipulate vector graphics, colors, and text. If you have access to Adobe Creative Cloud, this is your best bet.
- CorelDRAW: Another powerful vector graphic editor that handles EPS files efficiently. It’s especially popular among Windows users.
- Inkscape: A free, open-source alternative that supports EPS files. While it might not have all the bells and whistles of Illustrator, it’s a solid option for basic editing.
Steps to Open and Edit EPS Files:
- Open your chosen software: Launch Adobe Illustrator, CorelDRAW, or Inkscape.
- Import or open the EPS file: Use the File > Open option to locate your EPS file. Some programs may allow you to drag and drop the file directly into the workspace.
- Unlock layers if necessary: Many EPS templates come with multiple layers. Make sure to unlock any layers you want to modify. In Illustrator, check the Layers panel; in Inkscape, look at the Layers menu.
- Edit your design: You can now change colors, move elements, add new text, or delete parts of the template. Remember, since these are vector files, your edits will remain crisp regardless of resizing.
- Save your work: After editing, save your file in the native format (like .ai or .svg) or export it as a PDF or PNG if needed for sharing or printing.
Tip: If your EPS file appears blank or you encounter issues opening it, ensure that your software is updated to the latest version. Sometimes, EPS files from certain sources may have compatibility quirks, so trying a different program might help.
Tips for Customizing Shutterstock EPS Templates Effectively
Customizing an EPS template isn’t just about changing a few colors or swapping out text — it’s about making the design truly your own while maintaining its professional look. Here are some practical tips to help you customize Shutterstock EPS templates effectively:
1. Start with a clear plan
Before diving into editing, take a moment to review the template and decide what elements you want to change. Do you need to update the text? Change colors? Add new graphics? Having a plan saves time and prevents accidental edits.
2. Use the right tools for color customization
The color palette is often a key part of branding. Use the software’s eyedropper tool to pick colors from your existing branding or palette. You can also create custom swatches for consistency across your project.
3. Maintain visual hierarchy
When modifying text or graphics, keep in mind the visual flow. Make sure headlines stand out, and supporting details are easy to read. Adjust font sizes, weights, or spacing as needed to keep the design balanced.
4. Replace placeholder images or graphics
If your template includes stock images or icons, swap them out with your own visuals. Use high-resolution images for print and web to keep the quality sharp. Remember to adjust the size and positioning for a natural look.
5. Keep vector editing in mind
Since EPS files are vector-based, always prefer editing in vector format rather than rasterizing elements. This way, your edits remain crisp at any size. If you need to add new graphics, create them as vectors for seamless integration.
6. Consistency is key
Ensure that fonts, colors, and styles are consistent throughout the template. Use styles and swatches to apply uniform formatting quickly. This professional consistency makes your final design look polished.
7. Save incremental versions
Throughout your editing process, save different versions of your work. This way, if something doesn’t turn out as expected, you can revert to an earlier stage without losing everything.
By following these tips, you’ll be able to customize your Shutterstock EPS templates efficiently and produce a design that truly represents your brand or project. Remember, patience and attention to detail go a long way in creating professional-looking results!
Common Issues When Using EPS Templates and How to Troubleshoot
Using EPS templates from Shutterstock can be a real time-saver, but it’s not without its quirks. Sometimes, you might run into issues that make editing or customizing your template a bit frustrating. Don’t worry—most of these problems have simple solutions once you know what to look for. Let’s go over some of the most common issues and how to troubleshoot them.
Common Issue 1: Missing or Broken Fonts
One of the most frequent hiccups is missing fonts. If the template was created with specific fonts that you don’t have installed on your computer, your design might not look the way it’s supposed to.
- Solution: Check the font warnings in your editing software. If fonts are missing, you can replace them with similar ones available on your system. Many programs, like Adobe Illustrator, will alert you to missing fonts and suggest replacements.
- Alternatively, install the missing fonts if you have access to them. Shutterstock usually provides font info in the download files or documentation.
Common Issue 2: Layers Not Organized Properly
Sometimes, EPS templates come with complex layer structures, and it can be overwhelming to figure out which layer does what. This can cause accidental edits or difficulty in customizing specific elements.
- Solution: Take a moment to familiarize yourself with the layer panel. Group related elements together and lock layers you’re not working on to prevent accidental changes.
- Use the layer names for guidance—they often indicate what each layer contains. If layers are poorly named or cluttered, consider cleaning up the layer structure for easier editing.
Common Issue 3: Compatibility Problems with Software Versions
EPS files created in newer versions of design software might not open perfectly in older versions, or vice versa. This can lead to missing elements or formatting issues.
- Solution: Always save or export your EPS files in a compatible version if you’re sharing with others. When opening an EPS, try to update your software or ask for a version compatible with your software.
- Sometimes, opening the EPS in a different program (like Adobe Illustrator if you’re using CorelDRAW, or vice versa) can help resolve compatibility issues.
Common Issue 4: Unexpected Changes in Colors or Appearance
If your template’s colors look off or elements appear differently after opening, it might be due to color profiles or transparency issues.
- Solution: Check the color settings in your software. Convert colors to RGB or CMYK as needed, and embed color profiles if necessary.
- For transparency issues, flatten transparency or adjust blending modes to ensure the appearance stays consistent across different platforms.
Final Tip: Always Save Backup Copies
Before making major changes, save a backup of your original EPS file. That way, if something goes wrong, you can always revert to the original version without losing your progress.
Finalizing Your Design and Exportting the Finished Project
After customizing your EPS template and making sure everything looks perfect, it’s time to finalize your design and prepare it for sharing or printing. Let’s walk through the essential steps to get your project ready.
Review and Fine-Tune Your Design
Start by zooming in and carefully inspecting all elements. Check for alignment, color consistency, and readability. Make any last-minute adjustments to ensure your design is polished and professional-looking.
- Verify all text: Double-check spelling, font sizes, and hierarchy.
- Confirm colors: Make sure the color palette matches your branding or project requirements.
- Check image quality: Ensure that all embedded images are high resolution, especially if you plan to print.
Remove Unnecessary Layers or Elements
Clean up your file by deleting unused layers or hidden elements that aren’t part of the final design. This reduces file size and prevents accidental edits later on.
Save Your Final Version
Save your project in the native format of your editing software (like AI for Adobe Illustrator) so you can make future edits if needed. Also, save a copy as a PDF for easy sharing and printing, or as a high-resolution JPEG or PNG if you need raster formats.
Exportting Your Design
Depending on your end goal, here are some common export options:
| Format | Best For | Notes |
|---|---|---|
| Printing, professional sharing | Maintain vector quality; choose high resolution for images | |
| JPEG/PNG | Web, social media, digital presentations | Raster formats; adjust resolution (300dpi for print, 72dpi for screen) |
| EPS | Further editing or professional printing | Keep vector quality intact |
Final Checks Before Export
- Ensure all elements are visible and correctly aligned.
- Set the correct color mode (RGB for digital, CMYK for print).
- Adjust resolution settings based on your output needs.
Once everything looks good, proceed with exporting your design in the desired format. Remember, it’s always a good idea to keep a backup of your original project files. Now you’re all set to share your beautifully customized project with the world!
Conclusion and Additional Resources for Design Inspiration
Using an EPS template from Shutterstock can significantly streamline your design process, allowing you to create professional-quality visuals with ease. By understanding how to customize these templates effectively, you can save time and ensure your final product aligns perfectly with your vision. Remember to always start with a clear concept and choose a template that best fits your project’s goals. Additionally, familiarizing yourself with tools like Adobe Illustrator can enhance your editing experience and help you get the most out of your EPS files.
For further inspiration and skill development, consider exploring the following resources:
- Design Blogs: Websites like Behance and Dribbble showcase creative projects and trends.
- Online Tutorials: Platforms such as Adobe Tutorials and YouTube offer step-by-step guides on EPS file customization.
- Design Communities: Join forums and social media groups focused on graphic design to exchange ideas and seek feedback.
- Stock Image and Template Libraries: Besides Shutterstock, explore other sources like iStock and Freepik for diverse design assets.
By leveraging these resources, you can continually enhance your design skills and stay updated with the latest trends, ensuring your projects are both innovative and impactful.