If you’re passionate about photography, videography, or digital art, becoming a Shutterstock contributor might be your next big move. Shutterstock is one of the world’s leading platforms for licensing images, videos, and music, giving creators like you a chance to earn money by sharing your work with a global audience. The contributor program is designed to be user-friendly, welcoming both beginners and seasoned professionals. Whether you’re looking to build a portfolio or make a steady income, joining
Prerequisites for Setting Up Your Contributor Account

Before diving into the registration process, it’s important to make sure you meet a few basic requirements. Shutterstock wants to ensure that their contributors are providing high-quality content that meets their standards, so there are some essentials you’ll need to prepare:
- Ownership of Your Content: You must be the original creator of the images, videos, or music you plan to upload. Shutterstock does not accept content owned by others.
- Legal Rights and Releases: Your content should not infringe on intellectual property rights or privacy laws. For photos featuring recognizable people or private property, you’ll need to provide model or property releases.
- Technical Quality: Files should meet Shutterstock’s technical standards, such as high resolution (for images, typically at least 4MP), proper focus, and no watermarks.
- Device Readiness: A computer or mobile device with internet access to upload and manage your portfolio.
- Bank Account Details: To receive your earnings, you’ll need a valid bank account or PayPal account, depending on your location.
Additionally, it’s a good idea to review Shutterstock‘s content guidelines and terms of service beforehand. Having all these prerequisites sorted out will make the registration process smoother and help you start uploading your content without delays. Once you’re ready, you’re all set to create your account and begin your journey as a Shutterstock contributor!
How to Sign Up for a Shutterstock Contributor Account

Getting started on Shutterstock as a contributor is pretty straightforward, but it’s important to follow each step carefully so your account is set up correctly from the get-go. First things first, head over to the Shutterstock Contributor Signup Page. Here, you’ll find the option to create your account — it’s as simple as clicking the “Sign Up” button.
Once you’re there, you’ll need to provide some basic information to get started:
- Email Address: Make sure it’s an active email you check regularly, as this will be the main way Shutterstock communicates with you.
- Password: Choose a strong password to keep your account secure.
- Country of Residence: This helps Shutterstock tailor the experience and may affect tax or payment details.
After filling out these details, click “Next” or “Create Account.” Shutterstock will then ask you to agree to their terms and conditions—definitely a good idea to skim through these so you’re aware of the platform’s policies.
Next, you’ll see a prompt to choose your contributor profile name or username. This is how you’ll be identified on the platform, so pick something professional but memorable. Once you’ve selected your username, Shutterstock might ask for additional information such as your full name, phone number, and preferred payout method.
At this stage, you’ll also have the option to link your social media accounts, which can sometimes boost your visibility or help you connect with the Shutterstock community. Just remember, linking accounts is optional, so do what feels right for you.
Finally, review all your entered information to ensure everything is accurate. After confirming, click “Complete Sign Up,” and you’re officially on your way to becoming a Shutterstock contributor!
Verifying Your Email and Completing Your Profile
Great! You’ve successfully signed up, but before you start uploading your fantastic images, there are a couple more steps to make your account fully functional. The first is email verification. Shutterstock will send a confirmation email to the address you provided during sign-up.
Check your inbox (and spam folder, just in case) for an email from Shutterstock. It will typically have a subject line like “Verify Your Email Address.” Click the link inside the email to verify your account. This step is crucial because it confirms your email is valid and helps prevent unauthorized access.
Once your email is verified, it’s time to complete your profile. Head back to your Shutterstock contributor dashboard. Here, you’ll see a “Complete Your Profile” prompt or a profile icon you can click on. Filling out your profile helps build credibility and makes your portfolio more appealing to potential buyers.
Here’s what you should focus on when completing your profile:
- Profile Photo: Upload a clear, professional photo of yourself. Profiles with a face tend to attract more trust.
- Bio: Write a brief, friendly bio about yourself. Mention your photography style, interests, or any specialties. Keep it authentic and approachable.
- Location: Confirm your country and, if applicable, your city. This information can be important for licensing and tax purposes.
- Keywords and Tags: Some platforms allow you to add keywords or tags to describe your work—this helps buyers find your images more easily.
Lastly, double-check your payout information—whether you prefer PayPal, bank transfer, or other methods. Ensuring your payment details are correct now will save you headaches later when you start earning commissions.
And that’s it! With your email verified and profile completed, you’re all set to start uploading images, videos, or illustrations to showcase your work. Remember, a complete and professional profile not only boosts your credibility but also increases your chances of making sales. Happy contributing!
Uploading Your First Photos and Videos
Congratulations! You’re now ready to start sharing your creative work with the world. Uploading your first photos and videos to Shutterstock might seem a bit daunting at first, but once you get the hang of it, it’s a straightforward process. Let’s walk through the steps together so you can confidently upload your content and start earning.
First, make sure your files meet Shutterstock’s technical requirements. For photos, the recommended resolution is at least 4 megapixels, and for videos, they should be at least 1920×1080 pixels with a minimum of 30 frames per second. Keep your files in high-quality formats like JPEG for images and MOV or MP4 for videos.
When you’re ready, log into your contributor account and navigate to the upload section. Here’s a quick overview:
- Select Files: Click the “Upload” button and choose your photos or videos from your device. You can upload multiple files at once, which saves time.
- Add Metadata: Fill in relevant details for each file, such as title, description, and keywords. Be descriptive and specific—think about what buyers will search for.
- Choose Categories: Select appropriate categories to help your content appear in the right searches.
- Set Licensing Options: Most contributors opt for Royalty-Free licensing, but review your options to ensure you’re comfortable with the terms.
Once everything’s filled out, submit your files for review. Shutterstock will evaluate your uploads to ensure they meet quality standards. The review process can take anywhere from a few hours to a few days, so don’t worry if your files aren’t live immediately. Keep an eye on your email for any feedback or approval notifications.
Remember, uploading consistently and maintaining high quality will improve your chances of making sales. Don’t be discouraged if your first few uploads don’t sell right away—perseverance is key!
Tips for Optimizing Your Content for Better Sales
Now that you’ve uploaded some content, the real fun begins—making sure your photos and videos get noticed and purchased. Optimizing your content is all about making it as discoverable and appealing as possible. Here are some tried-and-true tips to help boost your sales:
1. Use Relevant Keywords
Keywords are the primary way buyers find your content. Think like your audience: what words would they type into the search bar? Use specific terms that accurately describe your image or video. Avoid keyword stuffing—be concise, relevant, and varied. Shutterstock allows you to add up to 50 keywords per file, so take advantage of that space!
2. Craft Clear and Descriptive Titles and Descriptions
Your titles and descriptions should complement your keywords. Write naturally and include important details such as location, mood, subject, and context. For example, instead of “Beach,” try “Sunset over a crowded beach with families and umbrellas.” Well-written descriptions help your content rank higher in search results.
3. Choose Appropriate Categories
Select the most relevant categories for your content. Proper categorization ensures your work appears in the right searches and collections, increasing visibility.
4. Focus on High-Quality Content
High resolution, sharp focus, good lighting, and compelling composition matter. Quality content naturally attracts more buyers and earns higher royalties.
5. Stay Consistent and Upload Regularly
The more quality content you add, the better your chances of making sales. Establish a routine—whether it’s weekly or bi-weekly uploads—and keep your portfolio fresh.
| Optimization Tip | Benefit |
|---|---|
| Use targeted keywords | Improves discoverability in search results |
| Accurate titles/descriptions | Helps buyers understand your content quickly |
| High-quality visuals | Attracts more buyers and earns higher royalties |
| Consistent uploads | Builds your portfolio and increases sales potential |
Finally, keep an eye on your sales data and performance metrics. Shutterstock provides valuable insights that can guide you in refining your content and optimizing future uploads. Remember, success on stock platforms is a marathon, not a sprint. Keep learning, experimenting, and improving, and you’ll see your efforts pay off over time!
Frequently Asked Questions About Shutterstock Contributor Accounts
If you’re considering becoming a Shutterstock contributor, you likely have some questions. Here are some of the most common inquiries to help you get started:
- How do I create a Shutterstock contributor account? You can sign up on the Shutterstock Contributor portal by providing your email, creating a password, and agreeing to their terms of service.
- Is there an approval process for submitted content? Yes, all images, videos, and vectors undergo a review process to ensure they meet Shutterstock’s quality and content guidelines.
- What are the payout options? Shutterstock offers payments via PayPal, Payoneer, and Skrill once your earnings reach the minimum threshold.
- Are there any content restrictions? Yes, content must be original, properly model or property released if applicable, and adhere to Shutterstock’s content policies.
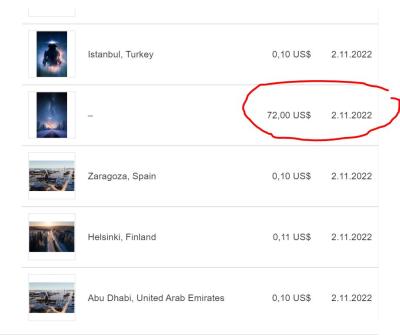
- How do I track my earnings and performance? The contributor dashboard provides detailed analytics, including downloads, earnings, and popular content.
For more detailed information, visit the Shutterstock Contributor Help Center or contact their support team. It’s essential to understand the platform’s policies to maximize your success as a contributor. Remember, creating high-quality, original content that aligns with Shutterstock’s guidelines will increase your chances of approval and earning potential.


