Thinking of flipping or reversing an image to add some creative flair or fit your design needs? Shutterstock Editor makes it super easy to do just that! Whether you’re customizing a photo for social media, a presentation, or a personal project, knowing how to reverse an image can make your visuals more dynamic and eye-catching. In this guide, we’ll walk through what Shutterstock Editor is all about and how you can quickly reverse any image with just a few clicks. No fancy tech skills needed—just simple steps to transform your images effortlessly.
Step-by-Step Guide to Reversing an Image in Shutterstock Editor
Reversing an image in Shutterstock Editor is straightforward and user-friendly. Follow these simple steps to flip your images horizontally or vertically, depending on your creative vision:
- Log in and Upload Your Image
- Access the Editing Tools
- Select the Flip Option
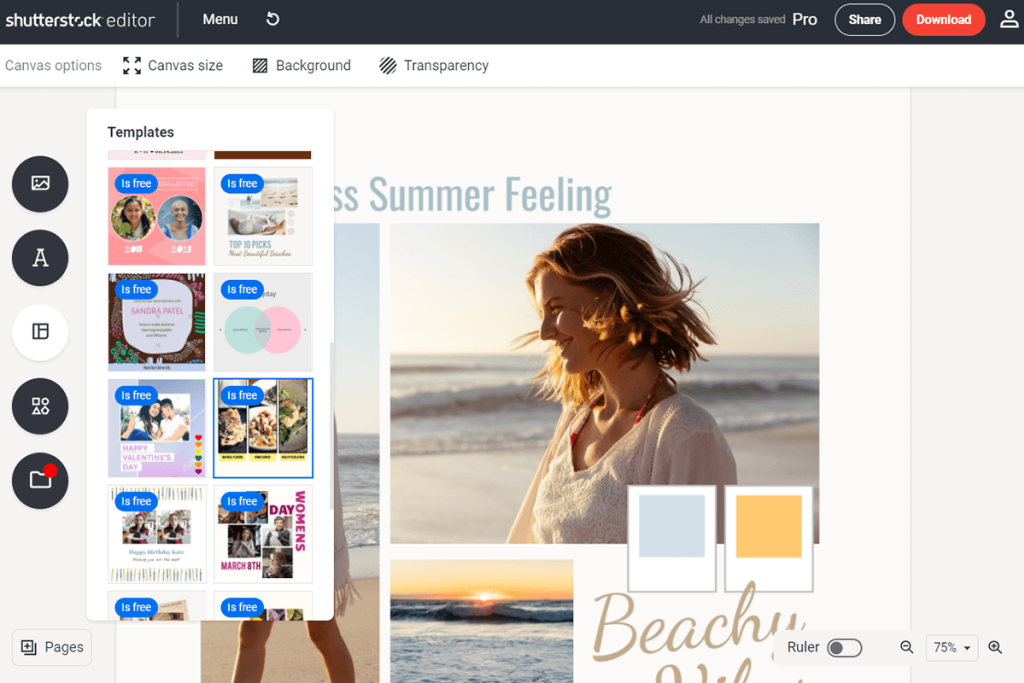
First, head over to Shutterstock Editor and log into your account. If you haven’t uploaded your image yet, click on the Upload button and select the image file from your device. Once uploaded, click on the image to open it in the editor workspace.
With your image open, look for the editing toolbar usually located on the left or top of the screen. Find the Transform or Flip options. Depending on the interface updates, these might be represented as icons like arrows or a mirror symbol.
Click on the flip or mirror icon. You’ll typically see options for Flip Horizontal and Flip Vertical. Choose the one that suits your needs:
- Flip Horizontal: Reverses the image from left to right, creating a mirror image across the vertical axis.
- Flip Vertical: Reverses the image from top to bottom, flipping it across the horizontal axis.
After selecting the flip option, you’ll see a real-time preview of your reversed image. Take a moment to review it. If everything looks good, proceed to the next step. If not, you can undo or try flipping again until you’re satisfied.
Once you’re happy with the flipped image, click the Save or Download button. Choose your preferred file format and quality settings. Your reversed image is now ready to be used in your project or shared online!
And that’s it! Reversing an image in Shutterstock Editor is quick and simple, giving you more creative control over your visuals without any hassle. Play around with the flip options to see what works best for your design—happy editing!
Tips for Achieving the Best Reversal Results
Reversing an image in Shutterstock Editor can seem straightforward, but to really make your photos pop and look professional, there are some handy tips you should keep in mind. Let’s dive into how you can get the best results every time!
1. Start with a High-Quality Image
The clearer and sharper your original photo, the better your reversed image will look. Blurry or pixelated images can become even more noticeable when flipped. So, always choose high-resolution images for the best outcome.
2. Use the Grid and Guides
Shutterstock Editor often provides grid lines or guides. Use these to align your image perfectly when flipping. This ensures the reversal looks natural, especially if you’re combining it with other elements or creating symmetrical designs.
3. Pay Attention to Lighting and Shadows
When you flip images that have shadows or specific lighting, double-check how they look after reversal. Sometimes, shadows may appear unnatural or inconsistent, so you might need to tweak brightness or contrast to make everything blend seamlessly.
4. Experiment with Different Flip Options
Most editors, including Shutterstock, offer horizontal and vertical flip options. Play around with both to see which looks best for your project. Sometimes, flipping horizontally gives a more natural look, especially for portraits or objects.
5. Preview Before Finalizing
Always take a moment to preview your reversed image. Look at it from different angles and distances to catch any oddities or distortions. Making small adjustments can make a huge difference in the final result.
6. Combine with Other Edits
Reversal works great when combined with other editing techniques like cropping, resizing, or adding filters. This can help create a unique visual effect and make your project stand out.
By following these tips, you’ll turn out images that are not only reversed but also polished and professional-looking. It’s all about paying attention to details and experimenting until you find what works best for your specific image!
Common Issues and How to Fix Them
Even with the best intentions, sometimes reversing an image can lead to unexpected problems. Don’t worry—many of these issues are easy to fix once you recognize them. Let’s go over some common problems and quick solutions.
Issue 1: Mirrored Text or Logos
If your image contains text or logos that appear backwards after reversal, it can look unprofessional. To fix this, consider:
- Reversing only parts of the image rather than the entire photo.
- Replacing or editing out the reversed text or logo if possible.
- Using overlays or additional text layers to correct the orientation.
Issue 2: Disproportionate or Distorted Images
Sometimes, flipping an image causes it to look stretched or squished, especially if it was resized beforehand. To prevent this:
- Always maintain the aspect ratio when resizing before flipping.
- If distortion occurs, undo the flip and resize again with the aspect ratio locked.
Issue 3: Shadows and Lighting Inconsistencies
Reversing can sometimes make shadows look unnatural or misplaced. To fix this:
- Adjust brightness, contrast, or shadows sliders to match the new orientation.
- Use the eraser or masking tools to remove or soften unnatural shadows.
Issue 4: Loss of Image Quality
Repeated editing or enlarging images can reduce quality, making the reversed version look pixelated. To avoid this:
- Always start with the highest resolution image possible.
- Limit resizing and avoid excessive enlarging after reversal.
Issue 5: Alignment Problems in Composite Designs
If your reversed image doesn’t align correctly with other elements, try:
- Using guides and snapping features to fine-tune placement.
- Adjusting layers or grouping objects for better control.
Remember, most issues can be quickly remedied with a little patience and some basic editing. Don’t hesitate to experiment and use the undo feature if something doesn’t look right. Practice makes perfect, and soon reversing images will become second nature!
Conclusion and Additional Resources for Image Editing
Reversing an image in Shutterstock Editor is a simple yet powerful way to enhance your creative projects, allowing you to create mirror effects, correct orientation issues, or achieve a specific visual style. By following the step-by-step instructions outlined earlier, you can easily flip your images horizontally or vertically, ensuring your design looks exactly how you envision it. Remember, practicing these techniques will improve your overall image editing skills and help you produce more polished content.
For further mastery, consider exploring these additional resources:
- Shutterstock Editor Help Center: Comprehensive guides and tutorials on various editing tools and features.
- Online Image Editing Courses: Platforms like Udemy, Coursera, or Skillshare offer courses on photo editing fundamentals and advanced techniques.
- Photo Editing Blogs and Forums: Communities such as Photoshop Gurus or Reddit’s r/photoeditors provide tips, tricks, and peer support.
- Free and Premium Editing Software: Experiment with tools like GIMP, Adobe Photoshop, or Canva to expand your editing capabilities beyond Shutterstock Editor.
By leveraging these resources, you can continue improving your skills, explore new creative possibilities, and produce high-quality images suitable for any project. Remember, mastering image reversal and other editing techniques opens up a world of creative opportunities—so keep practicing and exploring new tools to elevate your design work.