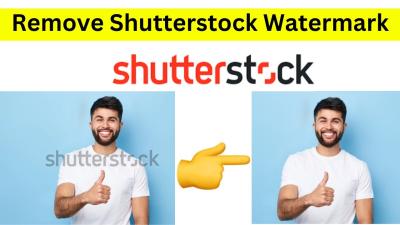
If you’ve ever downloaded a logo from Shutterstock and wished you could tweak the tagline to better fit your brand, you’re not alone. Many users find themselves wanting to customize logos to make them more personal and aligned with their business identity. The good news is, editing a Shutterstock logo tagline isn’t as daunting as it sounds—once you understand the basics, you can easily make those adjustments yourself. Whether you’re a small business owner, a designer, or just someone experimenting with branding, this guide will walk you through the essential steps to edit logo taglines effectively. Let’s dive in and unlock the full potential of your logo files!
Understanding Shutterstock Logo Files and Formats
Before you can start editing a Shutterstock logo tagline, it’s important to understand the types of files you’re working with and their formats. Logos from Shutterstock typically come in various formats, each suited for different purposes. The most common formats include:
- AI (Adobe Illustrator): A vector file that’s perfect for editing because it retains quality regardless of size. Ideal for making detailed changes like altering text or colors.
- EPS (Encapsulated PostScript): Another vector format that’s widely supported by design programs. Great for scalability and editing.
- PSD (Photoshop): A raster format suitable for detailed editing, but it’s pixel-based, so enlarging it too much can cause quality loss.
- PNG/JPG: Raster images used mainly for quick viewing or online use. Not suitable for editing the actual logo or tagline.
Most editable logo files from Shutterstock are vector-based, such as AI or EPS files. These formats allow you to modify the tagline without losing image quality. If you only have a raster file like JPG or PNG, editing becomes trickier, and you might need to recreate or trace the logo in a graphic design program.
When downloading your logo, always check the file type. For editing purposes, choose the vector formats—they give you the flexibility to modify text, colors, and layout easily. Also, ensure you have compatible design software like Adobe Illustrator, CorelDRAW, or other vector graphic editors. Once you understand the file format, you’re better equipped to make precise, professional edits to your Shutterstock logo tagline, ensuring it fits your branding perfectly.
Tools Needed for Logo Tagline Editing
Alright, before we dive into the nitty-gritty of editing your Shutterstock logo tagline, let’s talk about the tools you’ll need. The good news is, you don’t have to be a graphic design expert or have a fancy setup. With the right resources, you’ll be able to make those tweaks smoothly and confidently.
First up, you’ll want a reliable image editing software. Here are some popular options:
- Adobe Photoshop: The gold standard for image editing. It offers powerful tools for detailed edits, including text manipulation.
- GIMP: A free, open-source alternative that packs a punch. It’s perfect if you’re looking for something budget-friendly but still capable.
- Canva: User-friendly and cloud-based. Great for quick edits, especially if you’re not familiar with complex software.
- Pixlr: Online editor that’s simple to use and requires no downloads. Good for quick fixes and minor tweaks.
Next, you’ll need the original logo file from Shutterstock, ideally in a high-resolution format like PNG or SVG. This ensures your edits remain clear and professional-looking.
Finally, having some basic knowledge of how to use these tools helps. If you’re new, don’t worry—there are plenty of tutorials online. Just make sure you’re comfortable opening your logo file, selecting text, and saving your work once done.
In summary, the essential tools are:
- An image editing program (Photoshop, GIMP, Canva, or Pixlr)
- The original logo file from Shutterstock
- Basic familiarity with your chosen editing tool
Once you have these ready, you’re all set to start customizing your logo tagline to better fit your brand’s voice and style!
Step-by-Step Guide to Editing Your Shutterstock Logo Tagline
Now that you’ve gathered your tools, let’s walk through the process of editing your Shutterstock logo tagline step-by-step. Don’t worry—it’s pretty straightforward, and I’ll break it down to make it easy to follow.
Step 1: Open Your Logo File
Launch your preferred editing software and open your logo file. If you’re using Photoshop, go to File > Open and select your logo. For GIMP or other tools, the process is similar. Make sure you’re opening the high-resolution version for the best results.
Step 2: Locate the Tagline
Once your logo is loaded, look for the text layer that contains your tagline. In Photoshop, layers are on the right side; click on the text layer to select it. If your logo was flattened into a single image, you may need to use the Text Tool and recreate the tagline over the existing one, which we’ll cover in the next step.
Step 3: Edit or Recreate the Tagline
- If the tagline is on a separate text layer: Simply double-click the text to edit it. Make your changes, then adjust font size, color, or style as needed.
- If the tagline is flattened: Use the Rectangular Marquee Tool to select the tagline area, then delete or hide it. Use the Text Tool to type in your new tagline. Pick a font that matches your original or choose a new style that aligns with your brand.
Step 4: Customize Your Text
Adjust the font, size, color, and alignment to match your branding. Most tools have intuitive options for these settings. For example, in Photoshop, you can use the top menu to change font type and size, or the color picker to select your preferred color.
Step 5: Position Your New Tagline
Drag the text box to position your tagline where it looks best. Often, logos have a designated spot for taglines—try to keep it balanced and aligned properly.
Step 6: Save Your Edited Logo
Once you’re happy with the look, save your work. Use Save As to create a new file, preserving the original. Export your logo in the needed format—PNG is usually a safe choice for web use, while SVG is great for scalability.
Step 7: Review and Finalize
Open your saved logo in different viewers or browsers to ensure the tagline appears crisp and correctly positioned. Make any final tweaks if necessary, and you’re done!
And voila—your logo now sports a fresh, updated tagline that better reflects your brand’s message. Remember, a little patience and attention to detail go a long way in making your logo look professional and polished.
Tips for Customizing Your Logo Tagline Effectively
When it comes to customizing your Shutterstock logo tagline, the goal is to make it stand out while staying true to your brand’s personality. Here are some practical tips to help you achieve that:
- Keep it concise and clear: Your tagline should communicate your message quickly. Avoid long-winded phrases; instead, aim for a short, memorable line that captures your brand’s essence.
- Choose the right font: The font sets the tone. For a modern look, go for sleek sans-serif fonts. For a more traditional vibe, serif fonts work well. Make sure the font aligns with your brand personality.
- Play with color: Use contrasting colors to make your tagline pop. If your logo has a specific color palette, incorporate those colors, but don’t be afraid to add a splash of something vibrant to draw attention.
- Adjust size and placement: The tagline should complement the logo without overpowering it. Play around with font size and positioning—either beneath the logo or beside it—to find the perfect balance.
- Use effects sparingly: Effects like shadows or outlines can add depth but overdoing them can make the tagline look cluttered. Less is more—aim for clarity and professionalism.
- Test for readability: Ensure your tagline is legible on various backgrounds and sizes. Zoom out or view on different devices to see how it performs.
Remember, the key to effective customization is to stay aligned with your brand identity and ensure your message resonates with your audience. Take your time experimenting with different styles until you find the perfect fit!
Saving and Exporting Your Edited Logo
Once you’re happy with your customized tagline and overall logo design, it’s time to save and export your work so you can use it across your branding materials. Here’s how to do it smoothly:
1. Save Your Project File: Before exporting, save your design in the native format of your editing tool (like PSD, AI, or the Shutterstock editor’s format). This allows you to make future edits without starting from scratch.
2. Choose the Right Export Format: The most common formats for logos are:
| Format | Best For | Notes |
|---|---|---|
| PNG | Web use, transparent backgrounds | High quality, supports transparency |
| JPEG | Web use, non-transparent backgrounds | Smaller file size but no transparency |
| SVG | Scalable graphics for high-resolution displays | Great for responsiveness; retains quality at any size |
| Print materials | High resolution, suitable for printing |
Depending on where you’ll use your logo, export in the appropriate format. For most online uses, PNG with transparency is ideal.
3. Set the Resolution and Size: For digital use, 72 dpi is standard, but for print, aim for 300 dpi. Make sure to export your logo at the size you’ll need, but also consider keeping a vector version (like SVG) for resizing without loss of quality.
4. Organize Your Files: Save your exported files in clearly labeled folders, like “Web,” “Print,” or specific project names. This keeps your branding assets organized and easy to find.
5. Backup Your Work: Always keep backups of your original project files and exported versions. Cloud storage or external drives are great options to prevent any data loss.
With these steps, you’ll ensure that your logo looks sharp and professional wherever it appears. Remember, a well-saved and properly exported logo is the foundation of consistent branding across all your marketing channels.
Common Challenges and How to Overcome Them
When you’re working on editing a Shutterstock logo tagline, it’s normal to encounter some hurdles along the way. Don’t worry—most challenges have simple solutions once you know what to look for. Let’s talk about some of the common issues and how you can tackle them effectively.
1. Finding the Right Files
Sometimes, the biggest challenge is locating the correct logo files. Shutterstock offers various formats and versions, and not all are suitable for editing. To avoid frustration, always ensure you download the high-resolution or vector files (like SVG or AI files) if available. These formats are easier to edit without losing quality.
2. Ensuring Compatibility with Editing Software
Not all editing tools handle logo files equally well. For example, raster images like JPEGs and PNGs can lose clarity when resized, while vector files are more flexible. To overcome this, pick professional design software like Adobe Illustrator or free alternatives like Inkscape for vector files. If you’re working with raster images, ensure your software supports layers and transparent backgrounds for smoother editing.
3. Maintaining Brand Consistency
One common mistake is accidentally changing the logo’s style or colors, which can dilute brand identity. To prevent this, always keep a reference of the original logo elements. Use the same color codes, fonts, and proportions. Many editing programs allow you to work with layers and guides, making it easier to keep everything consistent.
4. Managing Text Quality
When editing the tagline text, you might notice quality loss or font issues. To avoid this, use the original font if possible. If you don’t have access to it, try to match the font as closely or consider purchasing the font from a reputable source. Also, check the resolution and size to ensure the text remains crisp and clear.
5. Saving and Exporting Correctly
Finally, saving your work in the right format is crucial. For web use, PNG or SVG works well, while for print, high-resolution PDFs or TIFFs are better. Always double-check your export settings to retain quality, and consider saving a master file with all layers intact for future edits.
Additional Resources for Logo Customization
If you’re serious about customizing logos and want to take your skills to the next level, there are plenty of resources out there to help you learn more. Here’s a quick roundup of some of the best tools and tutorials:
Online Tutorials and Courses
- Adobe Creative Cloud Tutorials: Adobe offers comprehensive guides on using Illustrator and Photoshop for logo editing.
- Coursera & Udemy: Platforms filled with courses on graphic design basics, logo creation, and branding.
- YouTube Channels: Channels like The Futur, Yes I’m a Designer, and Adobe Creative Cloud provide free step-by-step tutorials.
Design Software and Tools
- Adobe Illustrator: Industry-standard for vector editing, perfect for logo customization.
- Inkscape: Free, open-source vector graphics software that’s quite powerful.
- Canva: User-friendly online tool great for quick edits and simple customizations.
Fonts and Color Resources
- Google Fonts: Free fonts that you can match or replace in your logo designs.
- Adobe Fonts: Extensive library if you’re an Adobe Creative Cloud subscriber.
- Color Hunt & Coolors: Websites to find trendy color palettes that match your brand’s style.
Design Inspiration and Community
- Dribbble & Behance: Platforms to see professional logo designs and get inspired.
- Reddit’s r/Design: Community discussions and feedback on logo projects.
Remember, mastering logo customization takes time and practice. Don’t hesitate to experiment with different tools and techniques, and always keep a backup of your original files. With the right resources and a bit of patience, you’ll be editing logos like a pro in no time!