In the age of social media, eye-catching visuals are essential to stand out. Shutterstock offers a vast library of high-quality images that can be perfect for your posts, but sometimes a little editing is needed to make them truly pop. Whether you’re customizing photos to match your brand or adding a personal touch, editing Shutterstock images can take your content to the next level. Don’t worry if you’re new to editing — this guide will walk you through simple, effective ways to enhance your
Why Editing Shutterstock Photos Enhances Your Social Media Content
Using stock photos from Shutterstock is a fantastic starting point, but editing them is what transforms a generic image into a tailored visual that resonates with your audience. Here’s why editing is so important:
- Personalization: Customizing images helps your content reflect your brand’s personality and message. It’s like adding your signature touch!
- Improved Visual Appeal: Small edits like adjusting brightness, contrast, or colors can make an image more vibrant and eye-catching, increasing engagement.
- Consistency: Editing allows you to maintain a consistent look and feel across your social media platforms, which helps build brand recognition.
- Highlighting Key Elements: By cropping or adding overlays, you can direct your audience’s attention to the most important parts of the image.
- Creating a Unique Style: Editing gives you the freedom to develop a signature style or aesthetic that sets your content apart from others.
Imagine scrolling through your feed — the images that stand out are often the ones that have been thoughtfully edited to match the vibe or message of the post. Whether it’s a subtle filter, a catchy overlay, or a bold color change, editing Shutterstock photos ensures your social media content isn’t just good, but memorable. Plus, with simple editing tools now available online and on mobile apps, you don’t need to be a professional designer to make your images look fantastic. It’s all about making small adjustments that elevate your visuals and help you connect better with your audience.
Tools and Software Needed for Editing Shutterstock Images
When it comes to editing Shutterstock photos for social media, having the right tools can make all the difference. Luckily, there’s a wide range of user-friendly software options suited for beginners and experienced editors alike. Let’s explore some of the most popular and effective tools you can use to give your images that extra pop.
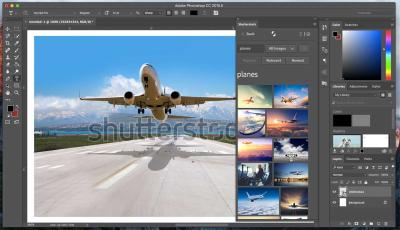
1. Adobe Photoshop – The industry standard for photo editing, Photoshop offers powerful features like advanced layering, masking, retouching, and a vast array of filters. While it’s a bit more complex, learning the basics can significantly elevate your images.
2. Canva – Perfect for quick edits and social media graphics. Canva provides a straightforward drag-and-drop interface, tons of templates, fonts, and effects. It’s ideal if you want to add text overlays or create engaging posts without fuss.
3. Lightroom – Great for adjusting colors, exposure, and overall image quality. Lightroom’s user-friendly interface makes it easy to enhance photos with minimal effort, making your Shutterstock images look professional.
4. GIMP – A free, open-source alternative to Photoshop. It offers many advanced editing features and is perfect if you’re looking for a powerful tool without the price tag.
5. Mobile Apps – Apps like Snapseed, VSCO, and Adobe Photoshop Express are fantastic for editing on the go. They offer filters, cropping, adjustments, and text options, making it easy to prepare images directly from your phone.
Ultimately, the choice of software depends on your needs and comfort level. For quick edits, Canva or mobile apps work well. For more detailed adjustments, Photoshop or Lightroom are excellent options. Whichever tool you choose, spending a little time familiarizing yourself with its features will pay off when creating eye-catching social media posts.
Step-by-Step Process to Edit Shutterstock Photos for Social Media
Ready to transform your Shutterstock images into stunning social media posts? Here’s a simple, step-by-step guide to help you through the editing process. Don’t worry — I’ll keep it straightforward and easy to follow.
Step 1: Choose the Right Image
Select a Shutterstock photo that aligns with your brand or message. Look for images with good composition, high resolution, and visual clarity. Remember, social media images are often viewed on small screens, so clarity matters!
Step 2: Download and Open in Your Editing Software
Download the image in the highest resolution available. Open it in your preferred editing tool — whether that’s Photoshop, Canva, or another program. This gives you a blank canvas to work with.
Step 3: Crop and Resize for Your Platform
Different social media platforms favor different image dimensions. For example:
- Instagram: 1080 x 1080 pixels (square)
- Facebook: 1200 x 630 pixels (landscape)
- Twitter: 1024 x 512 pixels
Crop or resize your image accordingly to ensure it displays perfectly without awkward cropping or distortion.
Step 4: Adjust Brightness, Contrast, and Colors
Enhance your image by tweaking brightness, contrast, and saturation. Small adjustments can make your photo pop and grab attention. Use sliders or auto-enhance features if available.
Step 5: Remove Unwanted Elements
If there are distracting objects or imperfections, use tools like the clone or healing brush to clean up the image. This step helps focus attention on the main subject.
Step 6: Add Text or Graphics
Overlay text, logos, or icons to communicate your message clearly. Keep text concise, use readable fonts, and complement the image’s style. Canva and Photoshop make this process seamless with their text tools.
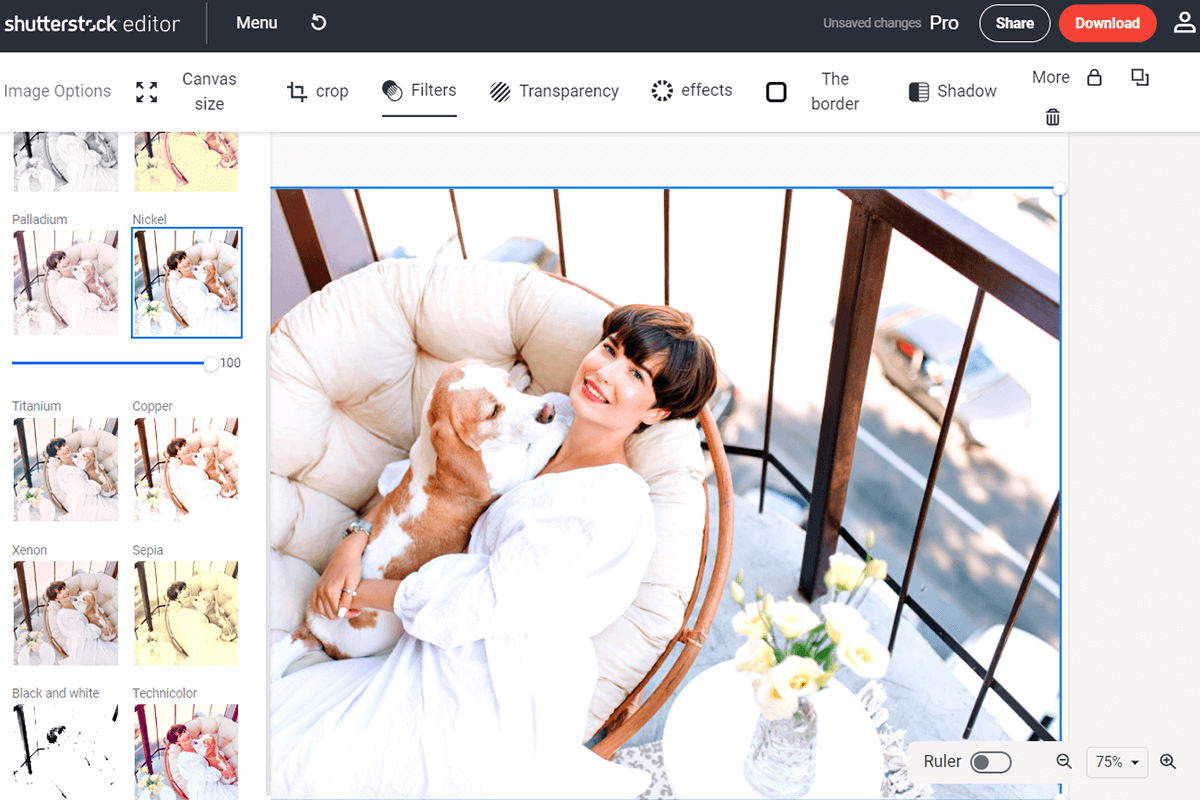
Step 7: Apply Filters or Effects (Optional)
Add filters or effects to give your image a unique look. Be cautious not to overdo it — subtlety often works best for maintaining a professional appearance.
Step 8: Save and Export
Save your edited image in a suitable format (like JPEG or PNG). Make sure to choose the right resolution for social media to keep your images crisp and clear.
Step 9: Upload and Share
Finally, upload your polished image to your social media platform. Add a compelling caption, hashtags, and tags to maximize engagement.
And there you go! With these simple steps, you can turn any Shutterstock photo into an eye-catching social media post that stands out. Practice makes perfect, so don’t hesitate to experiment and find your editing style. Happy posting!
Tips for Creating Eye-Catching Social Media Graphics
When it comes to grabbing attention on social media, your graphics need to stand out in the feed. Here are some friendly tips to help you craft visuals that catch the eye and communicate your message effectively:
- Use Bold Colors: Bright, contrasting colors can make your images pop. Don’t be afraid to experiment with vibrant palettes that align with your brand or mood.
- Keep It Simple: Cluttered images can be overwhelming. Focus on one main message or element and give it plenty of space to breathe.
- Include Clear Text: If you add text, make sure it’s easy to read. Use large fonts, high contrast, and minimal wording—think punchy headlines or calls to action.
- Use High-Quality Images: Blurry or pixelated photos will turn viewers off. Start with high-resolution Shutterstock images and enhance them for social media.
- Incorporate Branding Elements: Add your logo, brand colors, or visual style consistently across posts to build recognition.
- Play with Layouts and Grids: Use grid tools or overlay techniques to arrange elements harmoniously. Balance is key—try rule-of-thirds or center-focused designs.
- Add Visual Effects Sparingly: Subtle shadows, overlays, or filters can enhance your image without overwhelming it. Just don’t go overboard!
- Test Different Formats: Carousel posts, infographics, quote images—variety keeps your feed interesting and engaging.
Remember, creating eye-catching graphics is as much about your creativity as it is about understanding your audience. Keep experimenting, stay consistent with your branding, and you’ll see your social media presence flourish!
Best Practices for Maintaining Image Quality and Consistency
Quality and consistency are the cornerstones of a professional-looking social media profile. When editing Shutterstock photos for social media, keeping these best practices in mind will ensure your visuals look sharp, cohesive, and on-brand:
- Start with High-Resolution Images: Always choose high-quality Shutterstock photos as your base. Resize and optimize them without sacrificing clarity.
- Use Proper Editing Tools: Stick to reputable editing software like Canva, Photoshop, or even free tools like GIMP. These help you make precise adjustments while maintaining quality.
- Maintain Consistent Color Palettes: Develop a set of brand colors and apply them across all images. This creates a unified look that’s easily recognizable.
- Keep Fonts and Styles Uniform: Use the same or complementary fonts for text overlays. Consistent typography enhances brand identity.
- Resize Correctly for Each Platform: Different platforms have different optimal image sizes. Use size guides to ensure your images aren’t stretched or pixelated—common sizes include:
| Platform | Recommended Image Size |
|---|---|
| Instagram Post | 1080 x 1080 px |
| Facebook Cover | 820 x 312 px |
| Twitter Header | 1500 x 500 px |
| LinkedIn Banner | 1584 x 396 px |
By following these best practices, you’ll maintain high standards of image quality and create a cohesive visual story across your social media channels. Remember, consistency builds trust and recognition—so keep your style aligned and your images sharp!
Legal Considerations When Using Shutterstock Photos for Social Media
Before you dive into editing and sharing Shutterstock photos on your social media platforms, it’s super important to understand the legal side of things. Even though Shutterstock provides high-quality images, they come with specific licensing rules that you need to follow to stay on the right side of copyright law.
First off, when you purchase or subscribe to Shutterstock, you’re getting a license to use those images, but it’s not the same as owning the photo outright. There are different types of licenses—Standard and Enhanced—that determine how you can use the images. Typically, for social media, a Standard license covers most personal and commercial uses, but there are limits, like the number of copies or views.
Here are some key points to keep in mind:
- Always check your license agreement: Make sure your intended use aligns with your license type.
- Avoid using Shutterstock images in a way that might infringe on trademarks or personalities: For example, images featuring recognizable brands, logos, or private individuals may require additional permissions.
- Don’t republish Shutterstock images as standalone files: Simply posting the original photo without significant edits or added value might violate license terms.
- Give credit where it’s due: While Shutterstock typically doesn’t require attribution, it’s good practice to credit the photographer if possible, especially if the image has specific licensing terms.
- Beware of restrictions on modifications: Some licenses might limit how much you can alter the image, so review the license details carefully before editing.
Another thing to consider is respecting the rights of individuals depicted in the photos. If the image shows someone recognizable, you might need a model release to use the image commercially, especially if it’s for promotional content.
Lastly, always keep records of your licensing agreements and receipts. This way, if questions ever come up about your usage, you’ll have the documentation to prove you’re compliant with Shutterstock’s licensing rules.
Conclusion and Final Tips for Effective Photo Editing
And there you have it — a simple guide to help you make the most of Shutterstock photos for your social media game! Remember, editing is all about making the images resonate with your brand and audience, so don’t be afraid to experiment and find your style.
Here are some final tips to keep in mind:
- Start with a clear goal: Know what message or vibe you want your photo to convey before editing.
- Keep it natural: Avoid over-editing. Sometimes, less is more, especially when it comes to authentic engagement.
- Use consistent branding elements: Incorporate your brand colors, fonts, or logos subtly into your edits to boost recognition.
- Pay attention to composition: Cropping, straightening, and adjusting the focal point can make a huge difference.
- Enhance with filters and adjustments: Slight tweaks like brightness, contrast, or warmth can help match your photo to your overall feed aesthetic.
- Test different edits: Don’t settle after one try. Play around to see what works best for your content.
- Stay updated with design trends: Fresh styles and editing techniques can keep your social media content looking current and engaging.
Remember, the key is to make your photos stand out while staying true to your brand’s voice. With a little practice and these tips, you’ll be editing Shutterstock images like a pro, creating eye-catching posts that captivate your audience. Happy editing!