If you’re into video editing, you know how crucial high-quality visuals are to making your projects stand out. Shutterstock offers an extensive library of stunning images, perfect for enhancing your videos. But did you know you can seamlessly integrate Shutterstock images directly into Adobe Premiere? This integration saves you time and effort, letting you access and incorporate premium visuals without leaving your editing workspace. Whether you’re creating a corporate video, a social media clip, or a personal project, understanding how to efficiently use
Steps to Download Images from Shutterstock for Video Projects
Getting started with Shutterstock images for your Adobe Premiere projects is easier than you might think. Here’s a simple step-by-step guide to help you through the process:
- Create a Shutterstock Account: If you haven’t already, sign up on Shutterstock’s website. This gives you access to a vast library and the necessary licensing options.
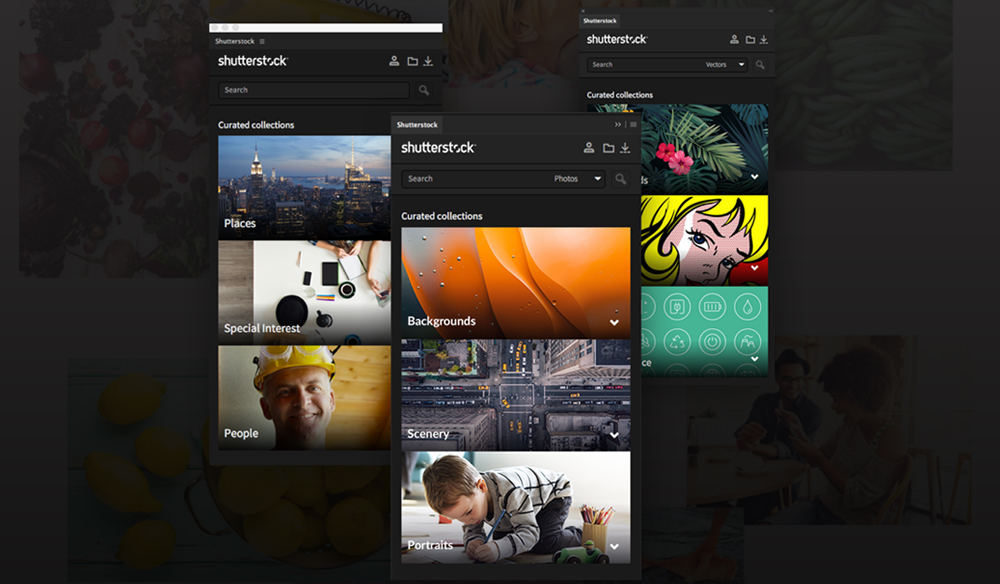
- Choose Your Images: Use the search bar to find images that match your project’s theme. You can filter results by orientation, color, or image type to narrow down your options.
- Select and License: Once you find the perfect image, click on it to view details. Choose the appropriate license type (standard or enhanced) based on your usage needs, then add it to your cart and proceed to checkout.
- Download the Image: After purchasing, download the image in the preferred resolution. Shutterstock typically offers various sizes; for video projects, higher resolutions ensure better quality.
- Import into Adobe Premiere: Open your Adobe Premiere project. Go to the File menu, select Import, then navigate to your downloaded Shutterstock image. Alternatively, you can drag and drop the image directly into the Project panel.
- Use in Your Video: Drag the imported image onto your timeline. Resize or animate as needed to fit your scene. Remember to respect licensing restrictions and give credit if required.
And that’s it! With these simple steps, you can effortlessly incorporate stunning Shutterstock images into your videos, making your projects more engaging and professional-looking. Happy editing!
Importing Shutterstock Assets into Adobe Premiere
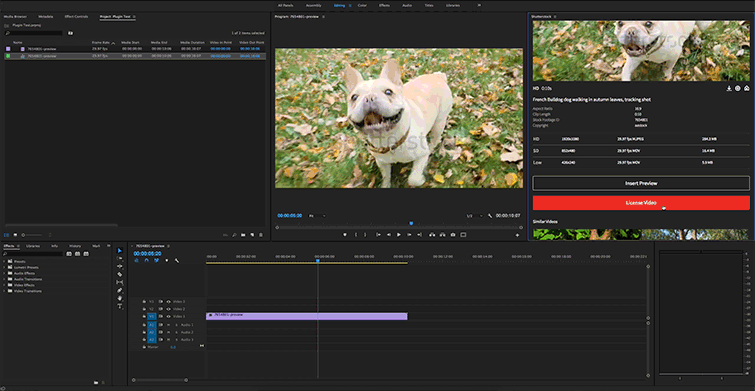
So, you’ve found the perfect images and videos on Shutterstock, and now you’re ready to bring them into Adobe Premiere to start editing your masterpiece. The process is pretty straightforward, but a few tips can make it even smoother. Let’s walk through the steps together!
First things first, make sure you’ve downloaded your Shutterstock assets onto your computer. When you purchase or license images or videos from Shutterstock, they’ll typically come in a standard format like JPEG, PNG, or MP4. Once downloaded, locate your files in your downloads folder or the designated folder you’ve saved them in.
Next, open up Adobe Premiere Pro and navigate to your project. To import your Shutterstock assets, you can use several methods:
- Method 1: Drag and Drop — Simply drag your downloaded files directly into the Project Panel in Premiere. This is the quickest way if you’re working with just a few files.
- Method 2: Import from Menu — Go to File > Import, then browse to your files, select them, and click ‘Open.’ The assets will then appear in your Project Panel.
- Method 3: Media Browser — Use the Media Browser panel in Premiere to navigate directly to your Shutterstock download folder. This is especially helpful if you have a large number of files organized in a folder structure.
Once imported, you can double-click the assets in the Project Panel to preview them. From there, simply drag the images or videos onto your timeline to start editing. Remember, if you’re working with high-resolution images, you might want to scale or crop them appropriately to fit your video frame.
Pro tip: If your Shutterstock assets are in a different color space or format that Premiere isn’t handling perfectly, consider converting or optimizing them beforehand with photo or video editing software. This ensures your final project looks polished and professional.
And that’s it! Importing Shutterstock assets is simple, but taking a moment to organize and preview your files can save you time down the line. Now, let’s move on to some handy tips to make your Shutterstock images work their best in your videos.
Tips for Using Shutterstock Images Effectively in Your Videos
Using Shutterstock images and videos can really elevate your project, but it’s all about how you incorporate them. Here are some friendly tips to help you make the most out of your Shutterstock assets and create engaging, professional-looking videos.
1. Choose the Right Resolution and Aspect Ratio
Before importing, check the resolution of your Shutterstock assets. High-resolution images (like 4K or above) are great because they give you flexibility for cropping, zooming, or resizing without losing quality. Also, pay attention to the aspect ratio. If you’re working in a standard 16:9 project, make sure your images match or can be easily adapted to that ratio to avoid awkward cropping or black bars.
2. Use Images to Enhance Storytelling
Images should support your story, not distract from it. Use Shutterstock images to illustrate key points, set the mood, or provide visual breaks. For example, if you’re talking about travel, a stunning landscape shot from Shutterstock can add impact. Just avoid overloading your video with too many images—balance is key!
3. Maintain Consistent Style and Color
To keep your video cohesive, try to select Shutterstock images that match your overall color palette and style. You can use photo editing tools to adjust colors, brightness, or contrast before importing. Consistency helps your video feel professional and polished.
4. Animate and Add Effects
Static images can become more engaging with simple animations. Use Premiere’s built-in motion effects like pan and zoom (also known as the Ken Burns effect) to bring still images to life. Adding subtle transitions, like crossfades, can also make the flow smoother. Keep effects gentle—overdoing it can be distracting.
5. Mind Licensing and Usage Rights
Always double-check your Shutterstock license to ensure you’re permitted to use the images in your intended way, especially if the project is commercial. Proper attribution isn’t generally required for Shutterstock assets, but respecting licensing terms is good practice and keeps your project above board.
6. Optimize for Performance
If your project becomes sluggish, consider resizing or compressing images before importing. High-res images can slow down your editing process. Tools like Adobe Photoshop or free online compressors can help create optimized versions that still look great but are easier for Premiere to handle.
By following these tips, you’ll be able to seamlessly incorporate Shutterstock images into your videos, making them more engaging, professional, and visually appealing. Remember, the key is to use images thoughtfully to support your narrative without overwhelming your viewers. Happy editing!
Troubleshooting Common Issues When Combining Shutterstock and Adobe Premiere
Working with Shutterstock images in Adobe Premiere can sometimes come with a few hiccups, especially if you’re new to the process. Don’t worry—most issues are easily fixable once you know what to look for. Here are some common problems and how to troubleshoot them:
Image Quality and Resolution Problems
If your Shutterstock images look blurry or pixelated after importing into Premiere, it’s often because of resolution mismatches. To fix this:
- Check the original resolution of the Shutterstock image. You can find this on the Shutterstock download page or in your file properties.
- Ensure your Premiere sequence settings match or exceed the resolution of your images. For example, if your images are 4K, set your sequence to 3840×2160 pixels.
- If you need to resize images within Premiere, use the ‘Scale’ property in the Effect Controls panel. Avoid enlarging images too much to prevent quality loss.
File Compatibility and Import Issues
Sometimes, Shutterstock images may not import smoothly, especially if you’re using unusual file formats. To troubleshoot:
- Make sure your images are in common formats like JPEG, PNG, or TIFF. These are well-supported by Premiere.
- If you encounter import errors, try converting the images to a different format using an image editor or converter tool.
- Double-check that the files are not corrupted or incomplete. Re-download from Shutterstock if necessary.
Slow Rendering or Performance Issues
If your editing process is sluggish when working with Shutterstock images, consider these tips:
- Use proxies for high-resolution images. Premiere can generate lower-res versions for smoother editing, then switch back to full quality for export.
- Close other heavy applications running in the background to free up system resources.
- Ensure your hardware meets the recommended specs for Premiere, especially GPU capabilities.
Color and Brightness Mismatches
Sometimes, Shutterstock images don’t match the color tone of your project. To fix this:
- Apply color correction or LUTs in Premiere’s Lumetri Color panel.
- Adjust the image’s brightness, contrast, or saturation as needed.
- Use adjustment layers or effects to create a consistent look across all media assets.
Conclusion and Additional Resources for Creative Video Editing
Mixing Shutterstock images with Adobe Premiere opens up a world of creative possibilities for your video projects. While the process is straightforward, being aware of potential issues helps you work more efficiently and produce professional-looking results. Remember, good organization, proper resolution settings, and staying updated with software features can make a big difference.
If you ever run into challenges, don’t hesitate to consult additional resources. Here are some helpful links to deepen your understanding:
- Adobe Premiere Pro Tutorials: Official Adobe tutorials and community forums for tips and troubleshooting.
- Shutterstock Help Center: Guides on licensing, downloading, and best practices for using Shutterstock images.
- Creative Communities: Websites like Reddit, StackExchange, or specialized Facebook groups where creatives share advice and solutions.
- Video Editing Courses: Platforms like Skillshare, Udemy, or LinkedIn Learning offer comprehensive courses on Premiere and digital asset management.
With patience and practice, you’ll master integrating Shutterstock images seamlessly into your Adobe Premiere projects, elevating your videos to the next level. Happy editing!