Looking for high-quality images without backgrounds? Shutterstock is a treasure trove for such visuals, whether you’re working on a design project, presentation, or social media content. The good news is, finding images with transparent backgrounds can be straightforward once you know where to look and how to filter your search. In this guide, we’ll walk through simple steps to help you locate these perfect images quickly and easily, so you can focus more on creating and less on hunting. Ready to unlock Shutterstock’s full potential for background-free images? Let’s get started!
Understanding Shutterstock’s Search Filters and Options
Shutterstock offers a range of powerful search filters designed to help you find exactly what you’re looking for, including images with transparent backgrounds. To make your search more efficient, it’s helpful to understand how these filters work and what options are available.
When you start a search on Shutterstock, you’ll notice several filtering options located at the top or side of the search results page. These include filters like Image Type, Orientation, Color, and People. For finding images without backgrounds, the most important filter is Image Type.
Here’s how to use these filters effectively:
- Select “Vectors” or “Illustrations”: These are often created with transparent backgrounds and are ideal for design work.
- Look for “Pictures” with transparent backgrounds: Shutterstock sometimes tags images with transparent backgrounds, especially in vectors or PNG formats.
- Use the search term “PNG”: Adding “PNG” to your search query can yield images with transparent backgrounds, as PNGs support transparency.
Another handy feature is the Advanced Search option, which allows you to filter images by file type. For example, selecting PNG files ensures you see images with transparency. To access this, simply click on the filter options and choose the relevant file format.
Additionally, Shutterstock sometimes labels images with a transparent background icon—a small checkerboard pattern—so keep an eye out for that visual cue. Remember, while the search filters are powerful, combining them with smart keywords like “transparent,” “background-free,” or “cutout” can help narrow your results even further.
In summary, understanding and utilizing Shutterstock‘s search filters effectively can save you time and help you find the perfect background-free images with ease. Experiment with these options, combine filters, and use descriptive keywords to streamline your search process.
Using Keywords Effectively to Locate Transparent or No-Background Images
Finding images with transparent backgrounds on Shutterstock can sometimes feel like searching for a needle in a haystack. But the good news is, you can make your search much more efficient by using the right keywords. Think of your keywords as the secret code that unlocks the treasure of transparent images waiting to be found.
When you’re on Shutterstock’s search bar, try adding specific terms like “PNG”, “transparent”, or “no background” to your search queries. For example, instead of just searching for “cat”, try “cat PNG transparent”. This way, you’re telling Shutterstock exactly what type of images you’re after—those with transparent backgrounds.
Here’s a handy list of effective keywords and phrases to include:
- PNG or .png – Most transparent images are saved as PNG files.
- Transparent
- No background
- Isolated – Popular in design to refer to objects without backgrounds.
- Cutout – Indicates images that are cut out from their backgrounds.
Additionally, you can combine these keywords with your subject matter. For example, if you’re searching for a transparent logo, try “company logo PNG transparent”. The more specific your keywords, the better your chances of landing on images that will seamlessly fit into your project without any background clutter.
Another tip is to use Shutterstock’s advanced filters. After you perform a search, look for the filter options—there’s often a checkbox or filter for “Transparent background”. This is an easy way to narrow down results further without relying solely on keywords.
Remember, patience and a strategic combination of keywords are key. Don’t hesitate to experiment with different word combinations until you find the perfect transparent image for your needs!
Identifying and Selecting Images with Transparent Backgrounds
Once you’ve used the right keywords and filters, the next step is to confidently identify which images actually have transparent backgrounds. Not every image labeled as “PNG” or “no background” will necessarily be transparent, so a quick check can save you from future headaches.
Here are some tips to help you spot transparent background images effortlessly:
- Look for a checkerboard pattern: Most image previews on Shutterstock display a small checkerboard pattern behind the image, which indicates transparency. However, this isn’t always visible in all preview sizes, so keep an eye out.
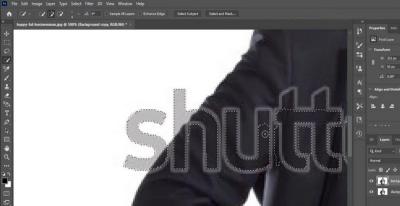
- Download a preview: If the platform allows, download a low-resolution preview of the image. Once you open it in your preferred editing software, you can easily see if the background is transparent—look for the checkerboard pattern or the absence of a background layer.
- Check the file format: Transparent images are typically saved as PNG files. When you download the image, ensure that the file format is PNG, as JPEGs do not support transparency.
- Use image editing software: Open the downloaded image in software like Photoshop, GIMP, or even Preview on Mac. If the background is transparent, you’ll see the checkered pattern behind the subject. If it’s white or another color, then the background isn’t transparent.
When selecting an image, also consider the following:
- Image quality: Choose high-resolution images to ensure they look crisp and professional once integrated into your project.
- Subject clarity: Make sure the subject is cleanly cut out without rough edges or leftover background artifacts.
- Usage rights: Always double-check the licensing agreement to confirm that you can use the image for your intended purpose.
In summary, identifying transparent background images involves a combination of visual inspection, file format verification, and sometimes a quick test in editing software. Taking these steps will help you select the perfect images that blend seamlessly into your creative projects, saving you time and ensuring a polished final look.
Downloading and Using No-Background Images from Shutterstock
Once you’ve found the perfect no-background image on Shutterstock, the next step is to download and start using it. It’s pretty straightforward, but a few tips can make the process smoother and ensure you’re getting the most out of your purchase.
First, make sure you’re logged into your Shutterstock account. If you haven’t purchased credits or a subscription plan yet, you’ll need to do that before downloading any images. Once you’re ready, simply click on the image to open its download options.
When downloading, you’ll typically see different file formats available. For images with no backgrounds, a transparent PNG is usually the best choice because it preserves the transparency and is widely compatible with most design software like Photoshop, Canva, or even PowerPoint.
Here’s a quick step-by-step:
- Click the Download button on the image page.
- Select PNG with Transparent Background as your preferred format.
- Confirm your selection and wait for the download to complete.
After downloading, locate the image in your downloads folder. It’s a good idea to rename the file to something descriptive, especially if you’re working with multiple images. This will help you stay organized.
Before using the image in your project, open it in your preferred design program to double-check the transparency. Make sure the background is truly transparent and that the image quality looks good. If everything checks out, you’re all set to incorporate it into your design!
Remember, Shutterstock typically grants licensing rights for both personal and commercial use, but always review the license agreement to ensure you’re complying with their terms, especially if you’re planning to use the image commercially.
Tips for Ensuring Image Quality and Compatibility with Your Projects
Getting a high-quality, transparent image is fantastic, but making sure it works perfectly with your project is just as important. Here are some handy tips to help you get the best results:
Check the Resolution
Always verify the image’s resolution before using it. Ideally, aim for at least 300 DPI if you’re planning to print, or a high pixel dimension (like 1920×1080 or higher) for digital projects. Low-resolution images can look pixelated or blurry when scaled up.
Consider the File Format
PNG files are the go-to for transparent images because they support lossless compression. However, if you need images with complex transparency or are working with vector graphics, consider SVG files (if available). For most projects, PNG works perfectly.
Match the Style and Color Palette
Ensure the image’s style and colors match your overall design. A mismatched image can look out of place. If the image’s colors are too vibrant or dull, you can adjust them in your editing software to better blend with your project.
Test Compatibility with Your Software
Different design programs handle images differently. Before finalizing your project, import the image into your software and see how it looks. Check for transparency issues, color accuracy, and file integrity.
Optimize for Web Use
If you’re incorporating the image into a website, optimize the PNG for web by reducing file size without sacrificing quality. Tools like TinyPNG or ImageOptim can help compress your images, leading to faster load times and better user experience.
Maintain Backup Copies
Always keep backup copies of your original high-resolution images. This way, if you need to make adjustments or resize later, you’ll have the original files ready to go without quality loss.
By paying attention to these details, you’ll ensure that your no-background images from Shutterstock look professional, blend seamlessly into your projects, and maintain their quality across different mediums. Happy designing!
Alternative Methods to Find Transparent Images if Needed
If you’re on the hunt for transparent images and Shutterstock’s search filters aren’t giving you exactly what you need, don’t worry — there are a few alternative methods you can try. Sometimes, the usual filters can miss specific styles or formats, so exploring other options can be a game-changer.
1. Use External Image Search Engines
- Google Images: Head over to Google Images, type in your keywords, and then click on ‘Tools’. Under ‘Color’, select ‘Transparent’ to filter images with transparent backgrounds. Remember, not all images labeled as transparent are high quality or copyright-free, so always double-check usage rights.
- Yandex Images: Similar to Google, Yandex offers filters to find transparent images with a simple toggle. It’s sometimes better at finding images with transparent backgrounds for specific niches.
2. Use Dedicated Transparent Image Websites
- PNGTree and FreePNGimg: These sites specialize in PNG images with transparent backgrounds. They offer free downloads, but be sure to review licensing terms.
- PNGWing: Another resource for free transparent PNGs. You can browse categories or search directly.
3. Search Within Shutterstock Using Different Keywords
If your initial search didn’t yield perfect transparent images, try tweaking your keywords. For example, add words like “PNG,” “transparent,” or “cutout” to your search query. Sometimes, images are tagged differently, and a slight change in keywords can make a big difference.
4. Use Image Editing Tools
If you find an image you love but it doesn’t have a transparent background, consider removing the background yourself using tools like Adobe Photoshop, Canva, or Remove.bg. These tools allow you to create your own transparent images effortlessly, giving you full control over the final look.
While these methods require a bit more effort, they open up a world of possibilities for finding or creating the perfect transparent image for your project. Remember, patience and a little creativity go a long way!
Conclusion and Best Practices for Using Shutterstock Background-Free Images
Finding high-quality, transparent images on Shutterstock can seem tricky at first, but once you understand how to use the filters and search strategies effectively, it becomes much easier. The key is to use the right keywords, apply the transparent background filter, and explore alternative methods when needed.
Here are some best practices to keep in mind:
- Always verify the license: Even with transparent images, ensure you’re compliant with Shutterstock’s licensing terms. Some images might require attribution or have restrictions on commercial use.
- Use the PNG format for transparency: When downloading images, choose the PNG format if transparency is crucial. This format preserves the transparent background without quality loss.
- Optimize images for your project: After downloading, consider resizing or optimizing images for faster website loading or better integration into your designs.
- Keep an organized library: Save your transparent images in a dedicated folder or library so you can easily find and reuse them later.
- Combine images creatively: Don’t hesitate to layer or edit images further to match your creative vision. Tools like Canva or Photoshop are perfect for customizing transparent images.
Ultimately, the goal is to streamline your workflow and ensure you’re using images that enhance your project without any unwanted backgrounds. With a bit of practice and these best practices, you’ll be a pro at sourcing and utilizing transparent images from Shutterstock and beyond. Happy designing!