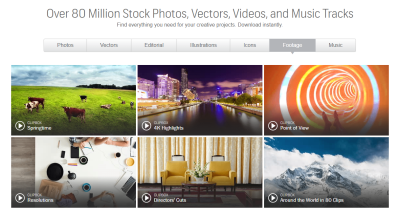
If you’re a videographer or content creator looking to monetize your work, Shutterstock is a fantastic platform to showcase and sell your videos. Uploading your videos might seem daunting at first, but once you get the hang of it, it becomes a straightforward way to earn passive income. In this guide, we’ll walk you through the essentials of uploading videos to Shutterstock, from preparing your footage to making sure it meets all the platform’s standards. Whether you’re a seasoned creator or just starting out, understanding the process can help you maximize your earnings and get your videos in front of a global audience.
Preparing Your Videos for Upload
Before you hit that upload button, it’s crucial to ensure your videos are perfectly polished and meet Shutterstock‘s requirements. Proper preparation not only increases your chances of approval but also helps your videos stand out to buyers. Here are some key steps to get your videos ready:
1. Check Shutterstock’s Technical Requirements
- File Format: MP4 (preferred) or MOV files.
- Codec: H.264 for MP4 files.
- Resolution: Minimum 1920×1080 (Full HD). 4K videos are highly encouraged.
- Frame Rate: 24, 25, or 30 fps.
- Bitrate: Use a high-quality bitrate for clarity.
- Audio: AAC codec, stereo, 48 kHz.
Sticking to these specs ensures your videos are compatible with Shutterstock‘s platform and look professional to buyers.
2. Clean and Edit Your Videos
Make sure your footage is clean, steady, and well-edited. Remove any unwanted segments, noise, or distractions. Use editing software to enhance colors, stabilize shaky shots, and correct exposure if needed. Remember, high-quality, visually appealing videos are more likely to be approved and purchased.
3. Keep Content Unique and Marketable
Think about what buyers are looking for. Trending topics, diverse cultures, and compelling visuals tend to perform well. Avoid including copyrighted material or logos unless you have permission. The goal is to produce original content that adds value to your portfolio.
4. Add Descriptive Metadata
Prepare descriptive titles, tags, and descriptions that accurately reflect your video content. Use relevant keywords to help your videos appear in search results. Well-thought-out metadata can significantly boost your video’s visibility and sales potential.
5. Review and Test Your Uploads
Before submitting, watch your video from start to finish to catch any errors or issues. Check the quality, ensure the audio syncs properly, and verify that the video plays smoothly. Testing on different devices can also help ensure compatibility.
By taking these steps to prepare your videos, you’ll set yourself up for a smoother upload process and better chances of earning income through Shutterstock. Remember, quality and attention to detail are key to standing out in the crowded stock footage marketplace!
Creating a Shutterstock Contributor Account
So, you’re ready to start earning by sharing your videos on Shutterstock? Great! The first step is setting up your contributor account. It’s a straightforward process, but a few tips can help you get it right the first time.
First, head over to the Shutterstock Contributor Sign-Up Page. You’ll see a simple form asking for your basic details like your name, email address, and creating a password. Make sure to choose a strong password to keep your account secure.
Next, you’ll need to fill out some additional information:
- Personal Details: Your full name, country of residence, and contact info.
- Tax Information: Depending on where you’re from, Shutterstock might ask for tax ID details for earnings reporting.
- Payment Preferences: Decide how you’d like to receive your earnings—PayPal, bank transfer, or other options available in your region.
Once you’ve filled out the form, Shutterstock will ask you to agree to their contributor agreement. It’s a good idea to read through the terms carefully so you understand how your videos will be used and how you’ll get paid.
After submitting your application, Shutterstock usually reviews your information within a few days. They might reach out if they need additional details or verification. When approved, you’ll receive a confirmation email, and you’ll be ready to start uploading your videos!
Tip: To streamline the process, have your tax documents, payment info, and some sample videos ready beforehand. This way, your registration can go smoothly without delays.
Uploading Your Videos to Shutterstock Platform

Congratulations! Your contributor account is set up, and you’re ready to upload your videos. Let’s walk through the process to make sure you do it right and maximize your chances of earning.
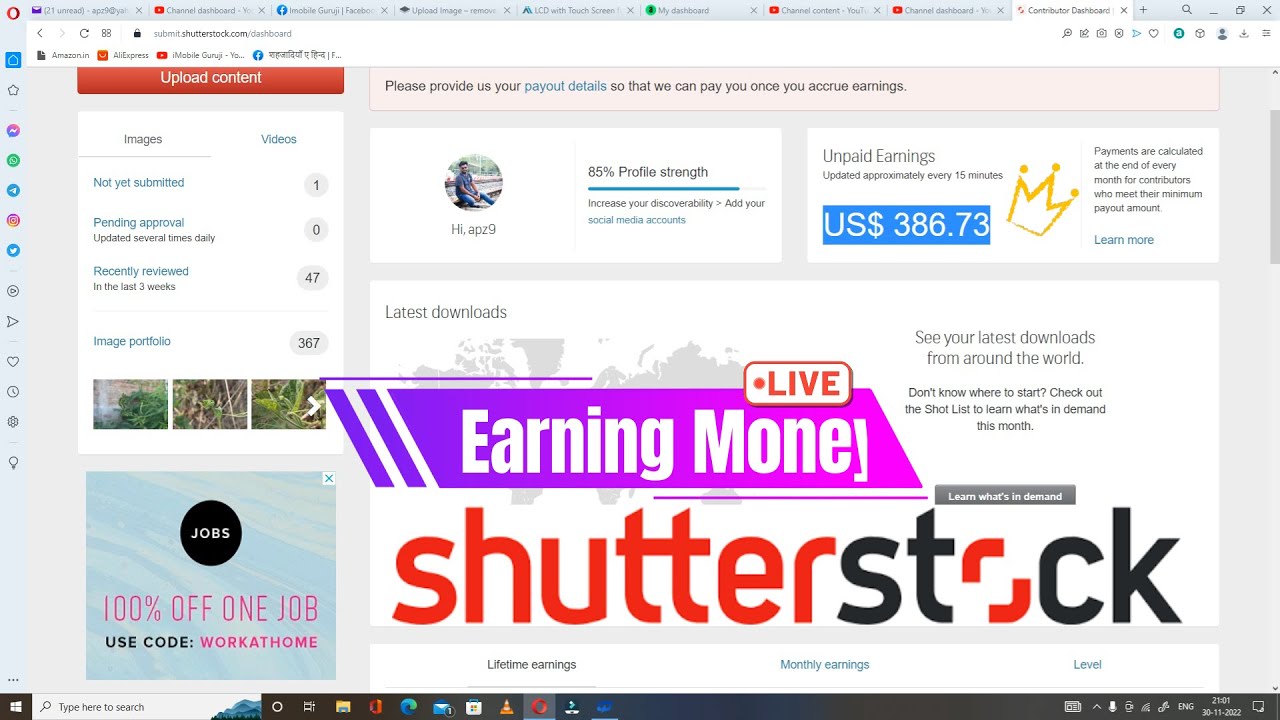
First, log in to your Shutterstock Contributor Dashboard. From there, look for the “Upload” button—usually prominently displayed on the main page. Clicking it will take you to the upload interface.
Preparing Your Videos
Before uploading, ensure your videos meet Shutterstock’s standards:
- Resolution: At least 1920×1080 (Full HD). Higher resolutions are preferred.
- Format: MP4 or MOV files are typically accepted.
- File Size: Max 75MB per file, but larger files are often better quality.
- Duration: Usually between 5 seconds and 60 minutes. Short clips tend to perform better.
- Quality: Clear, well-lit, and steady footage. Avoid shaky or blurry videos.
Uploading Process
- Select Files: Drag and drop your videos or click to browse and select multiple files.
- Fill in Metadata: For each video, you’ll need to add:
- Title: Be descriptive but concise.
- Description: Provide context to help buyers understand your footage.
- Keywords: Use relevant tags—think about what someone might search for when looking for your video.
After uploading, your videos will go through Shutterstock’s review process, which typically takes a few days. They check for quality, originality, and adherence to guidelines. If your video passes, it will go live in the Shutterstock marketplace, and you’ll start earning royalties whenever it’s downloaded.
Pro Tip: Regularly uploading high-quality videos and optimizing your metadata can significantly boost your visibility and earnings on the platform. Keep an eye on your dashboard for feedback and performance insights, and don’t hesitate to update or re-upload improved versions if needed.
Optimizing Video Titles and Descriptions for Better Visibility
Once you’ve uploaded your videos to Shutterstock, the next step is making sure they get seen by the right audience. Think of your video titles and descriptions as the storefront windows of your content—if they’re eye-catching and clear, more people will want to click and view. So, how do you optimize them effectively?
Start with clear, descriptive titles. Your title should accurately reflect what’s in the video without being overly complicated. For example, instead of a vague title like “Nature Clip,” go for something specific like “Sunset Over Mountain Range with Birds Flying.” This way, buyers searching for sunset or mountain scenes will find your work easily.
Use relevant keywords naturally. Keywords are the words or phrases people type when searching. Incorporate keywords that match your video’s content but avoid keyword stuffing—that looks spammy and can hurt your rankings. For instance, if your video features “city skyline at night,” include those terms seamlessly in your description and tags.
Craft compelling descriptions. Your description should expand on your title, offering more detail about what’s happening in the video, the mood, location, and any unique features. Highlight the potential uses, like for commercials, backgrounds, or presentations. Remember, a well-written description helps buyers understand exactly what they’re getting, increasing the chances of sales.
| Tip | Example |
|---|---|
| Use specific keywords | “Drone shot of New York City skyline at sunset” |
| Avoid keyword stuffing | Use natural language that integrates keywords smoothly |
| Highlight unique aspects | “Perfect for corporate presentations and marketing videos” |
Remember, the key is to think like someone searching for footage. What words would they use? Be honest and precise in your descriptions, and you’ll improve your chances of your videos appearing in relevant searches, ultimately leading to more earnings.
Understanding Shutterstock’s Video Submission Guidelines and Requirements
Before you hit that upload button, it’s crucial to understand Shutterstock’s guidelines and requirements. They have specific standards to ensure that the content available on their platform is top-quality and suitable for their diverse audience. Let’s walk through the main points so you can avoid rejections and submit confidently.
Video Quality Standards: Your videos should be in high definition, typically 4K or at least 1080p. They need to be well-lit, sharp, and free of compression artifacts or pixelation. Shutterstock prefers clean, professional-looking clips that are visually appealing and free from noise.
File Format and Codec Requirements: Shutterstock accepts specific formats—usually MP4 or MOV files encoded with H.264 compression. Make sure your files are compatible and meet the recommended specifications to prevent upload issues.
Content Restrictions: Shutterstock has strict rules about what can and cannot be uploaded. For example:
- Prohibit content that infringes on copyrights or trademarks.
- Avoid videos with explicit, violent, or offensive material.
- Ensure that you have the necessary rights and releases for all recognizable people, private property, or branded products.
Model and Property Releases: If your video features identifiable individuals or private property, you need to provide signed releases. Without these, your video may be rejected, or you could face legal issues down the line.
Audio Quality and Content: If your video contains sound, ensure it’s clear, balanced, and free from background noise. Avoid copyrighted music unless you have the rights to include it. Shutterstock prefers videos with natural or ambient sounds rather than heavily edited or commercial music.
Understanding and adhering to these guidelines is essential for a smooth submission process. Take the time to review Shutterstock’s detailed contributor resources regularly, as rules can evolve. Following their standards not only helps your videos get accepted but also positions you as a professional contributor, opening the door to more earnings and opportunities on the platform.
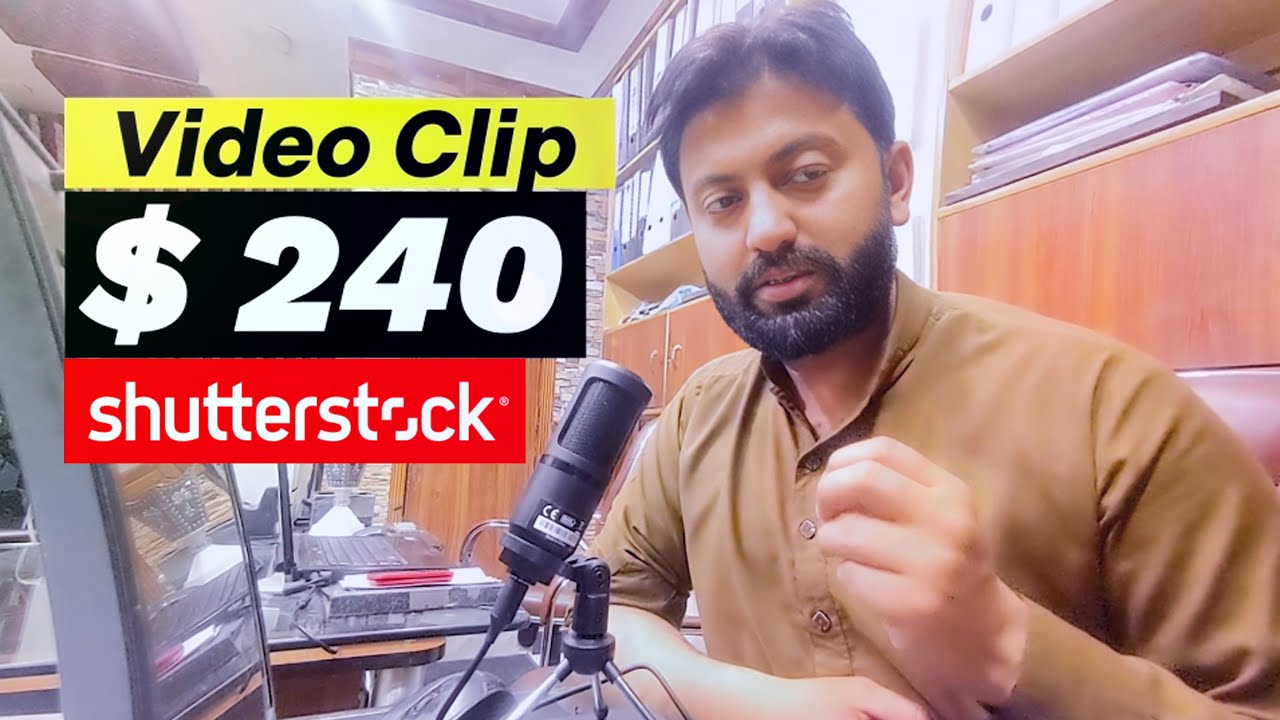
Pricing, Royalties, and Earning Potential from Video Uploads
When it comes to earning money from your videos on Shutterstock, understanding the basics of pricing and royalties is key. Shutterstock operates on a royalty-based system, which means you earn a percentage of the sales whenever someone licenses your video. The actual amount you earn depends on several factors, including your contributor level, the type of license purchased, and your overall contribution history.
Typically, Shutterstock offers different royalty tiers, and your earnings per download increase as you contribute more high-quality content and reach higher tiers. For example, new contributors might start earning around 30-35% per license, but as you build your portfolio and reputation, this can rise to 40% or even higher. Keep in mind, these percentages are based on the net amount Shutterstock receives after any discounts or promotions.
Pricing for video licenses generally falls into two categories:
- Standard License: Suitable for most uses, like websites, social media, or promotional videos. The price ranges from around $50 to $250 per license, depending on the video length and resolution.
- Enhanced License: For more extensive uses, such as TV, film, or large-scale advertising campaigns. These licenses can go from $250 to several thousand dollars.
Your earning potential is directly tied to how well your videos perform. Popular videos with high demand and broad usage tend to generate more sales, boosting your overall income. Remember, Shutterstock handles the licensing process, so you don’t have to worry about transaction details—just focus on uploading quality content that appeals to buyers.
Another thing to keep in mind is that Shutterstock may occasionally run promotions or discounts, which can temporarily affect royalties. However, over time, consistent uploads of high-quality videos tend to lead to a steady stream of earnings. If you’re serious about making this a side hustle or even a primary income source, diversifying your content and understanding market trends can really pay off.
Tips for Increasing Your Video Sales and Earnings on Shutterstock
If you want to boost your earnings on Shutterstock, it’s all about strategy and quality. Here are some practical tips to help you maximize your video sales:
1. Focus on Quality and Relevance
High-quality videos that are well-lit, stable, and professionally edited always perform better. Make sure your videos are sharp, clear, and free of noise or distractions. Think about what buyers are looking for—trending topics, universal themes, or versatile footage that can be used in various projects.
2. Use Keyword Optimization
Keywords are your best friends on Shutterstock. Use descriptive, relevant keywords that accurately reflect your video’s content. Think about what a buyer might search for—include locations, concepts, emotions, and any specific details. The better your keywords, the higher your videos will rank in search results.
3. Upload Diverse Content
Don’t put all your eggs in one basket. Create a variety of videos covering different subjects, styles, and formats. This not only increases your chances of making sales but also helps you discover what works best for your audience.
4. Keep Up with Trends
Stay informed about current trends in stock footage. For example, videos related to remote work, sustainability, or AI are currently in high demand. Creating content aligned with trending topics can significantly boost your sales.
5. Regularly Upload New Content
Consistency is key. The more fresh content you upload, the more opportunities you create for sales. Plus, Shutterstock favors active contributors in search rankings, so keep adding new videos regularly.
6. Promote Your Work
While Shutterstock handles the licensing, sharing your portfolio on social media or your personal website can attract more buyers. Building a personal brand and engaging with your audience can lead to more exposure and sales.
7. Analyze and Adapt
Pay attention to which videos perform best and learn from the data. Use Shutterstock’s analytics tools to see what’s selling, and adapt your future content based on that insight.
By combining quality, strategic keywording, diversity, and staying current with trends, you can steadily increase your sales and earnings on Shutterstock. Remember, patience and persistence pay off—building a successful stock video portfolio takes time, but with dedication, your efforts will definitely start to show results.
Common Troubleshooting Tips for Upload Issues
Uploading videos to Shutterstock can sometimes be a bit tricky, and encountering issues is more common than you’d think. Don’t worry—most problems have simple solutions. Here are some of the most common upload challenges and how to troubleshoot them:
File Size and Format Problems
- Check your video format: Shutterstock accepts specific formats like MP4 (preferably H.264 codec) and MOV. Make sure your video is in one of these formats.
- File size limits: Keep an eye on the maximum file size—usually around 4GB. If your video exceeds this, you’ll need to compress or trim it.
- Resolution and aspect ratio: Ensure your video meets Shutterstock’s quality standards—generally, a minimum of 1920×1080 pixels. Avoid non-standard aspect ratios.
Slow or Failed Uploads
- Check your internet connection: A stable, high-speed connection makes a huge difference. If you’re experiencing interruptions, try resetting your router or switching to a wired connection.
- Use a supported browser: Google Chrome, Firefox, or Safari are recommended. Clear your browser cache and cookies if uploads are stalling.
- Disable VPNs or firewall settings: Sometimes, security settings can interfere with uploads. Temporarily disable VPNs or adjust firewall rules if necessary.
Video Quality or Content Issues
- Check for watermarks or branding: Shutterstock reviews videos for watermarks, so make sure your footage is clean.
- Content guidelines: Ensure your video doesn’t contain copyrighted music, logos, or sensitive content that violates Shutterstock’s policies.
- Video stability and clarity: Blurry or shaky footage may be rejected. Use stabilization tools and ensure good lighting during filming.
Other Tips
- Update your browser and software: Using outdated versions can cause compatibility issues. Keep everything current.
- Try uploading in smaller batches: If you have multiple videos, upload a few at a time to identify specific problematic files.
- Contact support: If all else fails, Shutterstock’s support team can help troubleshoot your specific issue.
Remember, patience is key. If an upload fails, double-check your files and settings, then try again. Often, small adjustments can resolve the problem quickly and get your videos live on Shutterstock in no time!
Conclusion and Final Tips for Successful Video Uploads
Uploading videos to Shutterstock can seem daunting at first, but with a little preparation and know-how, you’ll be submitting high-quality content that stands out. Here are some final tips to help you succeed:
Prepare Your Videos Carefully
- Follow the guidelines: Always review Shutterstock’s submission requirements for format, resolution, and content.
- Quality matters: Use good lighting, steady shots, and clear audio. High-quality videos are more likely to be approved and earn more.
- Metadata is key: Write accurate, descriptive titles and tags. This helps your videos get discovered and increases sales potential.
Optimize Your Upload Process
- Use a reliable internet connection: Prefer wired connections for stability and faster uploads.
- Choose the right time: Upload during off-peak hours when internet traffic is lighter.
- Batch uploads: Upload multiple videos at once, but monitor each to catch any issues early.
Stay Informed and Keep Improving
- Read Shutterstock’s updates: Policies and technical specs can change, so stay current.
- Review your submissions: Learn from rejected videos by reading feedback and improving your future uploads.
- Engage with the community: Join forums or social media groups of Shutterstock contributors to share tips and experiences.
Be Patient and Persistent
Success on Shutterstock doesn’t usually happen overnight. Keep uploading, refining your videos, and learning from each experience. Over time, you’ll develop a workflow that makes uploading smoother and more efficient, increasing your chances of earning steady income from your videos.
Remember, every expert was once a beginner. With patience, consistency, and attention to detail, your videos will find their audience and start generating earnings. Happy uploading!