Thinking about turning your iPhone photography into a source of income? Shutterstock is one of the biggest platforms where photographers and hobbyists alike share their work and earn royalties. It’s a fantastic way to showcase your creativity, reach a global audience, and make some extra cash — all from the comfort of your own home. But before you start uploading, it’s helpful to understand how the process works and what it takes to stand out. Don’t worry; with a little know-how and some attention to detail, you can successfully sell your iPhone photos and even build a small business around your passion for photography.
Preparing Your iPhone Photos for Sale

Before you hit that upload button, it’s important to prepare your photos to meet Shutterstock’s quality standards and appeal to potential buyers. First, always shoot in the highest possible resolution and use your iPhone’s native camera app or a trusted third-party app that offers manual controls. Good lighting is key — natural sunlight often works wonders, so try to shoot during the golden hours of early morning or late afternoon. When editing, stick to enhancing the photo’s clarity, brightness, and contrast without overdoing it. Remember, authenticity sells!
Next, pay attention to composition. Use the rule of thirds, keep the horizon straight, and avoid cluttered backgrounds to make your images more eye-catching. It’s also crucial to ensure your photos are sharp and in focus; blurry images won’t be accepted or sell well.
File quality matters a lot. Save your photos in JPEG format with a minimum of 8 megapixels resolution and a high-quality compression setting. Avoid heavy filters or overly stylized edits, as Shutterstock prefers natural and versatile images that can be used across various projects.
Finally, add relevant keywords and descriptions that accurately reflect your photo. This helps buyers find your work easily. Think about what someone might search for — location, subject, mood, or colors — and include those terms thoughtfully. Proper preparation ensures your iPhone photos not only meet Shutterstock’s standards but also have the best chance of catching a buyer’s eye and earning you royalties.
Creating High-Quality and Appealing Images

When it comes to selling your iPhone photos on Shutterstock, the first step is ensuring your images are top-notch. Think of your photos as the first impression; if they catch the eye and look professional, you’re more likely to attract buyers. Luckily, with modern iPhones, you have a powerful tool right in your pocket — but a few tips can help you maximize their potential.
Focus on Composition: Pay attention to how your photo is framed. Use the rule of thirds — imagine dividing your image into nine equal parts and placing key elements along these lines or at their intersections. This creates a balanced and engaging photo. Keep clutter to a minimum and make sure your main subject stands out.
Lighting is Key: Natural light is your best friend. Shoot during the golden hours — shortly after sunrise or before sunset — for warm, soft lighting. Avoid harsh midday sun which can create strong shadows and overexposed spots. If you’re indoors, try to position your subject near a window with diffuse light.
Steady Hands and Focus: Hold your iPhone steady or use a tripod if possible. Tap on your screen to focus precisely on your subject. A sharp image is essential; blurry photos tend to get rejected. You can also adjust exposure manually by sliding your finger up or down after focusing to get the perfect brightness.
Pay Attention to Backgrounds and Colors: Choose backgrounds that complement your subject rather than distract from it. Simple, uncluttered backgrounds often work best. Bright colors or interesting textures can add appeal, but make sure they don’t overshadow your main subject.
Editing Matters: Post-processing can elevate your photos. Use editing apps to enhance colors, adjust brightness and contrast, or crop for better composition. However, avoid over-editing — keep your images looking natural and authentic. Remember, Shutterstock prefers realistic images over heavily stylized or manipulated ones.
Theme and Consistency: Think about what kind of photos sell well. Nature, lifestyle, food, technology, or abstract images tend to perform quite well. Try to develop a style or theme that makes your portfolio cohesive and attractive to buyers browsing for specific needs.
By focusing on these elements, you’ll create high-quality, appealing images that stand out in Shutterstock’s vast library. The better your images look, the higher the chances they’ll be accepted and purchased!
Uploadting Your Photos to Shutterstock Effectively
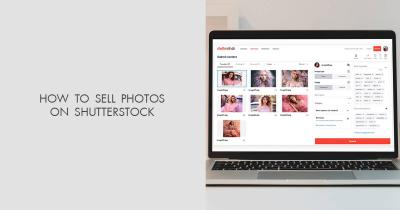
Once you’ve got a collection of stunning photos, it’s time to upload them to Shutterstock. Doing this efficiently and correctly can make a big difference in getting your images accepted and noticed by buyers.
Prepare Your Files Carefully: Before uploading, ensure your photos meet Shutterstock’s technical requirements:
- Minimum resolution of 4 megapixels (e.g., 2400 x 1600 pixels)
- JPEG format with sRGB color profile
- Maximum file size of 50MB
- High-quality images with minimal compression artifacts
Use Descriptive and Keyword-Rich Titles: Your photo’s title should clearly describe the image. Be specific but natural — e.g., “Sunset over Mountain Lake,” rather than just “Beautiful Scene.”
Craft Effective Descriptions: Add details that help buyers understand the context and potential uses of your image. Mention locations, subjects, moods, or themes. This extra info can boost your image’s visibility in searches.
Select Relevant and Accurate Keywords: Keywords are crucial. Think about what a buyer might search for when looking for your photo. Use a mix of broad and specific keywords, and avoid overstuffing. Shutterstock allows up to 50 keywords per image, so make good use of them!
| Example of Keywords for a Beach Sunset Photo |
|---|
| beach, sunset, ocean, twilight, seascape, vacation, travel, sky, nature, horizon |
Categorize Properly: Choose the most appropriate categories and subcategories. This helps your images get found in relevant searches and collections.
Review Before Uploading: Double-check your images for any issues, like watermarks or unwanted objects. Make sure the image looks sharp and well-edited.
Upload in Batches: To save time, upload multiple photos at once. Shutterstock’s upload tool supports batch uploads, but ensure each image has its own accurate metadata.
Stay Consistent: Develop a routine for uploading and keywording your photos. Consistency helps you manage your portfolio and improves your chances of success over time.
By following these tips, you’ll streamline your upload process and maximize the chances of your photos being accepted and seen by potential buyers. Remember, quality and clear presentation are key — so take your time to prepare each submission properly.
Optimizing Your Photo Metadata for Better Visibility
When it comes to selling your iPhone photos on Shutterstock, one of the most overlooked but crucial steps is optimizing your photo metadata. Metadata is essentially the information about your images that helps search engines and Shutterstock’s own search algorithm understand what your photos are all about. The better your metadata, the higher the chances your photos will be discovered by potential buyers.
So, what exactly should you focus on? Here are some key elements:
- Keywords: Use relevant, descriptive keywords that accurately represent your photo. Think about what someone might type into the search bar to find an image like yours. Be specific and avoid generic terms like “beautiful” or “nice.”
- Titles: Craft clear and concise titles that highlight the main subject of your photo. Instead of “Sunset,” try “Vibrant Sunset over Mountain Range.” This helps in better indexing and user search experience.
- Descriptions: Write detailed descriptions that expand on your title. Mention the context, mood, or any notable features. For example, “A colorful sunset casting warm hues over a serene mountain landscape, perfect for travel and nature themes.”
Here are some tips to keep in mind:
- Use accurate keywords: Don’t stuff keywords or use irrelevant ones. Focus on what truly describes your image.
- Be specific: Instead of vague terms, include details like location, activity, or objects in the photo.
- Update metadata periodically: If you notice your images aren’t getting views, revisit your keywords and descriptions to make them more appealing or relevant.
Remember, good metadata doesn’t just help in search visibility. It also improves the overall presentation of your images, making them more appealing to buyers who are browsing the platform. Taking the time to optimize each photo’s metadata can significantly boost your sales potential on Shutterstock.
Understanding Shutterstock’s Licensing and Payment Processes
Before you dive deep into selling your iPhone photos, it’s essential to understand how Shutterstock handles licensing and payments. This knowledge helps you set realistic expectations and ensures you’re fully aware of how your images are used and compensated.
Licensing Options
Shutterstock offers two main licensing types:
- Standard License: This license covers most uses like websites, blogs, social media, ads, and print materials up to a certain size or scope. It’s suitable for everyday commercial and personal projects.
- Enhanced License: When a buyer needs to use your photo for larger scale projects—like product packaging, billboards, or mass distribution—they opt for an enhanced license. This provides broader usage rights and typically results in higher payouts for contributors.
As a contributor, it’s important to understand that once your photo is downloaded under a license, it’s essentially a legal agreement that the buyer can use it within the terms of that license. Make sure your photos are clear, high quality, and accurately represent what you’re licensing, to avoid any disputes.
Payment Processes
Shutterstock operates on a royalty-based system. Here’s how it works:
| Sales Volume | Royalty Rate |
|---|---|
| Up to 500 downloads/month | 15% of the download price |
| 501–2,500 downloads/month | 20% |
| 2,501+ downloads/month | 30% |
Payments are made monthly via PayPal or bank transfer, usually around the 15th of each month. To ensure smooth payments:
- Set up your payout details: Make sure your payment info is accurate and up to date in your Shutterstock contributor account.
- Meet the minimum payout threshold: Typically, you need to earn at least $35 before payout.
- Monitor your earnings: Use the dashboard to track downloads and earnings, helping you understand what types of photos perform best.
Additionally, Shutterstock provides detailed reports to help you analyze your sales trends. This can guide you in refining your portfolio and focusing on styles or subjects that generate more income.
Understanding both licensing options and the payout system empowers you to make informed decisions about what to upload, how to price your photos (when applicable), and how to maximize your earnings. The more you familiarize yourself with these processes, the more confident you’ll be in building a successful photography side hustle on Shutterstock.
Tips for Increasing Your Sales and Earnings
So, you’ve got a collection of stunning iPhone photos ready to go—awesome! Now, how do you turn those into a steady stream of income on Shutterstock? Here are some practical tips to help you boost your sales and earnings:
Optimize Your Photo Titles and Descriptions
Think of your titles and descriptions as the shop window for your photos. Use clear, descriptive, and keyword-rich language that accurately represents what’s in the shot. For example, instead of “beautiful scene,” try “Sunset over mountain lake with colorful sky.” This helps buyers find your images when they search for specific topics.
Use Relevant Keywords Wisely
Keywords are your best friends on Shutterstock. Spend time researching popular search terms related to your photos. Don’t stuff keywords, but choose the most relevant ones—think about colors, locations, subjects, and emotions. A well-tagged image is more likely to appear in search results, increasing your chances of sales.
Focus on Trending and Evergreen Topics
Keep an eye on current trends—like remote work, sustainability, or health—and create images that match these themes. At the same time, don’t neglect evergreen topics such as nature, business, or family. A balanced mix ensures you get both quick wins and long-term steady sales.
Consistently Upload New Content
Regular uploads keep your portfolio fresh and increase your visibility on the platform. Set a schedule—whether weekly or biweekly—and stick to it. The more quality images you have, the higher your chances of catching the eye of buyers.
Leverage Your Unique Perspective
Since you’re shooting with your iPhone, embrace your personal style and perspective. Authentic, original images stand out. Don’t be afraid to experiment with different angles, editing styles, or niche subjects that resonate with you. Authenticity often translates into higher engagement and sales.
Engage with the Shutterstock Community
Participate in forums, read other contributors’ tips, and learn from feedback. Sometimes, small adjustments based on community insights can significantly boost your sales.
Offer High-Quality, Well-Edited Photos
Even with an iPhone, you can produce professional-looking images by paying attention to lighting, composition, and editing. Use editing apps to enhance colors, straighten horizons, and remove distractions. Clear, crisp, and appealing images attract more buyers.
Common Mistakes to Avoid When Selling Photos on Shutterstock
While it’s exciting to start selling your photos online, there are some pitfalls you’ll want to steer clear of. Avoiding these common mistakes can save you time, effort, and frustration—and help you build a successful portfolio:
1. Ignoring Image Quality
Despite shooting with an iPhone, poor lighting, blurry images, or cluttered compositions can hurt your chances. Always review your photos carefully before uploading. Use editing tools to enhance your images, and discard anything that doesn’t meet professional standards.
2. Overusing or Misusing Keywords
Stuffing your images with irrelevant keywords not only confuses buyers but can also violate Shutterstock’s guidelines. Be honest and precise with your tagging. Use a mix of broad and specific keywords to improve searchability.
3. Uploading Low-Resolution or Cropped Images
Remember, Shutterstock requires images to meet certain quality standards. Uploading images that are too small or heavily cropped can lead to rejection. Always upload the highest resolution version you can, and avoid excessive cropping that compromises quality.
4. Ignoring Trends or Niche Opportunities
Sticking only to what you find easy or familiar can limit your earning potential. Explore different niches and stay aware of current trends to diversify your portfolio and reach a wider audience.
5. Not Reading Shutterstock’s Contributor Guidelines
Each platform has its rules. Failing to adhere to Shutterstock’s guidelines regarding content, model releases, or copyright can result in rejection or account suspension. Take time to read and understand their policies.
6. Failing to Diversify Your Portfolio
Relying on just a few types of images makes your income vulnerable. Aim to upload a variety of subjects, styles, and themes to attract a broader customer base.
7. Expecting Quick Riches
Building a successful stock photography portfolio takes time. Be patient, keep improving your skills, and stay consistent. The more quality images you upload over time, the better your earning potential becomes.
By avoiding these common mistakes and following the tips above, you’ll be well on your way to turning your iPhone photos into a reliable income stream on Shutterstock. Remember, persistence and continuous improvement are key. Happy shooting—and selling!
Additional Resources for Selling Photos Successfully
Enhancing your knowledge and skills can significantly improve your success in selling iPhone photos on Shutterstock. Below are some valuable resources to help you maximize your potential:
- Shutterstock Contributor Tutorials: The official contributor resource center offers comprehensive tutorials on image submission guidelines, keywording, and portfolio optimization. Visit their Contributor Portal for step-by-step guides.
- Photography Blogs and Websites: Regularly following popular photography blogs such as PetaPixel, Fstoppers, and Digital Photography School provides insights into current trends, tips for mobile photography, and editing techniques.
- Mobile Photography Apps: Utilize apps like Snapseed, Lightroom Mobile, and VSCO to enhance your images directly on your iPhone. Mastering editing can make your photos stand out and meet Shutterstock’s quality standards.
- Online Courses and Workshops: Platforms such as Udemy, Skillshare, and Coursera offer courses on mobile photography, composition, and photo editing. Investing in these can refine your skills and increase your sales potential.
- Community Forums and Social Media Groups: Join groups on Facebook, Reddit, or specialized forums where contributors share experiences, feedback, and advice. Engaging with a community can provide motivation and practical tips.
By leveraging these resources, you can stay updated on industry best practices, improve your photography skills, and effectively market your iPhone photos on Shutterstock. Consistent learning and adaptation are key to building a successful stock photography portfolio.