Thinking about sharing your photography with a global audience? Uploading images to Shutterstock is a fantastic way to monetize your creativity and reach millions of potential buyers. Whether you’re a seasoned pro or just starting out, understanding the process can make a huge difference in getting your work accepted and appreciated. In this guide, we’ll walk you through the essentials—from preparing your images to mastering the upload process—so you can upload like a pro and start earning from your shots!
Preparing Your Images for Submission
Before you hit that upload button, it’s crucial to ensure your images are polished and meet Shutterstock’s standards. Proper preparation not only increases your chances of acceptance but also helps your images stand out in a crowded marketplace. Here’s what you need to focus on:
1. Choose the Right Images
- High Quality: Ensure your photos are sharp, well-exposed, and properly focused. Avoid blurry or noisy images.
- Commercial Appeal: Think about what buyers might want—think landscapes, business scenes, lifestyle shots, or unique concepts.
- Original Content: Upload images that are unique and haven’t been posted elsewhere. Shutterstock values fresh content.
2. Edit and Optimize
Editing can elevate your images from good to great. Use editing software like Lightroom or Photoshop to enhance colors, adjust contrast, and remove distractions. Be careful not to over-edit; the goal is a natural, professional look.
Make sure your images are:
- Properly Color-Corrected: Colors should be accurate and vibrant without being oversaturated.
- Correctly Cropped: Crop images to highlight the main subject, following Shutterstock’s aspect ratio guidelines.
- Free of Watermarks and Logos: Your images should be clean and ready for licensing, without any branding or watermarks.
3. Check Technical Specifications
| Requirement | Details |
|---|---|
| File Format | JPEG (.jpg) |
| Resolution | Minimum 4 MP (e.g., 2400×1600 pixels) |
| Color Mode | sRGB or Adobe RGB |
| Compression | High quality, minimal compression to preserve details |
Ensuring your images meet these technical specs helps streamline the review process and avoids unnecessary rejections.
4. Metadata and Keywords
Accurate titles, descriptions, and keywords are key to making your images discoverable. Use relevant, specific keywords that describe the content, mood, colors, and potential uses of your image. Think like a buyer searching for a particular shot and include synonyms and related terms.
Take your time to craft thoughtful metadata—this step can significantly impact your image’s visibility and sales.
Creating a Shutterstock Contributor Account
So, you’re ready to start sharing your photography magic with the world? Great! The first step is setting up your Shutterstock contributor account. It’s pretty straightforward, but a few tips will help you get started smoothly and make sure your images stand out from the crowd.
First things first, head over to the Shutterstock Contributor page and sign up. You’ll need to provide some basic info like your name, email address, and create a password. Once you’ve filled out all the necessary details, Shutterstock will send you a verification email—so keep an eye on your inbox!
After verifying your email, you’ll be prompted to fill out your profile. Here’s where you can add a brief bio, upload a profile picture, and select your areas of expertise. Think of this as your digital handshake—make it friendly, professional, and reflective of your style.
Next, you’ll be asked to agree to Shutterstock’s Contributor Agreement. It’s a good idea to read through it, so you understand your rights and responsibilities. Don’t worry; it’s pretty standard, and Shutterstock’s policies are transparent.
Once your account is set up, you can start uploading images right away. But before you hit that upload button, consider creating a portfolio within your account. A well-organized portfolio showcases your best work and makes it easier for buyers to find your top images. Remember, quality over quantity is key here.
Also, consider linking your social media profiles or website if you have one. This can help you build your brand and attract more buyers who appreciate your style.
Finally, familiarize yourself with the dashboard. It’s where you’ll manage your uploads, track sales, and see your earnings. Navigating it confidently will save you time and make your contributor journey much more enjoyable!
Getting your contributor account set up is just the beginning. Once you’re all registered, the real fun starts—uploading fantastic images that can make your portfolio shine and even generate some income. Ready to learn more? Let’s dive into Shutterstock’s image guidelines so your photos meet their high standards!
Understanding Shutterstock’s Image Guidelines and Requirements
Before you upload your images, it’s super important to understand Shutterstock’s guidelines and requirements. Think of these as the rules of the game—they help ensure your images are accepted, look professional, and sell well. Plus, following these standards can avoid unnecessary rejections or delays in getting your work published.
First up, image quality. Shutterstock demands high-resolution images with sharp focus and good exposure. Usually, a minimum of 4 megapixels is required, but higher resolutions are always better—they give you more flexibility for cropping and printing. Avoid images that are blurry, pixelated, or have noise; clarity is key!
Next, consider composition. Your images should be well-framed, with balanced elements and interesting subject matter. Avoid cluttered backgrounds or distracting objects that take away from the main focus. A clean, professional look helps your images stand out.
Color consistency and accurate whites are also essential. Make sure your images aren’t overly saturated unless intentional, and keep the white balance natural. This helps buyers envision how your photos will look in their projects.
Now, let’s talk about content restrictions:
- No offensive or controversial material: Avoid images that could be considered hate speech, violence, or discrimination.
- No copyrighted or trademarked content: You can’t upload images with recognizable logos, brand names, or copyrighted works unless you have permission.
- Model and property releases: If your image features recognizable people or private property, you may need releases—especially if you’re aiming for editorial or commercial use.
Speaking of releases, Shutterstock has specific requirements for model and property releases. Make sure to upload clear, signed documents if your images include identifiable individuals or private property. Without these, your images might be restricted to editorial use only.
Another important aspect is avoiding spammy or deceptive content. Don’t upload images that are misleading, over-processed, or contain watermarks. Authenticity and honesty shine through and make your work more appealing.
Finally, pay attention to the technical specifications for different types of files. JPEGs are the standard, and they should be saved in the sRGB color space. Keep file sizes optimized but without sacrificing quality—usually, around 15-20 MB per image is good.
In summary, understanding and adhering to Shutterstock’s guidelines not only helps get your images approved faster but also ensures they look professional and are more likely to sell. Take the time to review their detailed guidelines on their website—they’re a valuable resource for new contributors. Remember, quality and compliance go hand in hand in making your journey as a Shutterstock contributor smooth and successful!
Step-by-Step Guide to Upload Your Images
Ready to get your stunning photos onto Shutterstock? Uploading might seem a bit daunting at first, but once you get the hang of it, it’s pretty straightforward. Here’s a simple step-by-step guide to walk you through the process like a pro.
Step 1: Log into Your Contributor Account
First things first, head over to Shutterstock’s contributor portal and log in with your credentials. If you’re new, you’ll need to create an account — no worries, it’s quick and easy!
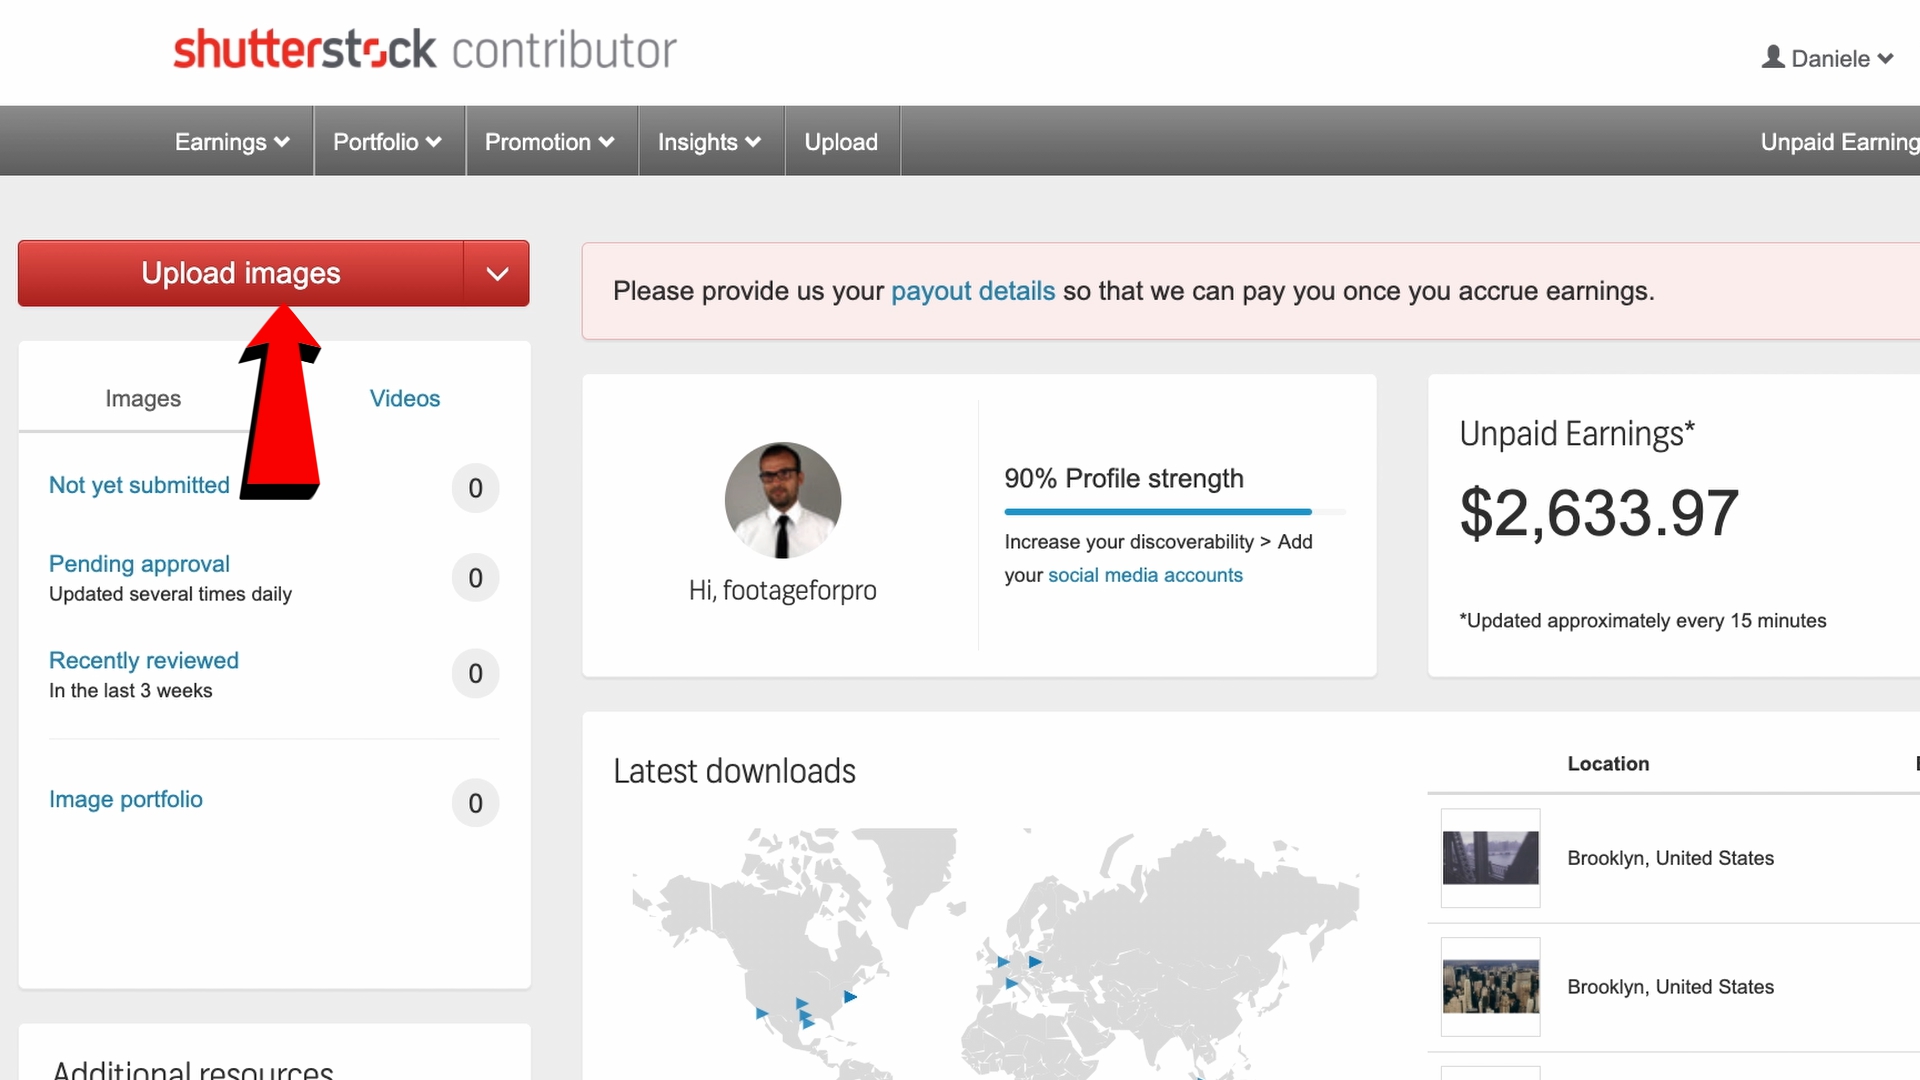
Step 2: Click on the ‘Upload’ Button
Once you’re logged in, find the “Upload” button, usually located at the top right corner of your dashboard. Click on it, and you’ll be directed to the upload page.
Step 3: Select Your Files
Now, choose the images you want to upload. You can either drag and drop your files into the upload window or click to browse your computer. Shutterstock recommends uploading high-quality images in JPEG format with a minimum of 4 megapixels.
Step 4: Fill Out Image Details
As your images upload, you’ll need to provide details such as titles, descriptions, and tags. Don’t worry — you can do this in batches if you’re uploading multiple images. Make sure your descriptions are accurate and descriptive to help buyers find your work.
Step 5: Select Licensing Options
Shutterstock offers different licensing options — Standard and Enhanced. Most contributors choose Standard, which covers most uses. Choose what works best for you.
Step 6: Submit for Review
Once all details are filled out, review everything to ensure accuracy. Then, hit the “Submit” button. Your images will go into Shutterstock’s review queue, which typically takes a couple of days. If your images meet the quality guidelines, they’ll be approved and go live!
Bonus Tip: Keep track of your uploads and review statuses in your contributor dashboard. It helps you stay organized and know when your images are approved or if you need to make adjustments.
Optimizing Your Image Titles, Descriptions, and Tags for Better Visibility
Great images can get lost in the shuffle without proper optimization. Think of your titles, descriptions, and tags as the clues that help buyers find your work. Here’s how to make them work for you:
1. Use Clear, Descriptive Titles
Your title should accurately describe what’s in the image. Instead of vague titles like “Beautiful Photo,” go for specifics — e.g., “Sunset Over Mountain Range with Orange and Pink Sky.” This helps both buyers and search engines understand your image at a glance.
2. Craft Detailed and Keyword-Rich Descriptions
Descriptions give context and tell a story about your image. Include relevant details such as location, mood, colors, and subjects. Incorporate keywords naturally, avoiding keyword stuffing, so your image appears in relevant searches.
| Good Example | Less Effective Example |
|---|---|
| “Close-up of a vibrant red rose with dew drops in early morning sunlight, showcasing intricate petal details.” | “Beautiful flower, red, nature, dew, morning.” |
3. Use Relevant and Specific Tags
Tags are like keywords that help categorize your images. Use a mix of broad and specific tags related to your image. For example, for a beach scene, tags like “beach,” “ocean,” “summer,” “vacation,” and “sandy shore” work well.
4. Think Like a Buyer
Consider what words a buyer might use to search for your image. Use synonyms and related terms to cast a wider net. Also, avoid spammy or irrelevant tags — quality over quantity wins here.
5. Keep Updating and Improving
Over time, review your existing images’ performance. If they aren’t getting enough visibility, tweak the titles, descriptions, and tags. Continuous optimization can significantly boost your images’ reach.
By paying attention to these details, you help ensure your images don’t just sit unnoticed. Instead, they become findable assets that attract buyers and generate sales. Remember, good metadata is your best friend on platforms like Shutterstock!
Reviewing and Submitting Your Images for Approval
Once you’ve uploaded your images to Shutterstock, the next big step is reviewing and submitting them for approval. Think of this as your opportunity to double-check everything and ensure your photos are ready to impress. After all, Shutterstock wants high-quality images that will resonate with their diverse audience.
First, take a close look at each image in your portfolio. Here are some key points to consider:
- Image Quality: Are your photos sharp, well-exposed, and free of noise or artifacts? Use editing tools to enhance clarity and correct any issues.
- Composition: Is the main subject clear and centered? Does the image follow good compositional guidelines like the rule of thirds?
- Lighting: Proper lighting can make or break an image. Make sure your photos are well-lit, with no harsh shadows or blown-out highlights.
- Color and White Balance: Are the colors natural and appealing? Adjust white balance if necessary to ensure accurate color representation.
- Model or Property Releases: If your image features recognizable people or private property, confirm that the proper releases are uploaded.
Next, ensure your keywords are accurate and descriptive. Effective keywording is crucial because it helps your images get discovered. Use relevant terms that potential buyers might search for, and avoid overstuffing with unrelated keywords.
When ready, click the “Submit for Approval” button. Shutterstock’s review team will then evaluate your image based on quality, technical standards, and originality. This process can take anywhere from a few days up to a week, so patience is key.
If your image is rejected, don’t be discouraged! Shutterstock provides feedback on why it was not accepted. Use this information to improve your next submission—whether that’s editing the image further or adjusting your keyword strategy. Remember, even the best photographers face rejections; it’s part of the journey to becoming a successful contributor.
Tips for Increasing Your Acceptance Rate and Sales
Getting your images approved is just the beginning. To really thrive on Shutterstock, you’ll want to maximize your acceptance rate and boost your sales. Here are some friendly tips to help you along the way:
1. Focus on Quality Over Quantity
While it’s tempting to upload hundreds of images, quality always trumps quantity. Choose your best shots—those that are sharp, well-composed, and visually appealing. High-quality images stand out and are more likely to be accepted and purchased.
2. Keep Up with Trends
Stay current by researching popular themes and styles. Are minimalistic designs in vogue? Is there a demand for eco-friendly or diversity-focused images? Aligning your portfolio with trending topics can increase your visibility and sales.
3. Use Effective Keywords and Titles
Think like your buyers. Use clear, descriptive keywords that accurately reflect your image. Avoid generic tags and instead include specific terms—like “healthy vegan meal” instead of just “food.” Well-crafted titles and tags help your images appear in relevant searches.
4. Diversify Your Portfolio
Cover a variety of subjects, styles, and concepts. The wider your range, the more opportunities you have for different buyers. Include images for different industries—business, lifestyle, technology, nature, etc.
5. Pay Attention to Technical Standards
Use high-resolution files (at least 4MP) and save your images in appropriate formats like JPEG or EPS. Avoid watermarks or distracting overlays, and ensure your images are free of borders, logos, or text unless intentionally part of the design.
6. Engage with the Community and Resources
Join Shutterstock contributor forums and read their guidelines regularly. Many successful contributors share tips and insights that can help you refine your approach. Keep learning from feedback and adapt accordingly.
7. Be Patient and Persistent
Building a successful portfolio takes time. Don’t get discouraged by rejections; instead, view them as learning opportunities. Consistency and persistence are your best friends in this journey.
By focusing on quality, staying trendy, and optimizing your keywords, you’ll not only increase your acceptance rate but also boost your chances of making sales. Keep honing your skills, and over time, you’ll see your Shutterstock portfolio grow into a rewarding source of income.
Managing Your Portfolio and Monitoring Performance
Once you’ve uploaded a collection of images to Shutterstock, the journey doesn’t end there. In fact, managing your portfolio effectively can make a huge difference in how well your images perform and how much you earn. Think of your portfolio as your creative storefront — it needs regular upkeep and attention to attract buyers and showcase your best work.
First off, it’s a good idea to keep your portfolio organized. You can categorize your images based on themes, styles, or subject matter. This not only helps you find your own work easily but also makes it easier for buyers to navigate your collection. Consider creating different folders or albums within your contributor dashboard, especially if you upload diverse types of images.
Monitoring your image performance is key to understanding what sells and what doesn’t. Shutterstock provides analytics tools that show you data like views, downloads, and earnings for each image. Use this data to identify your top-performing images — those that get lots of downloads and generate income. Pay attention to trends: Are certain subjects or styles more popular? Are your images performing better in specific seasons or markets?
Based on these insights, you can tailor your future uploads. For example, if your nature photos are frequently downloaded, consider focusing more on that niche. If images with a specific color palette or composition style do well, incorporate that into your workflow. Regularly reviewing your performance stats helps you optimize your portfolio for better results.
Additionally, updating your portfolio with fresh content keeps your profile active and engaging. Shutterstock’s algorithms tend to favor active contributors, so uploading new images regularly can boost your visibility. Remember, quality always beats quantity, so prioritize adding high-quality, well-tagged images that meet Shutterstock’s standards.
Engage with the community and stay informed about trends by exploring what other successful contributors are doing. Join forums, read blogs, and participate in Shutterstock webinars or tutorials. The more you learn about market demands and best practices, the better you’ll become at managing your portfolio for long-term success.
Common Mistakes to Avoid When Uploading to Shutterstock
Even seasoned contributors can fall into pitfalls when uploading images to Shutterstock. To help you stay on the right track, let’s go over some common mistakes and how to avoid them. Learning from these can save you time, effort, and potential rejection down the line.
1. Ignoring Shutterstock’s Content Guidelines
Shutterstock has clear guidelines about what content is acceptable. Uploading images with inappropriate content, poor quality, or violating copyright can result in rejection or account suspension. Always review their content policies before uploading—this includes avoiding offensive material, ensuring model releases are in place when needed, and not uploading images that infringe on trademarks or intellectual property.
2. Poor Image Quality
Low-resolution images, bad lighting, noise, or over-compression are common issues. Remember, buyers look for high-quality images that look professional. Always upload images at the recommended resolution, and do a final check for sharpness, exposure, and color accuracy. Use editing tools to enhance your images if necessary before uploading.
3. Improper Tagging and Metadata
Tags are how buyers find your images. Using irrelevant or minimal tags decreases your image’s discoverability. Be descriptive and specific with your keywords, and include relevant details like location, subject, mood, and style. Avoid keyword stuffing—accuracy and relevance are key.
4. Neglecting Model and Property Releases
If your images feature recognizable people or private property, you need the proper releases. Uploading images without these can lead to rejection or legal issues. Always obtain and keep releases handy, and upload them with your images when required.
5. Uploading Duplicate or Similar Images
Uploading many similar images can dilute your portfolio and reduce your chances of sales. Instead, focus on creating a diverse collection with unique compositions and subjects. Use variations sparingly and ensure each image offers something different or valuable.
By being mindful of these common mistakes and actively working to avoid them, you’ll improve your chances of success on Shutterstock. Remember, patience and continuous learning are essential. Keep refining your workflow, listen to feedback, and stay updated on best practices. With time, your portfolio will grow into a powerful tool for generating income and showcasing your talent!
Conclusion and Final Tips for Uploading Like a Pro
Uploading images to Shutterstock can be a rewarding experience when approached with the right strategies. To maximize your success, remember that high-quality, well-edited images stand out and attract more buyers. Always review Shutterstock’s content guidelines to ensure your submissions meet their standards, reducing the risk of rejection.
Here are some final tips to help you upload like a pro:
- Use Descriptive Titles and Keywords: Accurately describe your images with relevant keywords to improve visibility in search results.
- Maintain Consistent Quality: Upload only your best work, ensuring each image is sharp, properly exposed, and free of distractions.
- Organize Your Portfolio: Categorize your images logically to make it easier for buyers to find what they need.
- Stay Updated: Keep current with Shutterstock’s policies and market trends to tailor your uploads accordingly.
- Be Patient and Persistent: Success on platforms like Shutterstock often requires consistent uploads and ongoing improvements.
By applying these tips and maintaining a professional approach, you’ll increase your chances of making your images stand out and generate income. Remember, quality and relevance are key—so invest time in perfecting each upload, and you’ll soon see your portfolio grow and thrive.