Thinking about submitting your photos to Shutterstock? Great choice! It’s an awesome platform for photographers to showcase their work and earn some income. But before you hit that upload button, there’s an important step many overlook: adding a reference image. This tiny detail can make a big difference in how your submission gets accepted and how easily it gets licensed. Reference images help Shutterstock verify what your photo depicts, ensuring clarity and accuracy for buyers. So, let’s dive into why reference images matter and how to prepare yours perfectly for submission!
Preparing Your Reference Image for Upload
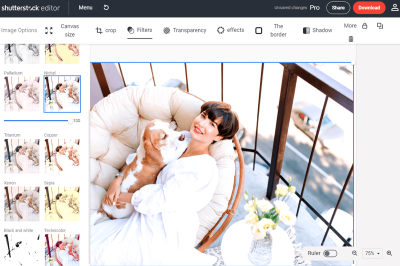
Getting your reference image ready might seem straightforward, but there are a few key tips to keep in mind to make the process smooth and professional. First, think about the clarity of your reference image. It should be a clear, high-quality shot that accurately shows the subject or scene. Avoid blurry, dark, or cluttered images—buyers and Shutterstock reviewers need to easily understand what your photo is about.
Next, consider the following steps:
- Choose the best angle: The reference image should clearly represent the main subject without unnecessary distractions.
- Maintain consistency: Make sure the reference image closely matches the main photo’s composition and perspective. This helps reviewers verify your submission quickly.
- Use high resolution: Aim for a resolution that’s at least 1920 pixels on the shortest side. Low-res images can be rejected or cause confusion.
- Ensure proper lighting: Good lighting makes details pop and reduces the risk of misinterpretation.
Another handy tip is to keep the background simple if your subject is complex, so the reference image doesn’t add unnecessary confusion. Also, avoid any watermarks or overlays—these can interfere with the verification process.
Finally, when preparing your image file, save it in a common format like JPEG or PNG, and give it a clear, descriptive filename. For example, “red-rose-bouquet.jpg” is more helpful than “IMG_1234.jpg”. Once you’ve polished your reference image and ensured it meets Shutterstock’s quality standards, you’re ready to upload it alongside your main submission. Proper preparation now saves time later and increases your chances of approval—happy submitting!
Accessing the Shutterstock Contributor Dashboard
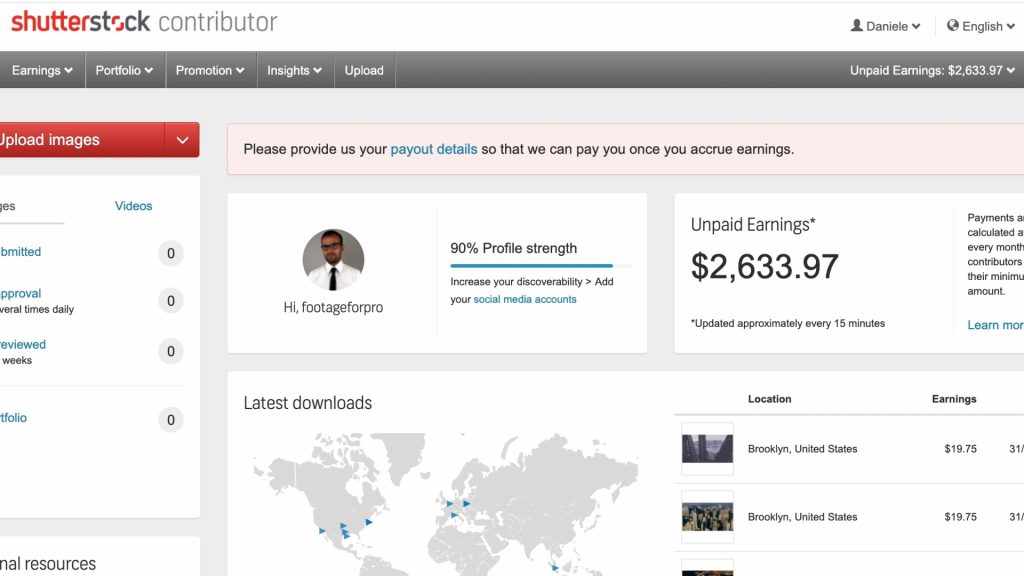
Alright, so you’ve got your reference image ready — now, the first step is to access your Shutterstock Contributor Dashboard. This is your control center, where all the magic happens, from uploading images to tracking your sales. If you’re new to Shutterstock, don’t worry—getting into your dashboard is straightforward.
First things first, head over to the Shutterstock Contributor website. If you already have an account, simply click on the “Sign In” button at the top right corner. Enter your email and password, and you’ll be taken straight to your dashboard. If you’re new to Shutterstock, you’ll need to create an account by clicking on “Join Now”. The registration process is quick and only requires a few details.
Once logged in, you’ll land on your dashboard—think of it as your personal hub. Here, you’ll see various options like Upload Files, My Portfolio, Sales Reports, and more. To add your reference image, look for the “Upload” button, usually prominently displayed. Clicking this takes you to the upload interface, where you’ll be able to select your files and add relevant details.
Pro tip: Take a moment to explore the dashboard. Getting familiar with where everything is will make your submission process smoother. Also, don’t forget to review your account settings, so your profile info is accurate — it’s important for licensing and communication purposes.
Uploading Your Reference Image During the Submission Process
Now, onto the exciting part — actually uploading your reference image! Whether you’re submitting a new illustration, photograph, or graphic, the process is pretty similar. Let’s walk through it step-by-step to make sure you don’t miss anything.
After clicking the “Upload” button from your dashboard, you’ll be directed to the upload page. Here, you’ll see options to drag and drop files or browse your computer. Select your reference image file — Shutterstock accepts common formats like JPG, PNG, TIFF, and sometimes PSD, depending on their current guidelines.
Once your image is uploaded, you’ll be prompted to add details. This is crucial because these details help Shutterstock reviewers understand what your image is about and how it can be used. Here’s what you typically need to fill out:
- Title: A clear, descriptive name for your image.
- Description: A brief explanation of what the image depicts.
- Keywords: Relevant words that help people find your image in searches. Think of keywords like “sunset,” “mountain,” or “cityscape,” depending on your reference image.
- Category: Choose the best category that fits your image, like “Nature,” “Technology,” or “People.”
For reference images, it’s especially important to be precise with keywords and descriptions, as they assist reviewers in understanding the context. If the reference image is part of a larger project or has specific features, mention that in the description.
Next, you’ll see options to select the licenses available for your image — standard or enhanced. For reference images, you usually choose standard unless they contain exclusive or high-value content.
Finally, before submitting, double-check all your details and make sure your image is high quality and meets Shutterstock’s technical requirements. When everything looks good, hit the “Submit” button. Your reference image will then go into the review process, which can take anywhere from a few hours to a few days.
And that’s it! Uploading your reference image might seem like a small step, but it’s a crucial part of your Shutterstock journey. Follow these steps, and you’ll be well on your way to sharing your creative work with a global audience.
Tips for Choosing the Right Reference Image to Enhance Your Submission
Choosing the perfect reference image can make all the difference in creating a compelling and accurate Shutterstock submission. After all, your goal is to produce artwork that’s authentic, clear, and easy for viewers to understand. Here are some friendly tips to help you pick the best reference images for your project:
Focus on Clarity and Quality
Look for images that are sharp, well-lit, and high-resolution. Blurry or pixelated photos won’t serve you well—your reference image should clearly showcase the subject’s details. Think of it as your visual blueprint; the clearer it is, the easier you can translate it into your artwork.
Ensure the Image Represents Your Concept
Select a reference that closely aligns with your intended final piece. If you’re drawing a portrait, choose a photo that captures the expression, pose, and lighting you envision. For illustrations of objects or scenes, pick images that display the key elements and perspective you want to replicate.
Pay Attention to Composition and Perspective
Pick reference images with compositions that inspire you. If you want to draw a character from a specific angle, find photos shot from that viewpoint. This helps you understand proportions and spatial relationships, making your artwork more realistic and dynamic.
Use Multiple References When Needed
Sometimes, one image isn’t enough to get all the details right. Don’t hesitate to gather multiple references—perhaps one for lighting, another for pose, and a third for textures. Combining elements from different images can give you a more comprehensive guide.
Respect Copyright and Licensing
Always ensure the images you choose are either your own or licensed for your intended use. Shutterstock’s reference images are a great resource because they’re legally cleared, but if you’re sourcing elsewhere, double-check licensing rules to avoid any legal hiccups down the line.
Common Mistakes to Avoid When Adding Reference Images
While adding reference images is a powerful tool, it’s easy to fall into some common pitfalls. Being aware of these can save you time and help you create submissions that truly shine:
Using Low-Quality or Blurry Images
This might seem obvious, but it’s worth emphasizing—never rely on fuzzy or poorly lit images. They won’t provide the details you need and can lead to frustration or a less polished final product.
Overloading Your Submission with Too Many References
It’s tempting to include every possible reference, but too many images can clutter your submission and confuse viewers. Instead, select a few high-quality images that best support your artwork. Focus on clarity and relevance.
Ignoring the Importance of Proper Attribution
If you’re using reference images from sources that require credit, make sure to give proper attribution. This not only respects copyright laws but also demonstrates your professionalism.
Failing to Match the Reference Style to Your Artwork
Don’t pick a reference image that doesn’t match your intended style or concept. For example, using a highly stylized photograph as a reference for a realistic portrait can cause inconsistencies. Choose images that complement your artistic direction.
Neglecting to Update or Reconsider References
If you find that your initial reference isn’t helping or your concept evolves, don’t hesitate to find new images. Sticking rigidly to a poor reference can hinder your creativity and the quality of your submission.
Remember, the goal is to use reference images as a helpful guide—not as a crutch. With thoughtful selection and awareness of common mistakes, you’ll be well on your way to creating stunning Shutterstock submissions that stand out!
Finalizing Your Shutterstock Submission with Reference Images
Congratulations! You’re almost there. You’ve uploaded your images, added all the necessary details, and now you’re ready to finalize your Shutterstock submission. But before hitting the submit button, let’s talk about the importance of reference images and how to make sure everything looks perfect.
Adding reference images isn’t just a formality — it’s a way to give reviewers a better idea of how your image can be used, which can significantly boost your chances of acceptance. Reference images help Shutterstock understand the context, composition, and potential applications of your work. Think of them as a visual explanation that supports your main image.
Steps to Finalize Your Submission:
- Review Your Main Image: Make sure it’s high quality, properly cropped, and free of any imperfections or watermarks.
- Check Your Metadata: Ensure that your title, description, and keywords are accurate and descriptive. Well-optimized metadata helps your image get discovered.
- Add Reference Images: Upload clear, relevant reference images that showcase different angles, details, or related concepts. These images should supplement your main image and be of high quality.
- Confirm Image Rights: Double-check that you hold the rights to all images and references you upload. This is crucial for a smooth approval process.
- Preview Your Submission: Use Shutterstock’s preview feature to see how your submission will appear once live. This helps catch any last-minute errors.
Tips for Effective Reference Images:
- Use high-resolution images that clearly display the subject or context.
- Include shots from different angles or perspectives if relevant.
- Ensure references are well-lit and focused to avoid confusion.
- If your main image is a product, include lifestyle shots or usage scenarios.
Once everything looks good, click the Submit for Review button. Shutterstock will then review your submission, which typically takes a few days. Remember, well-prepared reference images can make your submission stand out and increase your chances of acceptance, so take your time to select and upload the best possible references.
Frequently Asked Questions About Adding Reference Images on Shutterstock
Still have questions about adding reference images? Don’t worry — you’re not alone! Here are some common questions and helpful answers to guide you through the process.
Q1: Why should I add reference images to my Shutterstock submission?
Adding reference images provides context to your main image, helping reviewers understand its use and potential applications. It can also showcase different angles, details, or related concepts, increasing the chances of approval and making your images more appealing to buyers.
Q2: What types of reference images are best?
Choose high-quality, clear images that complement your main shot. Examples include close-ups of details, alternative angles, lifestyle shots, or related scenes. Avoid blurry or low-resolution images, as they might hinder your submission’s acceptance.
Q3: How many reference images should I upload?
There’s no fixed number, but typically 2-5 relevant reference images are sufficient. Focus on quality over quantity — select images that add meaningful context and value to your main image.
Q4: Can I reuse reference images from previous submissions?
Yes, but only if they are relevant and you hold the rights to reuse them. Using fresh, original references tailored to each submission often yields better results.
Q5: Are there any technical specifications for reference images?
Yes, reference images should be high-resolution and in common formats like JPEG or PNG. They should be well-lit, focused, and free of watermarks or logos. This ensures clarity and professionalism in your submission.
Q6: Will adding reference images delay the review process?
No, adding reference images during submission does not delay the review. However, ensure all images meet Shutterstock’s quality standards to avoid rejection or rework.
Q7: What if my reference images get rejected?
If your references are rejected, review Shutterstock’s guidelines, improve the quality or relevance of your images, and resubmit. Properly selected and high-quality references increase the likelihood of approval.
Hopefully, this FAQ clears up your doubts! Remember, adding thoughtful reference images can really enhance your portfolio and improve your chances of success on Shutterstock. Happy uploading!
Conclusion and Additional Resources for Shutterstock Contributors
Adding reference images to your Shutterstock submissions can significantly enhance the clarity and quality of your work, increasing your chances of acceptance and sales. Remember to always use high-resolution images, ensure proper licensing, and follow Shutterstock’s content guidelines. Incorporating reference images not only helps reviewers understand your concept better but also demonstrates professionalism and attention to detail.
As you continue to contribute, consider exploring the following resources to improve your workflow and stay updated:
- Shutterstock Contributor Help Center: Comprehensive guides and FAQs to assist you at https://submit.shutterstock.com/
- Community Forums: Connect with other contributors, share tips, and get feedback at https://forums.submit.shutterstock.com/
- Online Tutorials and Webinars: Enhance your skills with tutorials on stock photography, editing, and submission best practices available through platforms like YouTube or Shutterstock’s own webinars.
- Stock Photography Blogs: Follow industry blogs such as Stock Photo Secrets or The Shutterstock Blog for insights, trends, and success stories.
By leveraging these resources and continuously refining your submission process, you’ll be well on your way to becoming a successful Shutterstock contributor. Keep experimenting, stay informed, and maintain high standards to maximize your portfolio’s potential and earnings.