Getting your photos approved on Shutterstock can feel like a bit of a mystery, right? You’re passionate about your photography, and you want to share your work with the world while earning some income. But Shutterstock has specific guidelines and standards to maintain quality across their platform. Knowing how to properly upload your photos and what they’re looking for can boost your approval chances significantly. In this guide, we’ll walk through the essentials—from preparing your images to understanding the submission process—so you can confidently upload and get your photos approved more often.
Preparing Your Photos for Submission
Before hitting the upload button, it’s crucial to make sure your photos are ready for prime time. Shutterstock is very particular about quality, composition, and metadata. Here are some key steps to prepare your images:
1. Ensure High-Quality Images
- Resolution: Upload images that are at least 4 megapixels (e.g., 2000 pixels on the shortest side). High-resolution images look more professional and meet Shutterstock’s standards.
- Focus and Sharpness: Your photos should be crisp and clear, with no blurriness unless artistically intended.
- Compression: Save your images in JPEG format with minimal compression to avoid artifacts. Use a quality setting of 8-12 in your image editor.
2. Check Composition and Content
Shutterstock favors well-composed images that tell a story or evoke emotion. Consider these tips:
- Lighting: Good lighting makes a big difference. Natural light often works best, but studio lighting can also produce stunning results.
- Subject Placement: Use the rule of thirds and avoid cluttered backgrounds.
- Uniqueness: Try to capture unique perspectives or subjects that stand out in a crowded marketplace.
3. Mind Legal and Model Releases
If your photo includes recognizable people, private property, or copyrighted elements, you’ll need appropriate releases. Shutterstock requires model and property releases for commercial use images involving identifiable individuals or private property. Make sure you have documented releases ready or avoid such content if you’re not prepared.
4. Metadata and Keywords
Proper metadata helps your photos get found. Use descriptive, accurate keywords that reflect the content of your image. Be honest and specific. Include relevant categories, locations, and themes. Avoid keyword stuffing, as it can hurt your approval rate.
5. Organize Your Files
Keep your images organized in folders named by theme or shoot date. This makes uploading smoother and helps you keep track of your submissions.
By following these steps, you’ll ensure your photos meet Shutterstock’s quality standards and are more likely to be approved quickly. Taking the time to prepare your images properly pays off in the long run, leading to a higher approval rate and more exposure for your work.
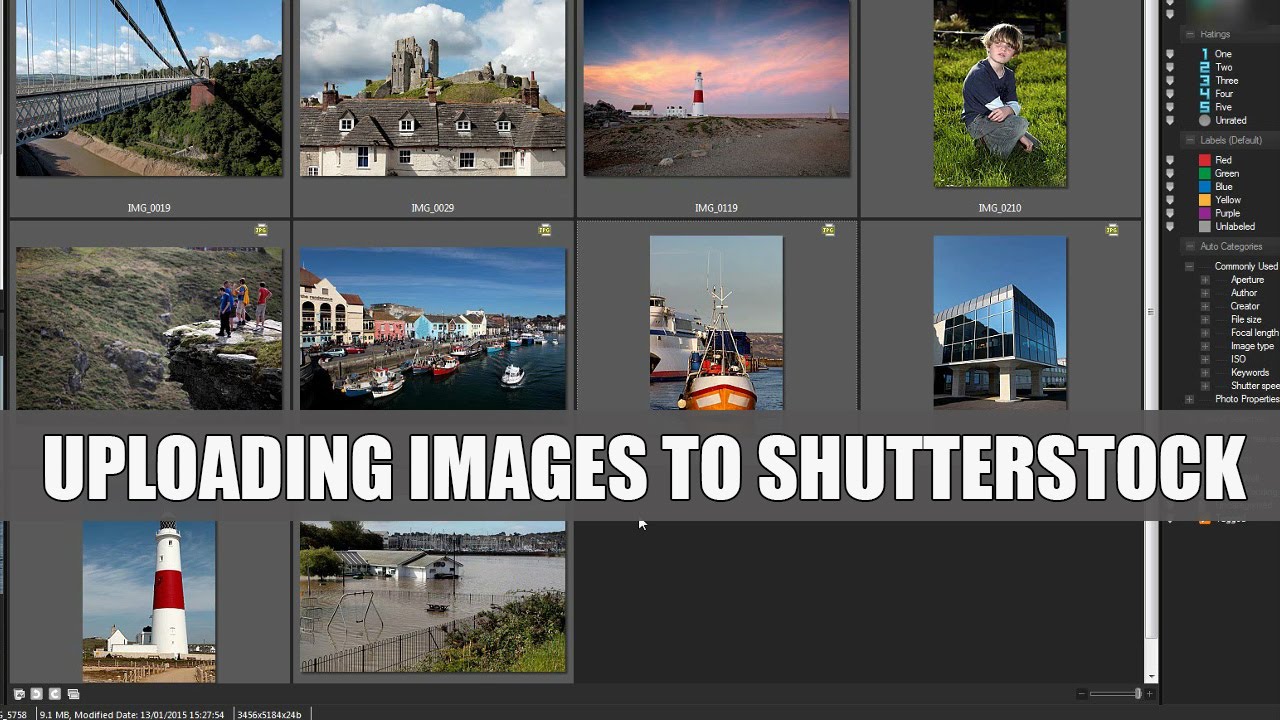
Step-by-Step Process to Upload Photos on Shutterstock
Uploading your photos to Shutterstock might seem a bit daunting at first, but once you get the hang of it, it’s pretty straightforward. Let’s walk through the process step-by-step so you can get your images submitted with confidence.
Step 1: Create a Contributor Account
If you haven’t already, head over to Shutterstock’s contributor portal and sign up. Fill out your profile details, agree to the contributor agreement, and verify your email. Once your account is approved, you’re ready to upload.
Step 2: Prepare Your Photos
Before uploading, make sure your photos meet Shutterstock’s quality standards. Your images should be high resolution (at least 4 MP), properly exposed, in focus, and free of noise or distractions. It’s also a good idea to review Shutterstock’s content guidelines to ensure your images comply.
Step 3: Log in and Access the Upload Tool
Log into your contributor dashboard. Click on the ‘Upload’ button, usually located at the top of the page. You’ll be directed to the upload interface where you can select files from your computer.
Step 4: Select and Upload Your Photos
Choose the photos you want to upload. Shutterstock allows multiple uploads at once, so feel free to batch your images. The platform supports JPEG files, so ensure your photos are saved accordingly.
Step 5: Add Metadata (Titles, Keywords, and Descriptions)
This is a crucial step. Proper metadata helps your images get discovered. Enter a clear, descriptive title, detailed description, and relevant keywords. Use both broad and specific keywords to improve visibility.
- Titles should be concise but descriptive.
- Descriptions should highlight what’s special about the photo.
- Keywords should cover all relevant aspects, including objects, colors, and concepts.
Step 6: Select Appropriate Categories and Settings
Choose the right categories that best fit your image. This helps Shutterstock’s review team understand the context and improves the chances of approval. You can also set licensing options and add model or property releases if needed.
Step 7: Submit for Review
Once all metadata is filled out, review everything to ensure accuracy. Click the ‘Submit’ button, and your images will be sent for Shutterstock’s review team to evaluate.
Step 8: Monitor the Status
You can track your submissions in your dashboard. Shutterstock will notify you via email once your images are approved, rejected, or need revisions. If rejected, review the feedback carefully before re-uploading.
And that’s it! With each upload, you’ll become more familiar with the process and what Shutterstock prefers. Now, let’s move on to some key tips that can help improve your approval rates.
Tips to Improve Your Approval Chances

Getting your photos approved on Shutterstock can sometimes feel like hitting a moving target. But don’t worry—there are proven strategies to boost your approval rates and get your images out into the world faster.
1. Follow Shutterstock’s Content Guidelines
This is the most important tip. Familiarize yourself with their rules regarding content quality, model releases, property releases, and subject matter. Avoid images with watermarks, logos, or copyrighted material unless you have permission. Keep images free of noise, blurriness, or over-compression.
2. Focus on Technical Quality
Upload only sharp, well-exposed, and properly edited photos. Use a tripod when necessary to avoid camera shake. Pay attention to white balance, contrast, and color accuracy. Remember, Shutterstock favors images that look professional and polished.
3. Use Relevant and Specific Keywords
When adding metadata, think about what buyers might search for. Use a mix of broad keywords (like nature, business) and specific ones (like mountain landscape at sunrise or business team brainstorming). Avoid irrelevant tags that might confuse the review team.
4. Submit Unique and High-Quality Content
Stock platforms are competitive. Stand out by offering original perspectives, interesting compositions, or niche topics. Avoid overly generic images that don’t add value.
5. Ensure Model and Property Releases are in Order
If your images feature recognizable people or private property, make sure you have the necessary releases. Uploading these documents during submission can prevent rejection based on legal issues.
6. Edit and Retouch Thoughtfully
Minor retouching, like color correction or removing distractions, can improve your image. However, avoid over-editing or creating unrealistic visuals, as Shutterstock prefers natural-looking photos.
7. Review Rejection Feedback Carefully
If an image gets rejected, don’t get discouraged. Read the reviewer’s comments, identify what needs improvement, and try again. Often, small adjustments can make a big difference.
8. Stay Consistent and Patient
Regularly upload new content, and don’t get discouraged by initial rejections. Building a quality portfolio over time increases your chances of approval and earnings.
Remember, patience and attention to detail are key. The more you understand what Shutterstock values, the better your odds of getting your photos approved. Keep practicing, stay updated with their guidelines, and you’ll see your success grow!
Common Reasons for Photo Rejections and How to Avoid Them
Getting your photos approved on Shutterstock can sometimes feel like navigating a tricky maze, especially when your images get rejected. But don’t worry! Understanding the most common reasons behind rejections can help you avoid pitfalls and increase your chances of approval. Let’s dive into the key issues and how to sidestep them.
1. Technical Issues
Shutterstock has strict technical standards. Photos that are blurry, pixelated, or have poor lighting often get rejected. Make sure your images are sharp, well-exposed, and free of noise. Use good quality cameras and editing tools to enhance clarity and color balance before uploading.
2. Model & Property Releases
If your photo includes recognizable people or private property, you need the appropriate releases. Shutterstock is particular about this—images without the necessary releases may be rejected or require additional verification. Always obtain model and property releases when applicable, and keep copies handy.
3. Non-Original Content
Shutterstock values original content. If your photo closely resembles existing images or is a derivative work, it might not pass the review. Focus on capturing unique perspectives or subjects that aren’t overly saturated in the marketplace.
4. Poor Composition & Framing
Composition makes a huge difference! Photos that are awkwardly framed, have distracting backgrounds, or are poorly cropped tend to be rejected. Take your time to compose your shot carefully—use the rule of thirds, clean backgrounds, and crop thoughtfully.
5. Over-Editing & Filters
While editing is part of the process, overdoing it with heavy filters or excessive post-processing can hurt your chances. Keep edits natural and subtle to preserve authenticity. Avoid overly stylized effects unless they add value to the image.
6. Content Violating Shutterstock Guidelines
Photos that depict illegal activities, violence, or offensive content will be rejected. Familiarize yourself with Shutterstock’s content policies and steer clear of controversial or inappropriate themes. When in doubt, review their content guidelines before submitting.
How to Avoid These Rejections
- Check your technical quality before uploading—use tools to verify sharpness and exposure.
- Secure necessary releases for recognizable people and private property.
- Be original—capture unique angles and subjects.
- Pay attention to composition—use good framing and backgrounds.
- Edit mindfully—aim for natural looks rather than heavy filters.
- Review Shutterstock’s policies regularly to ensure compliance.
By keeping these points in mind, you’ll reduce the chances of rejection and streamline your journey toward higher approval rates. Remember, patience and attention to detail are your best friends in this process!
Optimizing Your Photos for Better Visibility and Sales
Once your photos are approved, the next step is making sure they get noticed—and hopefully purchased! Optimization is key to increasing your visibility on Shutterstock and boosting your sales. Let’s explore some practical tips to help your images stand out in the crowded marketplace.
1. Use Descriptive and Relevant Titles
Your photo’s title is one of the first things buyers see. Make it clear, specific, and keyword-rich without being spammy. Instead of generic titles like “Beautiful Image,” try something like “Golden Sunrise Over Mountain Lake with Reflection.” Descriptive titles help search algorithms match your images with relevant searches.
2. Write Effective Descriptions
A compelling description provides context and additional keywords. Be honest and detailed—mention the location, mood, colors, or any unique features. For example, “A vibrant sunset scene with orange and pink hues over a peaceful mountain lake, perfect for travel or nature-themed projects.”
3. Tag Thoughtfully and Strategically
Tags are crucial for discoverability. Use a mix of broad and specific keywords related to your image. Think about what potential buyers might search for. For example, tags like “sunset,” “mountain lake,” “reflection,” “nature,” “outdoors,” “tranquil,” and “scenery” can help your photo appear in diverse search results.
- Include synonyms and related terms.
- Avoid spammy tags—stick to relevant keywords.
- Limit to 50 tags for optimal results.
4. Choose the Right Categories
Select appropriate categories to help users find your photos easily. Shutterstock offers a variety of categories—pick the ones that best match your image’s content. Accurate categorization enhances visibility in category-specific searches.
5. Maintain Consistent Quality and Style
Building a cohesive portfolio with a recognizable style can attract buyers looking for specific aesthetics. Consistency in color schemes, themes, or subject matter can boost your overall visibility and sales potential.
6. Promote Your Portfolio
Don’t rely solely on Shutterstock’s internal search. Share your portfolio on social media, personal websites, or photography communities. The more exposure your images receive, the higher the chance of sales.
7. Keep Uploading Fresh Content
Regularly adding new, high-quality images keeps your portfolio active and relevant. Shutterstock’s algorithm favors active contributors, giving your new images better visibility.
Final Tips for Better Visibility
- Research trending topics and incorporate relevant keywords.
- Use high-quality, well-edited images to attract attention.
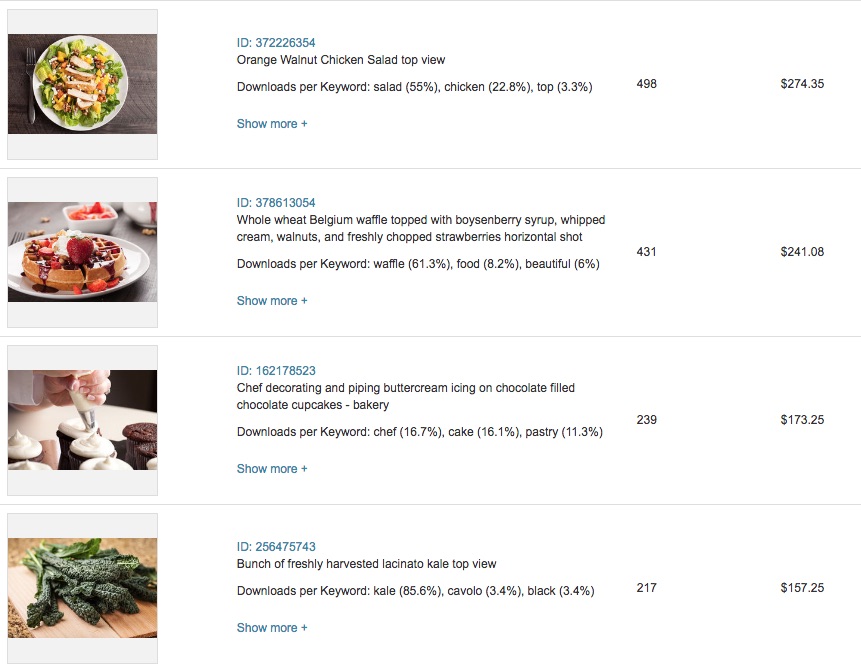
- Monitor your sales data to understand what buyers prefer.
- Update your keywords, titles, and descriptions periodically to refine your search performance.
Optimizing your photos isn’t a one-time task; it’s an ongoing process that can significantly impact your sales. With thoughtful titles, descriptions, tags, and strategic promotion, you’ll enhance your images’ visibility and maximize your earnings on Shutterstock. Happy uploading!
Conclusion and Final Tips for Successful Uploads
Uploading photos to Shutterstock can be a rewarding experience when done correctly. To maximize your approval rates, ensure that your images meet Shutterstock’s quality standards and align with their content guidelines. Remember, high-quality, well-composed photos are more likely to be accepted, so take the time to review each submission carefully.
Here are some final tips to boost your success:
- Use high-resolution images: Aim for at least 4MP resolution to meet Shutterstock’s requirements.
- Focus on clarity and sharpness: Blurry or pixelated photos are unlikely to pass review.
- Properly keyword your images: Use relevant and accurate tags to improve discoverability.
- Follow model and property release guidelines: Ensure you have the necessary permissions for recognizable people or private property.
- Maintain originality: Submit unique content that stands out from the crowd.
Ultimately, patience and persistence are key. Review feedback carefully, learn from rejected uploads, and continuously refine your photography skills. With consistent effort and attention to detail, you’ll increase your chances of approval and build a successful portfolio on Shutterstock.