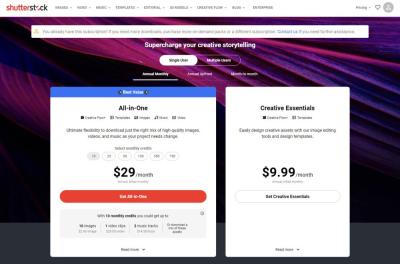
Thinking about turning your photography passion into a source of income? Shutterstock is one of the biggest platforms where photographers and creators share their work and earn royalties. Uploading pictures might sound intimidating at first, but the process is pretty straightforward, especially with their user-friendly app. Whether you’re a seasoned pro or just starting out, understanding how to upload your photos correctly can make all the difference in getting your work noticed. In this guide, we’ll walk you through everything you need to know about uploading pictures to Shutterstock using their app, step by step.
Step-by-Step Guide to Upload Photos via the Shutterstock App
Ready to showcase your photos on Shutterstock? Let’s break down the process into simple steps so you can start uploading with confidence.
Step 1: Download and Install the Shutterstock Contributor App
First things first, head over to your device’s app store—whether it’s the Google Play Store or Apple App Store—and search for “Shutterstock Contributor”. Download and install the app. Once installed, open the app and sign in with your existing Shutterstock contributor account or create a new one if you’re a first-timer.
Step 2: Prepare Your Photos
Before uploading, make sure your photos are optimized:
- Resolution: Use high-resolution images (at least 4 MP recommended).
- File Format: JPEG is preferred for photos, with sRGB color profile.
- Quality: Ensure your images are sharp, well-exposed, and free of noise or distractions.
- Copyright: Only upload images you own or have rights to.
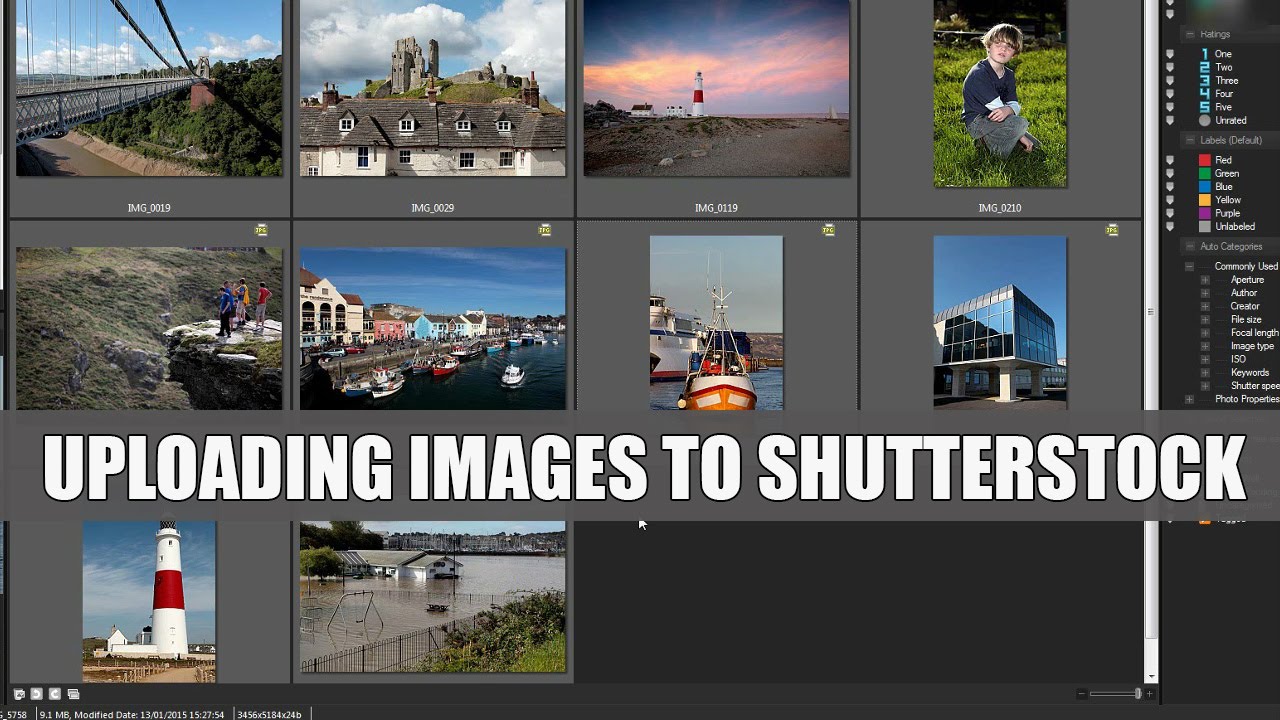
Organize your photos in folders so you can easily select them during uploading.
Step 3: Start Uploading
Open the app, tap on the “Upload” button (usually represented by a camera or plus icon). Select the photos you want to upload from your gallery or files. You can upload multiple images at once, which saves time.
Step 4: Add Metadata
This is a crucial step! For each photo, you’ll need to add:
- Title: A clear, descriptive name.
- Keywords: Relevant tags that help buyers find your image. Think about what words someone might search for.
- Description: Brief details about the photo, including context or notable features.
Accurate and detailed metadata improve your chances of making sales.
Step 5: Choose Licensing Options
Decide whether your image will be offered under Standard or Enhanced license. Typically, the app will guide you through this, and you can select the preferred option based on your goals.
Step 6: Submit for Review
Once everything is filled out, tap “Submit”. Your images will enter Shutterstock’s review process, which usually takes a few days. If your images meet their quality standards, they’ll be approved and go live on the platform.
Tips for Success
- Check your email or app notifications for feedback or approval status.
- Keep uploading consistently to build your portfolio.
- Stay updated with Shutterstock’s guidelines to ensure your images remain compliant.
And that’s it! Uploading pictures via the Shutterstock app is simple once you get the hang of it. Happy shooting and uploading!
Preparing Your Images for Upload

Before you hit that upload button, it’s super important to make sure your images are in the best shape possible. Shutterstock has some guidelines to keep in mind, and taking a little extra time now can really pay off when your photos get approved and start earning. So, let’s walk through the key steps to prepare your images for upload using the app.
First, check the technical quality of your photos. Shutterstock prefers high-resolution images with sharp focus, good lighting, and minimal noise. Make sure your images are at least 4 megapixels (preferably higher) so they look professional and clear. If your photos are blurry, pixelated, or poorly lit, it’s best to retake them.
Next, consider the file format and size. The app typically accepts JPEG files for images. Save your photos in JPEG format with a high-quality setting—usually 80-100% quality—so they look great but don’t have unnecessarily large file sizes. Aim for a file size under 50MB to ensure smooth uploading, but don’t compromise on quality.
Then, think about color correction and editing. Use your favorite editing app to enhance brightness, contrast, and color balance if needed. Avoid over-editing or adding heavy filters—Shutterstock prefers natural-looking images. Also, crop your images to the appropriate aspect ratio—common ratios are 4:3, 3:2, or square (1:1)—depending on the subject and how you want them displayed.
Finally, remove any watermarks, logos, or branding. Shutterstock only accepts original, unmarked images. Double-check that all personal or branded elements are taken out, or your upload might get rejected.
Once your images are polished and ready, save them in a dedicated folder on your device. This makes it easier to locate and upload in the app. Remember, quality is key—taking a few extra minutes here can make a big difference in how well your photos perform on Shutterstock!
Best Practices for Tagging and Describing Your Photos
Now that your images are prepared, the next step is making sure they’re easy to find and appealing to buyers. That’s where tagging and describing come in. Think of it as giving your photos a detailed map so people searching for similar images can discover yours effortlessly.
First, use relevant, specific keywords. When you upload through the app, you’ll be prompted to add tags—these are the words that describe what’s in your photo. Be honest and precise. For example, instead of just “dog,” use “golden retriever puppy in park” or “dog playing fetch.” The more accurate your tags, the higher the chances someone searching for that exact scene will find your photo.
Next, write a clear, concise description. This should complement your tags by providing context. Mention details like location, mood, or activity. For example: “A vibrant sunset over the city skyline with a cyclist in the foreground.” Descriptions help Shutterstock’s algorithm understand your image better and improve its searchability.
Follow these tips for effective tagging and descriptions:
- Use a mix of broad and specific keywords: Include general terms like “nature,” along with specific ones like “mountain lake” or “autumn leaves.”
- Limit your tags: Focus on the most relevant keywords—don’t stuff your image with unrelated tags.
- Add location tags: If applicable, include the city, country, or landmark.
- Be honest: Only tag what’s actually in your photo to avoid rejection or poor search performance.
- Check existing popular tags: Browse Shutterstock to see what tags successful images use for similar subjects.
Remember, well-tagged and thoughtfully described images stand a better chance of being discovered and downloaded. So, take your time with this step—it’s worth it in the long run!
Troubleshooting Common Upload Issues
Uploading pictures to Shutterstock using the app can sometimes come with a few hiccups. Don’t worry—most issues are easy to resolve once you know what to look for. Here are some common problems and how to fix them:
File Size and Format Issues
One of the most frequent problems is incompatible file formats or sizes. Shutterstock prefers high-resolution images in JPEG format, with a minimum of 4 megapixels and a maximum of 50 megapixels. If your upload isn’t working, double-check your image’s specifications:
- Ensure your image is in JPEG format
- Check that the file size isn’t too large (preferably under 50MB)
- Make sure the resolution is at least 4MP (e.g., 1920×1080 pixels)
If your image doesn’t meet these criteria, use photo editing tools to convert or resize your images before uploading.
Internet Connectivity Problems
A stable internet connection is crucial for uploading files smoothly. If uploads keep failing or taking too long, try these steps:
- Switch to a Wi-Fi network instead of mobile data
- Restart your router or modem
- Pause other bandwidth-heavy activities on your network
- Close and reopen the app to refresh the connection
Sometimes, waiting a few minutes and retrying the upload helps resolve temporary connectivity issues.
App Glitches or Crashes
If the app crashes or behaves unexpectedly during upload:
- Update the app to the latest version from your app store
- Clear the app cache in your device settings
- Restart your device to refresh memory and processes
- If problems persist, uninstall and reinstall the app
Most of these steps resolve common glitches and help ensure smooth uploads.
Metadata and Keywording Errors
Incorrect or missing metadata can sometimes cause issues with your uploads. Make sure to:
- Fill in all required fields, including title, description, and keywords
- Use relevant, accurate keywords to improve discoverability
- Avoid using prohibited words or spammy tags
Proper metadata not only helps with upload success but also makes your images easier for buyers to find.
Tips to Maximize Your Earnings from Shutterstock Uploads
Once you’re comfortable with uploading pictures, it’s time to focus on earning as much as possible. Here are some practical tips to boost your Shutterstock income:
Upload High-Quality, Relevant Content
Quality is king. Upload sharp, well-lit images with good composition. Focus on trending themes or evergreen topics like business, technology, lifestyle, or nature. Keep your portfolio diverse but consistent in quality. Remember, buyers are willing to pay more for images that look professional and polished.
Use Strategic Keywords and Descriptions
Effective keywording is crucial for discoverability. Think about what potential buyers might search for and include those terms in your metadata. Use a mix of broad and specific keywords, and avoid keyword stuffing. Well-crafted descriptions and tags can significantly increase your images’ visibility and sales.
Stay Consistent with Uploads
Regular uploading keeps your portfolio fresh and increases the chances of your images being seen. Set a schedule—whether it’s weekly or biweekly—and stick to it. Consistency helps build your presence and attracts repeat buyers.
Engage with the Community and Trends
Follow trending topics and seasonal themes. For example, during holiday seasons, upload related images. Also, engage with the Shutterstock contributor community through forums or social media to learn tips and stay inspired.
Leverage Exclusivity and Licensing Options
Shutterstock offers options for exclusive contributors. If you’re willing to commit to exclusive rights, you might earn higher royalties. Also, consider offering images with extended licenses for businesses needing premium rights, which can earn you more per sale.
Monitor Your Performance and Analytics
Use Shutterstock’s analytics tools to see which images perform best. Pay attention to which keywords and themes generate more downloads. Use this data to guide your future uploads, focusing on what sells best.
By combining high-quality content with smart metadata, consistent uploading, and trend awareness, you can maximize your earnings on Shutterstock. Keep learning, experimenting, and refining your approach—success is a journey!
Conclusion and Additional Resources for Shutterstock Contributors
Uploading your photos to Shutterstock using the app is a straightforward process that allows you to share your creativity with a global audience. By following the steps outlined, ensuring your images meet the platform’s quality standards, and utilizing the app’s features effectively, you can streamline your submission process and increase your chances of acceptance. Remember, consistency and attention to detail are key to building a successful portfolio on Shutterstock.
For further growth and expert tips, consider exploring the following resources:
- Shutterstock Contributor Help Center: Comprehensive guides and FAQs to address common questions and troubleshoot issues.
- Shutterstock Contributor Blog: Regular updates, success stories, and tips from experienced contributors.
- Online Photography Courses: Platforms like Skillshare or Udemy offer courses to enhance your photography and editing skills.
- Community Forums: Engage with other contributors to exchange feedback, advice, and support.
| Resource Type | Description |
|---|---|
| Help Center | Official support with detailed tutorials and troubleshooting. |
| Contributor Blog | Insights, updates, and success stories from Shutterstock. |
| Online Courses | Enhance skills in photography, editing, and market trends. |
| Community Forums | Connect with other contributors for advice and feedback. |
Utilizing these resources can help you optimize your contributions, stay informed about platform updates, and ultimately succeed as a Shutterstock contributor. Keep practicing, stay creative, and leverage the community to grow your portfolio and income streams.