If you’ve ever uploaded photos to Shutterstock, you know the feeling—excited to see your work go live, only to find out some images didn’t make the cut. Rejections can be frustrating, but they’re also a part of the creative journey. The good news is, once you understand why photos get rejected, you can manage your portfolio more effectively. Today, we’ll walk through how to delete rejected photos from Shutterstock, helping you keep your portfolio organized and ready for the next submission. Let’s turn those setbacks into opportunities for growth and improvement!
Understanding Shutterstock’s Rejection Reasons
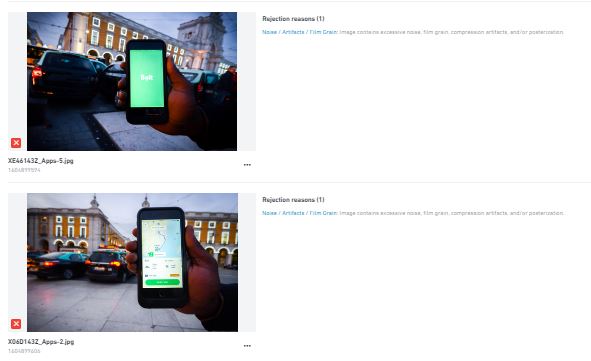
Before you dive into deleting rejected photos, it’s essential to understand why Shutterstock might turn down your images. Knowing the common reasons can help you avoid the same pitfalls in future uploads and improve your overall submission quality. Shutterstock’s review team looks at several factors, including technical quality, content standards, and legal considerations.
Here are some of the most common rejection reasons:
- Poor Technical Quality: Images that are blurry, pixelated, poorly exposed, or have noise issues often get rejected. Shutterstock expects sharp, well-lit photos with good color balance.
- Incorrect Model or Property Releases: If your photo features recognizable people or private property without the necessary releases, it will be rejected.
- Copyright or Trademark Violations: Using logos, branded products, or copyrighted artwork without permission can lead to rejection or even legal issues.
- Lack of Commercial Value: Photos that don’t have a clear commercial appeal or don’t meet market demand might be turned down.
- Inappropriate Content: Shutterstock maintains strict guidelines against offensive, violent, or controversial content.
- Incorrect Metadata: Poor or misleading tags, titles, and descriptions can also cause rejections, as accurate metadata helps buyers find your images.
Understanding these reasons not only helps you improve your future uploads but also makes it easier to decide which rejected images you can safely delete. Remember, not every rejected photo is a lost cause—sometimes, a few tweaks can turn a rejected shot into a bestseller! But if an image consistently falls short or doesn’t meet your standards, deleting it is a smart move to keep your portfolio clean and professional.
Step-by-Step Guide to Deleting Rejected Photos from Your Shutterstock Portfolio
If you’ve ever uploaded photos to Shutterstock and faced rejection, you know how frustrating it can be. But don’t worry—deleting those rejected images from your portfolio is straightforward. Here’s a simple, step-by-step guide to help you clear out those unwanted photos and keep your portfolio clean and professional:
Step 1: Log into Your Shutterstock Contributor Account
First things first, head over to the Shutterstock Contributor website and sign in with your credentials. Once logged in, you’ll be taken to your dashboard where you can manage all your uploads and submissions.
Step 2: Navigate to Your Portfolio
On the dashboard, find the menu or tab labeled “My Portfolio” or “Uploads”. This is where all your submitted images are stored, including those that have been rejected.
Step 3: Filter for Rejected Photos
To make things easier, use the filtering options to sort your images by status. Select “Rejected” to display only those photos that didn’t make the cut. This way, you won’t accidentally delete approved images.
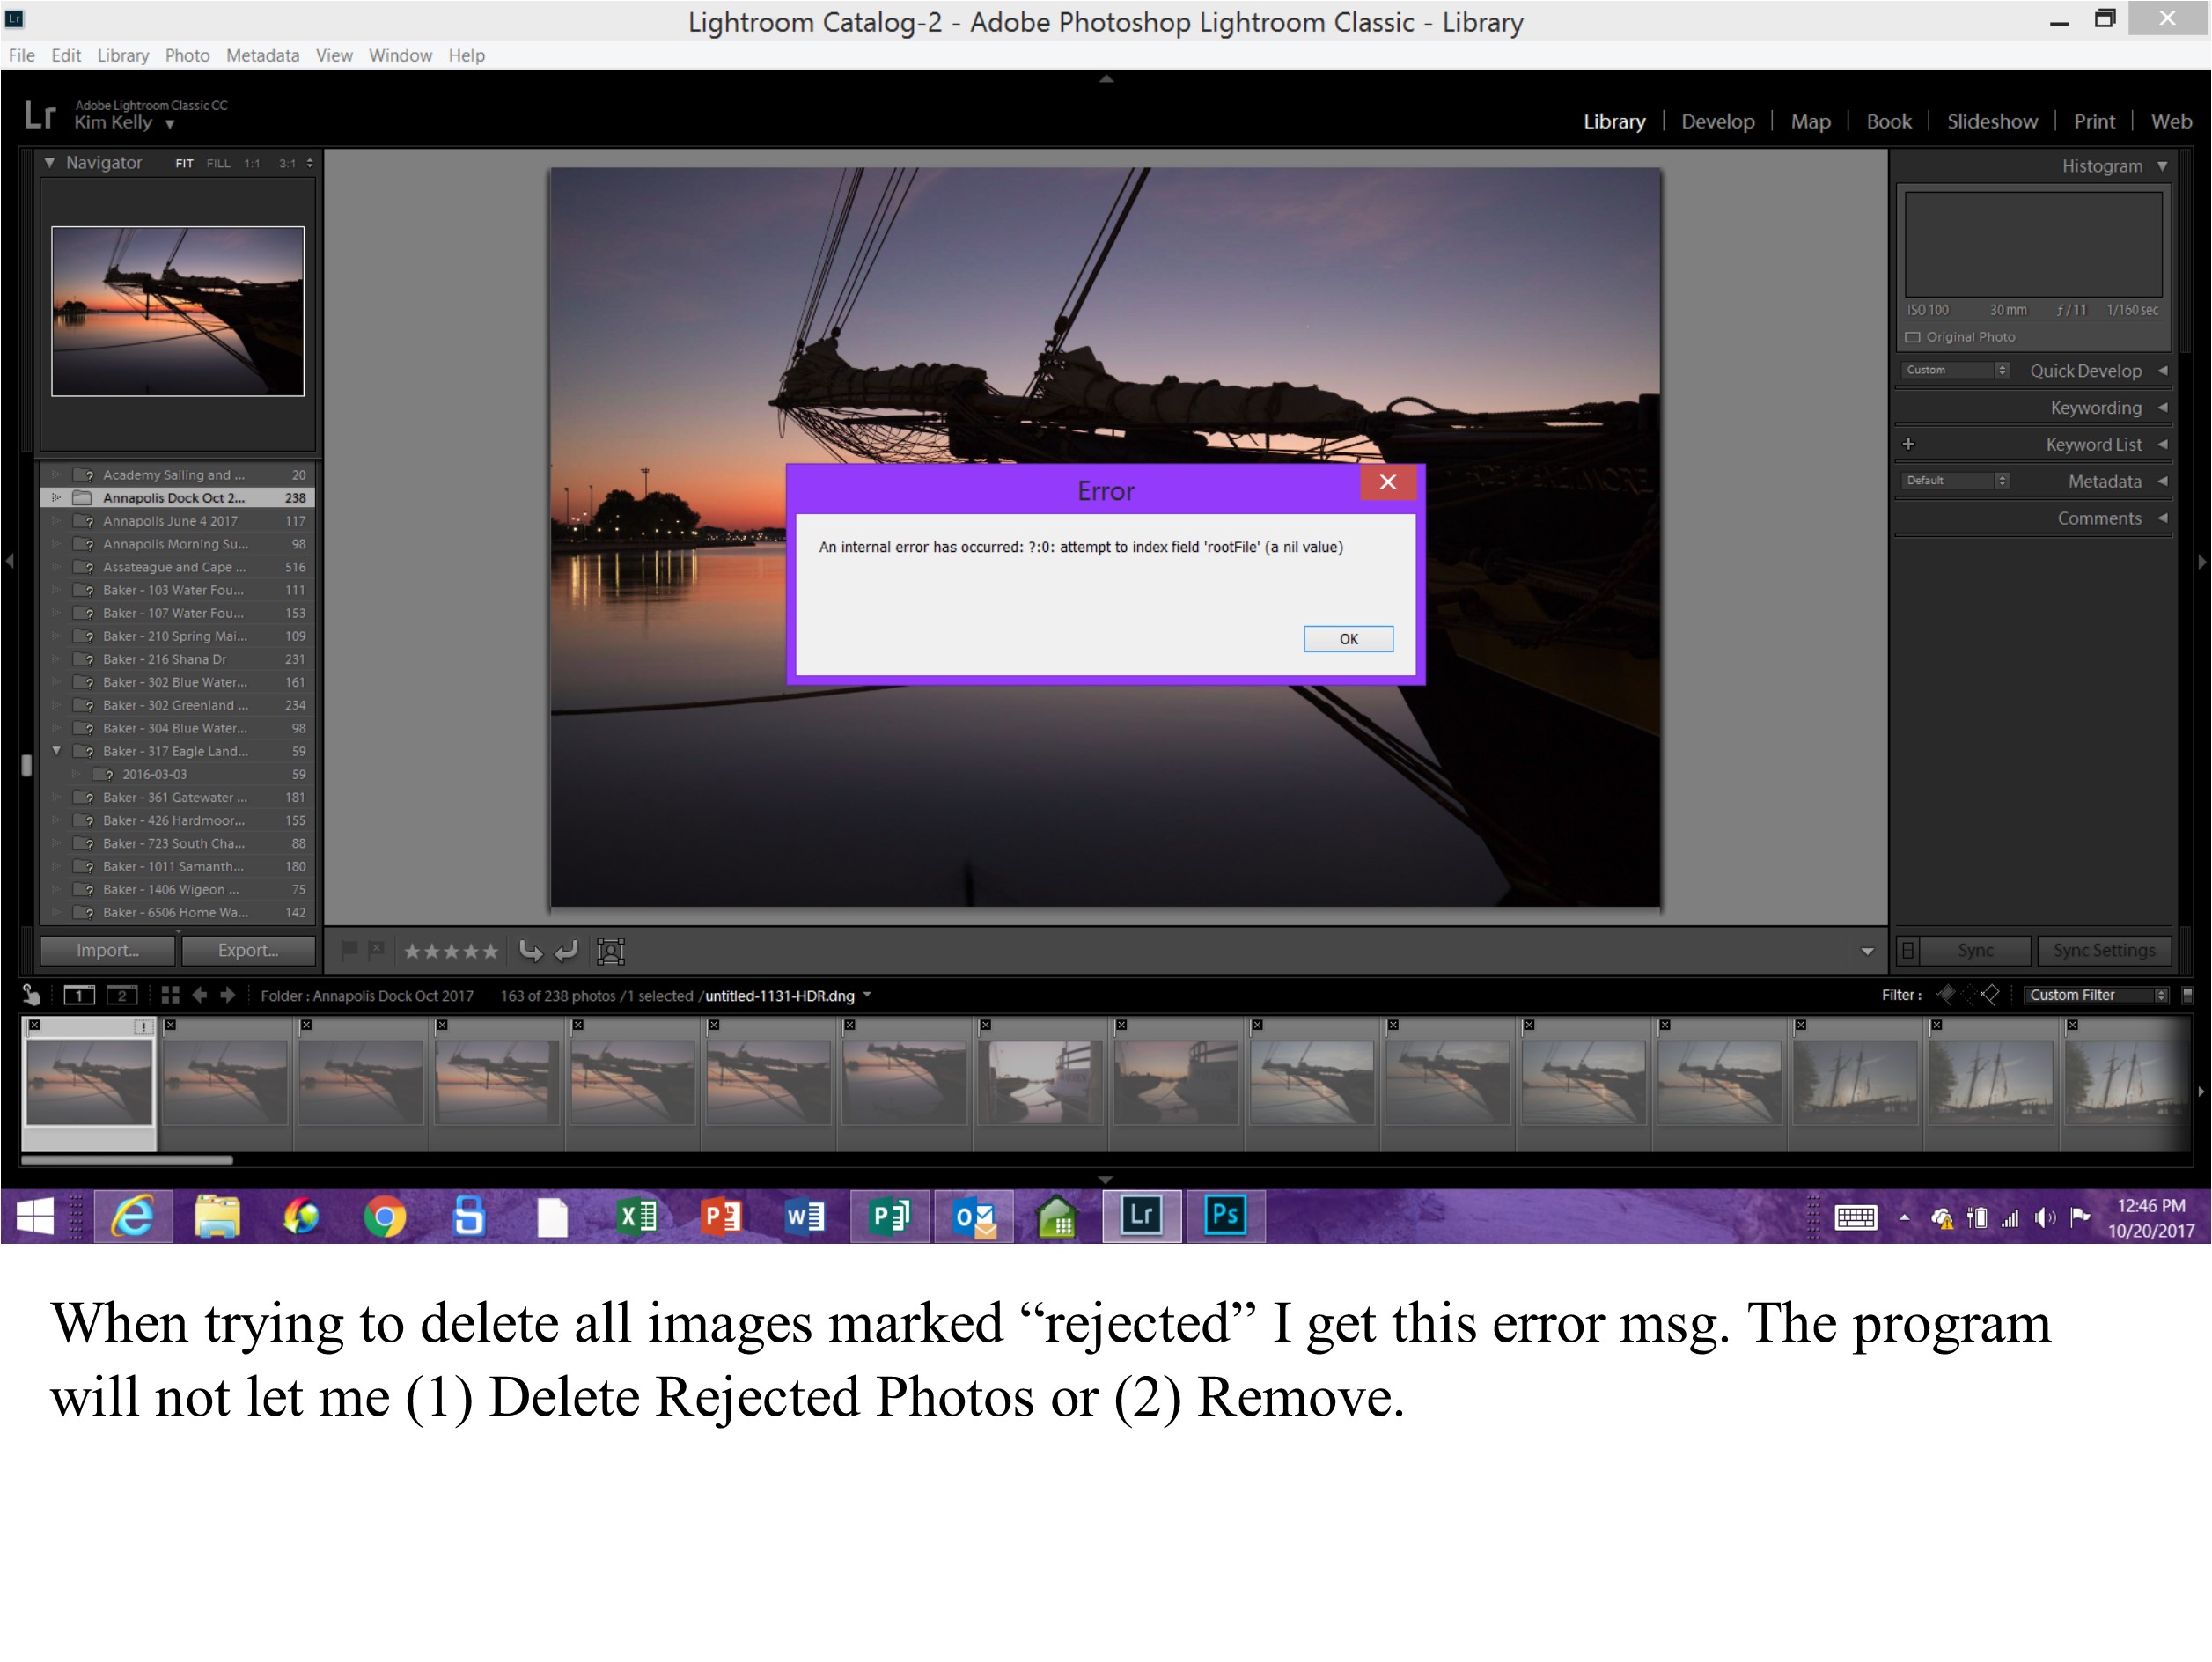
Step 4: Select the Rejected Photos You Want to Delete
- Click the checkbox next to each rejected image you want to remove.
- If you want to delete all rejected photos at once, look for a “Select All” option.
Step 5: Delete the Selected Photos
Once your photos are selected, look for the “Delete” button or icon. Confirm your choice when prompted—most platforms will ask you to verify that you really want to delete these images.
Step 6: Confirm Deletion and Review
After confirming, the rejected photos will be removed from your portfolio. It’s a good idea to review your portfolio afterward to ensure everything looks tidy and only contains images you’re confident about submitting again or keeping for your records.
Extra Tips:
- Always double-check before deleting—once gone, it’s hard to recover.
- If you’re unsure about whether to delete or keep a rejected photo, consider revisiting the rejection reasons to improve your future submissions.
Deleting rejected photos not only declutters your portfolio but also helps you focus on your best work. Now, with a cleaner portfolio, you can upload new images with confidence!
Best Practices to Prevent Future Rejections
While deleting rejected photos is a quick fix, the real goal is to reduce the chances of rejection in the first place. Here are some tried-and-true best practices to help your submissions get approved more consistently:
Understand Shutterstock’s Content Guidelines
Every platform has its own rules, and Shutterstock is no different. Spend some time reviewing their content guidelines and technical requirements. Pay close attention to:
- Image quality standards (resolution, sharpness, noise)
- Model and property releases when needed
- Proper categorization and keywords
Knowing the rules helps you create compliant images that are more likely to be accepted.
Focus on Technical Quality
Shutterstock looks for high-quality, professional images. Here’s what you should keep in mind:
- Sharp focus: Make sure your subject is crisp and clear.
- Proper exposure: Avoid overexposed or underexposed shots.
- Color accuracy: Use correct white balance and vibrant, natural colors.
- Minimal noise and artifacts: Use good equipment and editing techniques.
Capture Unique and Relevant Content
Stand out by offering images that are fresh and relevant. Instead of overdone themes, try to bring a unique perspective or capture trending subjects with your own twist. Use current events, cultural shifts, or niche interests to your advantage.
Pay Attention to Composition and Lighting
Good composition makes a big difference. Follow basic rules like the rule of thirds and ensure your subject is well-lit. Natural lighting often works best, but artificial lighting can be used effectively if done right.
Review and Edit Before Upload
Never upload images straight from your camera without reviewing. Use editing software to crop, adjust exposure, and correct colors. Remove any distracting elements or imperfections that might cause rejection.
Use Keywords Wisely
Accurate and relevant keywords help your images get discovered. Avoid keyword stuffing or misleading tags—they can hurt your chances of approval and affect your reputation.
Stay Updated and Learn from Rejections
If an image gets rejected, try to find out the reason. Shutterstock often provides feedback. Use this information to improve your future uploads. Join contributor forums or communities to learn tips and tricks from fellow photographers and designers.
By following these best practices, you increase your chances of getting accepted and build a strong, professional portfolio that stands out. Remember, quality and consistency are key—keep honing your skills, and rejection will become less frequent over time.
Additional Tips for Managing Your Shutterstock Portfolio Effectively
Optimizing your Shutterstock portfolio is essential for maximizing your earnings and maintaining a professional presence. Here are some effective strategies to manage your portfolio efficiently:
- Regularly Review Your Uploads: Periodically go through your portfolio to identify and remove outdated, low-quality, or rejected photos. Keeping only high-quality images ensures better visibility and sales.
- Organize Files Systematically: Use clear naming conventions and folders to categorize your images by themes, styles, or upload dates. This makes it easier to locate and update specific photos as needed.
- Utilize Keywords Effectively: Accurate and comprehensive keywords improve your images’ discoverability. Update keywords regularly to reflect trending search terms and ensure your photos reach the right audience.
- Monitor Your Performance Metrics: Keep an eye on your sales, views, and acceptance rates. Analytics can help you identify which types of images perform best and guide your future uploads.
- Engage with the Community: Participate in forums and discussions to stay informed about platform updates, best practices, and industry trends. Networking can also provide valuable feedback on your work.
Additionally, consider creating a backup of your portfolio periodically to prevent data loss. Staying proactive and organized will help you manage rejected and accepted photos more efficiently, leading to a more successful Shutterstock presence.
By implementing these tips, you can streamline your portfolio management process, enhance your visibility, and ultimately increase your sales and reputation on the platform.