If you’ve decided that Shutterstock no longer fits your needs or you’re simply looking to tidy up your digital life, deleting your account might be the right move. Whether you’re done with stock images, want to switch to another service, or just need a break, the process is straightforward—once you know the steps. In this guide, we’ll walk you through how to delete your Shutterstock account easily and without any hassle. Don’t worry; we’ll also cover some common reasons people choose to say goodbye, so you can make an informed decision.
Reasons You Might Want to Delete Your Shutterstock Account
People decide to delete their Shutterstock accounts for a variety of reasons. Sometimes, it’s as simple as feeling like you’ve outgrown the platform or no longer needing stock images. Other times, privacy concerns or switching to competitors play a role. Here are some of the most common reasons:
- Finished Projects: You’ve downloaded all the images you need and no longer plan to use Shutterstock.
- Cost Management: Subscriptions might be more than you want to spend, or you’re cutting down on recurring expenses.
- Privacy Concerns: You prefer to limit your online footprint and want to ensure your data isn’t stored unnecessarily.
- Switching Services: You found a different platform offering better prices, licensing options, or a different selection of images.
- Account Inactivity: Your account has been inactive for a long time, and you want to clean up your online presence.
- Security Reasons: You suspect your account has been compromised or want to prevent unauthorized access.
- Personal Reasons: Sometimes, a change in career or personal interests means you no longer need access to Shutterstock’s resources.
Whatever your reason, understanding why you want to delete your account can help you weigh the decision and ensure it’s the right move for you. Remember, once you delete your account, you typically lose access to your download history, licenses, and any saved preferences, so be sure to download any important files beforehand.
Preparing to Delete Your Shutterstock Account
If you’ve decided that it’s time to say goodbye to your Shutterstock account, it’s a good idea to get everything in order before you take the plunge. Preparing properly can help you avoid any surprises or loss of important data down the line.
First, take a moment to review your account details. Are there any remaining credits, subscriptions, or pending downloads? It’s best to resolve these before initiating deletion. Here’s a quick checklist to get you started:
- Cancel any active subscriptions: If you have an ongoing plan, make sure to cancel it to avoid future charges. You can usually do this from your account settings or subscription management page.
- Download important assets: Have a backup of any images, videos, or files you might want to keep. Once your account is deleted, access to your assets will be gone.
- Clear pending transactions: Check for any pending payments or transactions. Complete or cancel them as needed.
- Note your login details: Make sure you remember your login credentials, especially if you plan to create a new account later or need to contact support.
- Review your account info: Double-check the email address associated with your account and update it if necessary. You may need it for confirmation or support purposes.
If you’re part of any teams or collaborative projects, consider informing your teammates or transferring any shared assets. Also, keep in mind that once your account is deleted, you won’t be able to recover it or any associated data, so double-check everything beforehand.
Finally, if you’re unsure or have any questions, reaching out to Shutterstock’s customer support can provide clarity. They might help with issues like canceling subscriptions or downloading assets before you delete your account.
Step-by-Step Instructions to Delete Your Shutterstock Account
Ready to delete your Shutterstock account? Don’t worry—it’s a straightforward process. Just follow these simple steps, and you’ll be all set.
- Log into your Shutterstock account: Head over to the Shutterstock website and sign in with your email and password.
- Navigate to your account settings: Once logged in, click on your profile icon or name typically located at the top right corner of the page. From the dropdown menu, select Account Settings.
- Find the account management options: In your settings menu, look for a section labeled Account Preferences or Account Management. Some platforms might have a dedicated Close Account or Delete Account link.
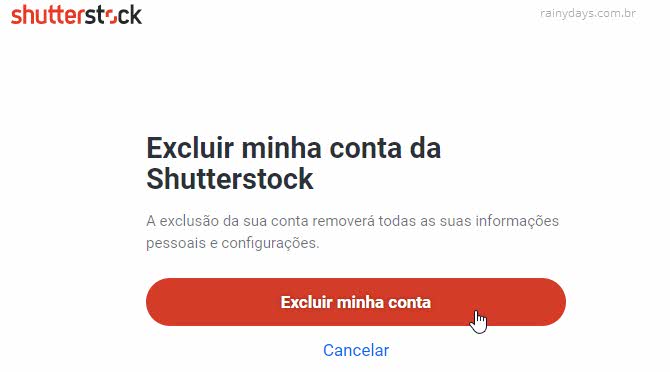
- Initiate the deletion process: Click on the Delete Account or similar link. You may be prompted to confirm your password or answer security questions for verification.
- Follow the prompts: Shutterstock might ask for a reason for leaving or offer alternative solutions. Confirm your choice to delete the account.
- Confirm deletion: You may receive an email confirmation. Check your inbox and click on any link provided to finalize the deletion process.
In some cases, Shutterstock may have a waiting period or require additional verification. If you don’t see the delete option directly, or if you encounter any issues, don’t hesitate to contact their customer support. They can guide you through the process or handle the deletion for you.
And that’s it! Once completed, your account will be scheduled for deletion, and you’ll no longer have access to your assets or account features. Remember, this action is usually irreversible, so make sure you’ve backed up everything you need before proceeding.
What to Do After Deleting Your Shutterstock Account
So, you’ve gone ahead and deleted your Shutterstock account—what’s next? It might feel a little strange to have everything wrapped up, but this is a great opportunity to make sure you’re all set for what’s ahead. Here are some helpful tips and considerations to keep in mind after your account removal:
Review Your Financial and Subscription Details
If you had any ongoing subscriptions or billing arrangements, double-check that they’ve been canceled or settled. Usually, deleting your account ensures no further charges, but it’s good to verify with your payment provider or bank. This way, you avoid any surprises or unwanted charges in the future.
Save Important Files or Content
If you’ve downloaded or saved any images, vectors, or clips from Shutterstock, make sure you back them up before deleting your account. Remember, once your account is gone, access to your purchased content might be lost unless you’ve saved copies locally. Keep a folder of your favorite assets or any licenses just in case you need them later.
Explore Alternative Resources
Thinking about replacing Shutterstock? There are plenty of other stock photo sites out there—like Adobe Stock, iStock, Unsplash, or Pexels—that might better suit your needs or budget. Do a little research to find the platform that offers what you need in terms of content variety, licensing, and pricing.
Update Your Content Workflow
If Shutterstock was part of your regular workflow, now’s a good time to adjust. For example, update your bookmarks, remove Shutterstock-related tools or plugins from your devices, and inform your team or collaborators about the change. This helps keep your process streamlined and avoids any confusion down the line.
Stay Informed About Copyright and Licensing
Remember, even after deleting your account, you’ll still need to respect copyright laws when using images online. If you plan to use stock content from other sources, familiarize yourself with licensing terms and ensure you’re compliant. It’s always better to be safe than sorry!
Frequently Asked Questions About Shutterstock Account Deletion
Still have questions about deleting your Shutterstock account? Let’s clear up some common concerns so you can walk away with confidence:
Q1: Will I lose access to my downloaded content after deleting my account?
Yes, unless you’ve saved copies of your purchased images, videos, or vectors beforehand. Deleting your account typically removes access to your download history and any licensed content associated with your account. Always download and back up important assets before proceeding with deletion.
Q2: Can I reactivate my Shutterstock account later?
It depends. If you delete your account, you might be able to create a new one using the same email address, but your previous purchase history and licenses may not transfer. If you want to keep your history intact, consider contacting Shutterstock support to inquire about account deactivation options instead of full deletion.
Q3: Will my billing or subscription be canceled automatically when I delete my account?
Not necessarily. It’s recommended to cancel any active subscriptions before deleting your account to prevent future charges. Check your subscription status and cancel through your account settings or contact support if needed.
Q4: How long does it take to delete my Shutterstock account?
The process is usually quick—often instant or within a few hours. However, in some cases, it might take a couple of days for the deletion to be fully processed. If you encounter delays, reaching out to customer support can help clarify the status.
Q5: What if I change my mind after deleting my account?
If you decide to come back later, you’ll need to create a new account with a different email address, and your previous licenses and history won’t carry over. Keep that in mind if you’re unsure about permanently closing your account.
We hope this FAQ clears up any lingering doubts. Deleting your Shutterstock account is a straightforward process, but understanding what happens afterward helps you plan accordingly. Remember, it’s always a good idea to review all steps carefully and stay informed—your digital workspace should work for you, not against you!
Additional Tips for Managing Your Digital Accounts Safely
Ensuring the security of your digital accounts is crucial in today’s interconnected world. Here are some essential tips to help you manage your online presence safely and effectively:
- Use Strong, Unique Passwords: Create complex passwords that combine uppercase and lowercase letters, numbers, and special characters. Avoid using the same password across multiple accounts to reduce vulnerability.
- Enable Two-Factor Authentication (2FA): Whenever possible, activate 2FA to add an extra layer of security. This typically involves receiving a code on your mobile device or email that you must enter alongside your password.
- Regularly Review Account Permissions: Periodically check app and third-party access in your account settings. Remove any unfamiliar or unnecessary permissions to prevent unauthorized access.
- Keep Software Updated: Ensure your devices, browsers, and apps are up to date. Updates often include security patches that protect against vulnerabilities.
- Be Cautious with Public Wi-Fi: Avoid accessing sensitive accounts over unsecured networks. Use a trusted Virtual Private Network (VPN) when necessary to encrypt your internet traffic.
- Backup Important Data: Regularly save copies of important files and account information. Use secure cloud services or external drives to prevent data loss.
By implementing these practices, you can enhance your online security and manage your digital accounts more confidently. Remember, staying vigilant and proactive is key to safeguarding your personal information in the digital age.