Thinking about turning your videography skills into a source of income? Shutterstock is one of the most popular platforms where creators like you can sell footage to a wide audience. Uploading your clips might sound a bit daunting at first, but once you get the hang of it, it’s a straightforward process that can open up new earning opportunities. Whether you’re a seasoned videographer or just starting out, understanding the basics of how to upload and monetize your footage is the first step toward making your creative work work for you. Let’s walk through the essentials so you can get started today!
Creating a Shutterstock Contributor Account

Before you can start uploading your footage, you’ll need to create a contributor account on Shutterstock. Think of this as your personal portal to a global marketplace where your videos can find new viewers—and earn you money. The process is pretty simple and involves a few key steps:
- Visit the Shutterstock Contributor Website: Head over to submit.shutterstock.com. This is the hub where all the magic begins.
- Click on “Sign Up”: You’ll find a clear button to create your account. You can sign up using your email address or connect via your existing Google or Facebook accounts for convenience.
- Fill Out Your Details: Enter your personal information, including your full name, email, and a secure password. Make sure your contact info is accurate, as Shutterstock may reach out to you for verification or updates.
- Agree to the Terms: Read and accept Shutterstock’s contributor agreement. It’s always good to understand the rights you’re granting and the platform’s policies.
- Verify Your Email: Check your inbox for a confirmation email and click the verification link. This step confirms your account’s legitimacy and gets you closer to uploading your first clip.
Once your account is set up, you’ll have access to the contributor dashboard, where you can upload footage, track your earnings, and manage your portfolio. It’s worth taking some time to explore the dashboard and familiarize yourself with the different sections. Setting up your profile with relevant information and samples can help attract buyers and increase your chances of making sales. Remember, the more complete and professional your profile looks, the easier it will be for your footage to stand out in the marketplace.
Preparing Your Footage for Upload
Before you hit that upload button, it’s super important to make sure your footage is polished and ready to shine. Think of it like preparing a dish — the better your ingredients, the more appealing the final product. When it comes to stock footage, quality and compliance are key. So, let’s walk through some essential steps to get your videos ready for Shutterstock.
First things first, check your video quality. Shutterstock has specific requirements, so aim for high resolution — ideally, 4K (3840×2160) or at least Full HD (1920×1080). Avoid shaky footage or anything with poor lighting; viewers and buyers prefer clear, stable shots. Use good editing software to stabilize or enhance your footage if needed.
Next, pay attention to the technical specifications:
- File formats: MP4 (preferred), MOV, or AVI
- Codec: H.264 is the standard for MP4 files
- Frame rate: Usually 24, 25, or 30 fps — stay consistent throughout the clip
- Bitrate: Keep it high enough for quality but not so high that it results in huge files
Then, consider the content itself. Shutterstock has guidelines about content that’s appropriate for licensing. Avoid footage that includes copyrighted material, logos, or recognizable private property unless you have rights to them. Also, ensure your footage is free of distracting elements like watermarks or branding.
Finally, think about metadata. This includes titles, descriptions, and keywords. Well-crafted metadata helps your footage get discovered by buyers. Use relevant, specific keywords that describe your shot accurately. For example, instead of just “city,” try “night city skyline with illuminated skyscrapers.”
And don’t forget about audio. If your footage has sound, make sure it’s clear and free of background noise unless the sound is a key part of the clip. Sometimes, it’s better to upload silent footage if the sound isn’t relevant or is distracting.
Step-by-Step Guide to Uploading Your Video Files
Ready to upload? Don’t worry — Shutterstock makes it pretty straightforward. Here’s a simple step-by-step guide to get your footage from your computer onto the platform and into the hands of potential buyers:
- Log into your Shutterstock Contributor account. If you don’t have one yet, sign up — it’s free and quick.
- Click on the “Upload” button. Usually found on your dashboard or in the main menu.
- Select your files. Browse your folders and choose the video files you prepared earlier. You can upload multiple files at once if you have several clips.
- Fill out the details. For each video, Shutterstock will prompt you to add:
- Title: Make it descriptive but concise.
- Description: Explain what’s happening in the footage.
- Keywords: Add relevant tags to improve searchability.
- Categories: Choose the appropriate categories to classify your clip.
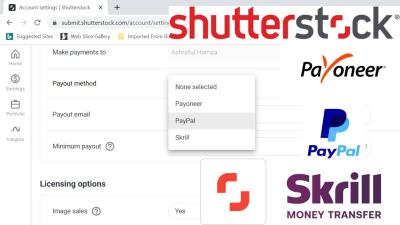
- Set licensing options. Shutterstock typically offers Standard or Enhanced licenses. Usually, the default is fine unless you have specific licensing considerations.
- Review your upload. Double-check your metadata, ensure the video plays correctly, and confirm all info is accurate.
- Submit for review. Once everything looks good, hit the “Submit” button. Your footage will go into Shutterstock’s review queue.
After submission, Shutterstock’s review team will assess your footage to ensure it meets their quality and content standards. This process can take anywhere from a few days to a couple of weeks. Once approved, your videos will be live and available for licensing, and you’ll start earning royalties whenever someone downloads your clips.
That’s pretty much it! With a little preparation and following these steps, you’ll be well on your way to turning your footage into a steady income stream. Happy shooting and uploading!
Understanding Shutterstock Submission Guidelines and Requirements
If you’re serious about turning your footage into income, it’s essential to get familiar with Shutterstock’s submission guidelines and requirements. Think of it as the rulebook that ensures your content meets their quality standards and can be accepted into their vast library.
First off, Shutterstock has specific technical specifications your videos need to meet. These include:
- File Formats: Preferred formats are MOV or MP4 files, with H.264 codec for optimal compression without sacrificing quality.
- Resolution: They usually require HD (1920×1080) or higher resolutions. 4K footage is a bonus, as it’s highly sought after.
- Frame Rate: Typically, 24, 25, or 30 fps. Be consistent and avoid irregular frame rates.
- File Size: Keep your files manageable—usually under 4GB—but check their latest limits.
Beyond technical specs, there are content guidelines too. Shutterstock prefers footage that is original, well-lit, and free from noise or distracting elements. Make sure your videos:
- Are properly exposed with good lighting
- Have steady shots—consider using stabilization if needed
- Do not contain logos, watermarks, or identifiable brand elements unless you have explicit rights
- Are free from copyright violations or sensitive content like violence, hate speech, or adult material
Another important aspect is model and property releases. If your footage features recognizable people or private properties, you’ll need to submit signed releases. This ensures legal clearance for commercial use and is crucial for acceptance.
Lastly, take time to review Shutterstock’s detailed contributor guidelines regularly. Submission policies evolve, and staying updated helps you avoid rejection and streamline your approval process. Think of it as tuning your instrument before a performance—you want everything in perfect harmony for your footage to shine!
Tagging and Categorizing Your Footage for Better Visibility
Once your footage is ready and meets all the guidelines, the next step is making sure it gets noticed. Proper tagging and categorizing are your best tools for boosting visibility and increasing your chances of making sales on Shutterstock.
Imagine you’re shopping online—if you want to find a specific clip, you rely on good keywords and clear categories. The same applies here. When uploading, you’ll be prompted to add tags—think of them as keywords that describe your video. Be specific and accurate. For example, instead of just “city,” include tags like “New York City skyline,” “urban traffic,” or “night city lights.”
Here are some tips for effective tagging:
- Use relevant keywords: Describe the main elements, subjects, and mood of your footage.
- Avoid overstuffing: Use enough tags to capture the content without going overboard. Usually, 15-20 well-chosen tags work best.
- Include synonyms and related terms: Broaden your reach by thinking of different ways people might search for your footage.
- Think about categories: Shutterstock offers predefined categories. Assign your clips to the most appropriate one, such as “Travel,” “Business,” “Nature,” or “Technology.”
Proper categorization not only helps your footage appear in relevant searches but also enhances the overall browsing experience for potential buyers. Remember, the more accurately your footage is categorized and tagged, the higher the chance it will be discovered by clients looking for exactly what you’ve created.
Additionally, consider periodically reviewing your tags and categories. Trends change, and updating your metadata can keep your content fresh and relevant. Think of it as giving your footage a little boost so it stays at the top of search results!
Submitting Your Footage for Review and Approval
Once you’ve uploaded your footage to Shutterstock, the next step is submitting it for review and approval. This process is crucial because Shutterstock has standards to maintain quality and consistency across their platform. Don’t worry — it’s pretty straightforward, but knowing what to expect can help things go smoothly.
After your files are uploaded, you’ll see them in your Contributor Dashboard. Before submitting, double-check that each clip meets Shutterstock’s requirements. For example, your videos should be well-lit, steady, and free from distracting noise or watermarks. Make sure you’ve included relevant metadata like titles, descriptions, and keywords—this helps reviewers understand what your footage is about and improves its chances of acceptance.
When you’re ready, select the clips you want to submit and click the “Submit” button. Shutterstock’s review team will then evaluate your footage based on several criteria:
- Technical quality (sharpness, color, exposure)
- File format and resolution
- Content originality and relevance
- Compliance with copyright laws and Shutterstock’s content guidelines
The review process typically takes a few days, but it can sometimes be longer depending on the volume of submissions. During this time, avoid making major edits or re-uploading the same footage repeatedly, as this might delay the review. Instead, if your footage gets rejected, carefully read the feedback provided, revise your clips accordingly, and resubmit.
Remember, patience is key. Many successful contributors have gone through multiple rounds of review before their footage gets approved. Use this process as an opportunity to learn and improve your skills. Once approved, your footage will be available for licensing, and you can start earning money whenever someone downloads it.
Tips for Increasing Your Earnings on Shutterstock
Want to boost your earnings on Shutterstock? It’s definitely possible with a few strategic moves and a bit of dedication. Here are some tips to help you maximize your income as a contributor:
1. Focus on High-Demand Topics
Research trending themes and popular categories. For example, footage related to technology, health, business, or lifestyle often performs well. Use Shutterstock’s popular search queries and trending topics to guide your content creation. Creating clips that match what buyers are actively searching for increases your chances of sales.
2. Diversify Your Portfolio
Don’t put all your eggs in one basket. Upload videos across various categories, styles, and formats. This way, you cater to different client needs and increase your overall earning potential. Keep an eye on which types of footage sell best and focus on expanding those collections.
3. Optimize Metadata Carefully
Use accurate, detailed titles, descriptions, and keywords. Think about what buyers might search for — include synonyms and related terms. Well-optimized metadata makes your footage more discoverable, leading to more downloads.
4. Upload Consistently
Frequent uploads keep your portfolio fresh and increase the chances of your clips appearing in search results. Set a schedule that works for you, whether it’s weekly or bi-weekly, and stick to it. The more quality content you have available, the better your odds of earning commissions.
5. Create Unique and High-Quality Content
Stand out from the crowd by producing original footage with high production values. Avoid common or overused themes unless you can add a unique twist. High-quality, captivating videos are more likely to be purchased and shared.
6. Engage in Community and Learning
Join forums, webinars, or community groups for Shutterstock contributors. Learning from others, sharing tips, and staying updated on trends can give you an edge. Plus, feedback from fellow contributors can help you refine your craft.
7. Monitor Your Performance and Adapt
Use the analytics tools in your Contributor Dashboard to see which clips perform best. Notice patterns—are certain categories or styles earning more? Use that data to guide your future uploads. Continually adapt your strategy based on what works.
By staying consistent, optimizing your content, and keeping an eye on market trends, you can steadily increase your earnings on Shutterstock. Remember, building a successful portfolio takes time, but with patience and persistence, your efforts can pay off handsomely!
Monitoring Your Sales and Earnings from Uploaded Footage
Once you’ve started uploading your footage to Shutterstock, it’s natural to want to keep track of how well your content is performing. Luckily, Shutterstock provides a user-friendly dashboard where you can monitor your sales, earnings, and overall performance as a contributor.
To access this information, simply log into your contributor account and navigate to the Dashboard. Here, you’ll see an overview of your recent sales, total earnings, and trending footage. It’s a great way to get a quick snapshot of which videos are resonating most with buyers.
For a more detailed analysis, check out the Sales & Earnings tab. This section provides:
- Sales Data: Information about each download, including date, buyer location, and licensing type.
- Income Reports: Breakdown of earnings over selected periods—daily, weekly, monthly, or yearly.
- Popular Content: Insights into your top-performing videos, which can guide your future content creation.
Tracking these metrics can help you understand what kind of footage sells best. Maybe your drone shots of cityscapes are popular, or perhaps nature footage is in high demand. Use this data to refine your content strategy, focusing on topics and styles that generate more income.
Additionally, Shutterstock often provides performance tips and updates through email or your contributor dashboard. Stay engaged and review these insights regularly. This proactive approach can help you optimize your portfolio, increase your sales, and maximize your earnings over time.
Remember, patience is key. It might take some time for your footage to gain traction, especially if you’re just starting out. Keep uploading quality content, monitor your progress, and adjust your strategy as you learn what works best. Before you know it, you’ll have a steady stream of income flowing from your creative efforts!
Conclusion and Additional Resources for Shutterstock Contributors
Congratulations! You’ve now learned the essential steps to upload footage to Shutterstock and start earning money as a contributor. Remember, success on this platform comes from consistently creating high-quality videos, understanding what buyers want, and actively managing your portfolio. Keep an eye on your sales, stay updated with Shutterstock’s guidelines and trends, and don’t hesitate to experiment with new styles or subjects.
To help you along your journey, here are some additional resources you might find helpful:
- Shutterstock Contributor Help Center: Comprehensive guides, FAQs, and troubleshooting tips directly from Shutterstock.
- Creative Inspiration Blogs & Websites: Check out sites like Art of the Stock Video or Shutterstock’s own blog for insights on trending topics and best practices.
- Video Editing Tutorials: Platforms like YouTube offer countless tutorials to enhance your editing skills, making your footage more appealing.
- Community Forums: Join online communities or social media groups where contributors share experiences, tips, and support each other.
Remember, building a successful stock footage portfolio takes time and dedication, but with persistence and a keen eye for quality and demand, you can turn your passion into a reliable income stream. Keep creating, keep learning, and enjoy the creative journey!