If you’re passionate about photography or digital art and want to turn your creativity into income, Shutterstock might be the perfect platform for you. Uploading images to Shutterstock is straightforward, but getting your work approved can sometimes feel like a challenge. That’s why understanding the process and knowing how to prepare your images properly can make all the difference. In this guide, we’ll walk you through the essentials of uploading images and share tips to boost your approval rates, helping you get your stunning photos in front of a global audience.
Preparing Your Images for Upload
Before you hit that upload button, it’s crucial to get your images ready to meet Shutterstock‘s quality standards. Well-prepared images not only increase your chances of approval but also ensure they look their best to potential buyers. Here’s what you need to focus on:
1. Image Quality and Resolution
Shutterstock insists on high-quality images. Aim for a minimum of 4 megapixels (roughly 2000 pixels on the shortest side). For the best results, upload images at 300 DPI — especially if they are intended for print. Make sure your images are sharp, well-focused, and free of noise or pixelation. Blurry or pixelated photos are a quick way to get rejected.
2. Proper File Format and Size
Use JPEG format for your uploads, with a RGB color profile. Keep your file size manageable; Shutterstock recommends images under 50MB. Compress your images without sacrificing quality, so they upload smoothly and maintain clarity.
3. Metadata and Keywords
Good metadata is essential. Add accurate and descriptive titles, captions, and keywords. Think about what a buyer might search for when looking for your image. Use relevant keywords, but avoid keyword stuffing. Clear, specific tags help your images get discovered.
4. Composition and Content
Focus on strong composition, good lighting, and interesting subject matter. Avoid overly busy backgrounds or distractions. If your image features people, ensure you have model releases if necessary. Also, make sure your images comply with Shutterstock’s content guidelines, avoiding prohibited content like illegal activities or offensive material.
5. Editing and Post-Processing
Subtle enhancements can improve your images—adjust brightness, contrast, or color balance—but avoid over-editing. Keep edits natural. Use editing software to crop images to the correct aspect ratio, straighten horizons, and remove any blemishes or distracting elements.
6. Consistency and Portfolio Building
Upload a diverse yet cohesive collection to build a strong portfolio. Consistent style or theme can attract specific buyers and improve your overall approval rate. Regular uploads also increase your visibility on the platform.
By carefully preparing your images following these tips, you’ll be setting yourself up for success on Shutterstock. Remember, quality and relevance are key—so take your time to perfect each upload and watch your approval rates soar!
Understanding Shutterstock’s Submission Guidelines
Before you start uploading your images, it’s super important to get a solid grasp of Shutterstock’s submission guidelines. Think of these rules as the secret sauce to ensuring your images get approved quickly and consistently. If you skip this step, you might find your uploads rejected, which can be frustrating and time-consuming.
First off, Shutterstock has specific technical requirements. Your images should be in JPEG format with a minimum of 4 megapixels. They prefer high-resolution images—think crisp, clear, and detailed. Also, make sure the files are in RGB color mode, not CMYK, since digital screens display RGB better.
Beyond technical specs, Shutterstock is pretty particular about the content you upload. They look for images that are original, high-quality, and commercially viable. Avoid overly staged or cliché shots—think stocky photos that feel fresh and authentic. Also, images must be free of watermarks, logos, or any brand identifiers unless you have explicit rights to include them.
Here are some key guidelines summarized:
- File Format: JPEG only
- Resolution: Minimum 4MP (e.g., 2000×2000 pixels)
- Color Mode: RGB
- Content: Original, high-quality, and free of watermarks or logos
- Model Releases: Required if people are recognizable
- Property Releases: Needed for private property or trademarks
Another important aspect is model and property releases. If your image features people or private property, you’ll need legal releases. Without these, your image is likely to be rejected, especially on Shutterstock, which places a high value on legal compliance.
Finally, take a moment to review Shutterstock’s content categories and avoid prohibited content like illegal activities, hate speech, or adult content. Keeping your submissions within their guidelines increases your chances of approval and helps you build a good reputation as a contributor.
Step-by-Step Process for Uploading Images
Now that you understand what Shutterstock is looking for, let’s walk through the actual process of uploading your images. It’s pretty straightforward, but paying attention to detail can make a big difference in approval rates.
Here’s a simple step-by-step guide:
- Log into your Contributor Account: Head over to Shutterstock’s contributor portal and sign in. If you’re new, you’ll need to create an account—don’t worry, it’s quick and easy.
- Prepare Your Files: Make sure your images meet all the technical and content guidelines we discussed earlier. Rename your files descriptively to help reviewers understand what they are.
- Click on ‘Upload Files’: Once logged in, find the upload button—usually labeled “Upload” or “Add Photos.”
- Select Your Images: Use the file browser to select the images you want to upload. You can upload multiple images at once, which saves time.
- Enter Metadata: Fill in details like title, keywords, description, and categories. Be as specific and accurate as possible—this helps your images get discovered and approved faster.
- Assign Releases if Needed: If your images contain recognizable people or private property, upload the appropriate model or property releases. Shutterstock provides templates for these if you need them.
- Review Your Submission: Double-check all the information and make sure your images meet the guidelines. Preview the images to ensure everything looks good.
- Submit for Review: Hit the “Submit” button. Your images will then go into Shutterstock’s review process.
Once submitted, Shutterstock’s review team typically evaluates images within a few days. If your images are approved, they’ll go live in the marketplace, ready for licensing. If rejected, you’ll get feedback—use this as a learning opportunity to improve your future uploads.
Pro tip: Keep uploading consistently and pay attention to the feedback. Over time, you’ll get a feel for what works best on Shutterstock, increasing your approval rates and boosting your contributor success!
Tips to Increase Your Approval Chances
Getting your images approved on Shutterstock can sometimes feel like navigating a complex maze, but don’t worry—there are some tried-and-true tips to boost your success rate. Think of this as your friendly guide to making sure your stunning visuals stand out and get the nod from reviewers.
First things first, focus on quality. Shutterstock is all about high-resolution, sharp, and professionally composed images. Make sure your photos are well-lit, clear, and free of noise or pixelation. Use good equipment if possible, but even smartphones today can produce excellent images if you pay attention to lighting and focus.
Next, pay attention to composition. Think about the rule of thirds, leading lines, and balance. Avoid cluttered backgrounds or distracting elements that take away from your main subject. A clean, focused shot is more likely to pass the review process.
Another key tip is to follow Shutterstock’s content guidelines closely. This means avoiding images that contain:
- Copyrighted logos or trademarks without permission
- Explicit or adult content
- Violent or controversial themes
- Overly processed or heavily filtered images
Additionally, consider the relevance and uniqueness of your images. Stock platforms value content that fills a niche or offers a fresh perspective. Before submitting, do a quick search on Shutterstock to see if similar images exist. If yours offers something new or different, it stands a better chance of approval.
Metadata matters too! Write clear, descriptive titles and tags. Use relevant keywords that accurately describe your image. This not only helps reviewers understand your content but also improves its discoverability once approved. Avoid keyword stuffing—be honest and precise.
Lastly, be patient and persistent. Not every image will be accepted on the first try, and that’s okay. Reviewers look for consistency and adherence to guidelines, so keep refining your skills and submitting quality content. Over time, you’ll get a better sense of what works and what doesn’t, increasing your approval rate steadily.
Common Mistakes to Avoid During Submission
Even seasoned photographers can stumble into pitfalls during the submission process. Knowing what to watch out for can save you time, frustration, and increase your chances of approval. Here are some of the most common mistakes to avoid:
1. Ignoring Shutterstock’s Submission Guidelines. Every platform has its rules, and Shutterstock is no different. Submitting images that violate their policies—such as containing copyrighted logos, inappropriate content, or low quality—will almost certainly lead to rejection.
2. Poor Image Quality. Submitting blurry, noisy, or pixelated images is a quick way to get rejected. Always check your images at full size before uploading. Use editing tools to enhance sharpness and correct exposure if needed.
3. Incorrect or Missing Metadata. Failing to add accurate titles, descriptions, or tags can hurt your chances. Be descriptive and specific with your keywords, and avoid misleading or irrelevant terms.
4. Overly Heavy or Incorrect File Formats. Shutterstock prefers JPEG files with specific parameters. Upload files that are too large or in unsupported formats. Use image editing software to resize or convert your images properly.
5. Submitting Duplicate Content. Uploading the same image multiple times, or very similar versions, can lead to rejection. Aim for variety and originality in your submissions.
6. Ignoring Model and Property Releases. If your image includes recognizable people or private property, ensure you have the necessary releases. Failing to do so will result in rejection and can cause legal issues later.
7. Not Reviewing Your Image Before Submission. Always double-check your image for any distractions, dust spots, or imperfections. A quick review can catch issues that might cause rejection.
By being mindful of these common mistakes, you can streamline your submission process and improve your approval success rate. Remember, patience and attention to detail are your best friends on this journey. Keep learning, adjusting, and submitting—your high-quality images will find their perfect audience on Shutterstock in no time!
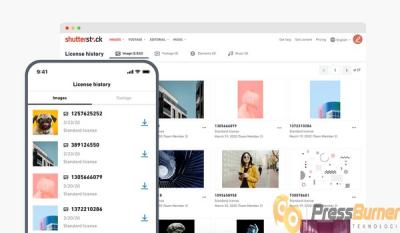
After Uploading: Tracking and Managing Your Submissions
Once you’ve uploaded your images to Shutterstock, the work isn’t quite done. Think of the submission process as the start of a journey—now, it’s all about tracking how your images are doing and managing your portfolio effectively. Staying on top of your submissions not only helps you understand what works but also boosts your chances of getting high approval rates in the future.
First things first, after your upload, you can head over to your Contributor Dashboard. Here, you’ll see a list of all your submissions, each with their current status:
- Pending Review: Your image is awaiting evaluation by Shutterstock’s review team.
- Approved: Congrats! Your image has been accepted and is now available for sale.
- Rejected: The image didn’t meet Shutterstock’s standards. Don’t get discouraged—review the feedback, learn from it, and try again.
- Needs Editing: Sometimes, images require minor tweaks before approval. If this happens, you’ll get specific notes on what to improve.
Monitoring these statuses helps you identify patterns. For example, if many of your images get rejected because of poor lighting or composition, you know to focus on improving those aspects in future uploads. Use the feedback from Shutterstock carefully—it’s a goldmine for honing your skills.
Another useful tip is to keep your portfolio organized. Consider maintaining a spreadsheet or a simple document where you log details like:
- Image title and description
- Upload date
- Status updates
- Notes on feedback or revisions needed
This way, you can easily track which images need to be revised or resubmitted, ensuring no submission falls through the cracks. Remember, uploading consistently and managing your submissions smartly can increase your overall approval rate and help you build a stronger portfolio.
Lastly, pay attention to Shutterstock’s analytics tools. They can show you which images are selling well, giving you insight into what buyers are looking for. Use this data to guide your future photo shoots and uploads. The more strategic you are in managing your submissions, the better your chances of success!
Conclusion and Final Tips for Successful Image Uploads
So, you’ve navigated the entire process—from preparing your images with the right resolution and keywords to understanding the review process and managing your submissions. Now, let’s wrap up with some final tips to set you up for continued success on Shutterstock.
Consistency is key. Regularly uploading fresh content keeps your portfolio active and increases your visibility to buyers and review teams alike. Plus, the more high-quality images you have, the better your chances of approval.
Focus on quality over quantity. It’s tempting to upload as many images as possible, but Shutterstock values images that are technically perfect, relevant, and appealing. Take your time to select and edit your best shots.
Stay updated with Shutterstock’s guidelines and trends. Photography styles and what buyers want can change over time. Follow Shutterstock’s contributor blog, join forums, or participate in webinars to stay in the loop.
Use relevant keywords and accurate descriptions. Proper metadata not only helps your images get discovered but also aligns with Shutterstock’s review criteria. Think from the buyer’s perspective—what would they search for?
Learn from rejection feedback. Don’t see rejection as a setback, but as an opportunity to improve. Review Shutterstock’s reasons, adjust your images accordingly, and resubmit.
Build a diverse portfolio. Cover different themes, styles, and subjects to appeal to a broader audience. This diversity can also reduce the risk of multiple rejections on similar images.
Remember, patience and persistence are vital. Success on Shutterstock doesn’t happen overnight, but with consistent effort, attention to detail, and a willingness to learn, you’ll increase your approval rates and generate a steady income stream.
Happy uploading! Keep honing your craft, stay organized, and enjoy the journey of turning your photography into a thriving asset.