Thinking about turning your photography hobby into a source of income? Selling photos on Shutterstock can be a fantastic way to do just that! Even if you’re new to the game, the platform makes it pretty straightforward to get started. All you need is some good images, a bit of understanding of their process, and a passion for sharing your work. In this post, we’ll walk through how to sell your photos without prior experience, so you can start earning from your creativity sooner than you think!
Understanding Shutterstock’s Requirements for Photographers
Before you upload your first photo, it’s important to understand what Shutterstock looks for in contributors. They have specific guidelines to ensure the quality and relevance of the images they offer to their customers. Here’s what you need to know:
- Image Quality: Photos should be sharp, well-exposed, and free of noise or compression artifacts. Use good lighting and proper focusing to make your images stand out.
- Content Guidelines: Shutterstock prefers original, authentic images that are relevant and marketable. Avoid copyrighted elements, and ensure you have model or property releases if needed.
- File Format and Size: Upload images in JPEG format with a minimum of 4 megapixels. Higher resolution images are better for sales potential.
- Metadata: Accurate and descriptive titles, keywords, and categories are crucial. They help buyers find your images easily, increasing your chances of sales.
- Legal Considerations: Always ensure you own the rights to the images you upload. If people or private properties are identifiable, obtain necessary releases to avoid legal issues.
Additionally, Shutterstock reviews every submission to maintain their quality standards. Don’t be discouraged if your first few uploads are rejected—review their guidelines carefully, make improvements, and try again! Remember, consistency and quality are key to building a successful portfolio on Shutterstock.
Preparing Your Photos for Submission
Alright, so you’ve got a bunch of photos ready to go—that’s fantastic! But before you hit that upload button, there’s a bit of prep work to do. Think of it like getting your photos ready for a big audition; you want them to look their best and follow the rules so they have the best shot at being accepted.
First off, image quality is king. Shutterstock is pretty strict about this, so make sure your photos are high-resolution. A good rule of thumb is to aim for at least 4 megapixels, but higher is better—think 12 MP or more. Keep your images sharp, clear, and well-focused. Avoid blurry or pixelated shots because they won’t make it past the review process.
Next up, file format and naming. Shutterstock prefers JPEG files, saved in RGB color mode. When naming your files, use descriptive and straightforward names—avoid random strings of numbers. For example, instead of “IMG0001.jpg,” try “sunset-over-mountains.jpg.” This helps with organization and makes your submissions look more professional.
Another important aspect is composition and editing. Ensure your photos are well-composed, with good lighting and proper exposure. Don’t over-edit or use filters that drastically change the look unless it’s part of a creative vision. Basic adjustments like brightness, contrast, and cropping can really make your images pop, but keep it natural.
Check for Model and Property Releases
If your photos include recognizable people or private property, you’ll need to have the appropriate releases signed. Shutterstock is quite strict about this—no releases, no acceptance. When in doubt, it’s better to have the paperwork ready to avoid delays or rejections.
Metadata Matters
Adding relevant keywords and descriptions is crucial. Think about what someone might type into the search bar to find your photo. Be specific, descriptive, and honest. Avoid keyword stuffing—quality over quantity wins here. Well-tagged images are more likely to get seen and purchased.
Final Checklist Before Upload
- High-resolution JPEG files in RGB mode
- Properly named files with descriptive titles
- Clean, well-edited images with good composition and lighting
- Relevant model and property releases, if applicable
- Accurate and comprehensive metadata (keywords and descriptions)
Taking the time to prepare your photos properly might seem like extra work, but it really pays off. The better your images are in quality and presentation, the higher your chances of getting accepted and making sales down the line!
Steps to Create a Shutterstock Contributor Account
Ready to share your amazing photos with the world? The first step is setting up your Shutterstock contributor account. Don’t worry—it’s straightforward, and I’ll walk you through each step so you can get started quickly.
Step 1: Visit Shutterstock Contributor Registration Page
Head over to the [Shutterstock Contributor registration page](https://submit.shutterstock.com/). Here, you’ll find the sign-up form. It’s free to create an account, and it’s the gateway to submitting your photos and earning money.
Step 2: Fill Out Personal Information
Provide your basic details—name, email address, and create a strong password. Make sure to use an email you check regularly, as Shutterstock will send important notifications about your submissions and account status.
Step 3: Agree to the Terms
Read through Shutterstock’s contributor agreement carefully. It covers rights, licensing, and payment terms. Once you’re comfortable, check the box to agree and move on.
Step 4: Verify Your Email
After submitting your info, Shutterstock will send a verification link to your email. Click that link to verify your account and activate it. This step is crucial—without email verification, you won’t be able to upload or access your dashboard.
Step 5: Complete Your Profile
Log in to your new account and fill out your profile. You can add details like your location, preferred payment methods, and tax information. Providing complete and accurate info helps ensure smooth payments later on.
Step 6: Upload a Sample Photo or Portfolio
While not mandatory, it’s a good idea to upload a few of your best photos initially. This gives Shutterstock an idea of your style and quality. Plus, it can help you get familiar with their upload process.
Step 7: Submit for Review
Once your profile is set up, you’re ready to start submitting photos. Just follow the prompts to upload your images, add metadata, and submit them for review. Shutterstock’s review team will assess your submissions, typically within a few days.
And that’s it! Creating your contributor account is the first big step toward turning your photography hobby into a potential income stream. Take your time to fill out everything accurately, and don’t get discouraged if you face some initial rejections—practice makes perfect, and every step gets you closer to success.
Uploading Your Photos and Optimizing Metadata
Once you’ve selected the best photos to upload, it’s time to get them onto Shutterstock. But simply clicking the upload button and submitting your images isn’t enough—you want to optimize each submission to make sure your photos get noticed and sold.
First, ensure your images meet Shutterstock’s technical requirements. Typically, this means providing high-resolution files (usually JPEGs with a minimum of 4 megapixels), with good color accuracy and no watermarks or borders. Clear, sharp, well-lit photos tend to perform better.
Now, onto the fun part—metadata. Think of metadata as the label that helps users find your photos when they search. The key components are:
- Title: Make it descriptive and straightforward. Instead of “Photo1,” use something like “Sunset over Mountain Lake.”
- Description: Write a detailed, natural-sounding paragraph that explains what’s in your photo. Include relevant keywords naturally—avoid keyword stuffing.
- Keywords: This is crucial. Shutterstock allows up to 50 keywords, so use all of them wisely. Think about what someone might search for when looking for your image. For example, if you uploaded a photo of a cat, include keywords like “cat,” “kitten,” “pet,” “furry,” “playful,” etc.
Pro tip: Use specific and varied keywords. Combine broad terms with niche ones to increase your chances of appearing in different searches. Also, avoid irrelevant keywords—they can hurt your chances of acceptance and sales.
When filling out metadata, keep it natural and professional. Remember, your goal is to help buyers find your work easily, so think from their perspective. Take your time to craft good titles, descriptions, and select the most relevant keywords for each photo.
Tips for Increasing Your Photo Sales on Shutterstock
Now that your photos are uploaded and optimized, let’s talk about how to boost your sales. It’s a competitive marketplace, but with a few smart strategies, you can stand out and start earning more.
Here are some tried-and-true tips:
- Consistent Uploads: Regularly adding new photos keeps your portfolio fresh and increases the chances of your images being viewed and purchased. Set a schedule—maybe upload a few images each week.
- Focus on Trends: Pay attention to current market trends. For example, if there’s a surge in demand for remote work images, consider capturing and uploading related photos.
- Specialize in Niche Topics: While broad images are good, specialized content can set you apart. Think about specific themes like eco-friendly living, certain professions, or cultural events.
- Engage in Keyword Optimization: Revisit your metadata periodically. Update keywords based on trending searches or new ideas, and remove irrelevant tags to improve discoverability.
- Promote Your Portfolio: Share your Shutterstock portfolio on your social media channels, personal website, or photography forums. Building an audience can drive more traffic to your images.
- Study Your Sales Data: Use Shutterstock’s contributor tools to see which images sell best. Analyze what works and focus on creating similar content.
- Maintain Quality Over Quantity: While uploading regularly is good, prioritize high-quality images. Sharp, well-composed, and properly lit photos attract more buyers.
- Be Patient and Persistent: Building a steady income takes time. Keep uploading, optimizing, and learning from your experience.
Remember, every photographer’s journey is unique. Keep experimenting, stay updated on market needs, and most importantly, enjoy the process of creating and sharing your art. Over time, your efforts can translate into a rewarding stream of income from Shutterstock!
Common Challenges for Beginners and How to Overcome Them
Starting out as a stock photographer can feel a bit overwhelming. You might wonder, “Where do I even begin?” or worry about standing out in a crowded marketplace. Don’t worry — these challenges are totally normal, and the good news is, there are straightforward ways to tackle them.
One of the biggest hurdles beginners face is understanding what kind of photos sell best. Shutterstock caters to a wide range of needs, but some images tend to perform better than others. For example, photos that are clear, high-quality, and aligned with current trends (like remote work setups or healthy lifestyles) usually attract more buyers.
How to overcome this? Spend some time browsing Shutterstock’s top-selling images. Notice recurring themes, styles, and subjects. Get familiar with what’s trending and try to create similar content, but don’t copy — add your unique twist!
Another common challenge is technical quality. Blurry, poorly lit, or improperly composed images won’t get accepted or sold. It’s tempting to rush shots, but investing time in learning the basics of good photography — like proper lighting, composition, and editing — makes a huge difference.
To improve your technical skills, consider:
- Taking free online tutorials on photography basics
- Practicing regularly to develop your eye
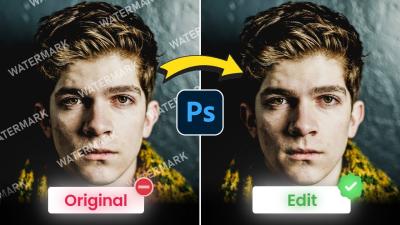
- Using editing tools like Lightroom or Photoshop to enhance your images
Another challenge is managing rejection. Shutterstock has strict quality and content guidelines, and not every upload will be accepted. It can be discouraging, but remember, rejection is part of the learning process. Review Shutterstock’s contributor guidelines carefully, and if an image gets rejected, analyze why. Was it out of focus? Overly busy? Off-topic?
Overcoming rejection: Keep a positive mindset, learn from feedback, and keep experimenting. The more you upload, the better you’ll understand what works and what doesn’t. Persistence is key!
Lastly, marketing your photos might seem daunting at first. But remember, once your images are on Shutterstock, they’re available worldwide. You don’t need to do much extra marketing, but creating a portfolio or sharing your work on social media can help you attract more clients and get feedback.
In summary, expect some hurdles along the way — but with patience, continuous learning, and a proactive attitude, you’ll find yourself improving steadily and making your mark in the stock photography world.
Additional Resources for Aspiring Stock Photographers
If you’re serious about turning your passion for photography into a steady income on Shutterstock, tapping into the right resources can make all the difference. Luckily, there’s a wealth of free and paid tools, courses, and communities designed to help you grow as a stock photographer.
Here are some top resources to consider:
Online Photography Courses
- Udemy: Offers affordable courses on photography basics, editing, and specific niches like food or travel photography.
- Skillshare: Provides a variety of classes focused on both technical skills and creative inspiration.
- LinkedIn Learning: Great for professional development, including business skills for photographers.
Photography Blogs & Websites
- Digital Photography School: Tips, tutorials, and inspiration for photographers at all levels.
- Fstoppers: A community and resource hub for photographers and videographers.
- PetaPixel: Industry news, reviews, and photographic insights.
Stock Photography Communities & Forums
- PhotoCrowd: A platform to showcase your work and learn from others.
- Fstoppers Forum: Connect with fellow photographers, share experiences, and get feedback.
- Reddit r/photography: A lively community to ask questions, share shots, and learn new techniques.
Books & Guides
- “Understanding Exposure” by Bryan Peterson — a classic for mastering camera settings.
- “The Digital Photography Book” by Scott Kelby — practical tips for taking better photos.
- Many photographers also recommend reading about marketing and branding to boost your sales. Consider books like “Building Your Photography Business”.
Software & Editing Tools
- Adobe Photoshop
- Adobe Lightroom
- Alternatives include free tools like GIMP or Canva for quick edits and enhancements.
Remember, continuous learning and community engagement are key. Surround yourself with resources, stay inspired, and don’t be afraid to experiment. Over time, you’ll refine your skills, build a compelling portfolio, and increase your chances of success on Shutterstock and beyond!