When it comes to creating high-quality videos for Shutterstock, lighting is often the unsung hero. It’s what makes your footage look professional, vibrant, and engaging. Good lighting can transform a simple scene into something that feels polished and visually appealing, catching the viewer’s eye instantly. Whether you’re shooting a product demo, a tutorial, or a lifestyle clip, understanding the basics of lighting is essential. In this post, we’ll explore what you need to know about lighting for stock videos, helping you produce content that stands out and meets Shutterstock’s standards.
Why Proper Lighting Matters for Stock Videos
Think of lighting as the foundation of your video’s visual quality. Without proper lighting, even the most interesting subject can look dull, blurry, or unprofessional. For stock videos, this is especially important because your footage needs to be versatile and usable across a variety of projects. Here’s why proper lighting is a game-changer:
- Enhances Visual Clarity: Good lighting ensures your subjects are clear and well-defined, making your footage more attractive to buyers.
- Sets the Mood and Tone: Lighting can evoke emotions—bright and soft light creates a cheerful vibe, while darker, shadowy lighting can add drama or mystery.
- Improves Color Accuracy: Proper lighting helps colors appear natural and vibrant, which is crucial for stock footage that might be used in different contexts.
- Reduces Post-Production Work: Well-lit footage requires less color correction and editing, saving you time and effort.
- Meets Shutterstock Quality Standards: Shutterstock has specific requirements for video quality, including good lighting. Poorly lit videos risk rejection or lower ratings.
In short, investing in proper lighting isn’t just about aesthetics—it’s about ensuring your footage is professional, versatile, and ready for commercial use. Whether you’re shooting indoors or outdoors, understanding how to control and manipulate light will make a significant difference in the final product. So, next time you plan a shoot for Shutterstock, remember that lighting is your best friend in creating compelling, high-quality videos that stand out in the crowded stock market.
Factors Influencing Lighting Needs for Video Content
When it comes to creating stunning video content for Shutterstock, understanding the factors that influence your lighting needs is essential. Lighting isn’t a one-size-fits-all situation; it varies depending on several key elements that can dramatically affect the look and feel of your footage.
First up, the subject matter plays a huge role. Are you filming a product, a person, or a landscape? Each requires different lighting techniques. For example, products often need even, diffused lighting to highlight details without harsh shadows, while a person’s face benefits from soft, flattering light that enhances features.
Next, consider the environment or setting. Indoor shoots generally require more controlled lighting setups, whereas outdoor shoots depend heavily on natural light. If you’re filming indoors, you have the advantage of manipulating your lighting setup, but need to account for existing ambient light, reflections, and shadows.
Camera specifications are another factor. Different cameras have varying sensitivities to light. Higher-end cameras might perform well in lower light conditions, but most require proper lighting to achieve optimal image quality. The resolution, frame rate, and sensor size all influence how much light you need.
Mood and tone also dictate lighting choices. Bright, high-key lighting creates a cheerful, energetic vibe, perfect for commercials or tutorials. Conversely, low-key lighting with shadows lends a dramatic or mysterious tone, ideal for storytelling or artistic projects.
Finally, budget and equipment availability can impact your setup. Professional lighting gear offers more control and better quality but can be costly. On a tight budget, even simple solutions like natural light or DIY diffusers can produce excellent results if used thoughtfully.
In essence, balancing these factors — subject, environment, camera capabilities, mood, and budget — will help you determine the right lighting setup for your Shutterstock video content. Taking the time to assess each aspect ensures your footage looks professional, engaging, and ready for the demands of digital licensing.
Recommended Lighting Setups for High-Quality Shutterstock Videos
Now that you understand what influences your lighting needs, let’s explore some tried-and-true setups to help you shoot high-quality videos that stand out on Shutterstock.
1. The Three-Point Lighting Setup
This is the classic professional lighting scheme used in filmmaking and photography, and it works beautifully for a wide range of video content. It involves three main light sources:
- Key Light: The primary source that illuminates your subject. It’s usually positioned at a 45-degree angle to create depth.
- Fill Light: Placed opposite the key light, it softens shadows created by the key light, ensuring the lighting isn’t too harsh.
- Back Light (or Hair Light): Positioned behind or above the subject, it helps separate them from the background, adding depth.
Using diffusers and softboxes with this setup yields soft, even lighting perfect for interviews, tutorials, or product shots.
Natural Light Setup
If you’re working outdoors or in a space with ample windows, natural light can be your best friend. To maximize its potential:
- Golden Hour Shooting: Shoot during early morning or late afternoon when sunlight is warm and soft.
- Diffusing Sunlight: Use sheer curtains, diffusers, or reflectors to soften harsh midday sun and avoid unflattering shadows.
- Reflectors: Use white or silver reflectors to bounce light onto your subject, filling in shadows and adding brightness.
Natural lighting offers a beautiful, authentic look, perfect for lifestyle, vlogging, or scenic footage. Just remember, consistency can be tricky outdoors, so plan your shoot accordingly.
The Softbox or Diffused Light Setup
If you’re filming indoors and want a professional look without expensive equipment, using softboxes or diffused LED lights works wonders. Here’s how to set it up:
- Position your softbox at a 45-degree angle from your subject for flattering, even light.
- Use a second, fill light or reflector on the opposite side to reduce shadows.
- Adjust the height and distance of your lights to control the softness and intensity.
This setup is versatile and works well for talking-head videos, product demos, or any scenario where you need consistent, high-quality lighting.
Creative Lighting for Mood and Atmosphere
Sometimes, standard setups aren’t enough, and you want to create a specific mood or artistic effect. Here are a few ideas:
- Colored Gels: Add color to your lights to evoke emotions or match branding.
- Practical Lights: Use lamps, candles, or neon signs within your shot for ambiance.
- Silhouettes and Shadows: Play with backlighting and minimal front light to create dramatic silhouettes.
Experimenting with different lighting techniques can help your videos tell a story visually compelling enough for Shutterstock’s diverse audience.
In summary, choosing the right lighting setup depends on your subject, environment, and the mood you want to convey. With a bit of practice and the right equipment, you can produce high-quality videos that meet Shutterstock’s standards and attract viewers worldwide.
Tips for Achieving Well-Lit Video Content on a Budget
Creating high-quality, well-lit videos doesn’t have to drain your wallet. With a few smart strategies and some DIY solutions, you can produce professional-looking stock footage without splurging on expensive equipment. Here are some practical tips to help you light your videos effectively, even on a tight budget.
Use Natural Light Wisely
Natural light is your best friend when working with limited funds. Shooting during the day, especially during the golden hours (early morning or late afternoon), provides soft, warm light that looks fantastic on camera. Position your subject near windows or outdoors to leverage sunlight. Just keep an eye on weather conditions and avoid harsh midday sun, which can create unwanted shadows and overexposed spots.
Invest in Affordable Lighting Equipment
You don’t need high-end gear to get good results. Look for budget-friendly options like LED panel lights or ring lights, which are widely available online. These lights are easy to set up, energy-efficient, and offer adjustable brightness and color temperature. Also, consider purchasing a simple reflector or white foam board to bounce light onto your subject, filling in shadows and creating a more balanced look.
Utilize DIY Light Modifiers
Get creative with household items to modify your lighting setup:
- White bedsheets or shower curtains: Diffuse harsh light for a softer appearance.
- Aluminum foil: Reflect light onto your subject.
- Cardboard and poster board: Build homemade reflectors or flags to control light spill.
Control Your Environment
Minimize unwanted light sources and reflections by choosing a quiet, controlled environment. Use blackout curtains or dark cloths to block out external light and prevent color temperature inconsistencies. Keep your background simple to avoid distractions and focus attention on your subject.
Plan Your Shots and Lighting Setup
Preparation goes a long way. Plan your scenes and lighting angles beforehand. Use a basic diagram or checklist to determine where to position lights, reflectors, and your camera. This reduces trial-and-error during filming and helps you make the most of your resources.
Common Lighting Mistakes to Avoid in Stock Video Creation
Even with the best intentions, lighting mistakes can creep into your footage, affecting its professionalism and appeal. Knowing what to watch out for can help you produce cleaner, more compelling stock videos. Here are some common pitfalls to avoid:
Overexposure and Underexposure
This is one of the most frequent issues. Overexposed footage appears washed out with blown-out highlights, while underexposed shots are too dark, losing detail in shadows. Use your camera’s histogram or exposure meter to ensure your footage stays within a balanced range. Always check your shots before filming a large batch.
Harsh Shadows and Uneven Lighting
Direct, unmodified light can cast unflattering shadows on your subject’s face or background. To prevent this:
- Diffuse light sources using umbrellas, softboxes, or household diffusers.
- Position lights at appropriate angles—typically at 45 degrees—to your subject.
- Use reflectors to fill in shadows and create a more even illumination.
Incorrect Color Temperature
Mixing different light sources without matching their color temperatures results in unnatural color casts. For example, combining daylight (around 5500K) with indoor tungsten lights (around 3200K) can produce inconsistent skin tones and backgrounds. Use adjustable lights or gels to match color temperatures, or set your camera’s white balance accordingly.
Ignoring Depth and Dimension
Flat lighting makes footage look dull and uninteresting. To add depth:
- Use three-point lighting setups—key, fill, and back lights.
- Position lights to create subtle shadows that give your subject a sense of volume.
- Avoid placing all lights directly in front of the subject.
Not Checking Your Lighting Setup
Always review your footage on a good monitor or screen before finalizing. What looks fine on a small camera display might be problematic on larger screens. Take the time to adjust your lighting as needed, ensuring consistent, appealing results across your clips.
By avoiding these common mistakes and applying our tips, you’ll be well on your way to creating stunning stock videos that stand out—without breaking the bank. Happy filming!
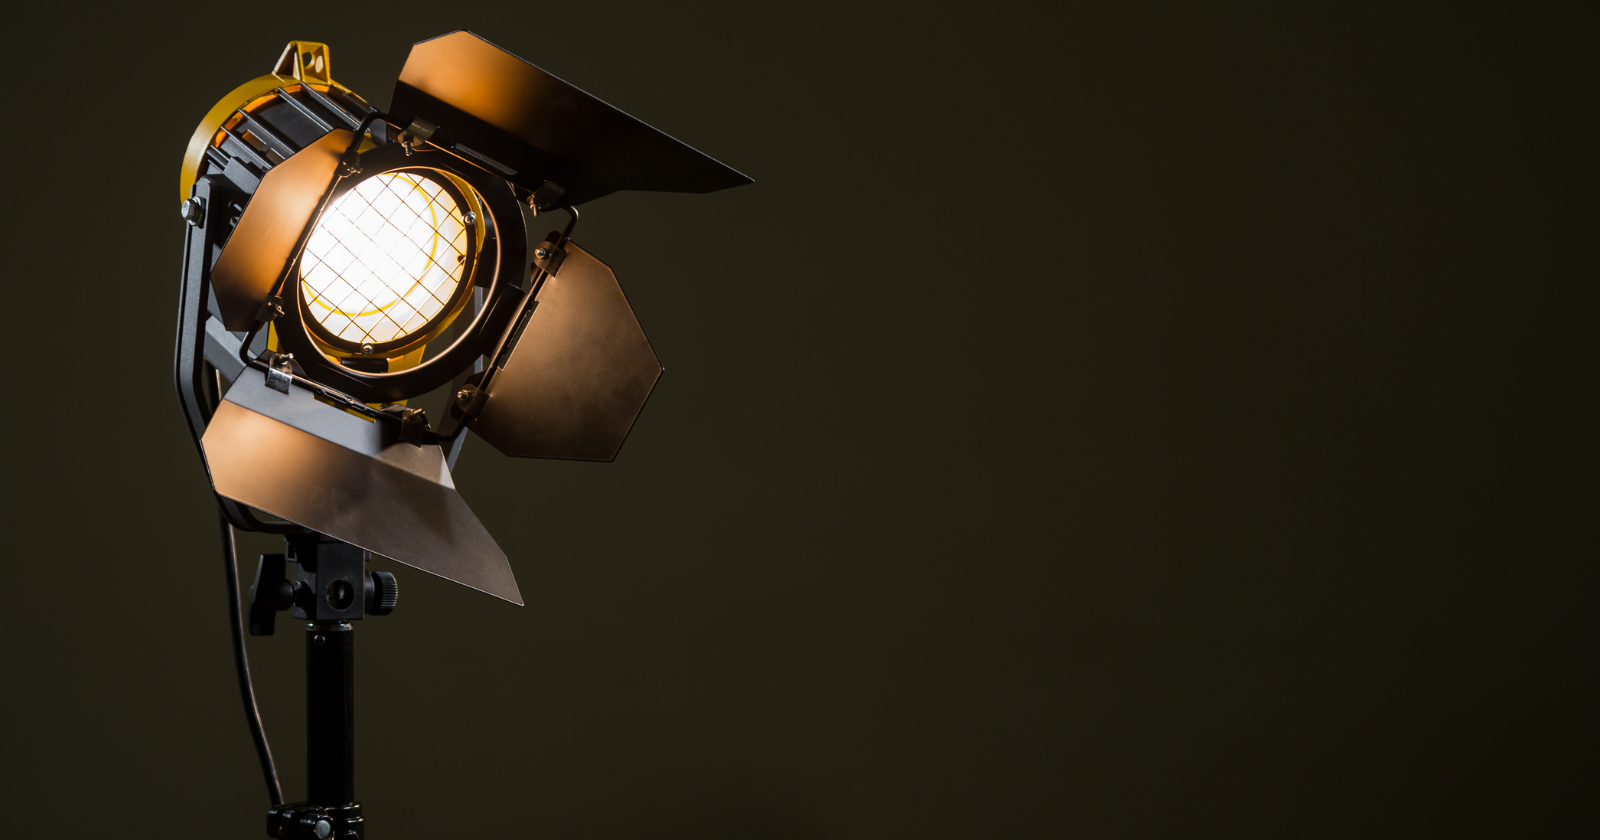
Tools and Equipment for Effective Video Lighting
Getting your video lighting just right doesn’t mean you need a Hollywood-level setup, but having the right tools definitely makes a big difference. Whether you’re a beginner or a seasoned creator, understanding the essential equipment can help you achieve professional-looking results that stand out on Shutterstock.
First off, let’s talk about lighting sources. The most common options include:
- LED panels: These are versatile, energy-efficient, and come in various sizes and brightness levels. They allow for adjustable color temperature and dimming, giving you control over your lighting environment.
- Softboxes: Softboxes diffuse light, creating soft, even illumination that reduces harsh shadows. Ideal for interviews or product shots.
- Ring lights: Popular with content creators, ring lights offer a flattering, even glow, perfect for close-up shots and beauty videos.
- Reflectors: These bounce existing light onto your subject, helping fill shadows without the need for extra power sources.
Next, consider the support equipment that keeps your lighting setup steady and flexible:
- Light stands: Adjustable and sturdy stands are essential for positioning your lights at the right angle and height.
- Clamps and mounts: These help attach lights or reflectors securely to various surfaces or position them precisely.
For controlling your lighting environment, don’t forget about light modifiers:
- Diffusers: To soften the light further, making your footage look more natural and pleasing.
- Colored gels can change the color temperature or add creative effects.
Finally, investing in measuring tools like a light meter can help you quantify your lighting setup, ensuring consistent results across shoots. While not mandatory, it’s a handy device for fine-tuning your lighting for the perfect shot.
In summary, the right combination of lights, stands, modifiers, and measuring tools can elevate your video quality significantly. Remember, your goal is to create well-lit, inviting footage that captures viewers’ attention—so choose your equipment based on your specific needs and budget.
Conclusion and Final Tips for Optimizing Video Lighting for Shutterstock
Wrapping up, understanding and implementing effective lighting techniques is key to creating compelling video content that performs well on Shutterstock. Good lighting not only enhances the visual appeal but also helps convey your message more clearly and professionally.
Here are some final tips to keep in mind as you optimize your video lighting:
- Start with natural light: Whenever possible, shoot during the day using soft, indirect sunlight. It’s free, beautiful, and easy to control.
- Use diffusers and reflectors: These simple tools can transform harsh sunlight or artificial lights into soft, flattering illumination.
- Balance your lighting: Aim for even lighting across your subject. Avoid overly bright spots or shadows that distract viewers.
- Control your background: Proper lighting should also illuminate your background appropriately, creating depth and interest.
- Adjust color temperature: Matching your light’s color temperature to your environment prevents unnatural hues and maintains consistency.
- Test and review: Always review your footage on different screens and make adjustments as needed. Small tweaks can make a big difference.
Remember, practice makes perfect. Experiment with different setups, learn from each shoot, and gradually develop your own lighting style that fits your content and helps it stand out on Shutterstock.
In the end, investing time and effort into proper lighting pays off—your videos will look more professional, attract more viewers, and increase your chances of licensing success. Happy shooting!