Welcome to our step-by-step guide on submitting non-editorial images to Shutterstock! Whether you’re a seasoned photographer or just starting out, sharing your creative works on stock platforms like Shutterstock can be a fantastic way to earn passive income and get your art in front of a global audience. Non-editorial images are your chance to showcase beautiful, commercial, or creative photos that help businesses, marketers, and consumers fulfill their visual needs. In this guide, we’ll walk you through the essentials—from understanding what counts as non-editorial to mastering
Understanding Shutterstock’s Submission Guidelines for Non-Editorial Content
Before you start uploading your images, it’s crucial to understand Shutterstock’s specific guidelines for non-editorial content. These rules are in place to ensure that all images meet quality standards and legal requirements, making your submissions more likely to be approved and successfully sold. Non-editorial images are typically commercial, lifestyle, conceptual, or creative photos that can be used for advertising, marketing, or personal projects. They are different from editorial images, which often depict newsworthy or current events and have different licensing rules.
Here are some key points to keep in mind:
- Image Quality: Your photos should be high-resolution (minimum 4 MP), sharply focused, well-lit, and properly exposed. Blurry or pixelated images are unlikely to pass.
- Model and Property Releases: If your image features recognizable people or private property, you must obtain and submit signed releases. Without these, Shutterstock can’t accept the image for commercial licensing.
- Content Restrictions: Avoid images with copyrighted material, trademarks, or offensive content. Shutterstock maintains a strict policy against such images to prevent legal issues.
- Metadata and Keywords: Accurate titles, descriptions, and keywords are essential. They help buyers find your images easily and improve your sales chances.
- Legal Considerations: Make sure you own the rights to all elements within your images and have the necessary releases. This protects you and Shutterstock from potential legal trouble.
Additionally, Shutterstock provides detailed guidelines and tips on their contributor portal. Familiarizing yourself with these rules not only speeds up the review process but also increases the likelihood that your images will be accepted and purchased. Remember, quality and compliance are key—so take the time to prepare your images thoroughly before submitting.
Preparing Your Images for Submission
Alright, so you’ve got your images ready to go—fantastic! But before you hit that submit button, there are a few important steps to ensure your photos meet Shutterstock’s standards and stand the best chance of getting approved. Think of this stage as your final quality check, kind of like a photographer’s version of a spa day for your images.
First things first, resolution and quality are king. Shutterstock recommends submitting images at a minimum of 4 megapixels, but higher is always better. Aim for a resolution of at least 300 DPI for best results, especially if you’re submitting for potential print sales. Make sure your images are sharp, properly exposed, and free from noise or pixelation. Remember, blurry or pixelated images are a quick way to get rejected.
Next up is file format and size. Shutterstock accepts JPEG files only, so save your images as high-quality JPEGs with a quality setting of around 80-100%. Keep the file size under 50MB, but don’t go overboard—smaller files are easier to upload and manage. Also, ensure your color profile is set to sRGB, which is the standard for web and print display, to keep colors consistent across platforms.
Now, onto composition and content. Your images should be free from watermarks, logos, or any branding unless they are part of the concept and you have the rights to include them. Make sure the main subject is well-centered or follows the rule of thirds for visual appeal. Avoid overly cluttered backgrounds or distracting elements that take away from the main focus.
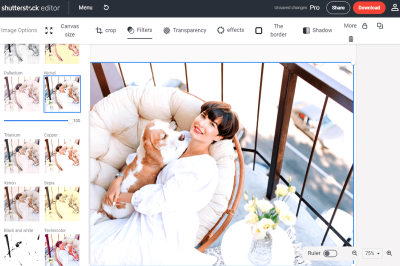
Cleaning up your images is a crucial step. Use editing software like Adobe Photoshop or Lightroom to crop, straighten, and enhance your photos. Adjust brightness, contrast, and saturation to make your image pop, but avoid over-editing. Minor retouching to remove dust or blemishes is fine, but don’t go overboard—authenticity matters.
Finally, metadata matters. Prepare a compelling, accurate title, description, and keywords. Think about what someone searching for your image might type. Use relevant keywords—both broad and specific—and include synonyms or related terms. Proper metadata helps your images get discovered!
Creating a Shutterstock Contributor Account
Great, your images are polished and ready. Now, it’s time to set up your contributor account on Shutterstock. This is your gateway to sharing your work with the world—and earning money! The process is straightforward, but a few tips can make it smoother and set you up for success.
First, visit the Shutterstock Contributor Portal and click on “Sign Up.” You’ll be prompted to provide basic information like your name, email address, and a secure password. Use a professional email address that you check regularly, as this will be your main contact point.
Next, you’ll need to agree to Shutterstock’s terms and conditions. Take a moment to read through their contributor agreement—it’s standard, but important to understand your rights and responsibilities. Once you accept, you’ll be guided through setting up your profile.
When creating your profile, be sure to include accurate details—especially your legal name and contact information. This helps build trust with Shutterstock and buyers who might inquire about your work. You’ll also upload a government-issued ID or other documents for verification purposes, which helps prevent fraud and ensures quality control.
After your account is verified, you can start uploading images. It’s a good idea to familiarize yourself with Shutterstock’s Contributor Resources—they provide helpful guidelines, tips, and best practices for submitting images and maximizing your earnings.
Once your account is set up, take a moment to explore the dashboard. Here, you can see your submissions, earnings, and sales analytics. It’s also where you’ll get feedback on your images and see which ones are approved or rejected, helping you refine your submissions over time.
Remember, building a successful contributor profile takes time and consistency. Keep uploading high-quality images, use relevant keywords, and stay updated on Shutterstock’s guidelines to grow your portfolio and increase your chances of making sales. Happy uploading!
Uploading Your Non-Editorial Images to Shutterstock
Alright, you’ve got your stunning photos ready to go—now what? Uploading your non-editorial images to Shutterstock is a straightforward process, but it’s important to do it correctly to make sure your images get approved and start earning. Let’s walk through the steps together.
Step 1: Log into Your Contributor Account
If you haven’t already, head over to the Shutterstock Contributor portal and log in with your credentials. If you’re new, you’ll need to create an account—don’t worry, it’s quick and easy!
Step 2: Click on “Upload” or “Add Content”
Once logged in, find the button that says “Upload” or “Add Content.” It’s usually prominently displayed on your dashboard. Clicking this will open the upload interface.
Step 3: Select Your Files
Choose the non-editorial images you want to upload from your device. You can typically upload multiple images at once, which saves time. Make sure your files meet Shutterstock’s technical requirements—usually, JPEG format, sRGB color space, and minimum resolution of 4 megapixels.
Step 4: Fill in the Required Metadata
After selecting your images, you’ll be prompted to add details like titles, descriptions, and keywords. Don’t skip this step! Proper metadata helps your images get found by buyers.
Step 5: Choose Licensing Options
For non-editorial images, you’ll want to select the appropriate licensing type—typically Royalty-Free (RF). This decision affects how buyers can use your images and how you get paid.
Step 6: Review and Submit
Before finalizing, double-check everything—file quality, metadata, licensing, and categories. Once satisfied, hit the “Submit” button. Your images will go into Shutterstock’s review process, which usually takes a few days.
And that’s it! Uploading is the easy part—just remember to keep your files organized and follow Shutterstock’s guidelines to increase your chances of approval and sales.
Tagging and Categorizing Your Images Effectively
Great, your images are uploaded! Now, the secret to making sure they get discovered? Effective tagging and categorization. Think of it as giving your images a detailed label so buyers can find them when searching. Here’s how to do it right.
Why It Matters
Proper tags and categories boost your images’ visibility, meaning more potential sales. Poorly tagged images might stay hidden, no matter how beautiful they are. So, invest a little time here—it pays off!
Tips for Tagging Your Images
- Use Relevant Keywords: Think about what a buyer might type in when searching for an image like yours. Be specific—if it’s a “sunset over mountains,” include those keywords.
- Include Synonyms and Variations: Different people search differently. For example, use “car,” “vehicle,” “automobile,” as applicable.
- Highlight the Main Subjects and Elements: Mention key objects, emotions, or concepts—like “happy children,” “business meeting,” or “nature landscape.”
- Avoid Overstuffing: Be honest and precise. Don’t add irrelevant tags just to get more views; it can hurt your reputation and rankings.
Effective Categorization
Shutterstock provides predefined categories and subcategories. Pick the ones that best fit your image. For example:
Main Category Example Subcategories Nature Landscapes, Wildlife, Plants People Portraits, Families, Business People Business & Technology Office, Communication, Gadgets Food & Drink Meals, Beverages, Ingredients Select the most relevant categories to help your images appear in the right searches. Remember, the goal is to make it as easy as possible for buyers to find your work.
Pro Tip: Use all available tags and categories thoughtfully. The more accurate your metadata, the higher your chances of sales. Take your time—this step is crucial for maximizing exposure.
In summary, effective tagging and categorization are about understanding your audience and being precise. When done right, they transform your images from just good photos into discoverable, sought-after assets in Shutterstock’s marketplace.
Reviewing and Submitting Your Images for Approval
Once you’ve uploaded your images to Shutterstock, the next step is to review everything carefully before hitting that submit button. Think of this as giving your work a final polish—after all, the goal is to make sure each image meets Shutterstock’s standards and stands out to buyers.
First, double-check the technical quality. Are your images in focus, well-lit, and free of noise or artifacts? Make sure your files are high resolution (at least 4MP) and saved in the appropriate formats like JPEG. Pay attention to cropping—ensure your subject is centered and not awkwardly cut off.
Next, review the metadata. This includes titles, descriptions, and keywords. Your titles should be clear and descriptive without being overly wordy. Descriptions should accurately explain what’s in the image, highlighting any unique elements. Keywords are crucial—they help buyers find your images, so be thorough and strategic here. Use relevant terms that potential customers might search for, including synonyms and related concepts.
Before submitting, also take a moment to look for any potential issues:
- Model Releases: If your image features recognizable people, ensure you have the proper model release uploaded.
- Property Releases: For images with private properties or trademarks, confirm you have the necessary permissions.
- Copyrights and Originality: Only submit images you have the rights to use and distribute.
Once everything looks good, click the “Submit” button. Shutterstock’s review team will then evaluate your images, which can take anywhere from a few hours to a couple of days. During this period, avoid making changes or resubmitting the same images repeatedly—patience is key. If your images are approved, they’ll go live on the platform, ready for buyers to discover and purchase.
Tips for Increasing Your Acceptance Rate and Earnings
Getting your images accepted is only part of the journey. To maximize your earnings and build a successful portfolio on Shutterstock, you’ll want to focus on improving your acceptance rate and creating content that sells. Here are some friendly tips to help you along the way:
1. Study Shutterstock’s Content Guidelines
Familiarize yourself with Shutterstock’s requirements and preferences. They tend to favor high-quality, original, and relevant images. Avoid overly processed or heavily edited photos that look unnatural. Keep up with current trends—think vibrant colors, diversity, and themes that resonate with buyers today.
2. Focus on Niche Topics
While broad images can be useful, specializing in a niche can help you stand out. Whether it’s food photography, business scenes, or nature shots, niche content often attracts dedicated buyers looking for specific visuals. This can also lead to higher sales and recurring customers.
3. Improve Your Keyword Strategy
Use detailed and accurate keywords. Think about what buyers might search for and include synonyms or related terms. Avoid keyword stuffing—quality over quantity is key. Well-chosen keywords can dramatically increase your images’ visibility.
4. Consistently Upload Fresh Content
Frequent uploads keep your portfolio active and increase the chances of getting accepted and purchased. Plus, Shutterstock’s algorithm tends to favor active contributors, making your work more visible to potential buyers.
5. Pay Attention to Trends and Seasons
Tap into trending topics, seasonal themes, and upcoming holidays. For example, during spring, images of blooming flowers or outdoor activities tend to sell well. Planning your shoots around these trends can boost your sales.
6. Engage with the Shutterstock Community
Join forums, read blogs, and participate in contributor groups. Sharing experiences and learning from others can give you valuable insights into what works and what doesn’t. Plus, it’s motivating to connect with fellow photographers and illustrators.
7. Review and Learn from Rejections
If your images aren’t approved, don’t get discouraged. Use the feedback (if provided) to improve your future submissions. Sometimes, it’s a matter of technical quality, composition, or metadata. Keep practicing and refining your skills.
By following these tips, you’ll not only increase your acceptance rate but also enhance your overall earnings on Shutterstock. Remember, patience and persistence are your best friends in this journey. Happy shooting!
Common Issues and Troubleshooting During Submission
Submitting images to Shutterstock can sometimes come with a few bumps along the way. Don’t worry — these are quite common, and most issues are easy to resolve once you know what to look out for. Here’s a rundown of some typical problems and how to troubleshoot them:
Image Rejection Reasons
- Poor Image Quality: Shutterstock insists on high-resolution images with sharp details. If your image is blurry, pixelated, or has compression artifacts, it might get rejected. Make sure you shoot in RAW or high-quality JPEGs.
- Incorrect Image Format or Size: Usually, JPEGs are preferred, and images should meet minimum resolution requirements (typically 4 MP or higher). Check Shutterstock’s specs before submitting.
- Watermarks or Logos: Remove all branding, watermarks, or logos unless they are part of a model or property release-approved shot.
- Model or Property Release Issues: If your image features recognizable people or private property, ensure you have the correct releases uploaded and approved.
- Inappropriate Content: Shutterstock has strict content guidelines. Avoid images with offensive, violent, or illegal themes.
Common Troubleshooting Tips
- Check Your File Specifications: Double-check image resolution, format, and size. Adjust your images if they don’t meet the criteria.
- Review Metadata and Keywords: Ensure your keywords are relevant and not spammy. Misleading or irrelevant tags can cause issues with discoverability or rejection.
- Update Your Browser or App: Sometimes, submission errors are due to technical glitches. Refresh your browser, clear cache, or try submitting via the contributor app.
- Resolve Model or Property Releases: If your images are rejected because of missing releases, double-check that all necessary documentation is uploaded correctly and approved.
- Contact Support: If you’ve tried everything and still face issues, Shutterstock’s contributor support is there to help. Provide them with details and screenshots to expedite the process.
Preventing Future Issues
- Always review Shutterstock’s content guidelines before submitting.
- Maintain a checklist of requirements for your images, including resolution, format, releases, and metadata.
- Regularly update your skills and knowledge about current trends and technical standards in stock photography.
By staying vigilant and proactive, you’ll minimize submission hiccups and increase your chances of getting your images accepted. Remember, patience and attention to detail are your best friends in this process!
Conclusion and Next Steps for Shutterstock Contributors
Congratulations! You’ve now got a solid understanding of the step-by-step process for submitting non-editorial images to Shutterstock. From preparing your images, optimizing keywords, to troubleshooting common issues — you’re well on your way to becoming a successful contributor.
Getting your images approved is just the beginning. Once they’re live, it’s important to keep the momentum going. Here are some next steps to consider:
Keep Creating and Uploading
- Regularly add new images to diversify your portfolio and increase your chances of sales.
- Stay updated on current trends and popular themes to tailor your content accordingly.
- Experiment with different styles and subjects to find what resonates best with buyers.
Optimize Your Portfolio
- Review your existing images periodically. Refresh your keywords and descriptions to improve discoverability.
- Remove or update underperforming images if possible.
- Analyze which images sell best and consider creating similar content.
Engage with the Community
Join online forums, social media groups, or Shutterstock’s contributor community. Sharing experiences, tips, and feedback can boost your skills and motivation.
Explore Additional Revenue Streams
Besides Shutterstock, consider submitting your work to other stock platforms like Adobe Stock, iStock, or Alamy. Diversifying your portfolio can lead to more income opportunities.
Stay Informed and Keep Learning
Stock photography evolves, and so should your skills. Attend webinars, read blogs, or take courses on photography and licensing to stay ahead.
Remember, persistence and continuous improvement are key. Keep uploading, learning, and refining your craft, and over time, your efforts will likely pay off. Happy shooting and submitting!