Ever felt overwhelmed by the sheer amount of data you need to manage on your WordPress site? You’re not alone! That’s where CSV (Comma-Separated Values) templates come into play. Whether you’re importing bulk products for an online store, managing user data, or handling SEO information for multiple pages, CSV files simplify the process. In this guide, we’ll explore what CSV templates are in WordPress, how you can locate them, and tips on making the most of these files for your site’s management.
Understanding the Importance of CSV Files

CSV files are like the magic wands of data management in WordPress! But why exactly are they so crucial? Let’s break down their significance:
- Easy Data Import/Export: CSV files allow you to import large amounts of data into WordPress in one go. Imagine not having to enter each piece of information manually!
- Compatibility: Most applications and platforms support CSV files, making them one of the easiest formats to work with. Whether you’re using WooCommerce, Elementor, or any other plugin, CSV imports are often a breeze.
- Structured Data: Each CSV file contains well-structured data organized in rows and columns, making it easy to understand where each piece of information goes within your site.
Think of it this way: if you’re managing a busy online store, manually entering product information can feel like a daunting task. But with the right CSV template, you’re equipped to handle dozens (or hundreds!) of products in a fraction of the time.
| Benefits of CSV Files | Examples |
|---|---|
| Bulk Data Management | Importing hundreds of products in WooCommerce |
| Quick Updates | Updating prices or descriptions for many items in one go |
| Data Analysis | Exporting user data for external analysis |
In short, understanding and utilizing CSV files can dramatically streamline your WordPress management experience. Ready to dive into how to locate and use these templates? Let’s get to it!
Finding the CSV Template in Your WordPress Dashboard

When you’re diving into the world of WordPress, you might come across various functionalities that enhance your website’s operations. One such feature is the CSV (Comma-Separated Values) template. This template is super helpful for importing or exporting data like posts, pages, or user information. So, let’s find out where to locate this gem within your WordPress dashboard.
First and foremost, you need to log into your WordPress admin area. Once you’re in, you might feel overwhelmed by all the settings and options available, but don’t worry! Locating the CSV template is pretty straightforward.
Here’s a simple guide:
- Navigate to the Plugins section if you’re using a plugin for CSV imports/exports, like “WP All Import” or “WP All Export.”
- Alternatively, go to your site’s Tools section on the left sidebar. This is a common place where CSV related options reside.
- If you’re importing/exporting WooCommerce products, for example, visit the Products tab and look for Import or Export options.
Once you’ve thought about where you might need to go, click around. The template might be under Settings or a similarly named section in a specific plugin. Don’t hesitate to consult the specific plugin documentation if you feel lost!
Step-by-Step Guide to Downloading the CSV Template
Now that you’ve found the CSV template option in your WordPress dashboard, it’s time to walk through how to download it. This step-by-step approach will ensure you won’t miss any crucial detail – let’s get started!
- Select the Right Tool: If you’re using a plugin, make sure you click on the relevant plugin in your dashboard. If it’s in the Tools section, select that.
- Find the Export/Import Option: Look for the Export or Import options related to CSV files. This is typically straightforward—just look for buttons that say “Download CSV Template” or “Export Data.”
- Download the Template: Click on the button to download the CSV template file. You’ll usually see a dialog box asking where to save the file—choose your desired location and hit save.
- Open and Edit the Template: Once you have the CSV file downloaded, open it with a spreadsheet application like Microsoft Excel or Google Sheets. You can now edit this document to fill it out with the appropriate data!
- Save Your Changes: After adding your information, save the file as a CSV again. Make sure you don’t accidentally save it in another format!
And just like that, you’re ready to use your CSV template for importing or exporting data to and from your WordPress site. It’s pretty straightforward once you get the hang of it!
How to Fill Out the CSV Template Correctly
Once you’ve downloaded the CSV template from WordPress, it’s time to fill it out. But filling in a CSV file isn’t just about typing away—there are best practices you should follow to ensure everything works seamlessly.
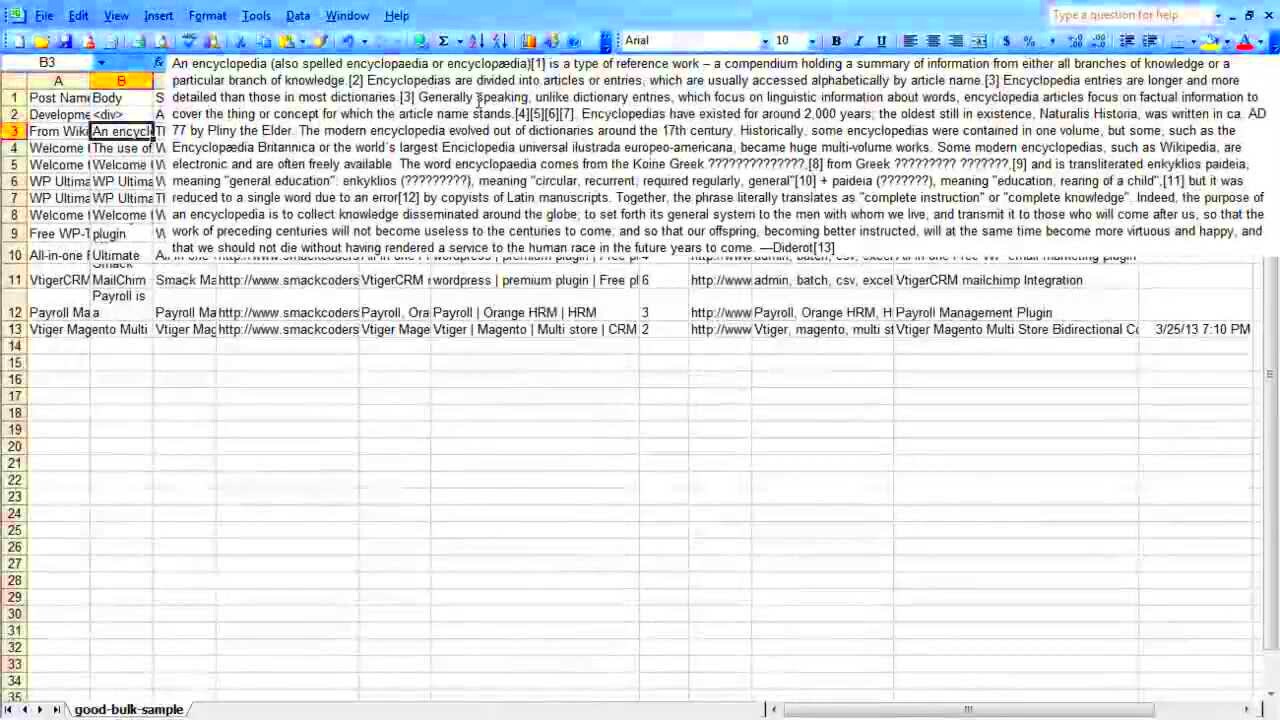
Firstly, let’s understand the structure. The CSV template usually contains several columns, and each one has a specific purpose. Here are a few common columns you might see:
- Post Title: This is the title of your future blog post or page.
- Post Content: The main content of your post, where you can paste your text, images links, etc.
- Post Status: Indicate whether the post is ‘draft’, ‘publish’, or ‘pending.’
- Categories: Here, you could enter categories that pertain to your post.
- Tags: These help in organizing your content further, so be sure to include any relevant tags.
Now, here are some important pointers for filling out the template:
- Keep It Clean: Avoid adding any extra columns or modifying existing headers in the template—this could confuse WordPress.
- Consistency is Key: Make sure you enter data consistently. For example, use the same category names throughout.
- Avoid Special Characters: Stick to basic letters, numbers, and spaces; special characters can create issues during the upload.
- Double-Check Your Content: Proofread your entries to avoid typos. Trust me; a small error can lead to big headaches!
Following these steps will smooth the way for your upload process, ensuring you get your content into WordPress without a hitch!
Uploading the Completed CSV File Back to WordPress
Congratulations! After filling out the CSV template correctly, you’re ready for the exciting part—uploading the completed file back to WordPress. This is where all your hard work pays off. Let’s go through the process step-by-step.
To begin, navigate to your WordPress dashboard and follow these steps:
- Access the Import Tool: Go to the “Tools” section in your left-hand sidebar, and then click on “Import.” You’ll see several options here.
- Select CSV Importer: If you have already installed a CSV importer plugin, locate and click on it. If not, you might need to install a plugin like “WP All Import” or “Ultimate CSV Importer.”
- Upload Your File: You’ll find an option to upload your CSV file. Click on “Choose File” and select the completed CSV from your computer.
- Start the Import: After selecting the file, click on the “Upload” or “Import” button. Wait for a moment while WordPress processes your CSV. This may take some time depending on how much content you have!
Once the import is complete, you should see a summary of what was successfully uploaded.
| Status | Number of Posts |
|---|---|
| Successfully Imported | X |
| Failed Imports | Y |
If there are any errors, WordPress will typically provide feedback on what went wrong—so be sure to address those issues. Once everything looks good, navigate to your posts to see your freshly imported content live on your site!
And that’s it! You’ve successfully uploaded your content using a CSV template in WordPress. With just a few simple steps, you can streamline your content management like a pro!
Troubleshooting Common Issues with CSV Files
Using CSV files in WordPress can be a game-changer, but sometimes, things don’t go as smoothly as we’d like. If you’ve ever wrestled with a CSV file that just wouldn’t upload or create the expected results, you’re not alone. Let’s cover some common issues you might face and how to troubleshoot them effectively.
1. Incorrect Formatting
The very first thing to check is whether your CSV file is correctly formatted. Here are some tips for ensuring your formatting is spot on:
- Use UTF-8 Encoding: Ensure your file is saved in UTF-8 format. This helps with special characters.
- Commas and Quotations: Make sure your text fields containing commas are enclosed in quotes.
- Consistent Headers: Ensure that the headers in your CSV match the expected fields in WordPress.
2. File Size Limitations
Sometimes, the problem lies in file size. Many hosting providers impose a limit on the size of files you can upload. To check this:
- Go to your WordPress Dashboard > Media > Add New to see the upload limit.
- If your file is too large, consider splitting it into smaller files or compressing your data.
3. Plugins and Compatibility Issues
If you’re using specific plugins for CSV import/export, compatibility can be a headache:
- Ensure all your plugins are updated.
- Check for known issues with your themes or other active plugins that might be conflicting.
If troubleshooting doesn’t resolve your issues, reaching out to your hosting provider’s support or checking WordPress support forums can be beneficial.
Best Practices for Using CSV in WordPress
When it comes to using CSV files in WordPress, following some best practices can save you time and reduce headaches down the line. Here’s a rundown of the most effective strategies to keep in mind.
1. Keep Your CSV Files Organized
Maintaining organization is crucial. Here’s how:
- Use Descriptive Names: Give your CSV files names that describe their content, like “product-import-2023.csv”.
- Folder Structure: Create folders for different CSV purposes—one for products, another for users, etc. This helps you easily find them later.
2. Backup Your Data
Always ensure that you back up your data before importing a CSV file. You can do this through:
- WordPress Plugins: Use backup plugins like UpdraftPlus or BackupBuddy.
- Manual Exports: Regularly export your existing content as a precaution.
3. Test on a Staging Site
Before executing large imports, consider testing your CSV files on a staging environment. This allows you to:
- Identify Formatting Errors: Detect potential issues without affecting your live site.
- Refine Import Process: Tweak settings and configurations before going live.
4. Regular Updates and Maintenance
Finally, consistency is key. Regularly review and update your CSV files to keep them aligned with your site content:
- Schedule Imports: Set a routine to import new data and keep your content fresh.
- Periodic Audits: Review your CSV files periodically for any outdated or irrelevant data.
By adhering to these best practices, you’ll streamline the way you use CSV files in your WordPress site, making your overall experience that much more efficient and effective!
Conclusion
In conclusion, finding and utilizing the CSV template in WordPress is a straightforward process that can significantly enhance your site’s functionality, especially when handling bulk data imports or exports. By following the steps outlined in this guide, you can efficiently manage your content, products, user data, and more.
To summarize the key steps:
- Access the Dashboard: Log in to your WordPress admin panel to get started.
- Navigating to Plugins: If you haven’t already, consider installing a plugin designed for CSV management like WP All Import or Really Simple CSV Importer.
- Locate the Template: Once you’ve installed a plugin, navigate to its settings where you can download the CSV template specific to your needs.
- Complete Your CSV File: Open the CSV template in Excel or Google Sheets, fill in the required data fields, and save your file in CSV format.
- Import/Export: Use the plugin’s features to import your completed CSV file or export existing data into a new CSV file.
By utilizing the CSV template, you can streamline your data management processes, which saves time and reduces errors. Make sure to follow best practices when working with CSV files to maintain data integrity and security. Happy editing!


