Are you ready to dive into the world of blogging or building your website? Using WordPress with GoDaddy hosting is not only a popular choice but also an easy and efficient one! In this post, we’ll walk you through everything you need to know to get started. Trust me, whether you’re a complete beginner or someone with a bit more tech-savvy, you’ll find that using WordPress alongside GoDaddy hosting can make your website journey smooth and enjoyable. Let’s jump right in!
Why Choose GoDaddy for WordPress Hosting?
When it comes to selecting a hosting provider for your WordPress site, there are plenty of options out there. However, GoDaddy has established itself as a favorite for many users. Here’s why:
- Beginner-Friendly: GoDaddy offers a simple and intuitive interface, making it easy for beginners to navigate through their hosting plans and control panel.
- One-Click Install: With GoDaddy, you can install WordPress with just one click! This feature saves time and simplifies the setup process.
- Reliable Performance: GoDaddy provides robust server performance, ensuring your site is fast and always accessible to your visitors.
- 24/7 Customer Support: Have a question or hit a snag? GoDaddy’s support team is available around the clock to help you with any issues that may arise.
- Scalability: As your site grows, you might need to upgrade your hosting plan. GoDaddy offers various options, allowing you to scale your hosting as needed.
In addition to these benefits, GoDaddy also provides security features, such as SSL certificates, to ensure your website is safe for users. All in all, it’s a solid choice for anyone looking to host a WordPress site!
Setting Up Your GoDaddy Account
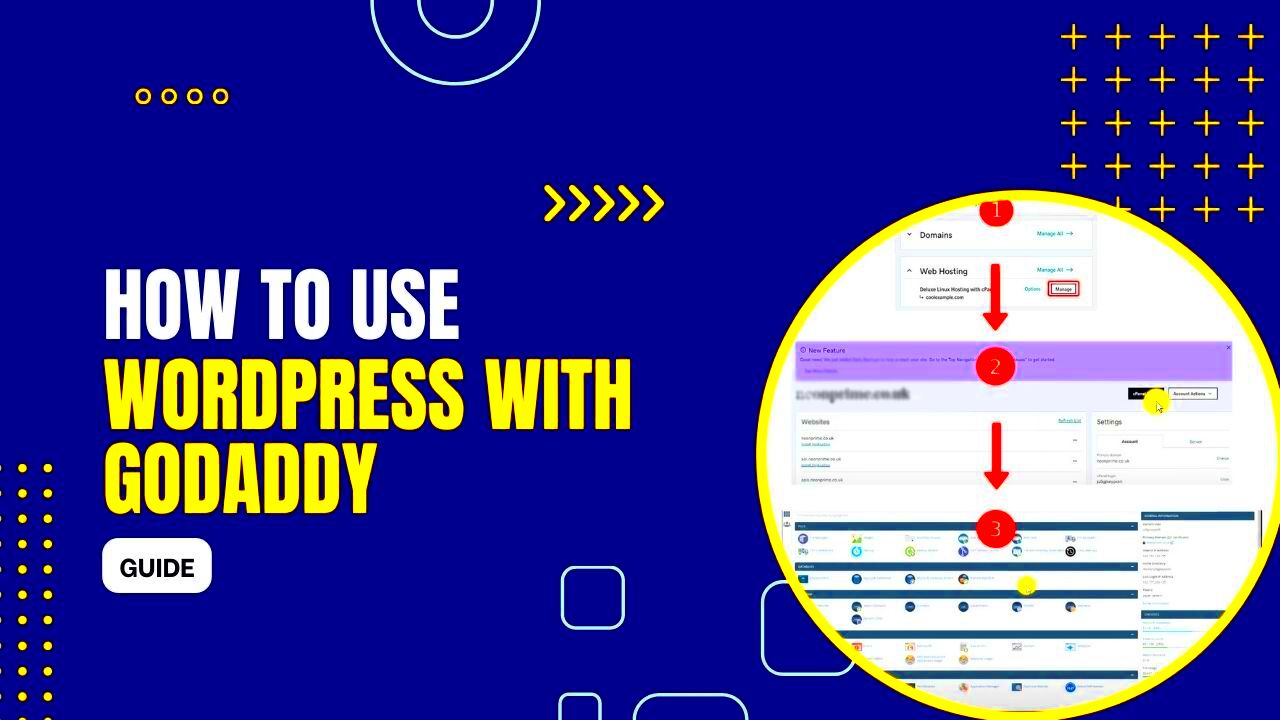
Getting started with GoDaddy is a breeze! First off, head over to the GoDaddy website. You’ll see a friendly interface that’s pretty straightforward—no tech jargon to confuse you here. When you arrive, just look for the ‘Sign Up’ button, and with a few quick clicks, you’ll be well on your way.
Once you click on ‘Sign Up’, you’ll be prompted to enter your email and create a password. Make sure to choose a strong password—after all, securing your online presence is essential! After entering your details, just hit that ‘Create Account’ button and voilà, you’re now a member of the GoDaddy family!
What’s next? You’ll want to confirm your email address. GoDaddy will send you a verification link to ensure your account is safe and sound. Just click on that link, and you’re good to go!
After verifying your account, you might want to complete your profile. This helps streamline your experience and gives you access to personalized features. Don’t forget to set up two-factor authentication for extra security—it’s a simple step that adds an important layer of protection to your account.
Now that your account is all set up, you can dive into exploring GoDaddy’s plethora of services. From domains to hosting plans, GoDaddy offers everything you need for your WordPress site. Make sure you familiarize yourself with the dashboard; it’s like your GoDaddy command center!
Purchasing a Hosting Plan
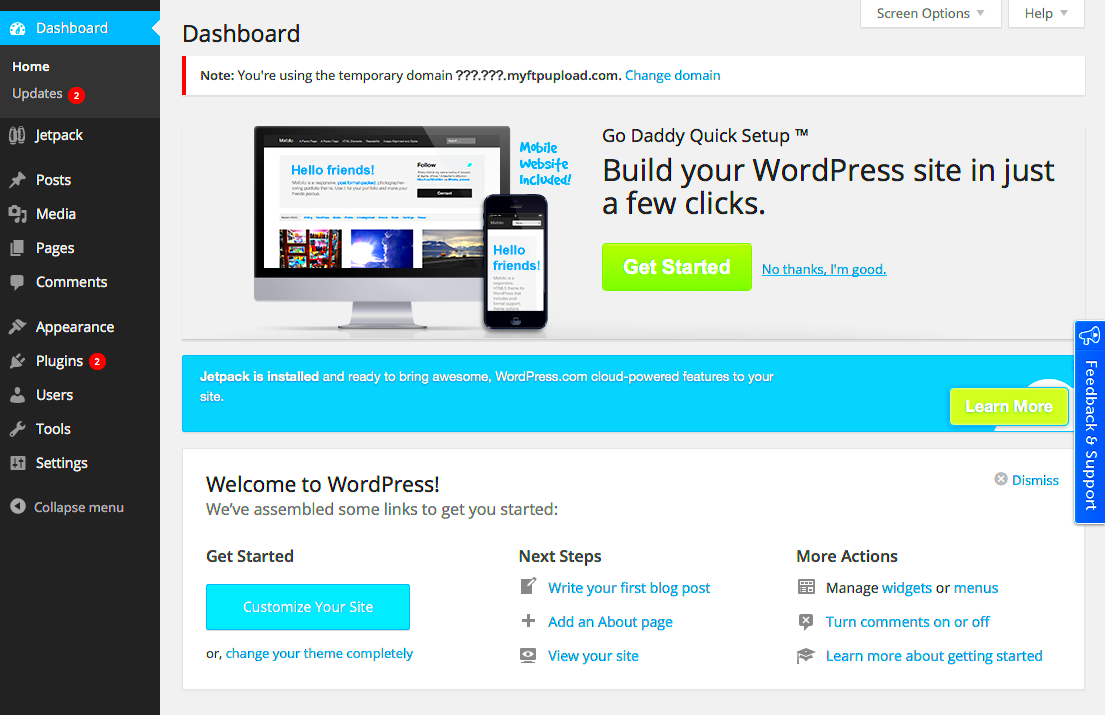
Now that your GoDaddy account is up and running, let’s talk about purchasing a hosting plan. Choosing the right hosting plan is crucial because it impacts your website’s performance, reliability, and even its scalability down the line.
To get started, log into your GoDaddy account and navigate to the “Hosting” section. You’ll see several hosting options available, so let’s break down a few popular choices:
- Shared Hosting: Ideal for beginners and small websites. It’s cost-effective and easy to manage.
- WordPress Hosting: Tailored specifically for WordPress sites, offering optimized performance and security features.
- VPS Hosting: For those who need more power and flexibility. It’s a bit pricier but a great option as your site grows.
- Dedicated Hosting: Best for large businesses and high-traffic websites. You get your own server, which means better performance and control.
After you’ve decided what type of hosting is right for you, click on the plan that interests you. You’ll typically get a chance to choose the duration of your plan—1, 2, or even 3 years. Longer terms may offer better deals, so keep an eye out for discounts!
Next up, GoDaddy will prompt you to either register a new domain or link an existing one. If you’re starting fresh, take your time to brainstorm an appealing domain name that resonates with your audience.
Finally, review your selections, check out any extras that may enhance your hosting experience (like SSL certificates for security), and proceed to checkout. Fill in your payment details, and before you know it, you’ll be the proud owner of a hosting plan ready to launch your WordPress site!
5. Installing WordPress on GoDaddy
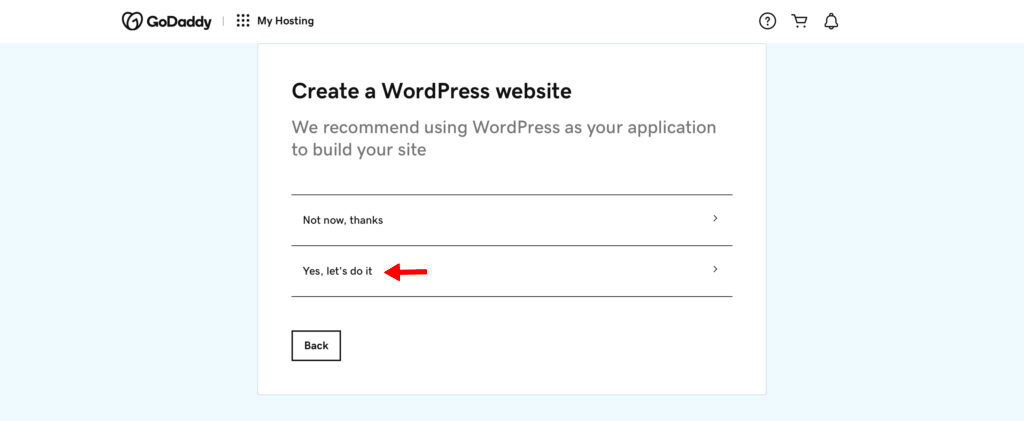
Getting started with WordPress on GoDaddy is a breeze, and the installation process has been streamlined to ensure you get your website up and running in no time! Here’s a step-by-step guide to help you through the installation process.
- Log into Your GoDaddy Account: First and foremost, you need to log into your GoDaddy account. If you don’t have one yet, you’ll need to create an account.
- Select Your Hosting Plan: Navigate to your account dashboard and select your hosting plan. GoDaddy offers several options, so pick the one that best fits your needs.
- Access Your cPanel: Once you have your hosting plan selected, access your cPanel. This is where all the magic happens.
- Find the WordPress Installer: In your cPanel dashboard, look for the “Installatron” or “WordPress Installer” option. It’s often listed under the “Website” section.
- Start the Installation: Click the installer and follow the prompts. You’ll need to choose your domain where you want to install WordPress. Select the domain, then click on the “Install” button.
- Choose Your Preferences: During the installation, you’ll have the opportunity to set your site name, admin username, and password. Make sure to note these down!
- Complete the Installation: After you’ve filled out the necessary information, click “Finish Installation.” Your WordPress site is now live!
Congratulations! You’ve successfully installed WordPress on GoDaddy. You can now dive into the world of themes and plugins to customize your website!
6. Configuring Your WordPress Settings
Once you have WordPress installed, the next crucial step is to configure your WordPress settings. The settings menu is where you can customize how your site behaves and appears to your visitors. Let’s go through the key settings you should focus on.
General Settings
Access the General Settings by going to Settings > General in your WordPress dashboard. Here are some important elements to configure:
- Site Title: This is the name of your website that visitors will see.
- Tagline: A brief description of your site—think of it as your site’s slogan!
- Timezone: Setting this correctly is important for scheduling posts and events.
Reading Settings
Navigating to Settings > Reading allows you to decide how your homepage behaves:
- Your Homepage Displays: Choose whether you want your homepage to show recent posts or a static page.
- Search Engine Visibility: Make sure to uncheck this if you want your site to be indexed by search engines.
Permalinks Settings
To set up friendly URLs, head to Settings > Permalinks. Opt for the “Post Name” option for a clean, SEO-friendly URL structure.
Once you’ve configured these settings, click “Save Changes.” You’re now on your way to running a well-optimized WordPress site! Remember, these settings can be adjusted anytime as you grow and evolve your website.
7. Choosing and Installing a WordPress Theme
Choosing a WordPress theme is like picking out an outfit for a big day. It not only influences how your website looks but also affects user experience and functionality. So, where do you start? First, consider your niche and target audience. Are you running a personal blog, an e-commerce site, or a business portfolio? Understanding your goals will help narrow down your theme options.
Once you have a good idea of what you need, browse the WordPress Theme Directory or premium theme marketplaces like ThemeForest or Elegant Themes. Here are a few key factors to consider while selecting a theme:
- Responsiveness: Ensure your theme looks great on both desktops and mobile devices.
- Customization: Look for themes that allow for easy customization, such as changing colors, layouts, and fonts.
- Loading Speed: Opt for lightweight themes that maximize site speed, making for a better user experience.
- Support and Updates: Choose a theme that offers regular updates and customer support in case you run into issues.
Once you’ve settled on a theme, installing it is straightforward. Here’s how:
- Log in to your WordPress dashboard.
- Navigate to Appearance > Themes.
- Click on Add New and either upload your theme or select one from the directory.
- Once installed, hit Activate to make it live!
Remember, your chosen theme serves as the foundation of your website, so pick wisely!
8. Essential Plugins for WordPress
Plugins are like Swiss Army knives for your WordPress website—they enhance functionality and make your life easier. With thousands available, it can be overwhelming to decide which ones to install. Start by identifying what your website needs. Here’s a selection of essential plugins that can help boost performance, security, and user engagement:
| Plugin Name | Purpose |
|---|---|
| Yoast SEO | Improves your website’s SEO and helps you rank higher in search engines. |
| Akismet | Protects your site from spam comments and malicious content. |
| WooCommerce | Transforms your site into a fully functional online store. |
| Wordfence Security | Provides robust security features to keep your site safe from threats. |
| Contact Form 7 | Makes it easy to add contact forms to your site. |
Installing plugins is as easy as pie:
- From your WordPress dashboard, go to Plugins > Add New.
- Search for the desired plugin using the search bar.
- Click Install Now and then Activate to start using it.
While it’s tempting to install as many plugins as possible, remember that less is often more. Choose the ones that genuinely add value and enhance your site’s performance!
Customizing Your WordPress Site
Once you’ve set up your WordPress site on GoDaddy hosting, it’s time to make it your own! Customizing your WordPress site allows you to reflect your personality or brand, providing visitors with a unique experience. Let’s explore the key steps to customize your site effectively.
Choose a Theme: The first step in customization is selecting a theme. WordPress offers a plethora of free and paid themes. To choose the right one:
- Navigate to Appearance > Themes in your WordPress dashboard.
- Browse through the options or use the search bar to find a theme that resonates with your goals.
- Once you find a theme you like, click Install and then Activate.
Customize Your Theme: After activating your theme, it’s time to tweak it! Click on Appearance > Customize. Here, you can modify several aspects:
- Site Identity: Add your logo and tagline.
- Colors: Set a color palette that matches your branding.
- Menus: Create navigation menus for easy access to different site sections.
- Widgets: Add special features to your sidebar or footer.
Plugins for Additional Features: Don’t forget about plugins! These little tools can add functionality. Some popular options include:
- Yoast SEO: Improve your search engine optimization.
- WooCommerce: Set up an online store.
- Contact Form 7: Create contact forms.
With these customization tips, your WordPress site will not just look great but will also serve your visitors effectively!
Maintaining Your WordPress Website
Maintaining a WordPress website might sound tedious, but it’s crucial for keeping your site running smoothly and securely. Just like a car needs regular servicing, your website deserves the same care. Here are key maintenance tasks to keep in mind:
Regular Backups: Backing up your site ensures that your data is safe in case something goes wrong. Use plugins such as:
- UpdraftPlus: Offers cloud backup options.
- BackupBuddy: A premium solution with thorough backup features.
Keep Everything Updated: Regularly check for updates for your themes, plugins, and WordPress core. To do this:
- Visit your dashboard and look for notifications.
- Click on Update Now when available.
Optimize Database: Over time, your database can become cluttered. Use plugins like WP-Optimize to clean up unnecessary data and keep your site optimized.
Monitor Site Performance: Regular checks can help identify issues. Tools like Google PageSpeed Insights or GTmetrix can provide insights into load times and performance optimization opportunities.
Security Checks: Protect your site from threats. Use security plugins such as:
- Wordfence: Provides firewall and malware scanning.
- iThemes Security: A comprehensive security plugin.
Staying proactive with maintenance tasks will ensure your WordPress website on GoDaddy hosting remains secure, fast, and user-friendly. Make a maintenance schedule to stay on top of these tasks and enjoy a seamless online presence!
Troubleshooting Common Issues
When you’re diving into the world of WordPress with GoDaddy hosting, it’s not uncommon to run into a few hiccups along the way. Whether you’re a complete newbie or have some experience under your belt, troubleshooting can feel a bit daunting. But fear not! Here are some common issues you might face and how to tackle them.
| Issue | Possible Causes | Solutions |
|---|---|---|
| Slow website performance | Heavy plugins, large images, or server issues |
|
| Error establishing a database connection | Incorrect credentials, database issues |
|
| White screen of death | Theme or plugin conflicts |
|
Remember, troubleshooting is all about trial and error. If you encounter an issue, don’t panic—take a deep breath, assess the situation, and follow these steps. And of course, GoDaddy offers 24/7 support, so reach out to them if you’re feeling stuck!
Conclusion
Getting started with WordPress on GoDaddy hosting can be a breeze if you approach it step by step. We’ve covered the basics of setting up your site, choosing the right themes and plugins, and even troubleshooting common issues. But more than anything, the key is to keep learning and experimenting.
Here’s a quick recap of what we discussed:
- Choosing the right hosting plan tailored for WordPress.
- Installing WordPress seamlessly from the GoDaddy dashboard.
- Customizing your website to reflect your vision and brand.
- Getting help when you need it through GoDaddy’s support.
Remember, every expert was once a beginner. It’s completely normal to face challenges along the way, so don’t let that discourage you. Stay curious, actively experiment with different features, and you’ll be amazed at what you can create. WordPress is a powerful platform, and with GoDaddy hosting, you’re well on your way to building a stunning website that can engage your audience effectively. Happy blogging!

